香橙派Kunpeng Pro初体验
引子
非常偶然的机会收到了CSDN发送过来的手机短信,邀请参与香橙派开发板评测活动。一开始没注意到,以为是广告。后来直到香橙派的工作人员微信加群之后,才确认活动真实性。看到微信群里来自各地的开发者,大家的评测积极性也很高。
本人之前有过树莓派的开发经验,在收到香橙派开发板之前也对开发板进行了一些了解。首先是价格,这一块开发板1076元起!我的树莓派4B当年也就500元左右。
看下香橙派Kunpeng Pro(下面简称香橙派)的主要硬件参数:
| 项目 | 规格 |
|---|---|
| CPU | 4核64位处理器+ AI处理器 |
| GPU | 集成图形处理器 |
| AI算力 | 8TOPS算力 |
| 内存 | LPDDR4X:8GB/16GB(可选),速率:3200Mbps |
| 存储 | TF,SATA/NVME SSD,eMMC |
| Wi-Fi+蓝牙 | Wi-Fi 5双频2.4G和5G,BT4.2/BLE |
| 以太网收发器 | 10/100/1000Mbps以太网 |
| 显示 | 2xHDMI2.0 Type-A TX 4K@60FPS 1x2 lane MIPI DSI via FPC connector |
| 摄像头 | 2x2-lane MIPI CSI camera interface,兼容树莓派摄像头 |
| USB | USB 3.0 HOST x2 USB Type-C 3.0 HOST x1 Micro USB x1 串口打印功能 |
| 音频 | 3.5mm耳机孔音频输入/输出 |
| 按键 | 1x关机键、1xRESET键、2x启动方式拨动键、1x烧录按键 |
| 40PIN | GPIO、UART、I2C、SPI、 I2S、PWM |
| 风扇 | 风扇接口x1 |
| 预留接口 | 2PIN电池接口 |
| 电源 | Type-C PD 20V IN ,标准65W |
| 支持的操作系统 | openEuler |
初步总结一下香橙派与树莓派在主要差异:
- 除了支持TF卡烧录系统,还支持SATA/NVME SSD,eMMC等其它大容量存储介质烧录系统,为应用提供基础环境支持。
- 香橙派Kunpeng Pro具有8TOPS的AI算力。
- 操作系统,香橙派Kunpeng Pro官方推荐的是openEuler,该系统支持云计算、边缘计算等应用场景。
开箱测评
首先来个正面照~

找到香橙派的用户手册,可以看到香橙派的硬件接口还是很丰富的,各种硬件接口都具备。如下图:
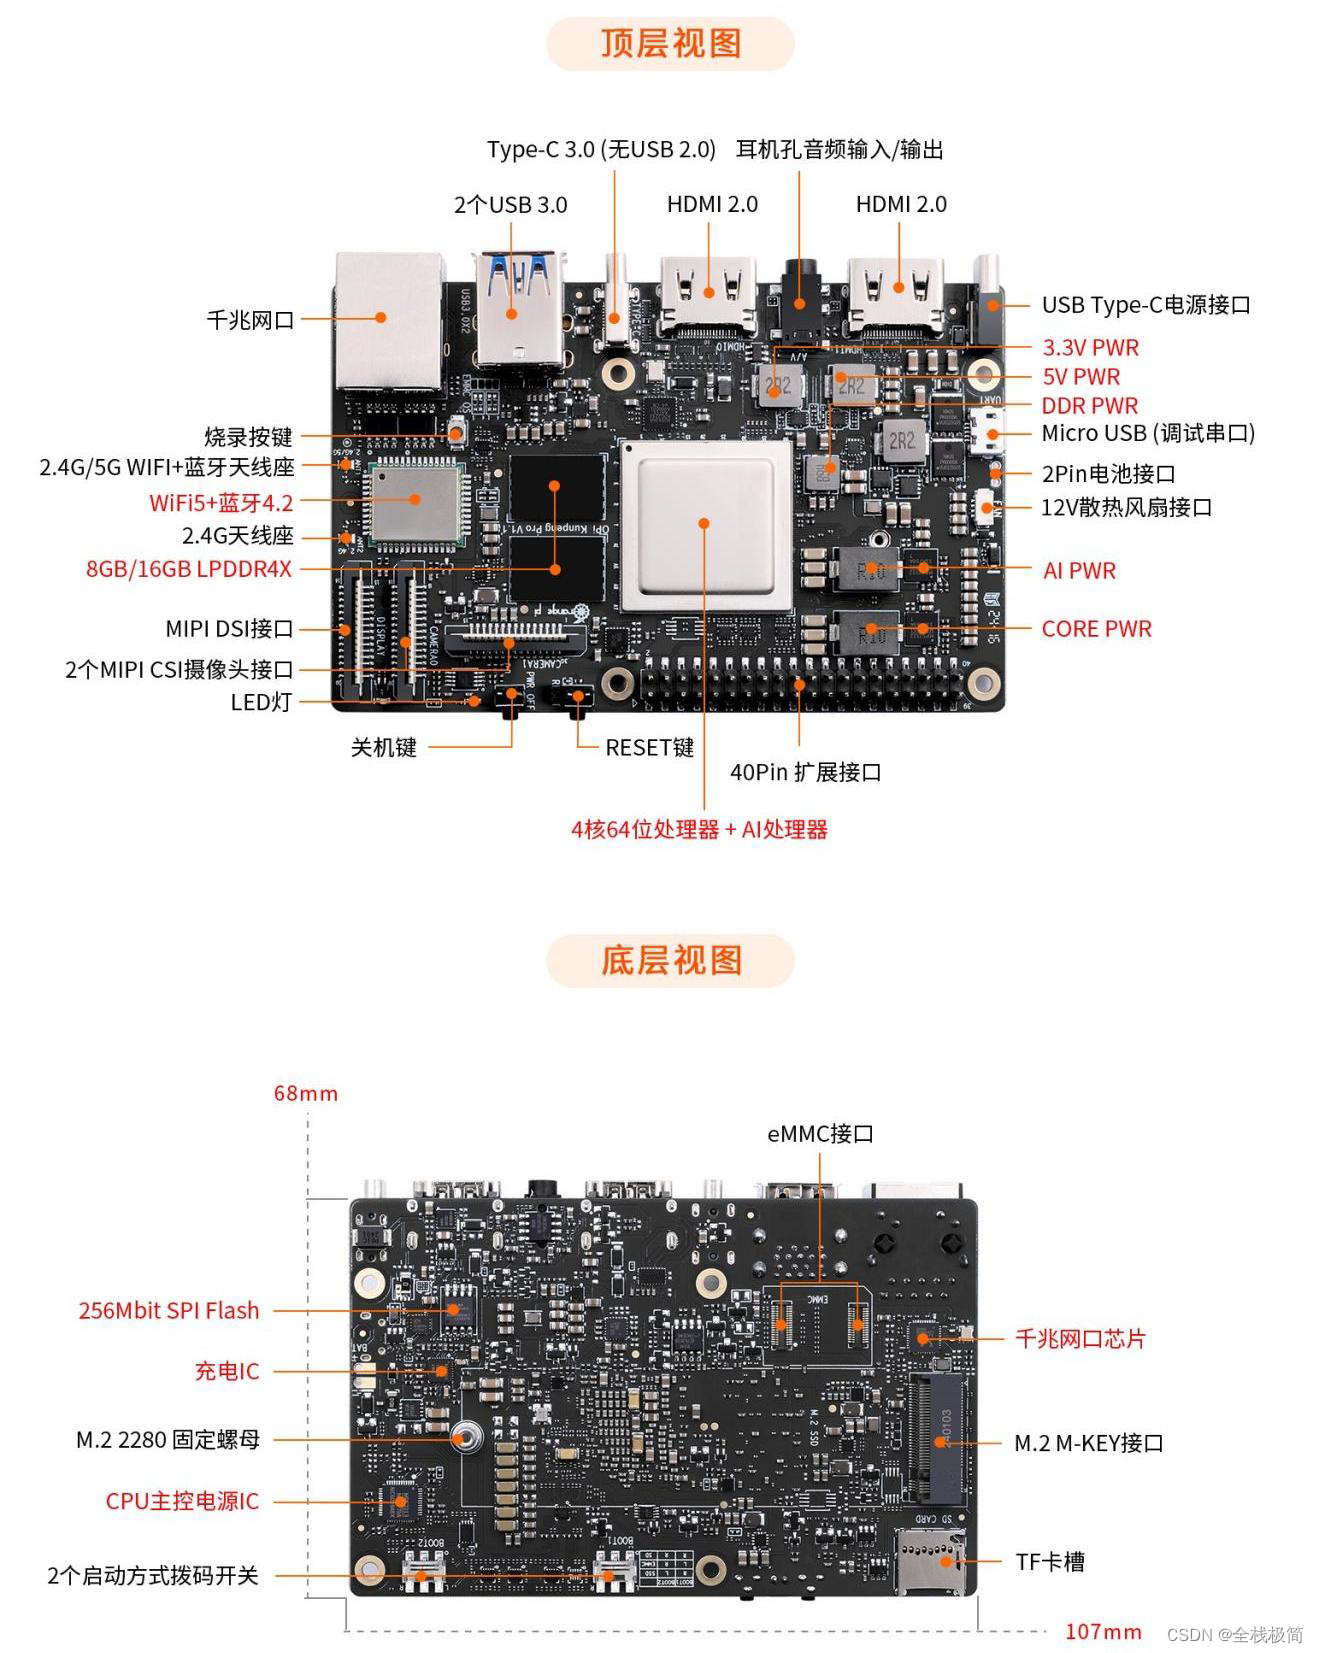
友情提醒:使用开发板时,WIFI天线不能贴到开发板上,同时天线上的导电布也不能挨着班子,否则可能会烧坏开发板。
初步体验
拿到了开发板,首先要将系统启动起来。很贴心,寄送过来的开发板连SD卡系统都烧录好了,但我们还是希望从零开始一步一步的“玩起来”。
- 系统烧录
首先我们可以从官方网站下载香橙派对应的官方工具,里面有各种可以用得上的工具。
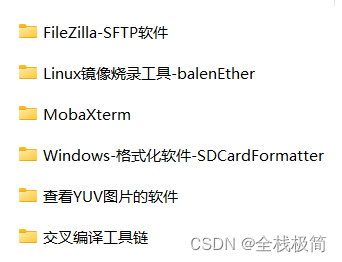
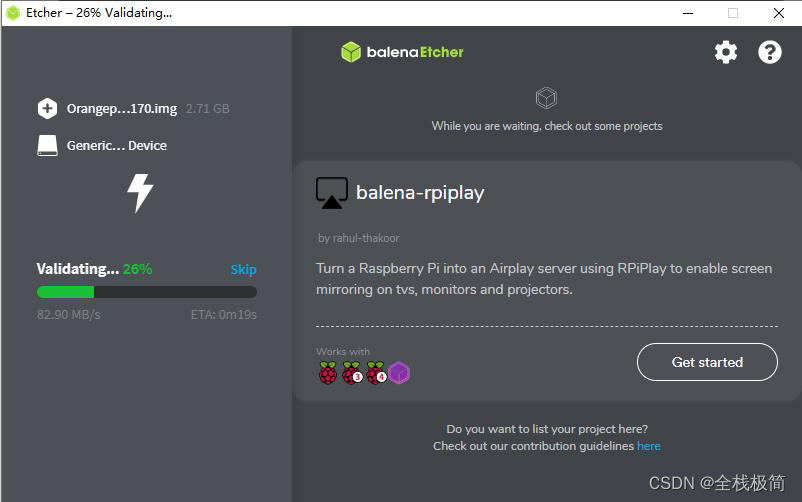
其中系统烧录的工具balenEther就在里面。然后在官方网站页面下载推荐的系统镜像文件,用于烧录。

然后用TF卡阅读器接入电脑,就可以对其烧录系统了。
烧录完成后,将SD卡取出,插入到香橙派SD卡槽。接上电源,启动香橙派。 - 开启SSH远程
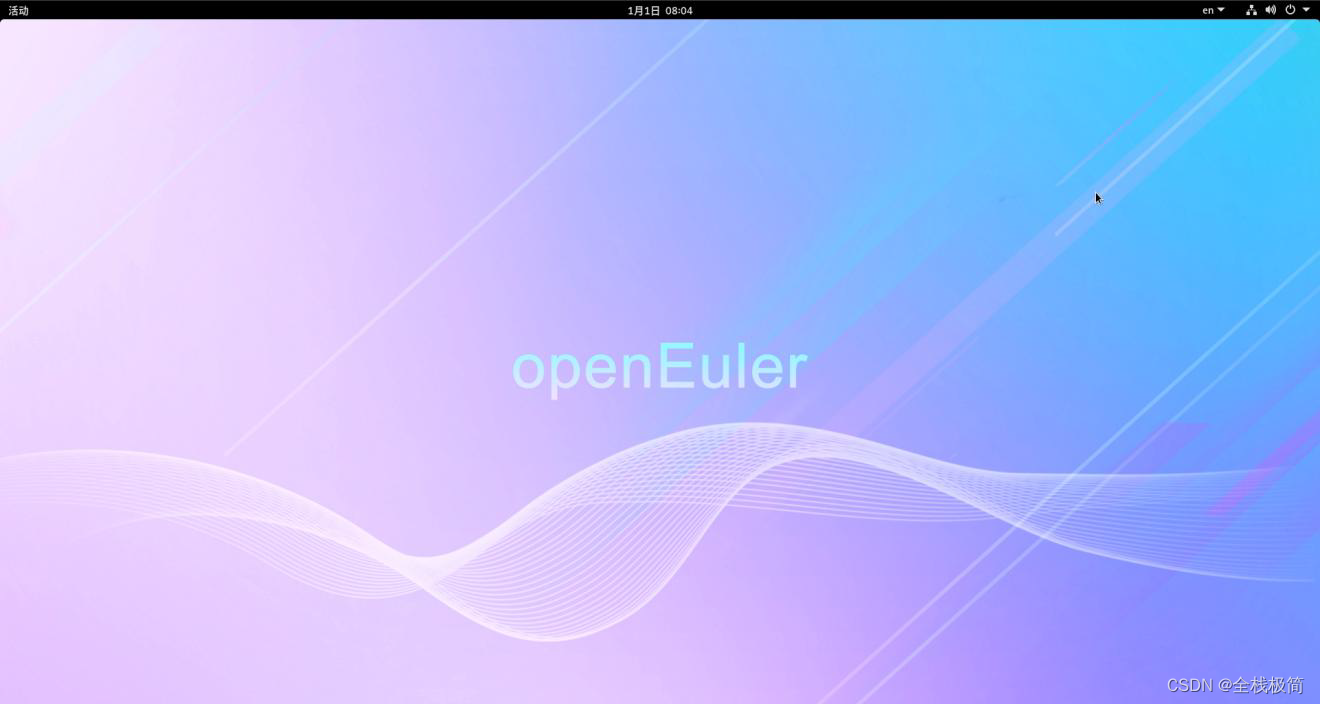
启动香橙派后,我们就可以通过HDMI接口接在显示器或者电视机上,等待数秒,就显示了登录界面。香橙派默认提供了两个HDMI接口,根据官方文档说明,只能使用HDMI0接入。然后通过香橙派的USB接口接入鼠标键盘就可以玩耍起来了。
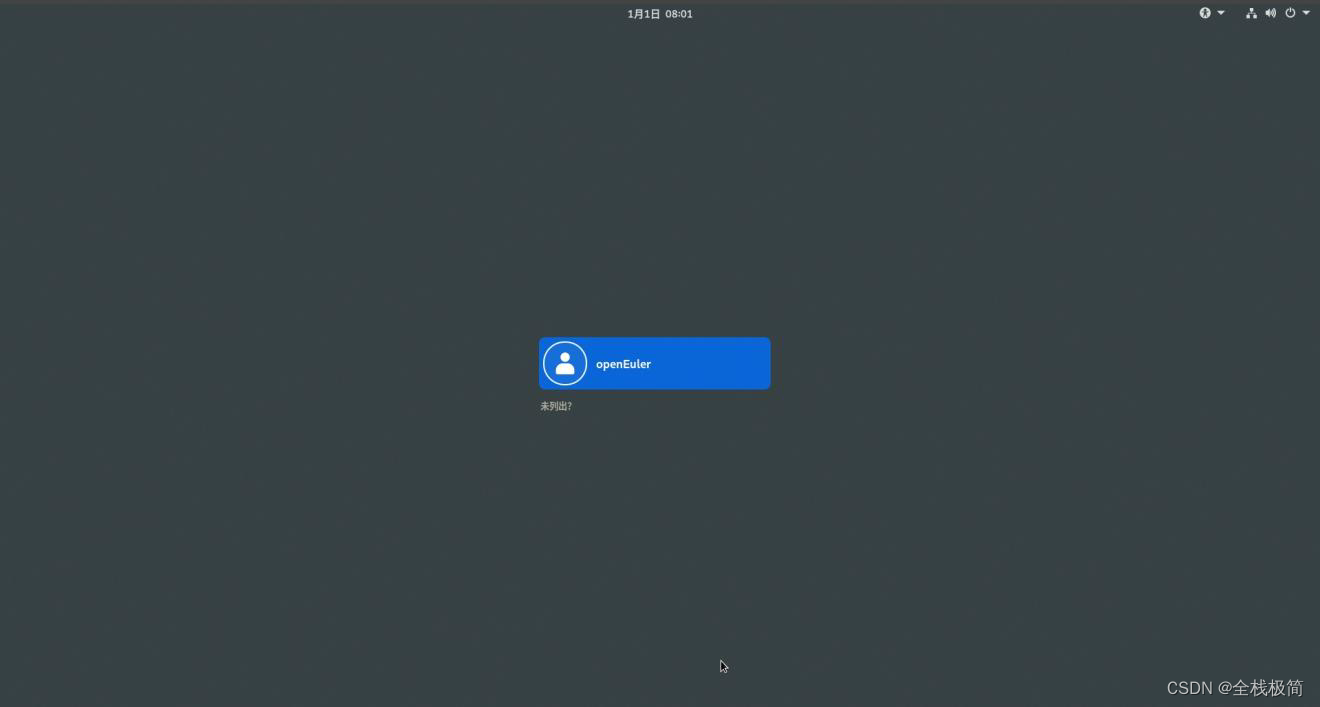
openEuler系统默认创建了openEuler账户,输入密码openEuler即可进入系统。
但为了方便开发,我们需要开启SSH和VNC远程。
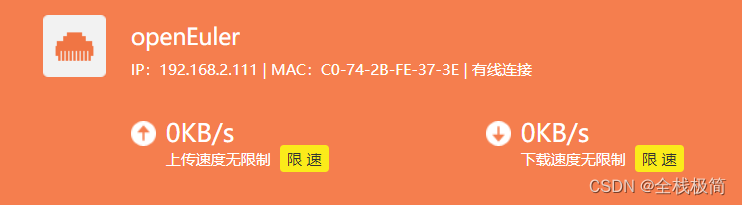
我们给香橙派接上网线,然后可以在路由器的管理后台查看到分配给香橙派的IP地址
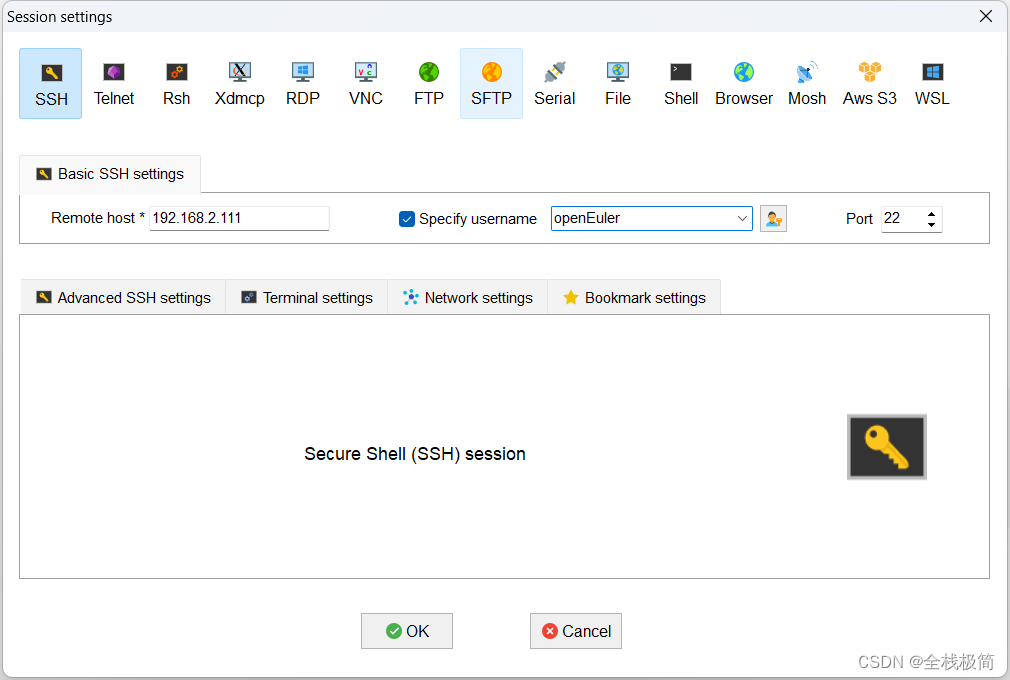
然后使用MobaXterm远程工具进行连接
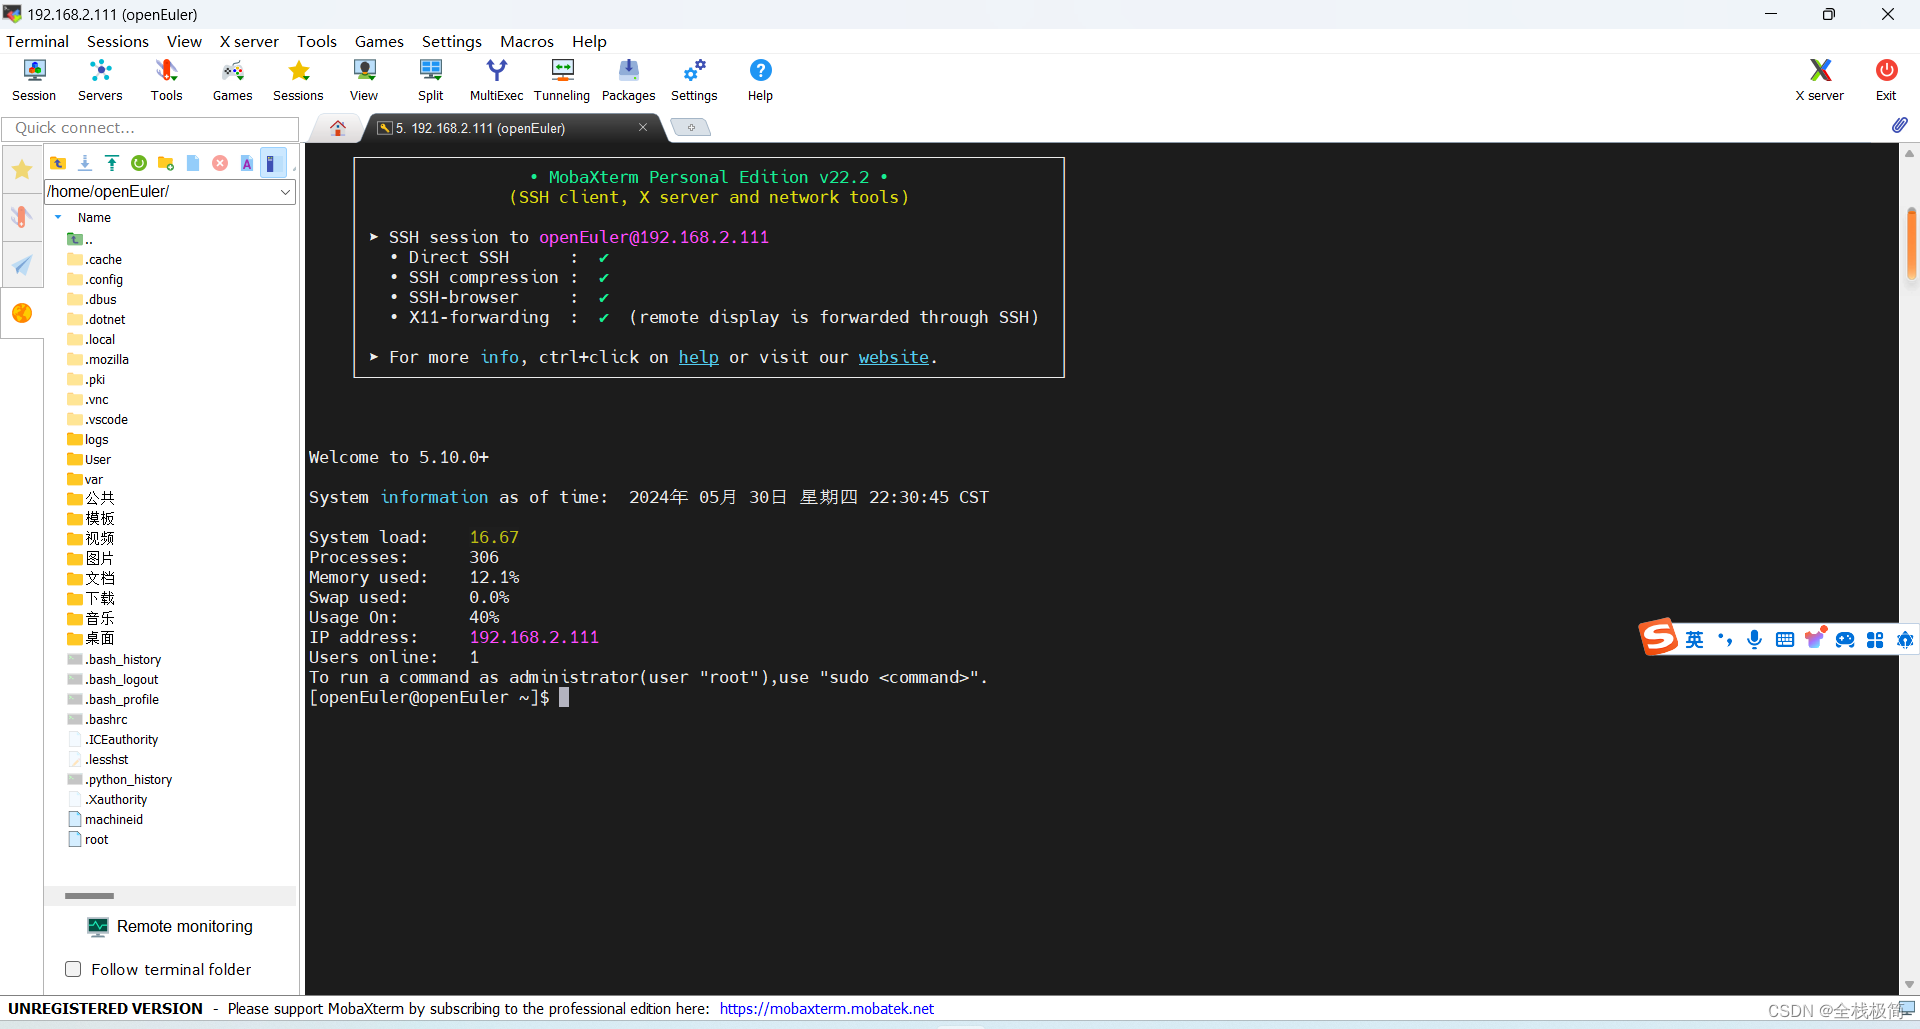
SSH连接成功之后的界面:
- 开启VNC远程桌面
在如上的控制台输入如下命令即可开启VNC远程
sudo systemctl enable vncserver@:service.1
sudo systemctl start vncserver@:service.1
sudo system status vncserver@:service.1
vncserver
然后使用vncviewer软件远程连接香橙派:
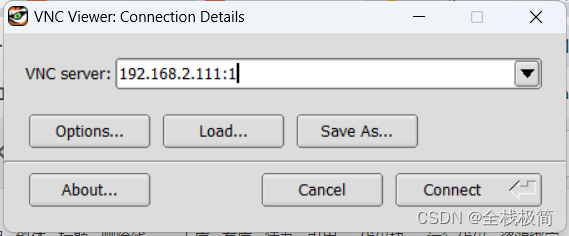
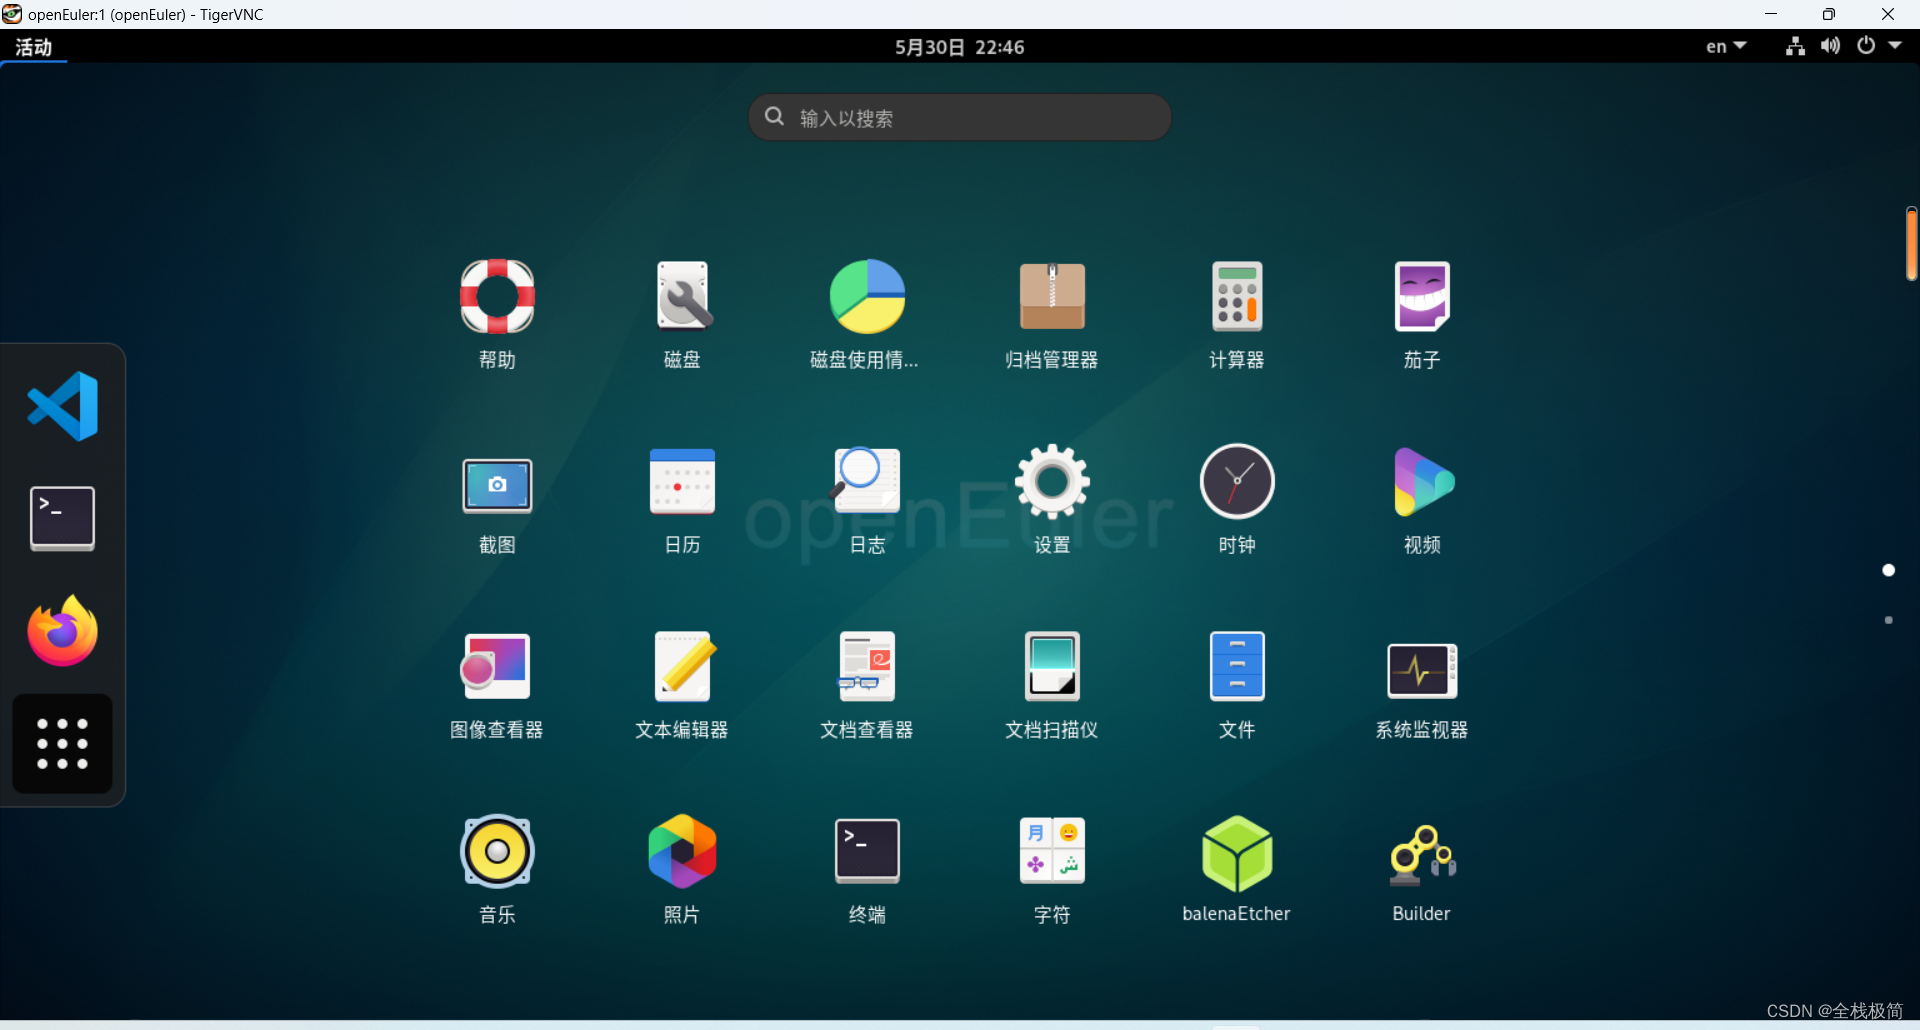
点击Connect,顺利连接。我们可以在里面将WIFI改成无线连接方式,这样后面就不需要连接网线了。即刻去体验吧~
注意:上面最后一步vncserver一定要执行,否则不能启动VNC远程桌面。
实例应用
GPIO的应用
拿到一个开发板,最先要测试的就是GPIO接口。而最基本的GPIO应用就是点亮LED或者蜂鸣器。这里以RGB三色彩灯为例。
查看用户手册,查看40Pin接口引脚说明:
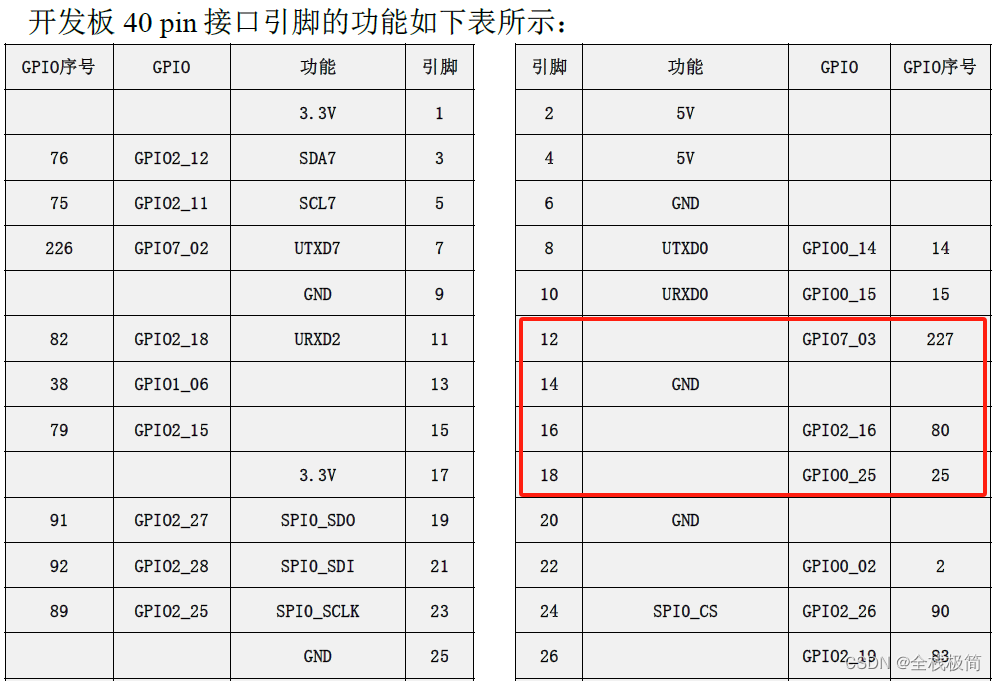
RGB三色灯有4根线,通过杜邦线,负极接14号引脚,R(红色)接12号引脚,G(绿色)接16号引脚,B(蓝色)接18号引脚。
在控制台先执行下面命令,将PIN口设置为输出
sudo gpio_operate set_direction 7 3 1
sudo gpio_operate set_direction 2 16 1
sudo gpio_operate set_direction 0 25 1
然后可以执行下面命令,将PIN口对应的值修改,实现高低电平的切换,从而实现点亮。
sudo gpio_operate set_value 7 3 1 #红色亮
sudo gpio_operate set_value 2 16 1 #绿色亮
sudo gpio_operate set_value 0 25 1 #蓝色亮
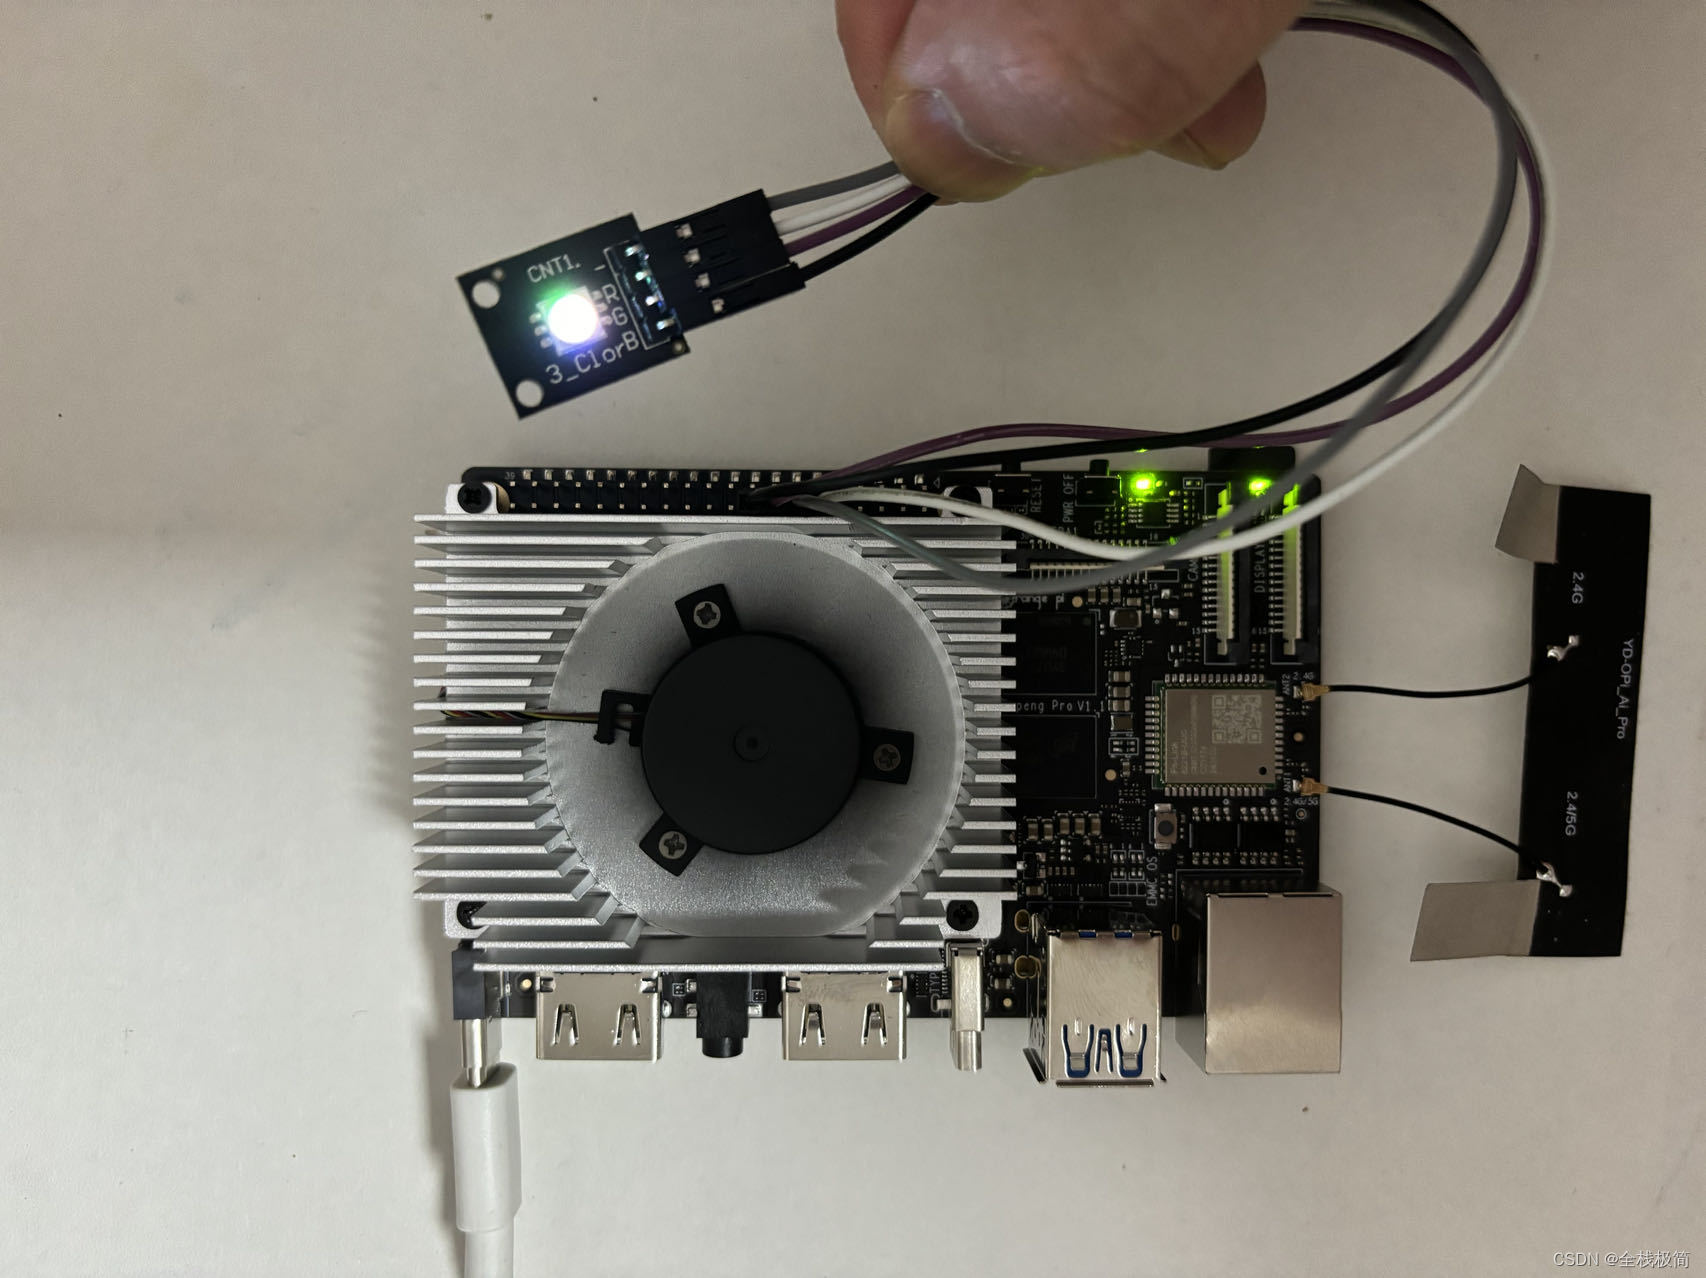
可以看到RGB三种颜色同时打开的时候,显示为白色光。
Python实现
进一步,我们可以利用openEuler里面安装好的VSCode进行Python代码的编写测试。
那么,怎么在Python里面进行GPIO操作呢?
先上一段封装好的操作GPIO的Python代码,GPIO的操作其实就是对export、unexport等文件的操作。
Python封装GPIO代码
# -*- coding: utf-8 -*-
__version__ = '1.0.0'

from threading import Lock
try:
    from collections.abc import Iterable
except ImportError:
    from collections import Iterable
import os


_export_lock = Lock()
_open_pins = {}


GPIO_ROOT = '/sys/class/gpio'
GPIO_EXPORT = os.path.join(GPIO_ROOT, 'export')
GPIO_UNEXPORT = os.path.join(GPIO_ROOT, 'unexport')
FMODE = 'w+'  # w+ overwrites and truncates existing files
IN, OUT = 'in', 'out'
LOW, HIGH = 0, 1


class GPIOPin(object):
    """Handle pin state.

    Create a singleton instance of a GPIOPin(n) and track its state internally.

    Args:
        pin (int): the pin to configure
        mode (str): use either gpio.OUT or gpio.IN
        initial (bool, optional): Initial pin value. Default is LOW
        active_low (bool, optional): Set the pin to active low. Default
            is None which leaves things as configured in sysfs
    Raises:
        RuntimeError: if pin is already configured
    """
    def __init__(self, pin, direction=None, initial=LOW, active_low=None):
        #  .configured() will raise a TypeError if "pin" is not convertable to int
        if GPIOPin.configured(pin, False) is not None:
            raise RuntimeError("pin {} is already configured".format(pin))

        self.value = None
        self.pin = int(pin)
        self.root = os.path.join(GPIO_ROOT, 'gpio{0}'.format(self.pin))

        if not os.path.exists(self.root):
            with _export_lock:
                with open(GPIO_EXPORT, FMODE) as f:
                    f.write(str(self.pin))
                    f.flush()

        # Using unbuffered binary IO is ~ 3x faster than text
        self.value = open(os.path.join(self.root, 'value'), 'wb+', buffering=0)

        # I hate manually calling .setup()!
        self.setup(direction, initial, active_low)

        # Add class to open pins
        _open_pins[self.pin] = self

    def setup(self, direction=None, initial=LOW, active_low=None):
        if direction is not None:
            self.set_direction(direction)

        if active_low is not None:
            self.set_active_low(active_low)

        if direction == OUT:
            self.write(initial)

    @staticmethod
    def configured(pin, assert_configured=True):
        """Get a configured GPIOPin instance where available.

        Args:
            pin (int): the pin to check
            assert_configured (bool): True to raise exception if pin unconfigured

        Returns:
            object: GPIOPin if configured, otherwise None

        Raises:
            RuntimeError: if pin is not configured
        """
        try:
            # Implicitly convert str to int, ie: "1" -> 1
            pin = int(pin)
        except (TypeError, ValueError):
            raise ValueError("pin must be an int")

        if pin not in _open_pins and assert_configured:
            raise RuntimeError("pin {} is not configured".format(pin))

        return _open_pins.get(pin)

    def get_direction(self):
        '''Get the direction of pin

        Returns:
            str: "in" or "out"
        '''
        with open(os.path.join(self.root, 'direction'), FMODE) as f:
            return f.read().strip()

    def set_direction(self, mode):
        '''Set the direction of pin

        Args:
            mode (str): use either gpio.OUT or gpio.IN
        '''
        if mode not in (IN, OUT, LOW, HIGH):
            raise ValueError("Unsupported pin mode {}".format(mode))

        with open(os.path.join(self.root, 'direction'), FMODE) as f:
            f.write(str(mode))
            f.flush()

    def set_active_low(self, active_low):
        '''Set the polarity of pin

        Args:
            mode (bool): True = active low / False = active high
        '''
        if not isinstance(active_low, bool):
            raise ValueError("active_low must be True or False")

        with open(os.path.join(self.root, 'active_low'), FMODE) as f:
            f.write('1' if active_low else '0')
            f.flush()

    def read(self):
        '''Read pin value

        Returns:
            int: gpio.HIGH or gpio.LOW
        '''
        self.value.seek(0)
        value = self.value.read()
        try:
            # Python > 3 - bytes
            # Subtracting 48 converts an ASCII "0" or "1" to an int
            # ord("0") == 48
            return value[0] - 48
        except TypeError:
            # Python 2.x - str
            return int(value)

    def write(self, value):
        '''Write pin value

        Args:
            value (bool): use either gpio.HIGH or gpio.LOW
        '''
        # write as bytes, about 3x faster than string IO
        self.value.write(b'1' if value else b'0')

    def cleanup(self):
        '''Clean up pin

        Unexports the pin and deletes it from the open list.

        '''
        # Note: I have not put "cleanup" into the __del__ method since it's not
        # always desireable to unexport pins at program exit.
        # Additionally "open" can be deleted *before* the GPIOPin instance.
        self.value.close()

        if os.path.exists(self.root):
            with _export_lock:
                with open(GPIO_UNEXPORT, FMODE) as f:
                    f.write(str(self.pin))
                    f.flush()

        del _open_pins[self.pin]


def cleanup(pin=None, assert_exists=False):
    """Cleanup the pin by closing and unexporting it.

    Args:
        pin (int, optional): either the pin to clean up or None (default).
            If None, clean up all pins.
        assert_exists: if True, raise a ValueError if the pin was not
            setup. Otherwise, this function is a NOOP.
    """
    # Note: since "pin" is a kwarg in this function, it has not been renamed it to "pins" above
    pins = pin

    if pins is None:
        # Must be converted to a list since _open_pins is potentially modified below
        pins = list(_open_pins.keys())

    if not isinstance(pins, Iterable):
        pins = [pins]

    for pin in pins:
        state = GPIOPin.configured(pin, assert_exists)

        if state is not None:
            state.cleanup()  # GPIOPin will remove itself from _open_pins


# TODO RPi.GPIO uses "pull_up_down", does rpio differ?
def setup(pins, mode, pullup=None, initial=LOW, active_low=None):
    '''Setup pin with mode IN or OUT.

    Args:
        pin (int):
        mode (str): use either gpio.OUT or gpio.IN
        pullup (None): rpio compatibility. If anything but None, raises
            value Error
        initial (bool, optional): Initial pin value. Default is LOW
        active_low (bool, optional): Set the pin to active low. Default
            is None which leaves things as configured in sysfs
    '''
    if not isinstance(pins, Iterable):
        pins = [pins]

    if pullup is not None:
        raise ValueError("sysfs does not support pull up/down")

    for pin in pins:
        state = GPIOPin.configured(pin, False)

        # Attempt to create the pin if not configured
        if state is None:
            state = GPIOPin(pin)  # GPIOPin will add itself to _open_pins

        state.setup(mode, initial, active_low)


def mode(pin):
    '''get the pin mode

    Returns:
        str: "in" or "out"
    '''
    return GPIOPin.configured(pin).get_direction()


def read(pin):
    '''read the pin value

    Returns:
        bool: either gpio.LOW or gpio.HIGH
    '''
    # These function calls lose us a little speed
    # but we're already > 2x faster so...
    # If you want things to be faster use a GPIOPin instance directly.
    return GPIOPin.configured(pin).read()


def write(pin, value):
    '''set the pin value to LOW or HIGH

    Args:
        pin (int): any configured pin
        value (bool): use gpio.LOW or gpio.HIGH
    '''
    # These function calls lose us a little speed
    # but we're already > 2x faster so...
    # If you want things to be faster use a GPIOPin instance directly.
    GPIOPin.configured(pin).write(value)


input = read
output = write
set = write  # TODO Set should be dropped, since it's a Python reserved word
然后在VSCode里面进行读写文件的操作就好了。在VSCode中写上如下代码:
from random import Random
from gpio import HIGH, LOW, OUT, GPIOPin
import time

pin1 = GPIOPin(227,OUT,0,False)
pin1.setup(OUT,None)
pin1.set_direction(OUT)

pin2 = GPIOPin(80,OUT,0,False)
pin2.setup(OUT,None)
pin2.set_direction(OUT)

pin3 = GPIOPin(25,OUT,0,False)
pin3.setup(OUT,None)
pin3.set_direction(OUT)

try:
    while True:
        pin1.write(HIGH)
        time.sleep(1)
        pin1.write(LOW)
        time.sleep(1)
        pin2.write(HIGH)
        time.sleep(1)
        pin2.write(LOW)
        time.sleep(1)
        pin3.write(HIGH)
        time.sleep(1)
        pin3.write(LOW)
        time.sleep(1)
except:
    pass

pin1.cleanup()
pin2.cleanup()
pin3.cleanup()
实现了RGB三种颜色的切换。然后直接VSCode中运行代码,产生如下错误:

根据错误提示,设置文件的读写权限就好了,如下图:
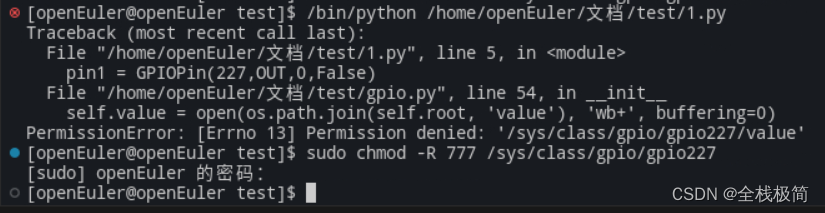
然后我们再次在VSCode里面运行python脚本即可。
YOLO的应用
要在香橙派的openEuler系统里面使用YOLO,需要先安装一些软件包。
系统默认的源更新较慢,首先需要更新pip软件安装源。
更改pip软件源
由于openEuler是CentOS系的系统,因此可以采用CentOS的方式修改。
- 创建或编辑~/.pip/pip.conf文件。如果文件不存在,可以使用以下命令创建一个:
mkdir -p ~/.pip
touch ~/.pip/pip.conf
- 使用文本编辑器打开~/.pip/pip.conf文件,例如使用vi编辑器:
vi ~/.pip/pip.conf
- 在文件中添加以下内容,将替换为你想要使用的镜像源地址: 输入i,进入vi文本编辑模式。
[global]
index-url = <your-mirror-url>
其中 your-mirror-url 可以更改为更新的软件源,比如清华的源:https://pypi.tuna.tsinghua.edu.cn/simple/。
- 保存并关闭文件
按esc键,输入:wq!,保存后退出文本编辑模式。
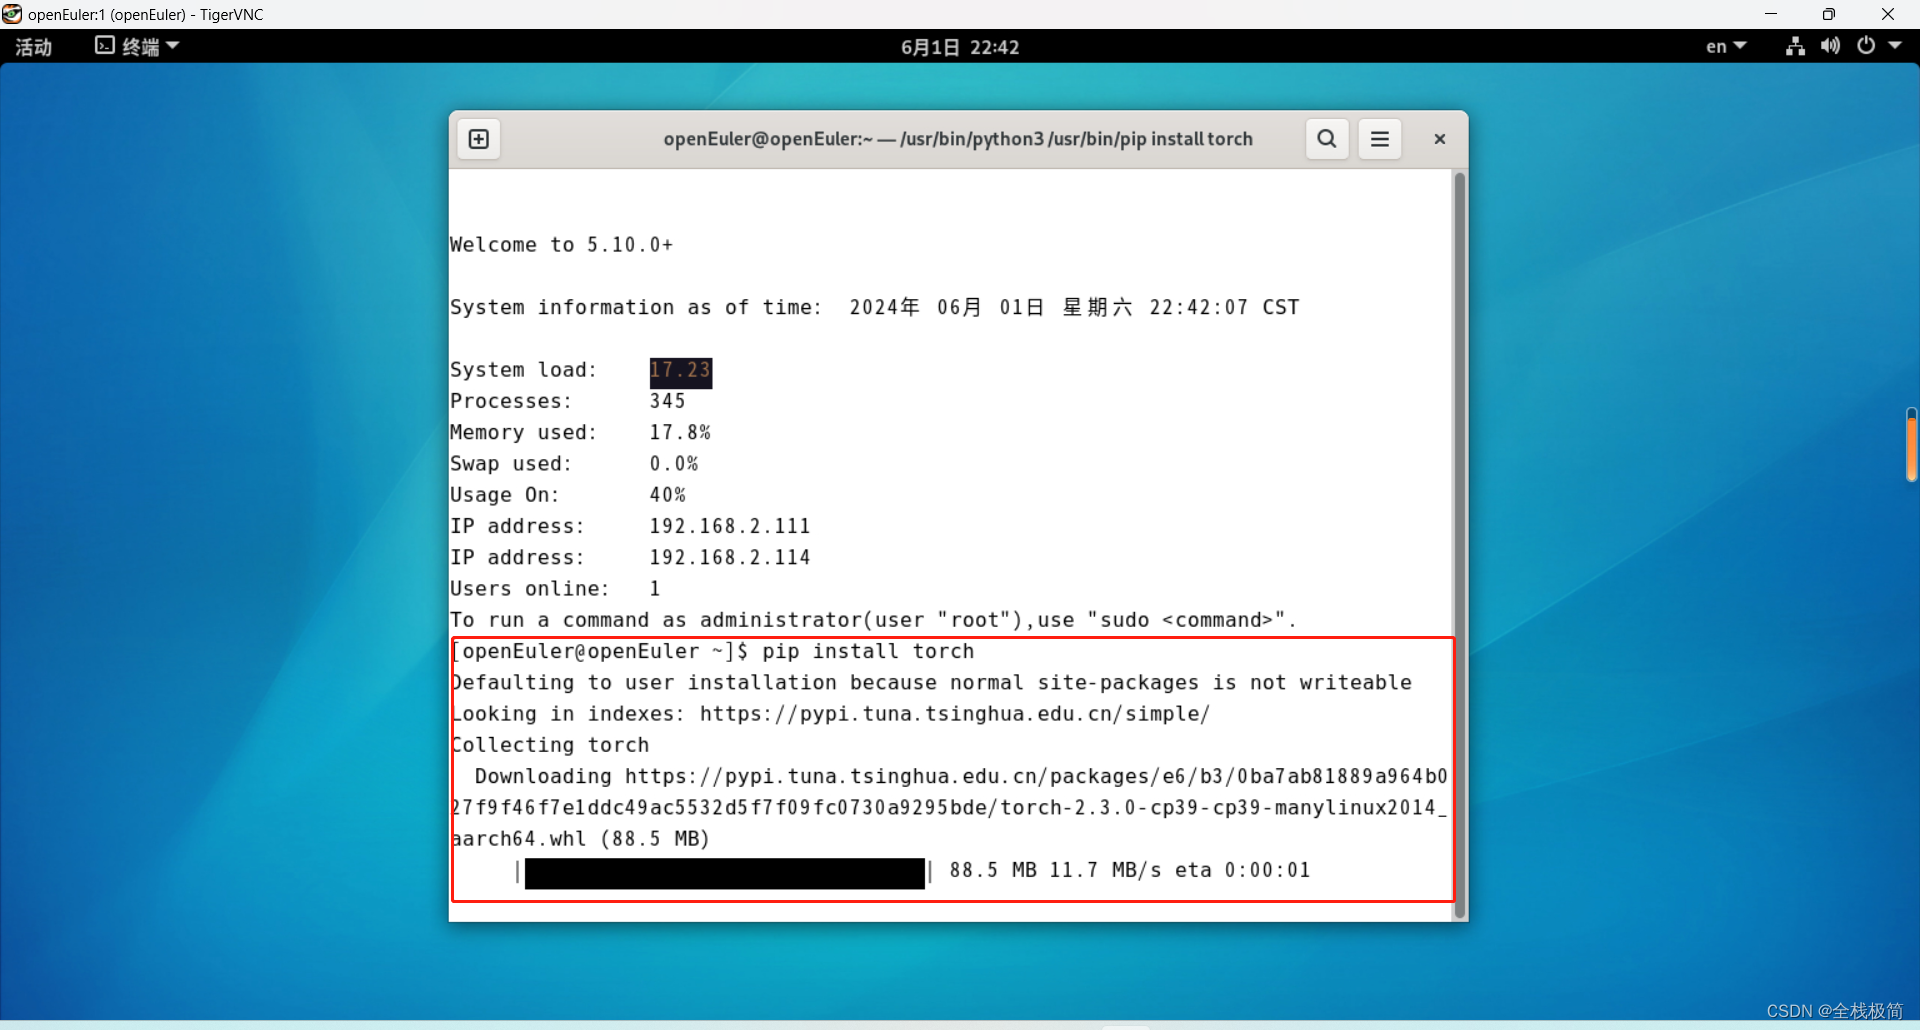
这时我们输入pip install 命令安装软件包时,速度快到飞起~
部署YOLO环境
- 下载YOLOv9
git clone https://github.com/WongKinYiu/yolov9.git
cd yolov9
- 安装依赖
pip install torch torchvision
pip install -r requirements.txt
- 下载yolov9权重文件
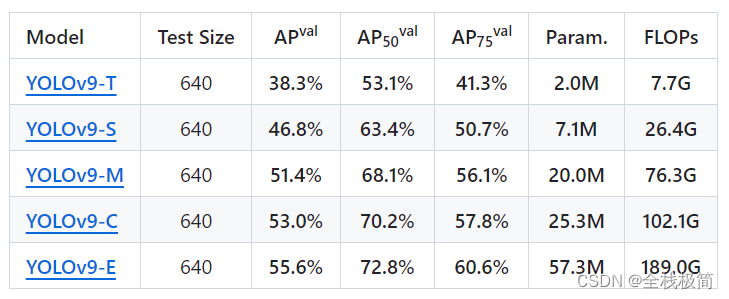
这里我们选择E级的权重模型来测试香橙派。将YOLOv9-E的权重文件下载下来放到yolov9根目录下即可。
地址:https://github.com/WongKinYiu/yolov9
然后就可以执行命令来测试识别效果了。
目标检测
输入图片中的命令即可进行图片中目标的检测与识别。
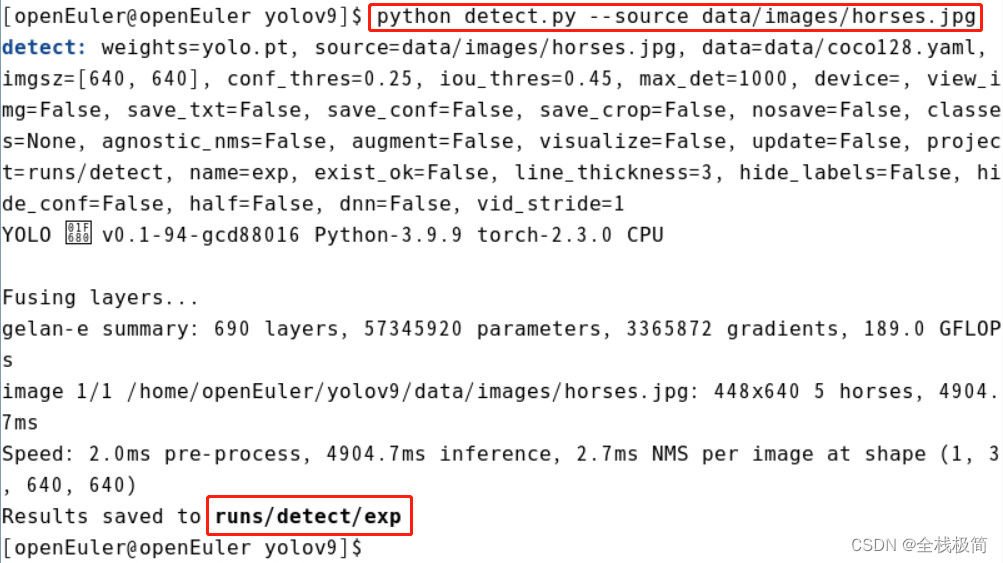
yolov9里面默认有一张图供测试,我们等待数秒,识别结果就默认保存好了。我们直接来查看一下检测的效果:
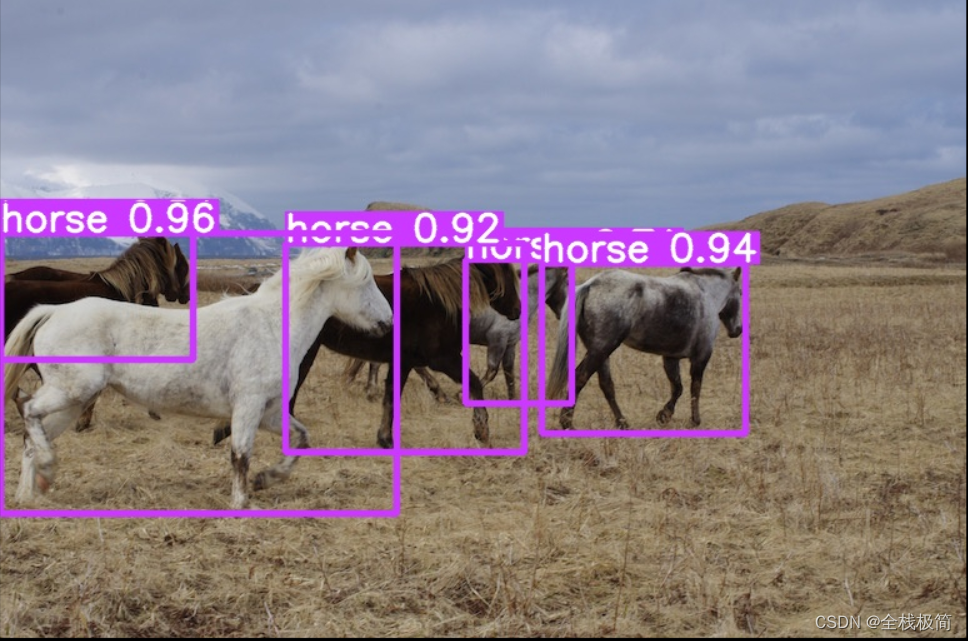
识别数量和识别精度都OK。
总结
通过初步的使用,明显感觉到香橙派Kunpeng Pro无论是硬件的接口类型还是计算能力,都明显要优先于树莓派4B。应该比树莓派能有更多的应用场景。

 浙公网安备 33010602011771号