uniapp跨域调用ASP.NET Core Web API
一、Web API跨域支持
因为浏览器有CROS(跨域资源共享)的问题,所以我们开发的Web API接口需要添加跨域功能。
1. 在Startup.cs的ConfigureServices方法里添加如下代码:
//支持跨域 services.AddCors(options => { options.AddPolicy("any", builder => { builder .AllowAnyOrigin() .AllowAnyMethod() .AllowAnyHeader(); //.AllowCredentials(); //指定处理cookie }); });
any为策略名称,可以自己起名。
2. 在Startup.cs的Configure方法里添加如下代码:
if (env.IsDevelopment()) { app.UseDeveloperExceptionPage(); } app.UseRouting(); app.UseStaticFiles(); app.UseCors("any"); app.UseAuthorization(); app.UseEndpoints(endpoints => { endpoints.MapControllers().RequireCors("any"); });
注意,app.UseCors("any"); 必须放入app.UseRouting和app.UseEndpoints方法之间。
3. 在Controller里启用跨域,添加[EnableCors("any")],如下所示:
[EnableCors("any")] [Route("api/[controller]")] [ApiController] public class RegInfoController : ControllerBase { //省略控制器代码 }
这样将该Web API发布到IIS,就可以支持跨域访问该接口服务了。
二、uniapp跨域访问
这里我主要用到uniapp的两个方法,uploadFile和request方法。具体的用法可以参考官方文档:https://uniapp.dcloud.io/api/request/request.html 。
a. uploadFile示例:
uni.chooseImage({ sourceType: sourceType[this.sourceTypeIndex], sizeType: sizeType[this.sizeTypeIndex], count4: this.imageList4.length + this.count4[this.countIndex4] > 1 ? 1 - this.imageList4.length : this.count4[this.countIndex4], success: (res) => { var size = res.tempFiles[0].size; console.log(size); if (size > 2097152) { uni.showToast({ title: "图片大小不能超过2M", icon: 'none', duration: 1000, mask: true }); return } if(size < 100000){ uni.showToast({ title: "图片大小不能少于100K", icon: 'none', duration: 1000, mask: true }); return } this.imageList4 = this.imageList4.concat(res.tempFilePaths); uni.showLoading({ title: '图片上传中' }); var imageSrc = res.tempFilePaths[0] uni.uploadFile({ url: 'http://ip:端口/api/RegInfo/UploadImage', formData: { 'd': 'Images4' //传参到Web API }, filePath: imageSrc, fileType: 'image', name: 'data', success: (res) => { console.log('uploadImage success, res is:', res.data) this.image4 = res.data uni.hideLoading(); uni.showToast({ title: '上传成功', icon: 'success', duration: 1000, mask: true }) }, fail: (err) => { console.log('uploadImage fail', err); uni.showModal({ content: err.errMsg, showCancel: false }); } }); }, fail: (err) => { console.log("err: ", err); // #ifdef APP-PLUS if (err['code'] && err.code !== 0 && this.sourceTypeIndex === 2) { this.checkPermission(err.code); } // #endif // #ifdef MP if (err.errMsg.indexOf('cancel') !== '-1') { return; } uni.getSetting({ success: (res) => { let authStatus = false; switch (this.sourceTypeIndex) { case 0: authStatus = res.authSetting['scope.camera']; break; case 1: authStatus = res.authSetting['scope.album']; break; case 2: authStatus = res.authSetting['scope.album'] && res.authSetting['scope.camera']; break; default: break; } if (!authStatus) { uni.showModal({ title: '授权失败', content: 'Hello uni-app需要从您的相机或相册获取图片,请在设置界面打开相关权限', success: (res) => { if (res.confirm) { uni.openSetting() } } }) } } }) // #endif } })
后台控制器方法接收上传的图片代码片段:
[HttpPost("UploadImage")] public string UploadImage() { var file = Request.Form.Files[0]; byte[] bytes = new byte[file.OpenReadStream().Length]; file.OpenReadStream().Read(bytes, 0, bytes.Length); MemoryStream ms = new MemoryStream(bytes); Bitmap bitmap = new Bitmap(ms); string d = Request.Form["d"]; //类型对应不同的目录 string path = Directory.GetCurrentDirectory() + "/Images/" + d + "/" + DateTime.Now.ToString("yyyyMMddHHmmssfff") + ".jpg"; bitmap.Save(path); ms.Close(); bitmap.Dispose(); return path; //返回路径给uniapp,可保存该路径到数据库 }
b. request示例:
uni.request({ url: 'https://xxx.xxx.xxx.xxx:8098/api/RegInfo/AddRegInfo', //仅为示例,并非真实接口地址,前面的xxx为服务器ip或者改成域名。 data: { text1: 'text1', text2: 'text2' }, success: (res) => { console.log(res.data); this.text = 'request success'; } });
这里的参数data,里面可以封装成一个json对象传给Web API后台,后台方法参数为对象,该对象的属性跟text1,text2对应即可,可自由设置这里仅作演示。
后台控制器方法接收代码片段:
[HttpPost("AddRegInfo")] public string AddRegInfo(RegInfo regInfo) { using (_context as IDisposable) { _context.RegInfos.Add(regInfo); //_context为EF数据库操作对象 int flag = _context.SaveChanges(); return flag>0?"添加成功":"添加失败"; } }
RegInfo类里有两个属性Text1和Text2,分为对应如上的text1和text2。
三、发布到IIS的一些问题
1. .net core HTTP Error 500.31-Failed to load ASP.NET Core runtime错误
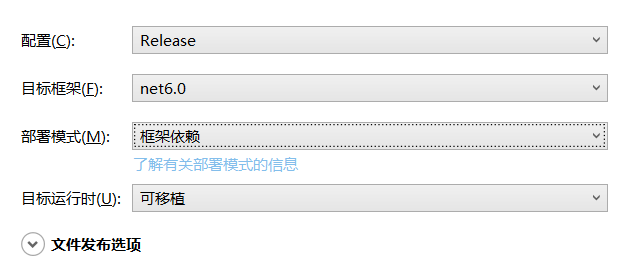
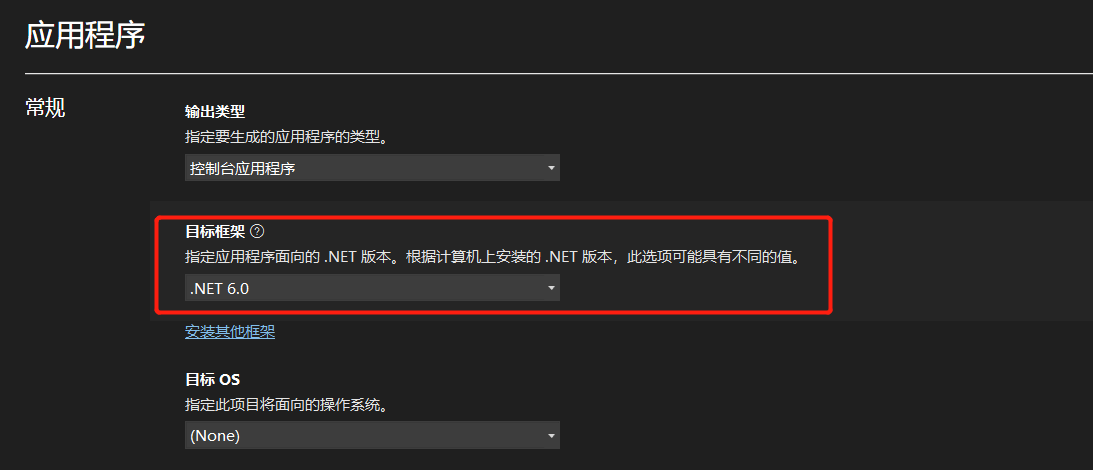
在服务器运行cmd,输入dotnet --version,查看.net core版本号。在发布Web API设置目标框架的时候,选择匹配这个版本号的.NET Core版本即可。
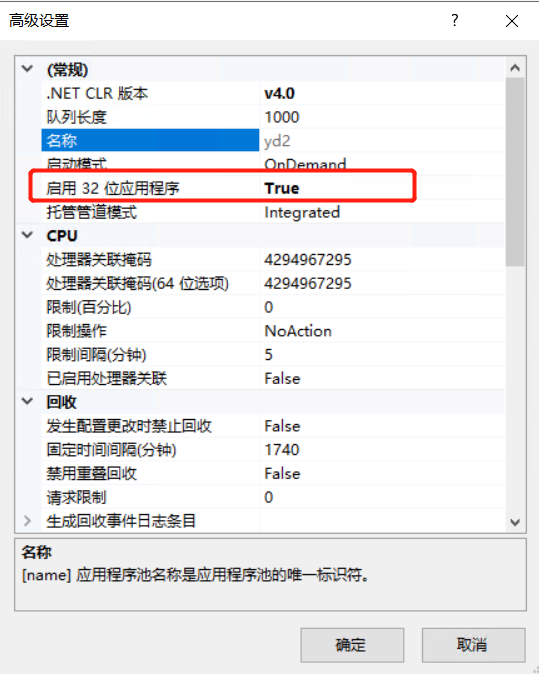
2. .net core HTTP Error 500.30 -ANCM In-Process Handler Load Failure
a. 找到发布过的Web API里的web.config文件并将 hostingModel="InProcess" 配置结点删除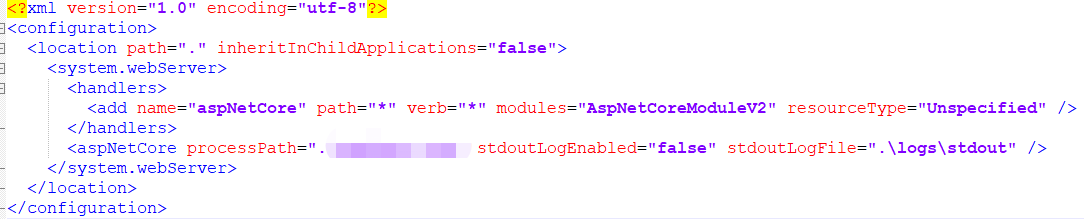
b. 在IIS该应用的应用程序池中,打开启用32位应用程序
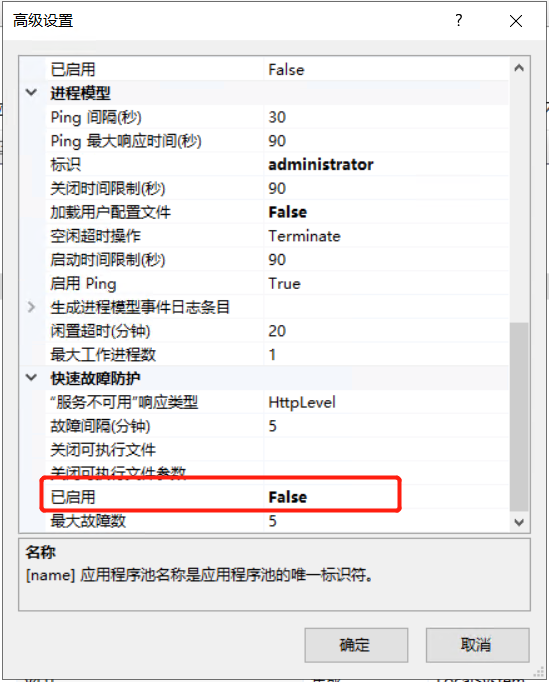
c. 快速故障防护是否关闭
参考资料:
1. uniapp官方首页: https://uniapp.dcloud.io/
2. 微软官方Web API教程:https://docs.microsoft.com/zh-cn/aspnet/core/tutorials/first-web-api?view=aspnetcore-6.0&tabs=visual-studio


【推荐】国内首个AI IDE,深度理解中文开发场景,立即下载体验Trae
【推荐】编程新体验,更懂你的AI,立即体验豆包MarsCode编程助手
【推荐】抖音旗下AI助手豆包,你的智能百科全书,全免费不限次数
【推荐】轻量又高性能的 SSH 工具 IShell:AI 加持,快人一步
· TypeScript + Deepseek 打造卜卦网站:技术与玄学的结合
· Manus的开源复刻OpenManus初探
· AI 智能体引爆开源社区「GitHub 热点速览」
· 三行代码完成国际化适配,妙~啊~
· .NET Core 中如何实现缓存的预热?
2017-03-26 《大型网站技术架构》读书笔记