快速上手MyBatis
相对于Hibernate,MyBatis是一个半自动化映射的数据库框架,它的前身是Apache的一个开源项目iBatis。Hibernate完全以面向对象编程的方式操作数据库(ORM),主要用在企业级应用开发领域,对于互联网应用开发中使用较少(主要是由于不够灵活,性能较差、SQL优化较难)。而对于原始的JDBC的方式,比较繁琐,容易造成重复的代码。MyBatis需要我们自己编写SQL,定义映射关系。虽然工作量有点大,但架构优雅,方便优化SQL,所以MyBatis在大多数Java Web项目中,是更灵活、更好的选择。
下面演示在eclipse for javaee的ide中使用MyBatis操作MySQL数据库。
一、下载MyBatis
首先需要下载这个框架的jar包以及dtd描述符文件(在编辑器中可以有自动提示)。在github上可以下载到,地址:https://github.com/mybatis/mybatis-3/releases。![]()
二、引用MyBatis
1. 新建一个java project,右键项目引用mybatis-3.5.7.jar,将mysql数据库驱动以及log4j等jar包也一并导入。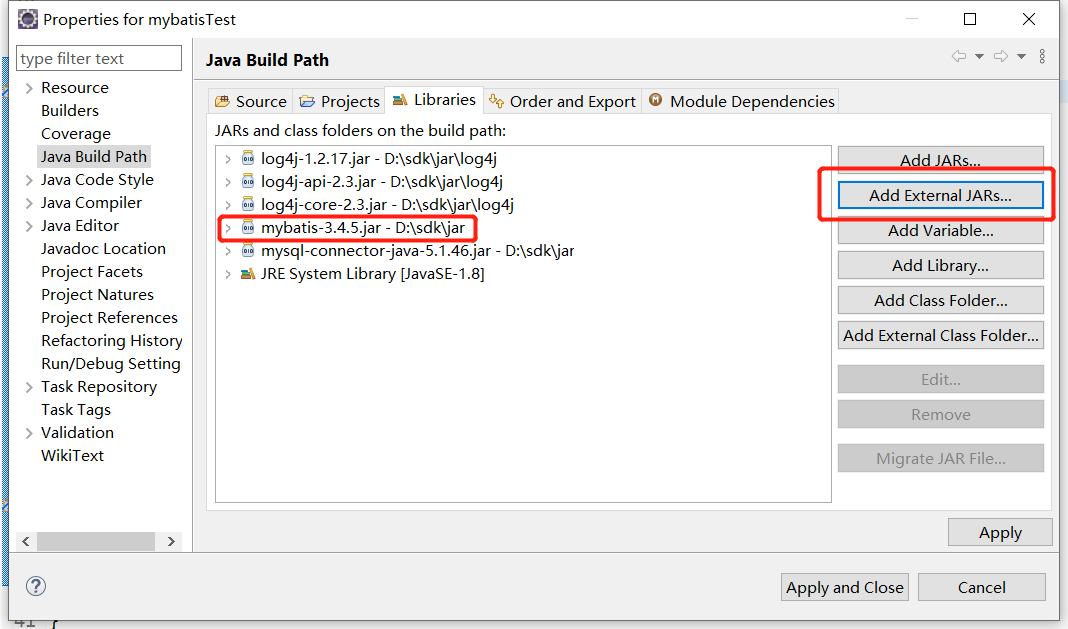
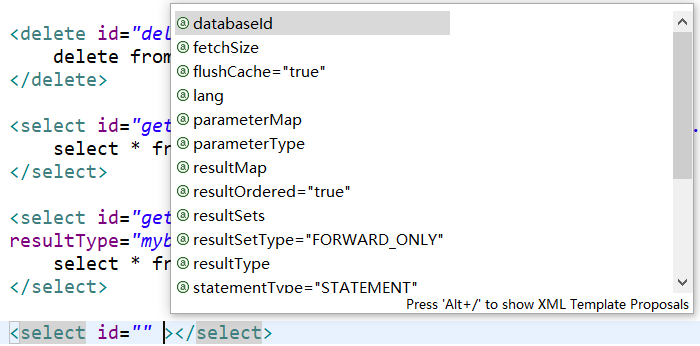
2. 项目中建立dtd文件夹,将mybatis-3-mapper.dtd描述符文件复制进去,这样我们写mybatis的配置信息时就会有自动提示的效果。
3. 创建MySQL数据库表结构语句
DROP TABLE IF EXISTS `t_article`;
CREATE TABLE `t_article`  (
  `id` int(11) NOT NULL AUTO_INCREMENT,
  `title` varchar(80) CHARACTER SET utf8 COLLATE utf8_general_ci NOT NULL,
  `author` varchar(30) CHARACTER SET utf8 COLLATE utf8_general_ci NOT NULL,
  `sort` varchar(30) CHARACTER SET utf8 COLLATE utf8_general_ci NOT NULL,
  `time` datetime NULL DEFAULT '2017-09-18 00:00:00',
  `star` int(11) NULL DEFAULT 0,
  `comment` int(11) NULL DEFAULT 0,
  `visit` int(11) NULL DEFAULT 0,
  `content` text CHARACTER SET utf8 COLLATE utf8_general_ci NULL,
  PRIMARY KEY (`id`) USING BTREE
) ENGINE = InnoDB AUTO_INCREMENT = 11 CHARACTER SET = utf8 COLLATE = utf8_general_ci ROW_FORMAT = Dynamic;
上面的准备工作做好,就可以正式使用MyBatis了。
三、使用MyBatis
1. 项目根目录下,创建config文件夹。然后右键这个文件夹,build path->use as source folder,将其作为源代码文件夹。后续创建的文件夹和文件都在这个config文件夹下面。
2. config目录下,创建mybatis-config.xml配置文件,内容如下:
<?xml version="1.0" encoding="UTF-8"?>
<!DOCTYPE configuration
  PUBLIC "-//mybatis.org//DTD Config 3.0//EN"
  "http://mybatis.org/dtd/mybatis-3-config.dtd">

<!-- XML配置文件包含对MyBatis系统的核心设置 -->
<configuration>
    <!-- 指定MyBatis所用日志的具体实现 -->
    <settings>
        <setting name="logImpl" value="LOG4J"/>
    </settings>
    <environments default="development">
          <environment id="development">
            <transactionManager type="JDBC"> <!-- 事务管理器。JDBC由应用程序管理、MANAGED由应用服务器管理 -->
            </transactionManager>
            <dataSource type="POOLED">
                  <property name="driver" value="org.gjt.mm.mysql.Driver"/> <!-- 数据库驱动 -->
                  <property name="url" value="jdbc:mysql://localhost:3306/test?characterEncoding=UTF-8"/> <!-- MySQL数据库地址 -->
                  <property name="username" value="root"/> <!-- 数据库用户名 -->
                  <property name="password" value="123456"/> <!-- 数据库密码 -->
            </dataSource>
          </environment>
    </environments>
    <mappers>
        <mapper resource="mapper/testMapper.xml"/> <!-- 映射文件路径 -->
    </mappers>
</configuration>
这个文件定义了数据库连接信息,以及映射文件信息。后面主程序将通过这个文件来连接数据库、建立映射关系。
3. config目录下创建mapper包,在里面创建testMapper.xml文件,内容如下:
<?xml version="1.0" encoding="UTF-8" ?>
<!DOCTYPE mapper
PUBLIC "-//mybatis.org//DTD Mapper 3.0//EN"
"http://mybatis.org/dtd/mybatis-3-mapper.dtd">
<mapper namespace="mybatisTest.mapper.ArticleMapper">
    <insert id="insertArticle" parameterType="mybatisTest.model.impl.Article" useGeneratedKeys="true"
    keyProperty="id" >
        insert into t_article(title,author,sort,time,star,comment,visit,content)
        values(#{title},#{author},#{sort},#{time},#{star},#{comment},#{visit},#{content})
    </insert>

    <update id="addArticleVisit" parameterType="java.lang.Integer">
        update t_article set visit = visit+1 where id=#{id}
    </update>

    <delete id="deleteArticle">
        delete from t_article
    </delete>

    <select id="getAllArticles" resultType="mybatisTest.model.impl.Article">
        select * from t_article
    </select>

    <select id="getOneArticle" parameterType="java.lang.Integer"
    resultType="mybatisTest.model.impl.Article">
        select * from t_article where id=#{id}
    </select>
</mapper>
这里面我定义了很多SQL,后面会用到其中的两个。
4. 建立log4j.properties 日志配置文件,内容如下:
# Global logging configuration
#\u5728\u5f00\u53d1\u73af\u5883\u4e0b\u65e5\u5fd7\u7ea7\u522b\u8981\u8bbe\u7f6e\u6210DEBUG\uff0c\u751f\u4ea7\u73af\u5883\u8bbe\u7f6e\u6210info\u6216error
log4j.rootLogger=DEBUG, stdout
# Console output...
log4j.appender.stdout=org.apache.log4j.ConsoleAppender
log4j.appender.stdout.layout=org.apache.log4j.PatternLayout
log4j.appender.stdout.layout.ConversionPattern=%5p [%t] - %m%n
5. 在src目录下,建立实体Bean类(Article),我们放到xxx.model.impl包里
package mybatisTest.model.impl;

import java.util.Date;

public class Article {
    private int id;
    private String title;
    private String author;
    private String sort;
    private Date time;
    private int star;
    private String comment;
    private int visit;
    private String content;

    public Article() {
        super();
    }
    public Article(int id, String title, String author, String sort, Date time, int star, String comment, int visit,
            String content) {
        super();
        this.id = id;
        this.title = title;
        this.author = author;
        this.sort = sort;
        this.time = time;
        this.star = star;
        this.comment = comment;
        this.visit = visit;
        this.content = content;
    }

    @Override
    public String toString() {
        return "标题->"+getTitle()+",访问次数->"+getVisit();
    }

    public int getId() {
        return id;
    }
    public void setId(int id) {
        this.id = id;
    }
    public String getTitle() {
        return title;
    }
    public void setTitle(String title) {
        this.title = title;
    }
    public String getAuthor() {
        return author;
    }
    public void setAuthor(String author) {
        this.author = author;
    }
    public String getSort() {
        return sort;
    }
    public void setSort(String sort) {
        this.sort = sort;
    }
    public Date getTime() {
        return time;
    }
    public void setTime(Date time) {
        this.time = time;
    }
    public int getStar() {
        return star;
    }
    public void setStar(int star) {
        this.star = star;
    }
    public String getComment() {
        return comment;
    }
    public void setComment(String comment) {
        this.comment = comment;
    }
    public int getVisit() {
        return visit;
    }
    public void setVisit(int visit) {
        this.visit = visit;
    }
    public String getContent() {
        return content;
    }
    public void setContent(String content) {
        this.content = content;
    }
}
6. 建立映射接口
package mybatisTest.mapper;

import java.util.List;
import mybatisTest.model.impl.Article;

public interface ArticleMapper {
    public boolean addArticleVisit(int id) throws Exception ;
    public List<Article> getAllArticles() throws Exception ;
}
简单起见,我只演示了其中两个。
7. 主方法调用测试
package mybatisTest;

import java.io.IOException;
import java.io.InputStream;
import java.util.List;

import org.apache.ibatis.io.Resources;
import org.apache.ibatis.session.SqlSession;
import org.apache.ibatis.session.SqlSessionFactory;
import org.apache.ibatis.session.SqlSessionFactoryBuilder;

import mybatisTest.mapper.ArticleMapper;
import mybatisTest.model.impl.Article;

public class Test {

    public static void main(String[] args) {
        // TODO Auto-generated method stub

        try {
            InputStream is = Resources.getResourceAsStream("mybatis-config.xml");
            SqlSessionFactory sqlSessionFactory = new SqlSessionFactoryBuilder().build(is);
            SqlSession session = sqlSessionFactory.openSession();

            ArticleMapper articleMapper = session.getMapper(ArticleMapper.class);
            articleMapper.addArticleVisit(10);
            session.commit();//提交更新

            List<Article> articles = articleMapper.getAllArticles();

            for (int i = 0; i < articles.size(); i++) {
                System.out.println(articles.get(i));
            }

        } catch (Exception e) {
            // TODO Auto-generated catch block
            e.printStackTrace();
        }
    }
}
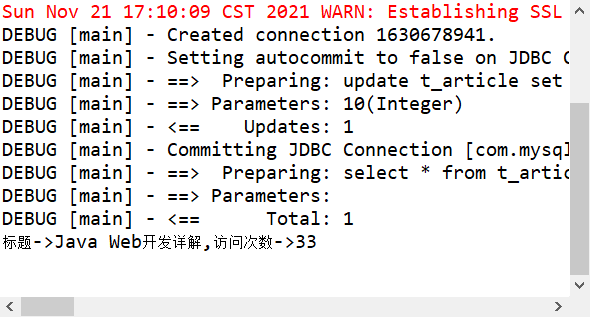
至此项目代码部分就完成了,下面可以直接运行这个项目。
运行结果
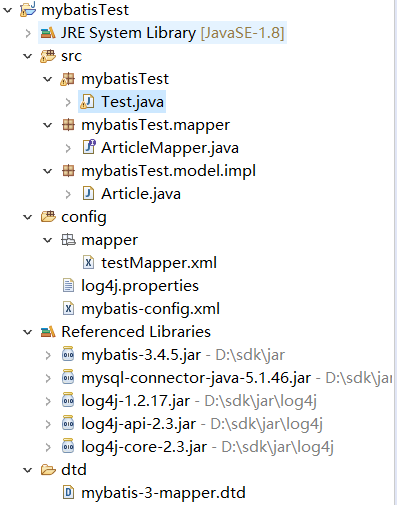
项目结构:

 浙公网安备 33010602011771号