使用 IntelliJ IDEA 开发 Azure Function APP (Java)
1.1 前提
- Azure 账户并有可食用的订阅。创建免费的 Azure 账户。
- Azure 支持的 Java Development Kit (JDK),JDK 8 或 JDK 11。
- IntelliJ IDEA 无限制版本或社区版本均可。
- Maven 3.5+
- 最新的 Function Core Tools
1.2 安装插件并登录
在 IntelliJ IDEA 中安装 Azure Toolkit 插件并登录,具体步骤如下:
-
在 IntelliJ IDEA
Settings/Perfernced中选择Plug。在MarketPlace中找到Azure Toolkit for IntelliJ,并点击install。在安装完成后点击Restart插件可被使用。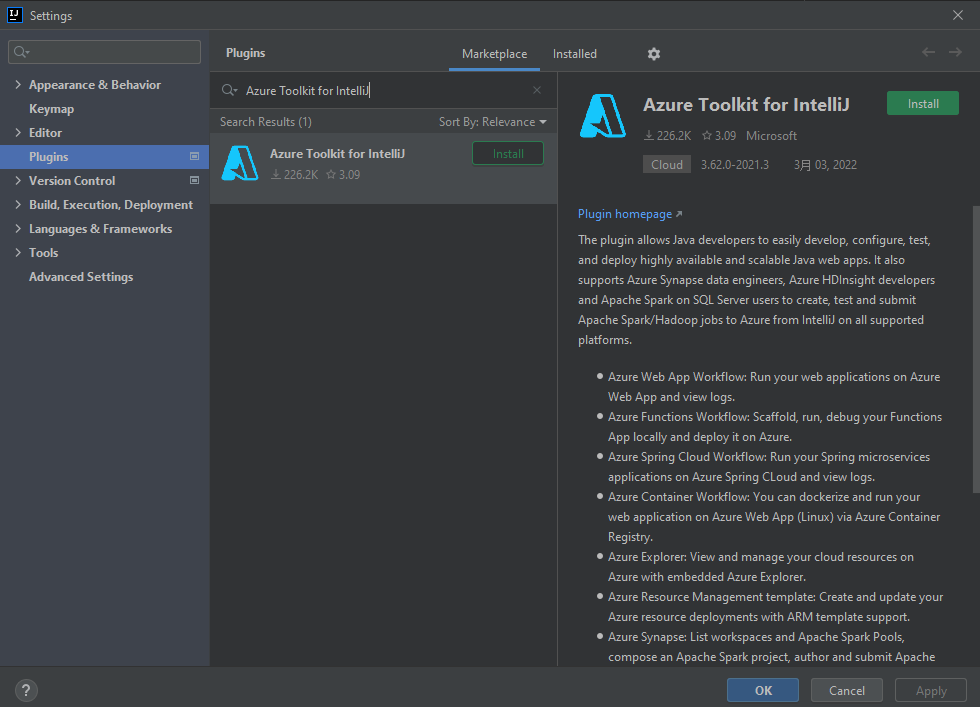
-
要登录 Azure account,首先打开侧边栏中的
Azure Explore,然后点击菜单顶部 (或者在 IDEA 菜单中,选择Tools > Azure > Azure Sign In)Azure Sign In图标。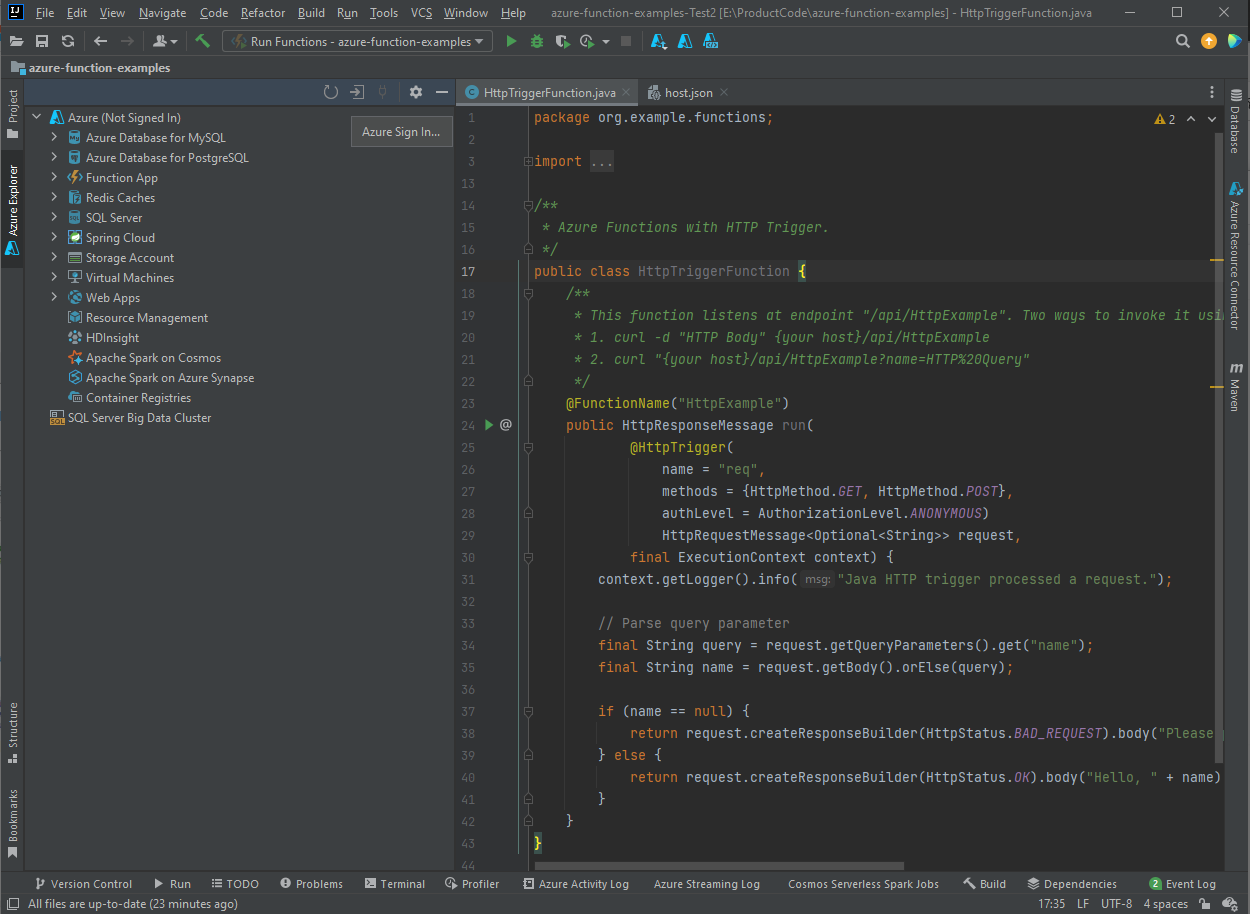
-
在
Azure Sign In窗口选择OAuth 2.0然后点击Sign In。如果使用其他登录选项,请参考 Sign-in instructions for the Azure Toolkit for IntelliJ。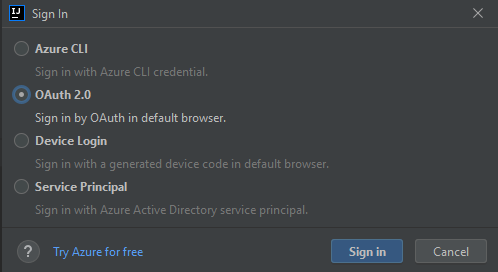
-
在浏览器中登录 Azure account,然后返回到 IntelliJ。在
Select Subscription对话框中选择您想要使用的订阅,并点击Select。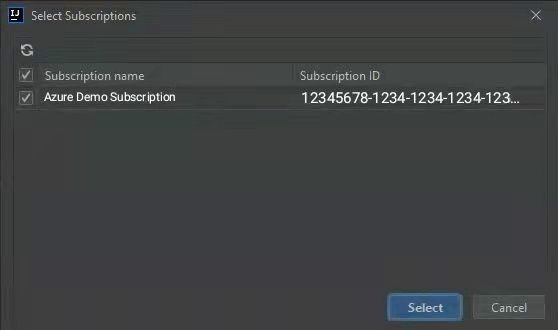
1.3 创建本地项目
使用 Azure Toolkit 通过 IntelliJ 创建本地的 Azure Function 项目,具体步骤如下:
-
打开 IntelliJ IDEA 您会看到
Welcome对话框,选择New Project打开新项目创建指导,并选择Azure Functions。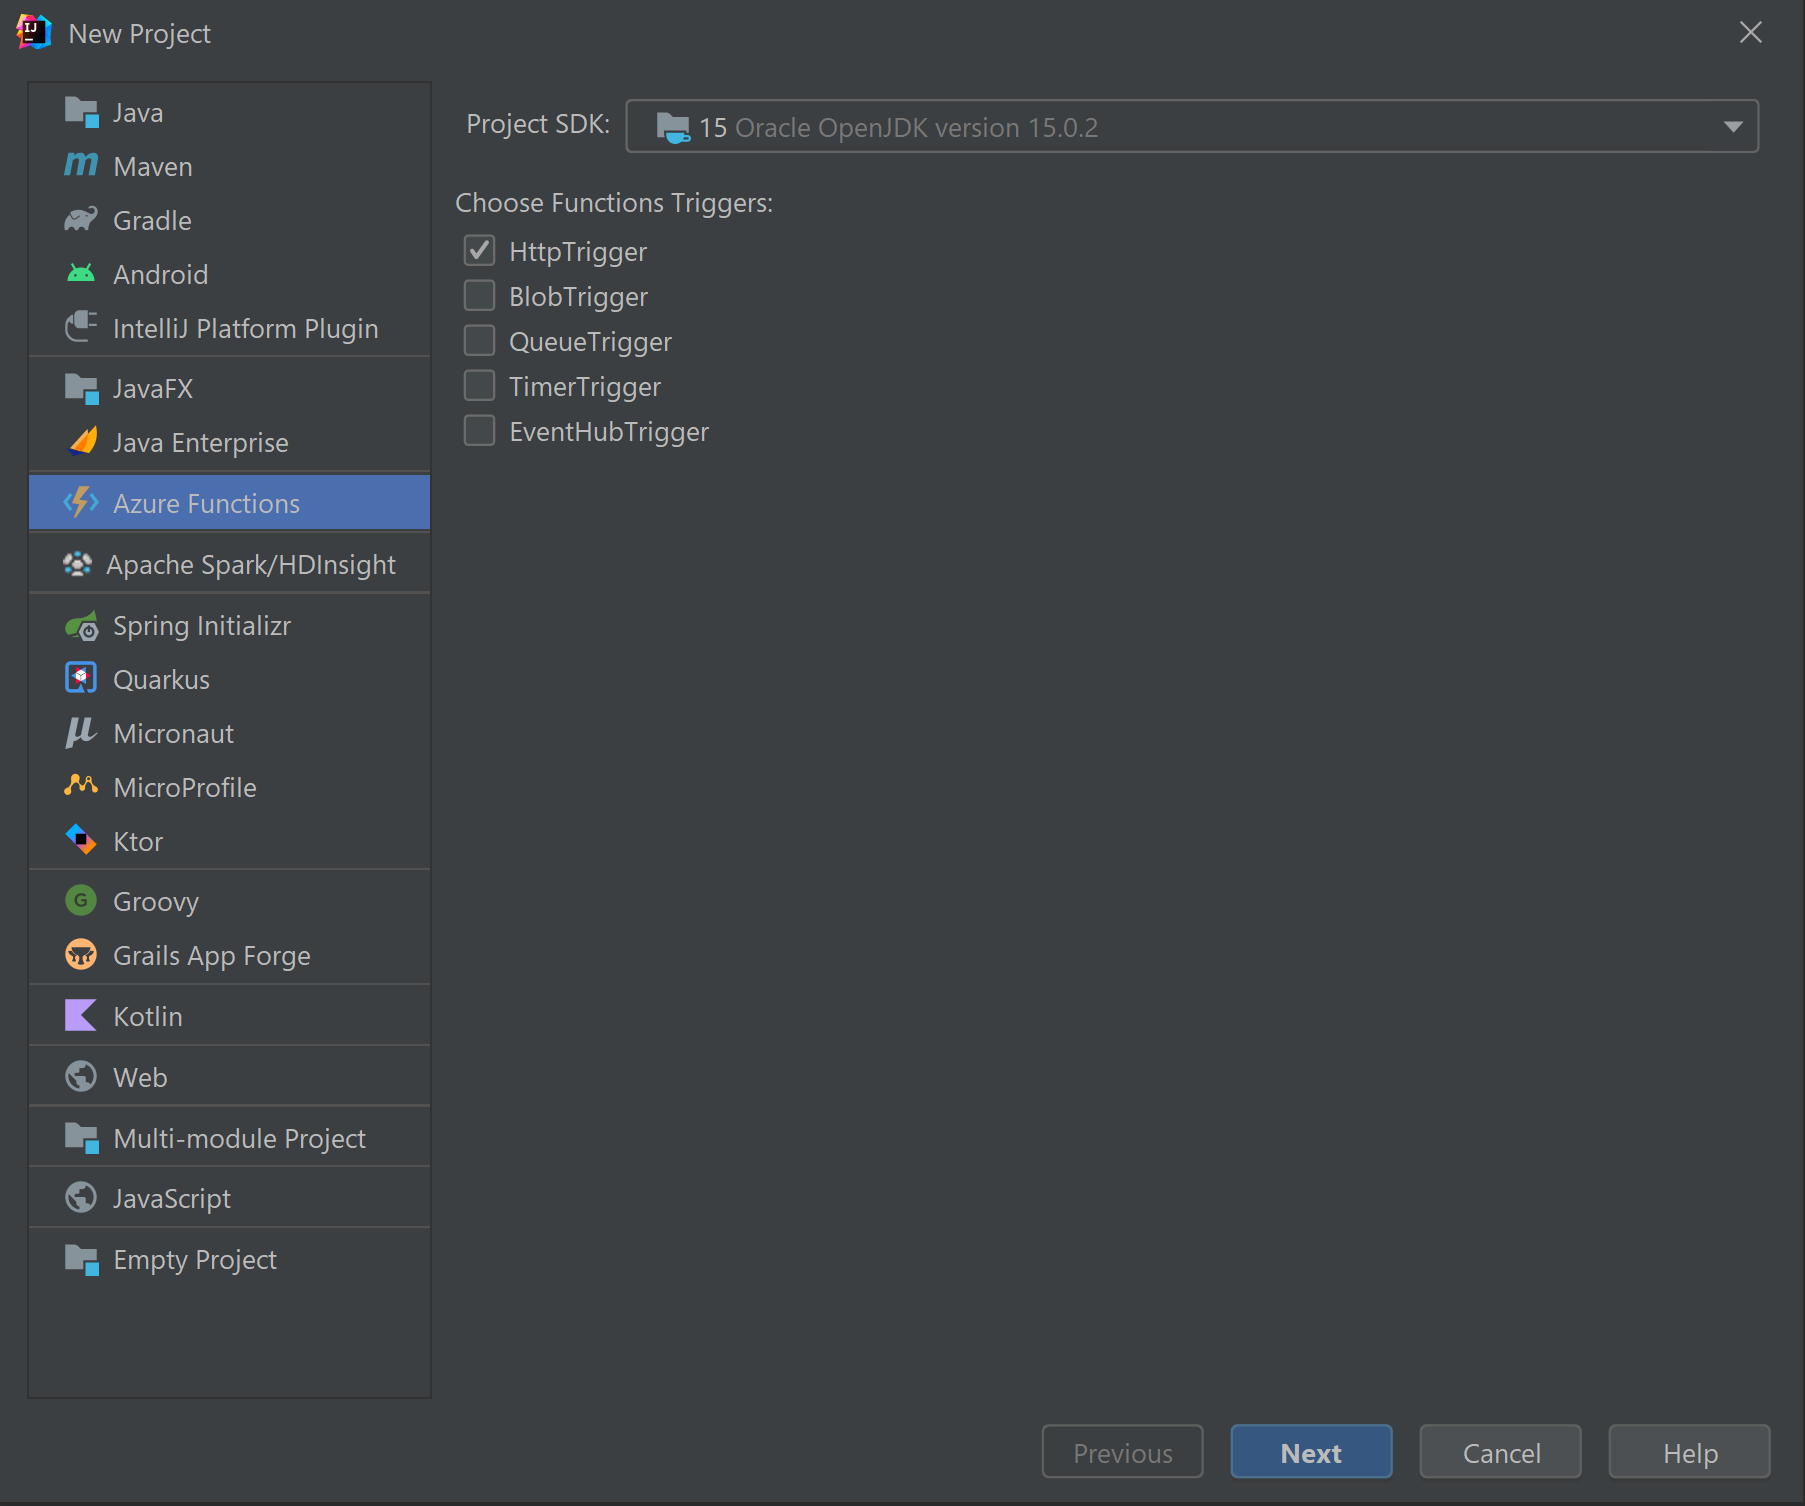
-
选择
Http Trigger,然后点击Next随后根据创建指引完善在后续页面中的配置信息。确认您项目的地址,随后点击Finish。IntelliJ IDEA 将会创建并在窗口中打开您的项目。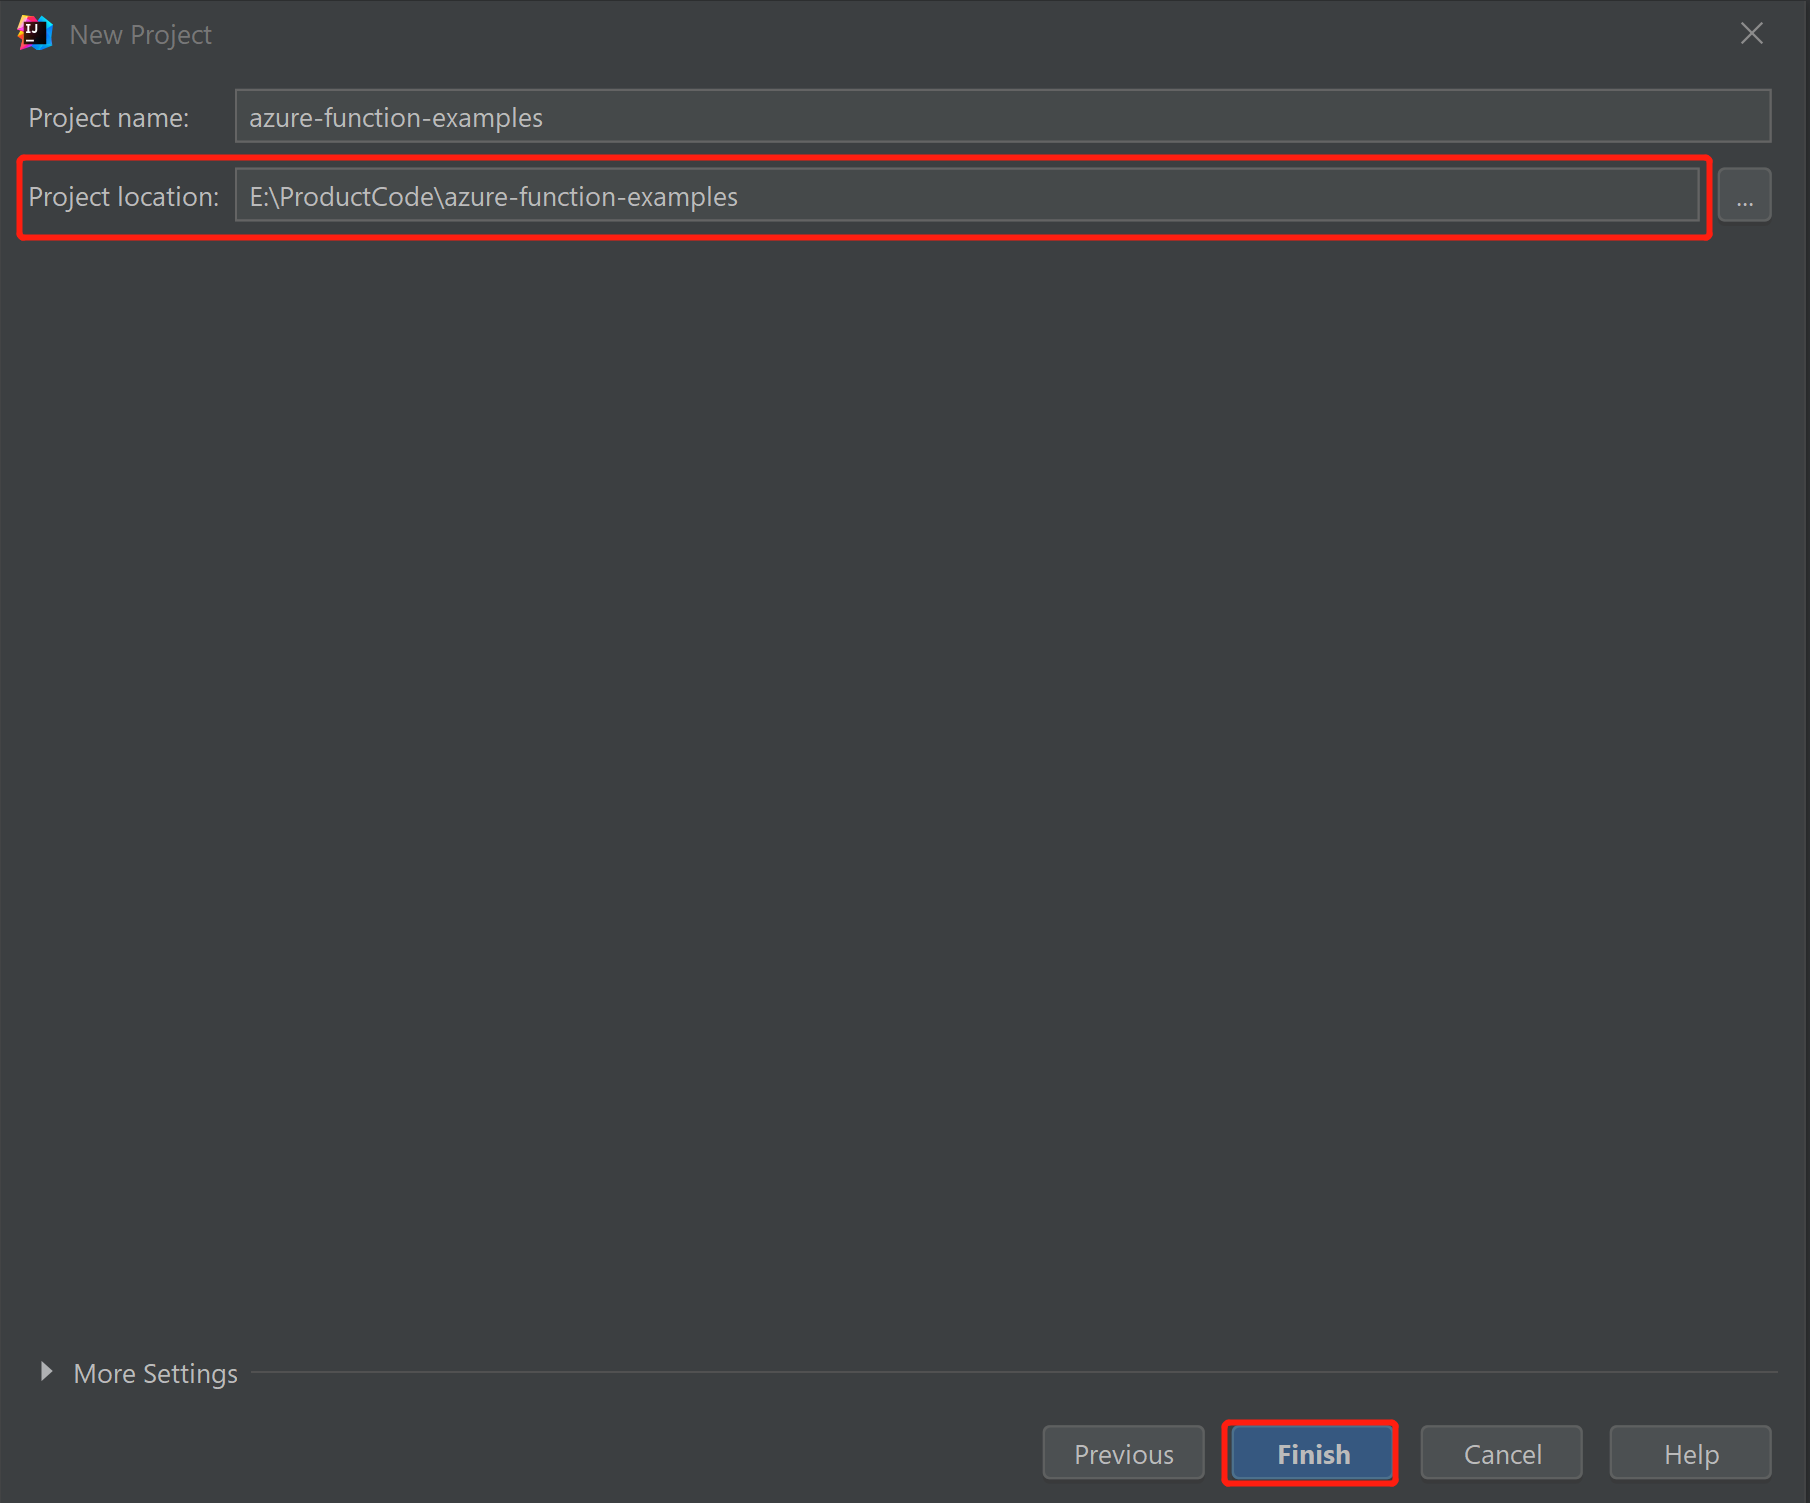
-
1.3 在本地运行项目
在本地运行项目,跟随以下步骤:
⚠️ Important
You must have the JAVA_HOME environment variable set correctly to the JDK directory that is used during code compiling using Maven. Make sure that the version of the JDK is at least as high as the
Java.versionsetting.您必须将 JAVA_HOME 环境变量正确设置为使用 Maven 编译代码时使用的 JDK 目录。确保JDK的版本至少与
Java.version的设置一样高。
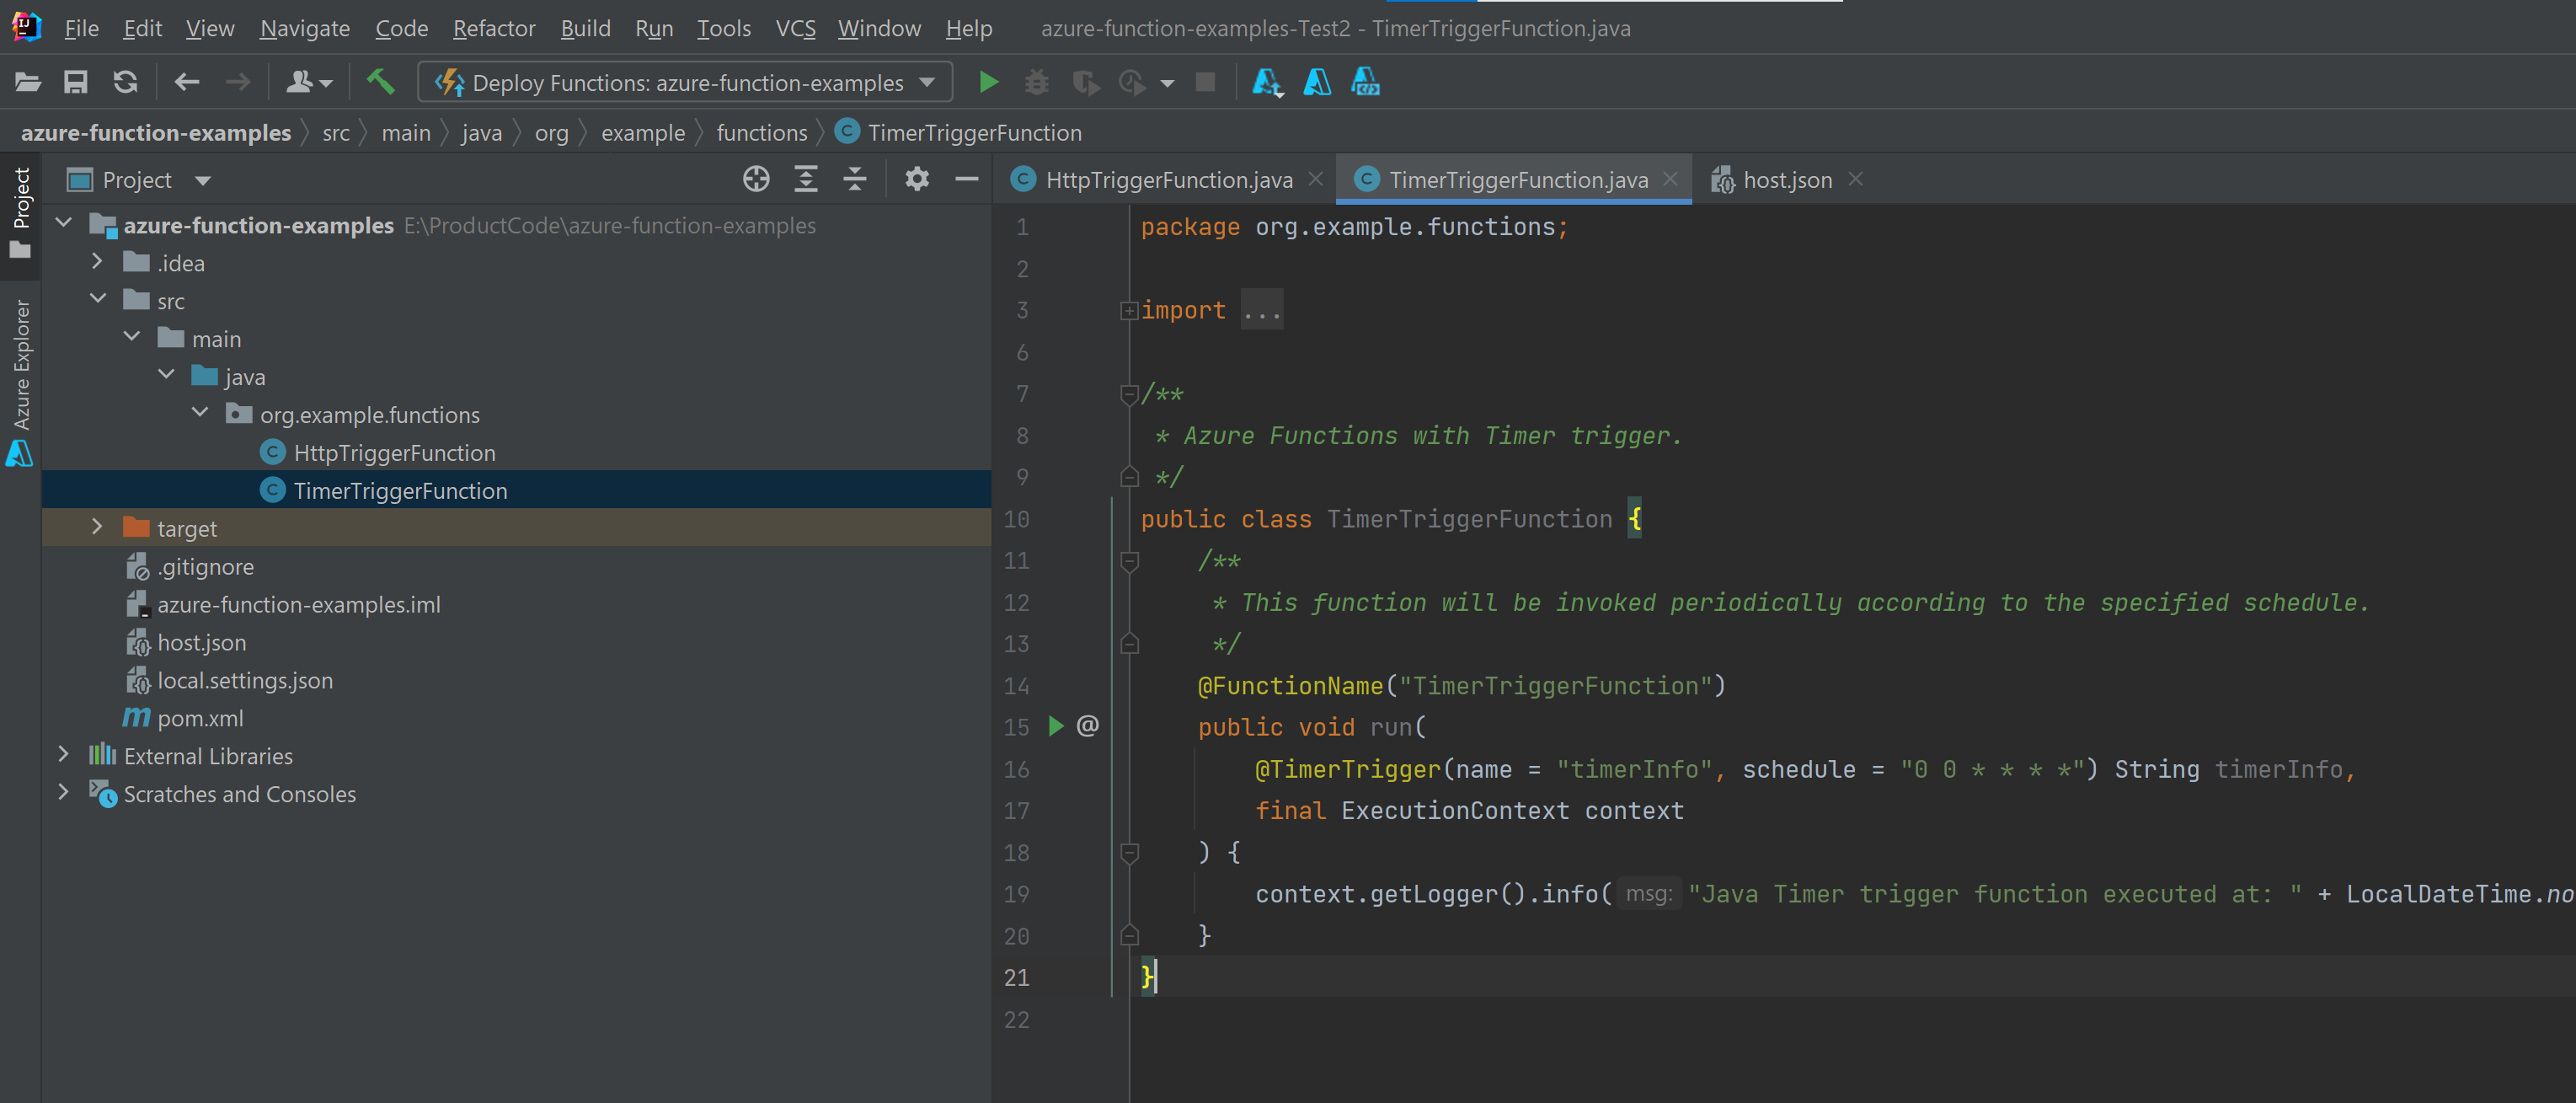
-
导航到 src/main/java/org/example/functions/HttpTriggerFunction.java 来查看生成的代码。在第 24 行旁边,你会发现有一个绿色的
Run按钮。点击它并选择运行Run 'Functions-azur...'。你会看到你的函数应用正在本地运行,并有一些日志。

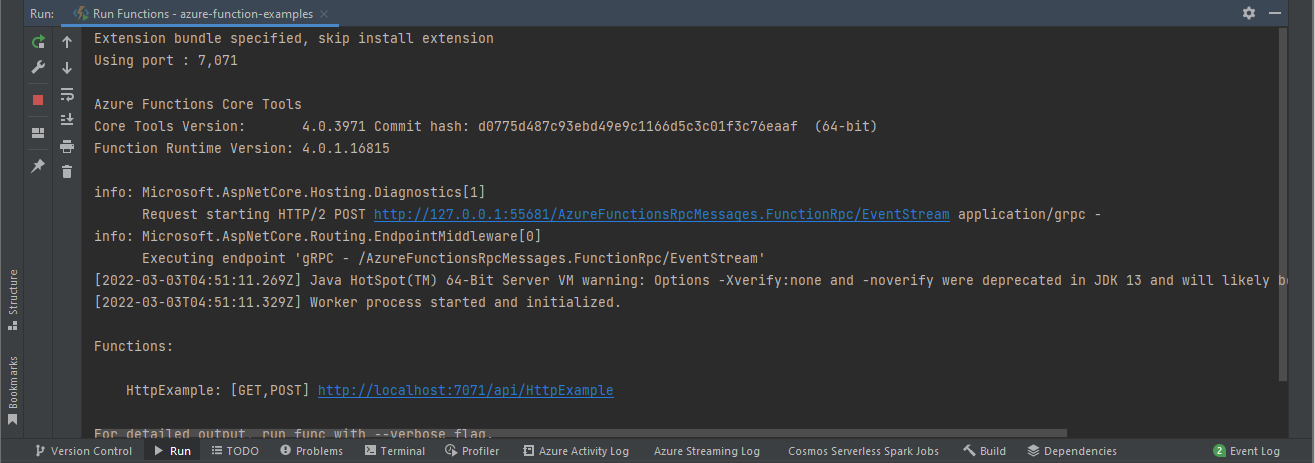
-
你可以通过从浏览器访问显示的端点来尝试该功能,如
http://localhost:7071/api/HttpExample?name=Azure。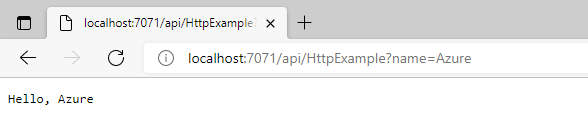
-
该日志也会显示在你的IDEA中。点击
Stop按钮,停止该功能应用。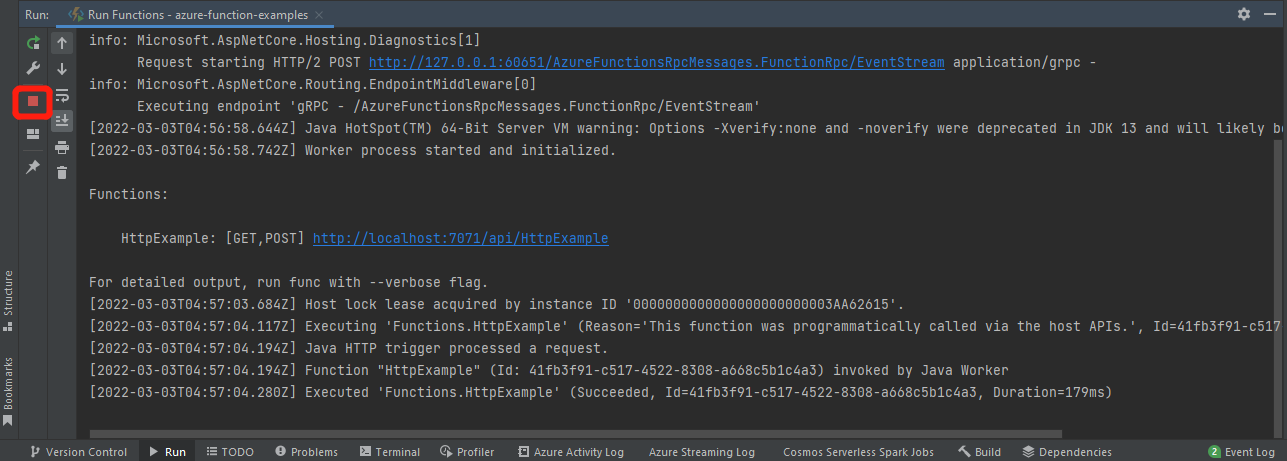
1.4 在本地 Debug 项目
在本地 Debug 项目,具体步骤如下:
-
选择 Debug 按钮在工具栏中,如果您未找到工具栏,请通过在菜单中选择
View > Apperance > Toolbar以激活菜单栏。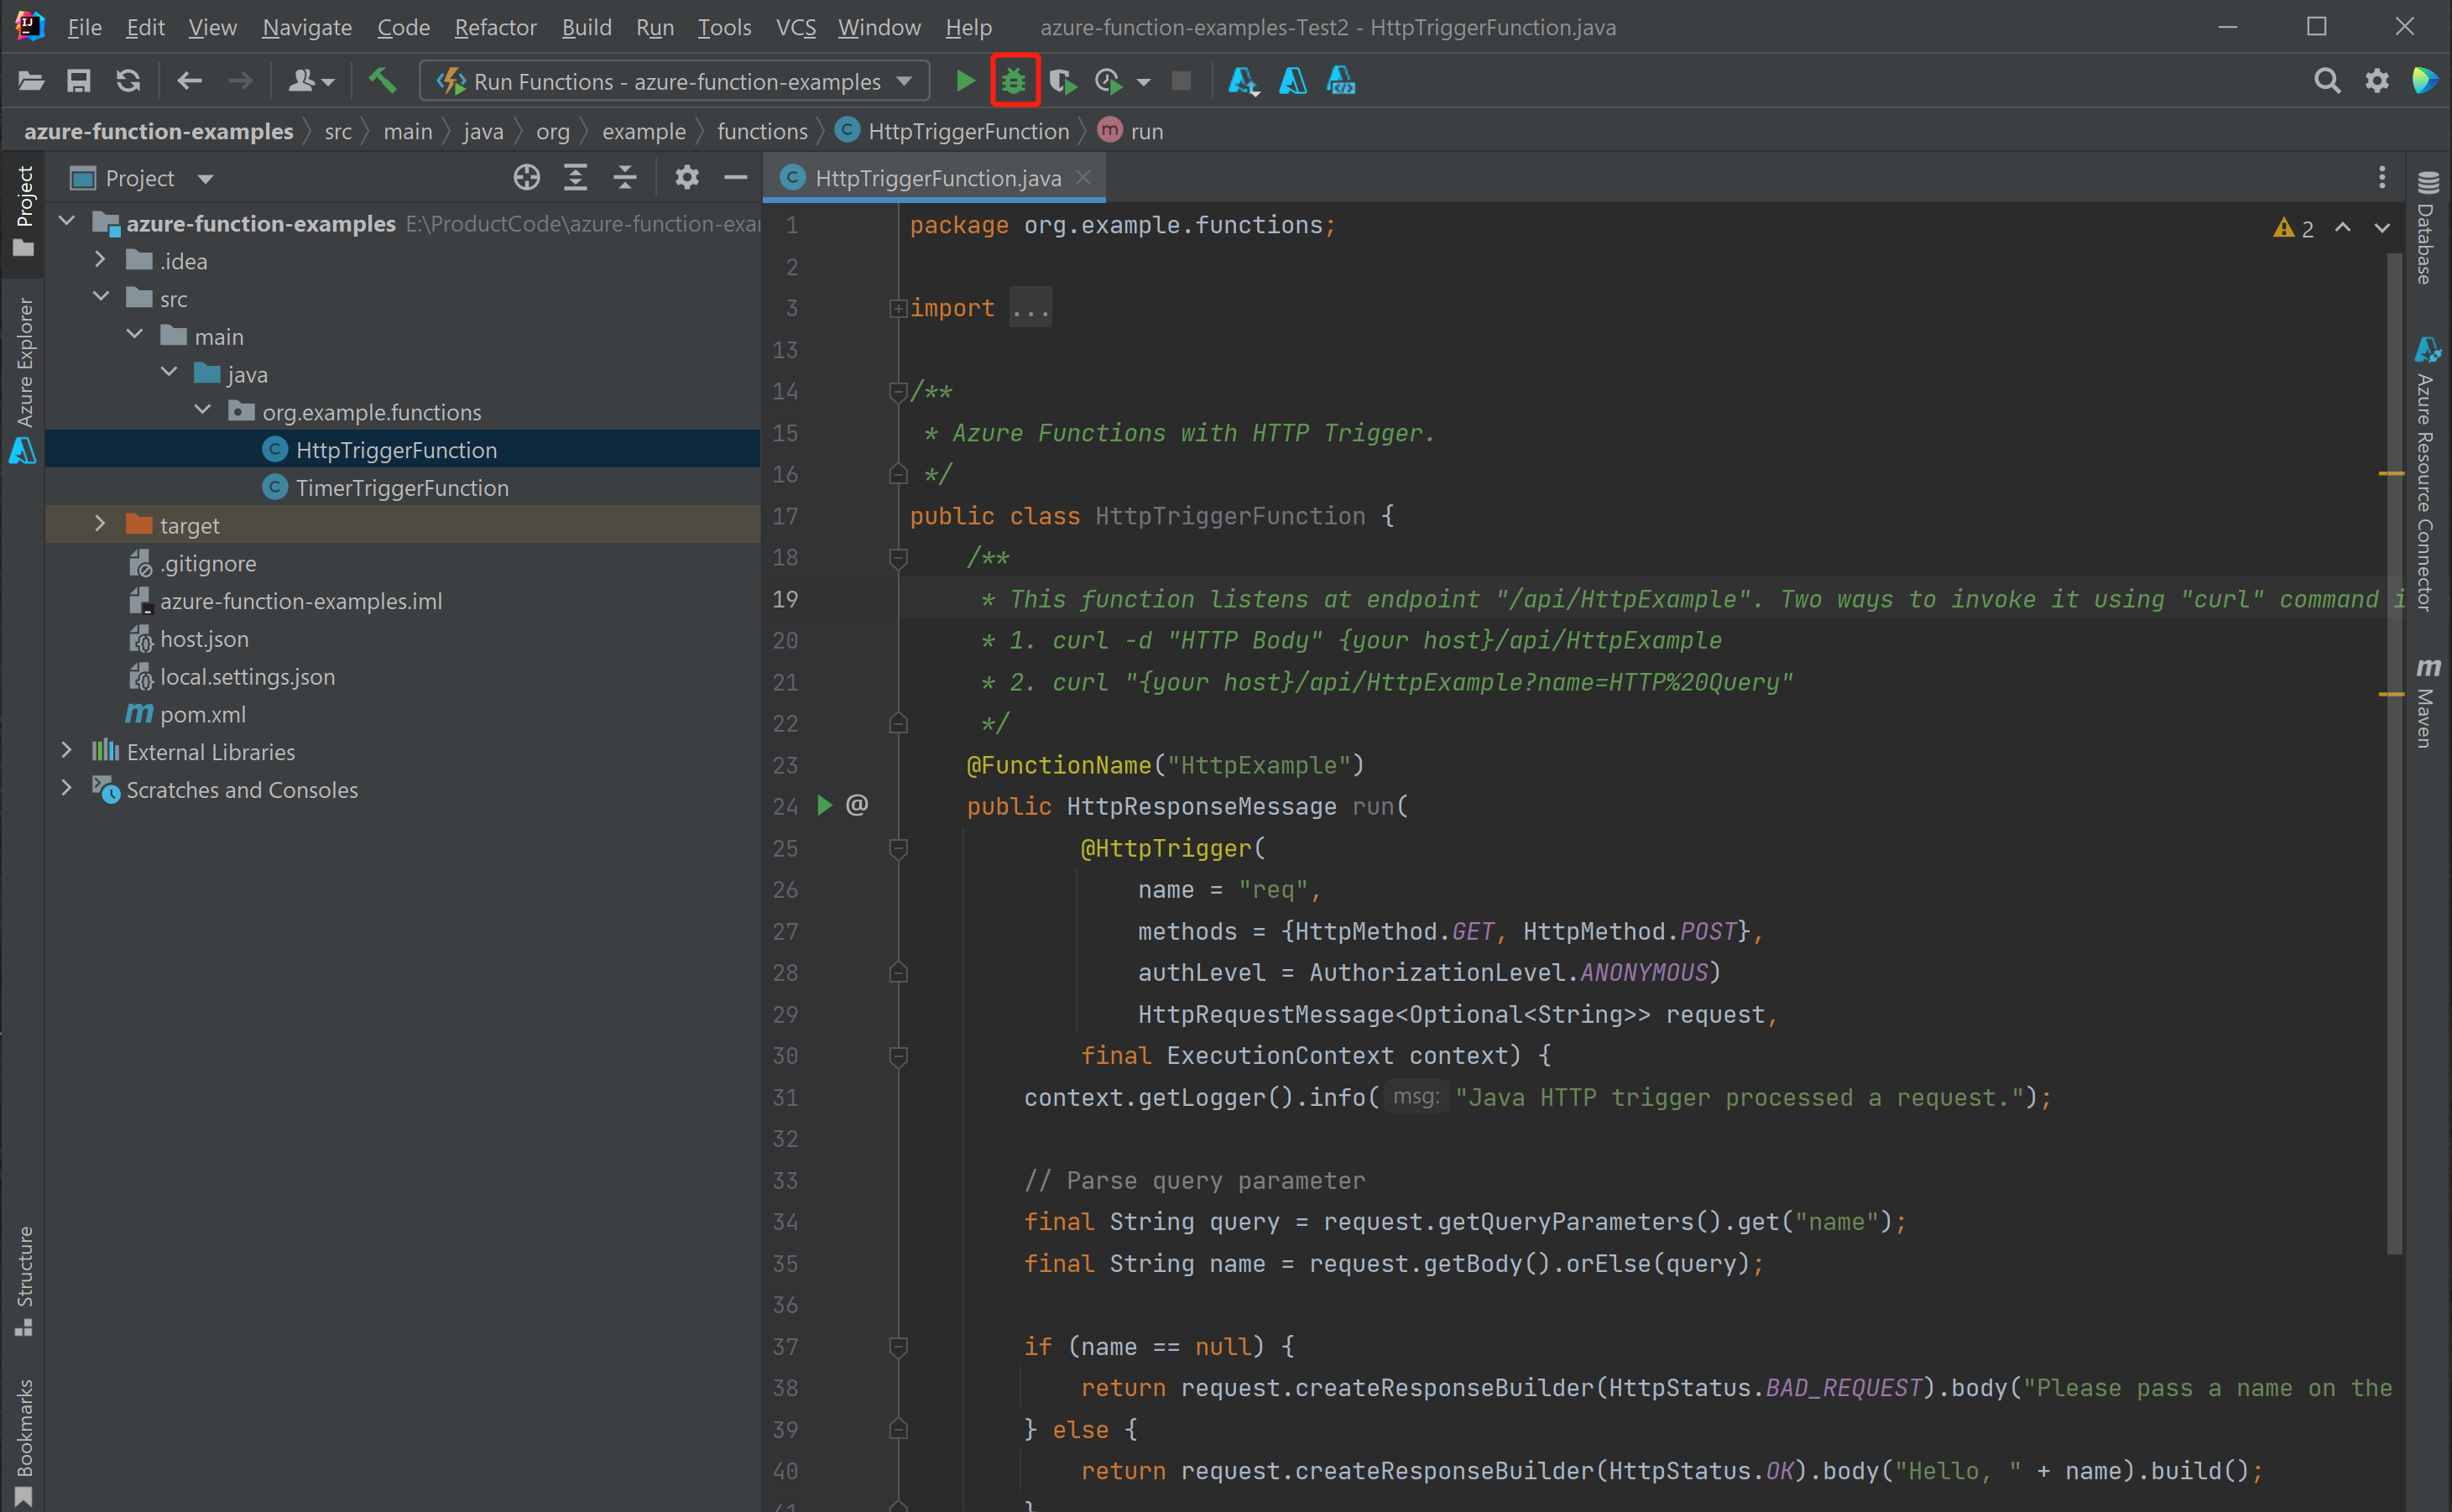
-
点击文件 src/main/java/org/example/functions/HttpTriggerFunction.java 的第 31 行,添加一个断点。再次访问端点
http://localhost:7071/api/HttpTrigger-Java?name=Azure,你会发现断点被击中。然后,你可以尝试更多的调试功能,如Step、Watch、and Evaluation。点击Stop按钮,停止调试会话。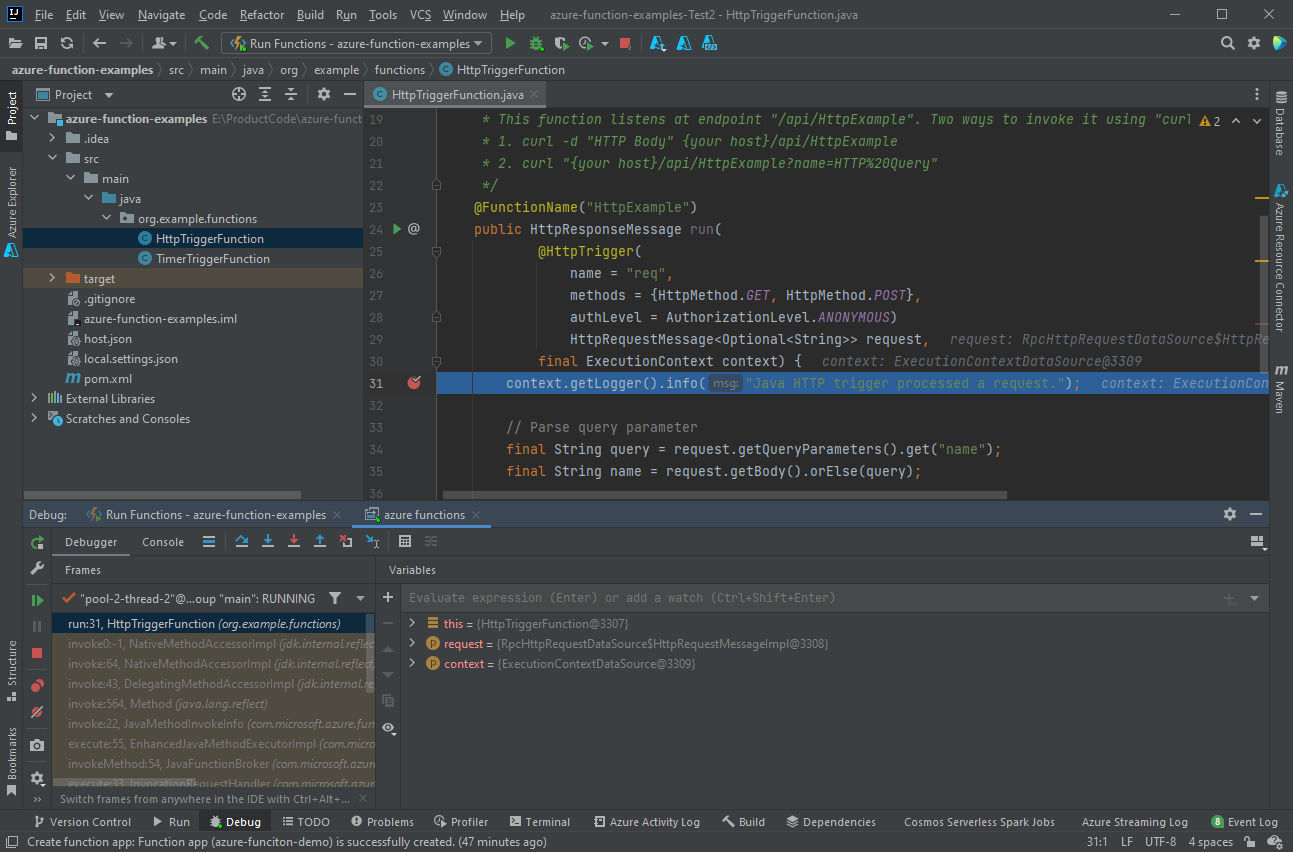
1.5 部署您的项目到 Azure 上
部署您的 Azure Function App 到 Azure 上具体步骤如下:
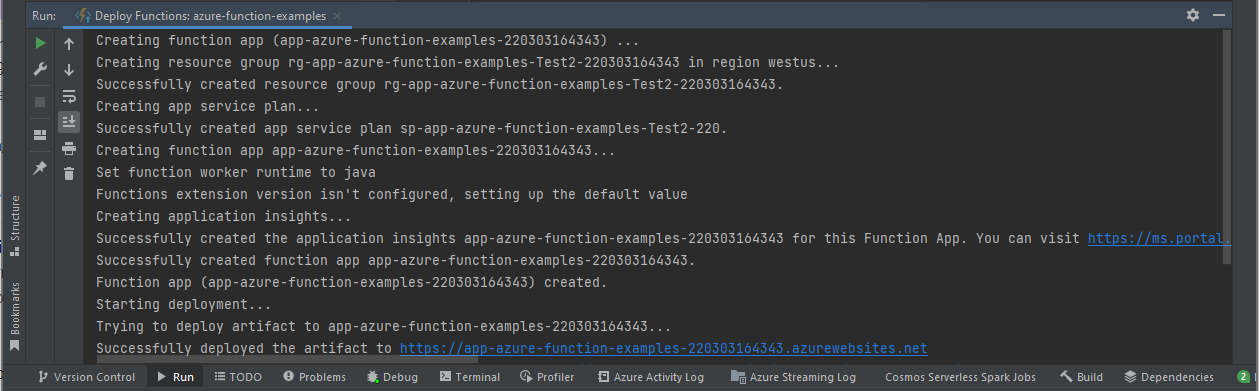
-
右键点击 IntelliJ 项目资源管理器中的你的项目。然后选择
Azure > Deploy > to Azure Functions。
-
如果你还没有任何 Function App,请在
Function line点击+。键入功能应用的名称,并选择适当的平台。这里你可以接受默认值。点击OK,你创建的新功能应用将被自动选中。点击Run来部署你的功能。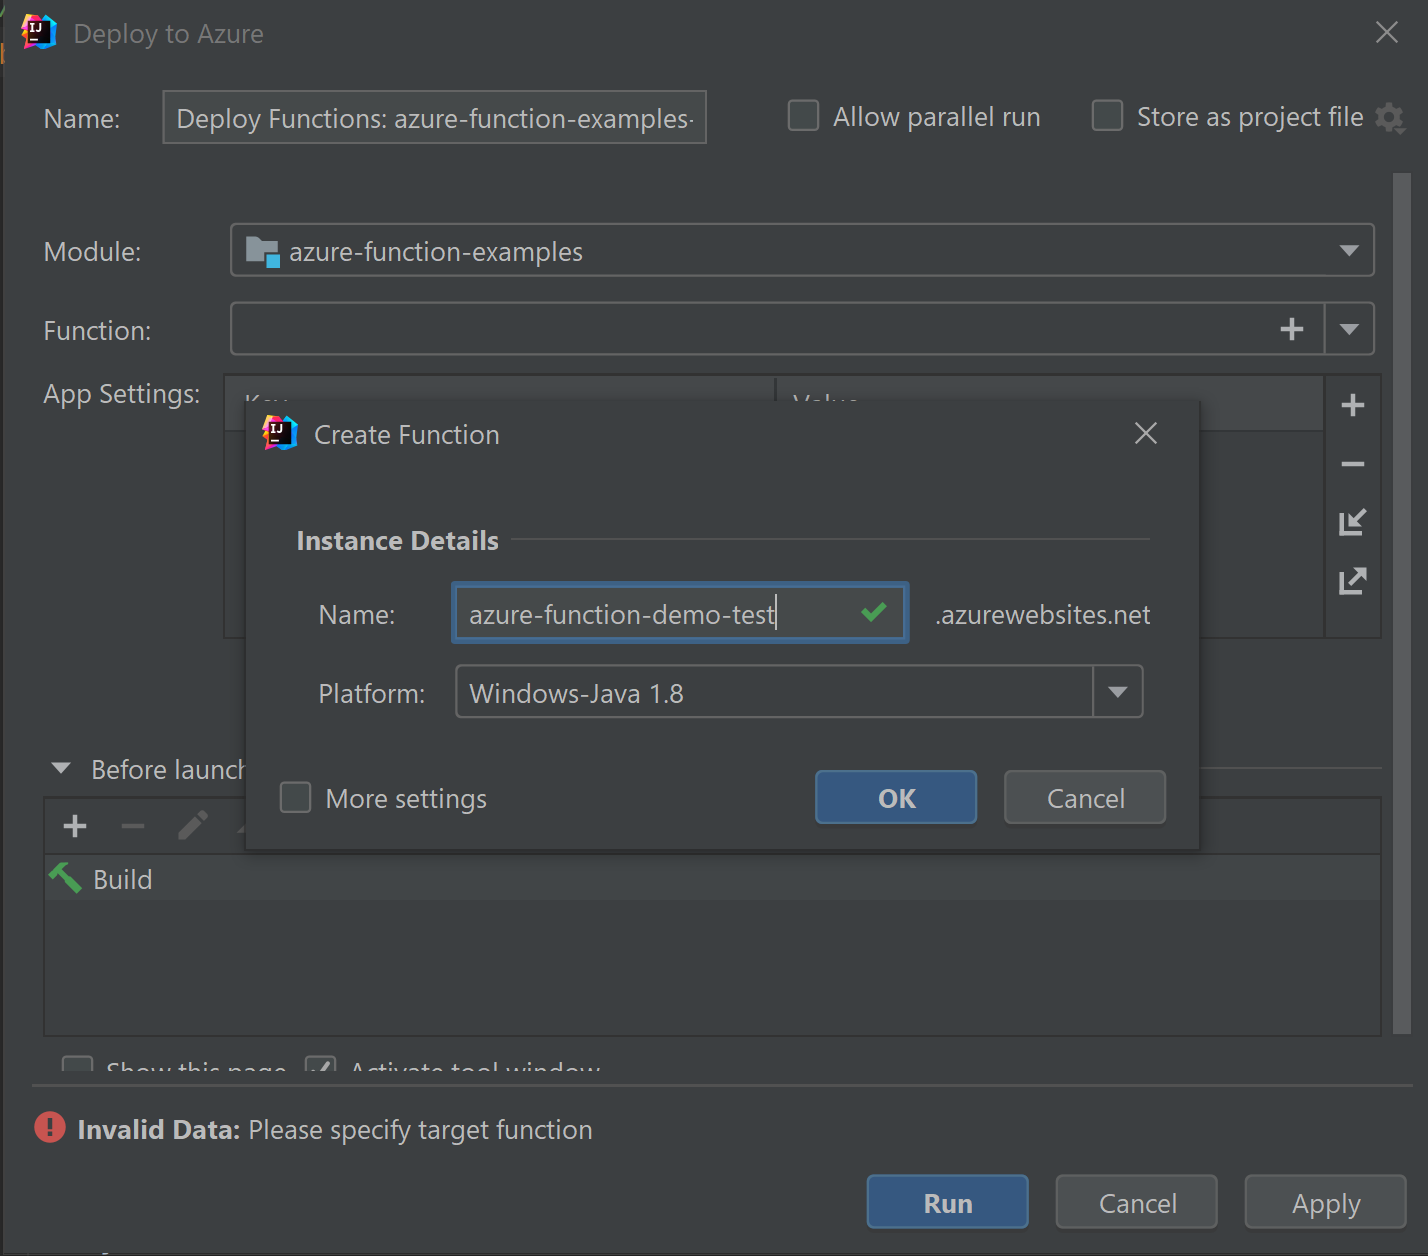
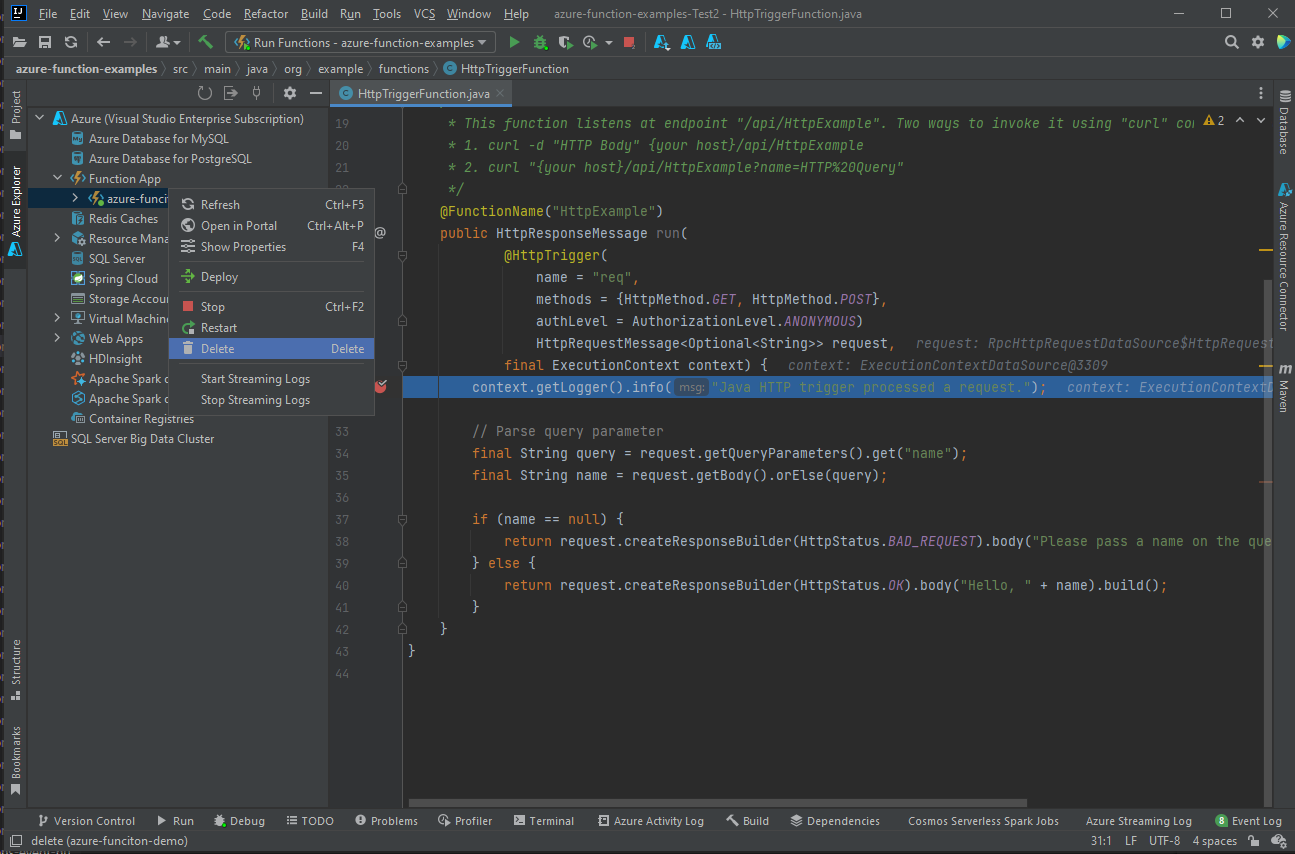
1.6 通过 IDEA 管理 Function App
要在 IDEA 中用 Azure Explorer 管理你的 Function App,请遵循以下步骤:
-
点击
Function App,你会看到列出的所有 Function App。
-
点击选择你的一个功能应用程序,然后点击右键,选择
Show Properties,打开详细页面。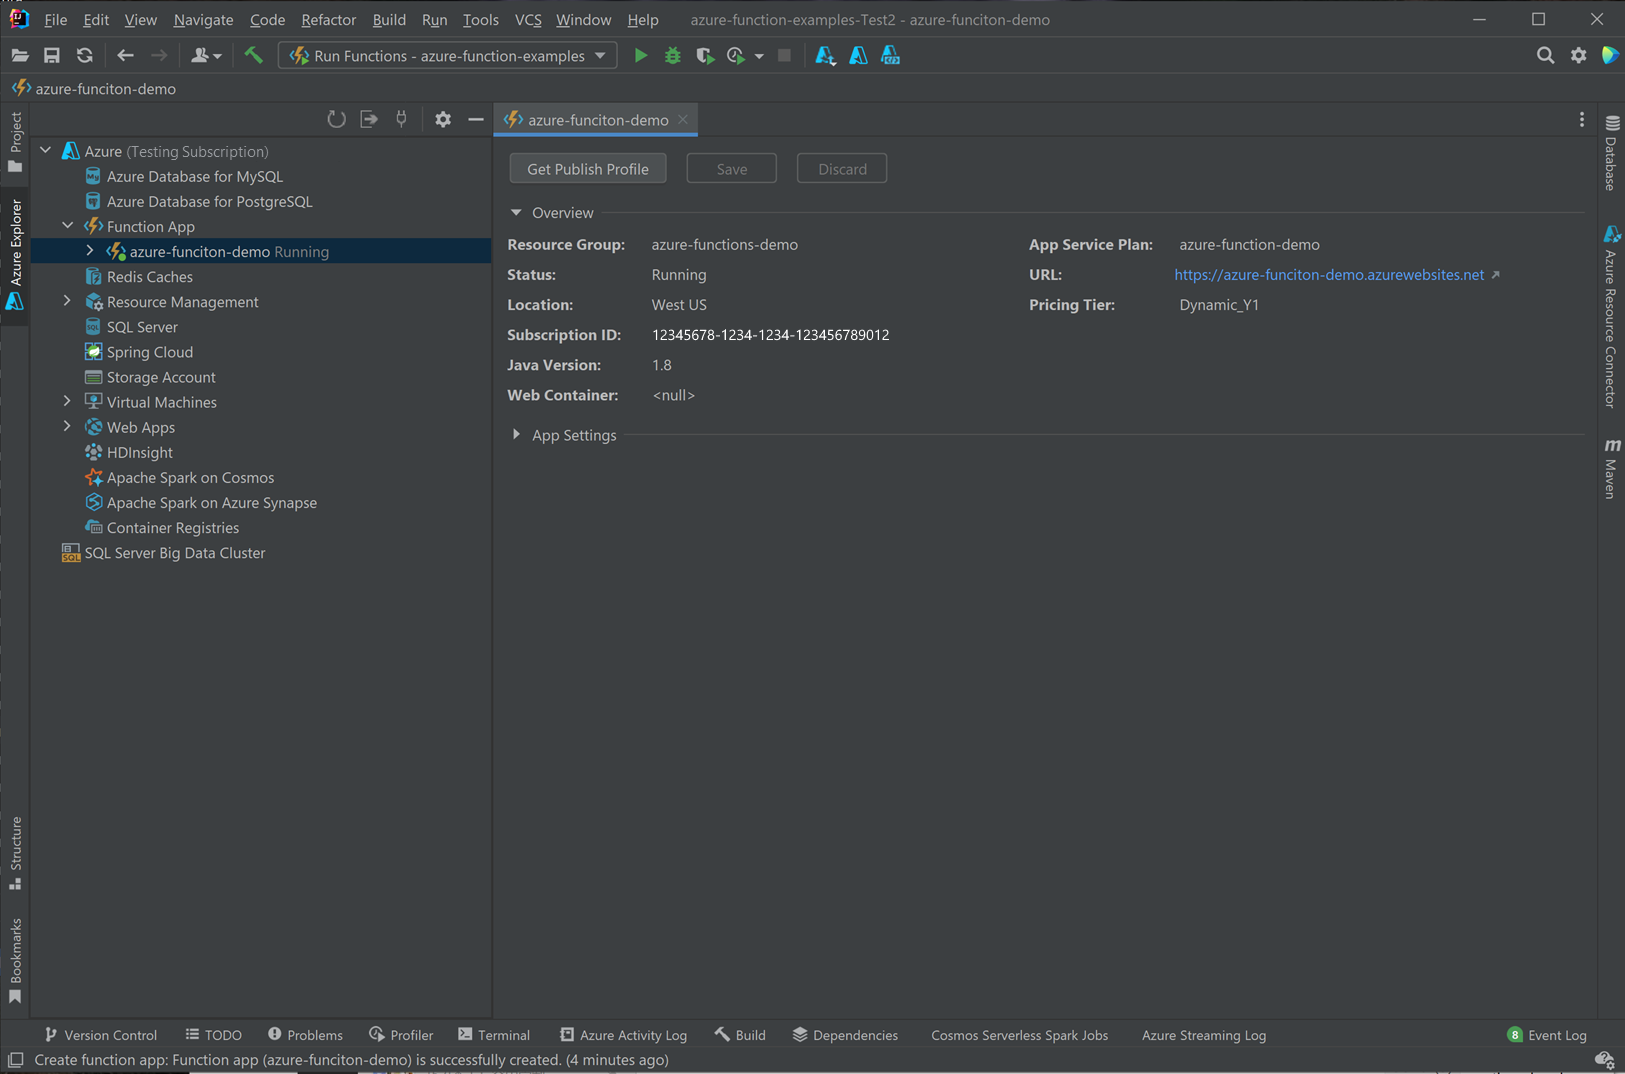
-
在你的
HttpTrigger-JavaFunction App 上点击右键,然后选择Trigger Function in Browser。你会看到浏览器被打开,里面有触发器的URL。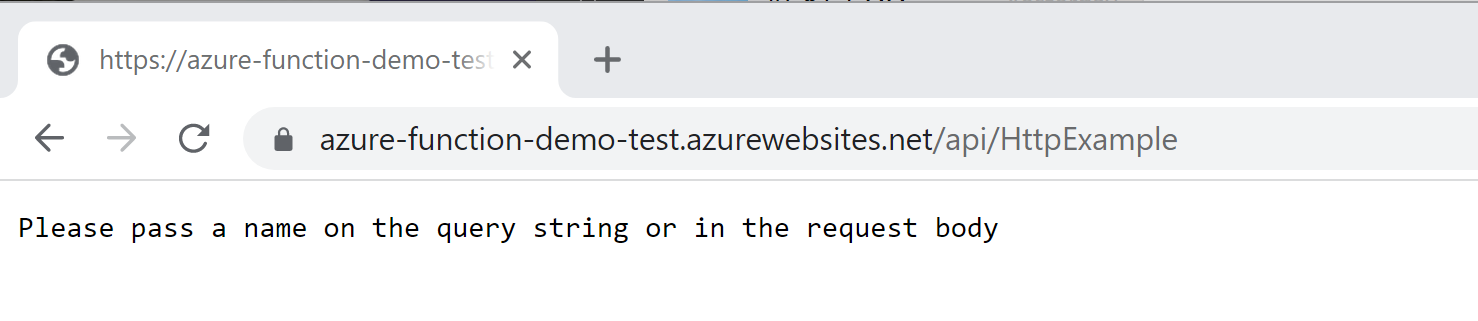
1.7 在项目中添加更多的 Functions
要在你的项目中添加更多的函数,请按照以下步骤进行:
-
在
org.example.function包上点击右键,选择New > Azure Function Class。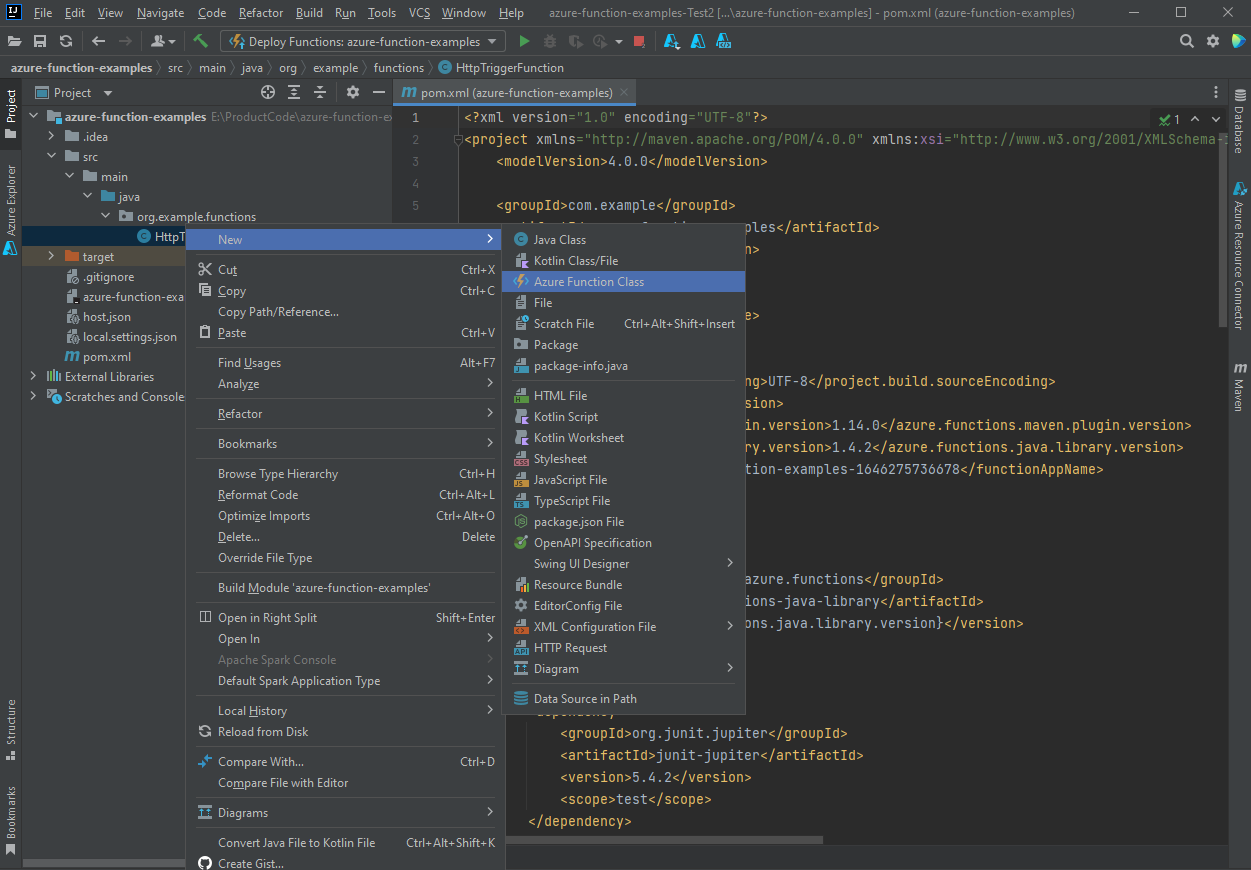
-
在创建函数类的向导中填写类名
HttpTest并选择HttpTrigger,然后点击OK创建。通过这种方式,你可以随心所欲地创建新的函数。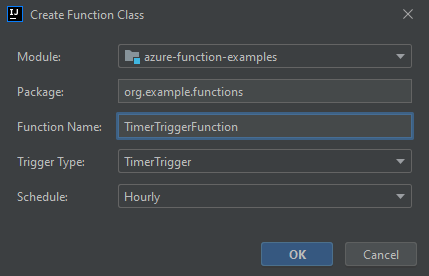
1.8 清理 Functions
在你的 IDEA 中使用 Azure Explorer 选择你的一个功能应用,然后右键单击并选择 Delete。这个命令可能需要几分钟的时间来运行。当它完成后,状态会在 Azure Explorer 中刷新。
Information
This article is translated from the official Azure Function documentation: https://learn.microsoft.com/en-us/azure/azure-functions/functions-create-maven-intellij


【推荐】国内首个AI IDE,深度理解中文开发场景,立即下载体验Trae
【推荐】编程新体验,更懂你的AI,立即体验豆包MarsCode编程助手
【推荐】抖音旗下AI助手豆包,你的智能百科全书,全免费不限次数
【推荐】轻量又高性能的 SSH 工具 IShell:AI 加持,快人一步
· 阿里巴巴 QwQ-32B真的超越了 DeepSeek R-1吗?
· 10年+ .NET Coder 心语 ── 封装的思维:从隐藏、稳定开始理解其本质意义
· 【设计模式】告别冗长if-else语句:使用策略模式优化代码结构
· 字符编码:从基础到乱码解决
· 提示词工程——AI应用必不可少的技术