


angular+ 动画;
最近项目第一阶段已经出来了;开始做收尾优化工作,于是这里准备处理下路由动画的;
然后在官网上看文档,然后自己做个笔记;
angular animation梳理

1.在根模块导入 BrowserAnimationsModule,它能把动画能力引入 Angular 应用的根模块中,并在imports导入声明;
import { BrowserAnimationsModule } from '@angular/platform-browser/animations';


2. 把动画功能函数导入组件文件中:import {
  trigger,
  state,
  style,
  animate,
  transition
  // ...
} from '@angular/animations';

3.在需要使用动画的组件下,添加元数据属性,如:
@Component({
  selector: 'app-root',
  templateUrl: 'app.component.html',
  styleUrls: ['app.component.css'],
  animations: [
    // animation triggers go here
  ]
})

// angular 动画基础:
1)样式
// style():指定html部分的动画css样式,样式属性为小驼峰命名;
style({
    opacity: 0.5,
    backgroundColor: 'red'
})

2)样式命名
//    state():创建可命名的css样式,在转换到该命名状态时,应用对应的style样式;state()和style()联用,
//    可以通过切换/引用state名称来切换显示不同样式;
//如:
state('open',style({    // 定义一个名叫 open状态的函数并指定对应的style样式;
    height: '200px',
    opacity: 1,
    backgroundColor: 'yellow'
}))
state('closed', style({ // 定义一个名叫 open状态的函数并指定对应的style样式;
  height: '100px',
  opacity: 0.5,
  backgroundColor: 'green'
}))

3)增加转场动画,使得各个状态样式平滑过渡
//    transition(): 动画转场修饰,通过改变时间和动画顺序让各个state()状态, 第一个参数:定义两个转场state()方向;第二个参数为animate()函数;
//    animate ('duration delay easing'):
//    定义指定的转场时序信息,第一个参数为:持续时间,延迟时间,缓动效果(ease-in(先快后慢),ease-out(先慢后快),ease-in-out(先慢中加速后慢); 第二个参数:单个样式函数style/多步订定义keyframes()
//    如:
 transition ('* => open, closed => open', [ // 定义转场方向,从*(任意)状态到open状态时,使用这个动画,该动画持续1s使得目标透明度为0;多个状态对会共用样式
        animate ('1s',
          style ({ opacity: '0' }),
        ),
      ]),

4)触发动画
// trigger(): 命名动画,该动画包括了一些state()和transitions等;并绑定到触发动画的元素上
// 当元素上该触发器绑定的值变化时,触发绑定的动画;元素可以同时触发多个触发器,但元素任意时刻只能处于一个状态;
// 如:

 animations: [ // 在元数据中,触发openClose触发器,从open转场到close,close=>open;
    trigger('openClose', [
      // ...
      state('open', style({
        height: '200px',
        opacity: 1,
        backgroundColor: 'yellow'
      })),
      state('closed', style({
        height: '100px',
        opacity: 0.5,
        backgroundColor: 'green'
      })),
      transition('open => closed', [
        animate('1s')
      ]),
      transition('closed => open', [
        animate('0.5s')
      ]),
    ]),
  ],
5)将触发器绑定在html的元素上
// <div [@triggerName]="expression">...</div>; // expression的值为state()状态;值变化时匹配相对应的state();
// 如:
<div [@openClose]="isOpen ? 'open' : 'closed'" class="open-close-container">
<p>The box is now {{ isOpen ? 'Open' : 'Closed' }}!</p>
</div>
整体代码如下:
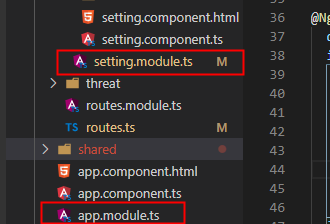
关于导入模块;可以放在根模块下,也可以放在单独模块下;(因为官网的文档是没有目录分级的;而正常项目是有会根据不同项目理念进行不同模块的分级;暂时先这么处理,等我吃透了再回来修改;)
简单目录结构:
import { Component, OnInit } from '@angular/core';
import { trigger, state, style, animate, transition } from '@angular/animations';
@Component({
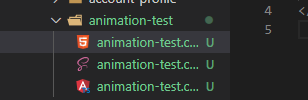
selector: 'app-animation-test',
templateUrl: './animation-test.component.html',
styleUrls: ['./animation-test.component.scss'],
animations: [
trigger('openClose', [
state(
'open',
style({
height: '200px',
opacity: 1,
backgroundColor: 'yellow'
})
),
state(
'close',
style({
height: '100px',
opacity: 0.5,
backgroundColor: 'red'
})
),
transition('open => close', [animate('1s')]),
transition('close => open', [animate('0.5s')])
// transition('open <=> close', [animate('1s')]) 双箭头可以指定两个状态互相转场
])
]
})
export class AnimationTestComponent implements OnInit {
isOpen = true;
constructor() {}
ngOnInit() {}
toggle() {
this.isOpen = !this.isOpen;
}
}
<button (click)="toggle()">切换</button>
<div [@openClose]="isOpen ? 'open' : 'close'" class="animation-container">
  <p>hello world</p>
</div>
.animation-container {
  border: 1px solid #dddddd;
  margin-top: 1em;
  padding: 20px 20px 0px 20px;
  color: #000000;
  font-weight: bold;
  font-size: 20px;
}
// 如果某个触发器以逻辑型的值作为绑定值,那么就可以使用能与 true 和 false 或 1 和 0 相比较的 transition() 表达式来匹配这个值。

如:
html:
// 触发器openClose绑定值 为 isOpen 状态表达式,其值为逻辑值 true/false;则可以代替响应的'open'/'close'状态

<div [@openClose]="isOpen ? true : false" class="open-close-container">
</div>

// 相对应ts;
// 当isOpen为true时,匹配'open'状态,HTML 元素的高度值为通配符样式 * 或某个默认值。在这种情况下,它会使用此元素开始动画前的现有高度

// 当为false,即'close'时,它的高度会从指定的高度运动到 0,这会让它不可见

animations: [
  trigger('openClose', [
    state('true', style({ height: '*' })), //
    state('false', style({ height: '0px' })),
    transition('false <=> true', animate(500))
  ])
],
2. 动画转场与触发器进阶
// 特殊转场状态 :
//    *(通配符): 预定义状态,可匹配任何一个动画状态,常用来定义一些 html元素的起始状态/结束状态的转场动画
如: open => * : 元素从open状态转场变为 任何状态, open <=> close: 两个状态间任意转场

使用*预定义状态最直接的优点:当存在一对多关系的转场,一个特定状态变化为多个潜在状态,可以简化其操作减少代码,
  如:
    1)常见退回到登录页面,可能存在session失效,404,loginout等需要跳转到登录页面时,不需要写多个转场到login页面;* => login;
    2)还可以作为 非指定状态的补充,当我们在在一个触发器里写了多个转场动画,会按照定义顺序进行匹配(可以理解为switch中default语句);
      当open => close 是单独指定特有的转场动画,而open => *可以补充为其他转场动画,所以 * => * 可以作为备用匹配状态;

实例代码html和css 用上面的一样:ts增加一部分:
import { Component, OnInit } from '@angular/core';
import { trigger, state, style, animate, transition } from '@angular/animations';
@Component({
  selector: 'app-animation-test',
  animations: [
    trigger('openClose', [
      state(
        'open',
        style({
          height: '200px',
          opacity: 1,
          backgroundColor: 'yellow'
        })
      ),
      state(
        'closed',
        style({
          height: '100px',
          opacity: 0.5,
          backgroundColor: 'green'
        })
      ),
      // transition('open => closed', [animate('1s')]),
      // transition('closed => open', [animate('0.5s')])
      transition('* => closed', [animate('1s')]),
      // transition('* => open', [animate('1s')])
      // 带样式的通配符状态,当运行该状态时,转场动画为该状态设定的样式,但转场结束后,会显示需要显示的状态样式,如这里动画结束后会显示open的样式;
      transition('* => open', [animate('1s', style({ height: '150px', opacity: '0.8', backgroundColor: 'pink' }))])
      // transition('open <=> closed', [animate('0.5s')]) 指定状态相互转场动画
      // transition('* => *', [animate('1s')])
    ])
  ],
  templateUrl: './animation-test.component.html',
  styleUrls: ['./animation-test.component.scss']
})
export class AnimationTestComponent implements OnInit {
  isOpen = true;
  constructor() {}

  ngOnInit() {}

  toggle() {
    this.isOpen = !this.isOpen;
  }
}
//    void:空状态;可以作为 进入/离开页面的元素配置转场;(可以理解为 某元素从无到有,从有到无的状态)
//  PS:当html 元素没有在视图中时(常见如删除操作),应用void状态


示例代码:

import {
  Component,
  Input,
  Output,
  EventEmitter
} from '@angular/core';
import {
  trigger,
  state,
  style,
  animate,
  transition
} from '@angular/animations';

import { Hero } from './hero';

@Component({
  selector: 'app-hero-list-enter-leave',
  template: `
    <ul class="heroes">
      <li *ngFor="let hero of heroes"
          [@flyInOut]="'in'" (click)="removeHero(hero.id)">
          <div class="inner">
            <span class="badge">{{ hero.id }}</span>
            <span>{{ hero.name }}</span>
          </div>
      </li>
    </ul>
    <p>now state: </p>
  `,
  styleUrls: ['./hero-list-page.component.css'],
  animations: [
    trigger('flyInOut', [ // 触发器绑定 flyInOut
      state('in', style({ transform: 'translateX(0)' })), // 初始绑定值为in状态和样式
      transition('void => *', [ // 元素从无到有,元素增加,效果从左侧进入
        style({ transform: 'translateX(-100%)' }), // 先在x轴-100%的位置,即试图外
        animate(100) // 然后100ms转场变为in 状态;即 0的位置
      ]),
      transition('* => void', [ // 从任意状态到空状态,当该元素被移除,效果从右侧离开
        animate(100, style({ transform: 'translateX(100%)' })) // 100ms 位置x轴从 0变为100%
      ])
    ])
  ]
})
export class HeroListEnterLeaveComponent {
  @Input() heroes: Hero[];

  @Output() remove = new EventEmitter<number>();

  removeHero(id: number) {
    this.remove.emit(id);
  }
}


父组件部分:
import { Component } from '@angular/core';
import { HEROES } from './mock-heroes';

@Component({
  selector: 'app-hero-list-enter-leave-page',
  template: `
    <section>
      <h2>Enter/Leave</h2>

      <app-hero-list-enter-leave [heroes]="heroes" (remove)="onRemove($event)"></app-hero-list-enter-leave>
    </section>
  `
})
export class HeroListEnterLeavePageComponent {
  heroes = HEROES.slice();

  onRemove(id: number) {
    this.heroes = this.heroes.filter(hero => hero.id !== id);
  }
}
想买的东西很贵,想去的地方很远,喜欢的女孩很完美
