参考
http://linuxblind.blog.51cto.com/7616603/1655550/
http://www.chenshake.com/oz-making-centos-mirror/
http://www.bubuko.com/infodetail-2167558.html
http://zhanguo1110.blog.51cto.com/5750817/1627500
https://www.tianmaying.com/tutorial/oz
http://www.cnblogs.com/kevingrace/p/5821823.html
http://dl528888.blog.51cto.com/2382721/1862568
安装
yum -y install oz
装完后,你最好就重启机器,你用ifconfig,可以看到virbr0这个网络,不然你就安装失败。
配置Oz
默认Oz是使用raw格式,我的习惯是使用qcow2格式,

[paths]
output_dir = /data/nvme0n1/oz
data_dir = /var/lib/oz
screenshot_dir = /var/lib/oz/screenshots
# sshprivkey = /etc/oz/id_rsa-icicle-gen

[libvirt]
uri = qemu:///system
image_type = raw
# type = kvm
# bridge_name = virbr0
# cpus = 1
# memory = 1024

[cache]
original_media = yes
modified_media = no
jeos = no

[icicle]
safe_generation = no

[timeouts]
install = 3600
inactivity = 300
boot = 300
shutdown = 90
这个就是Oz的配置文件,我把默认文件格式改成qcow2.
Oz支持的系统
目前EPEL的源,已经更新到最新的版本,支持Centos 6.5。
创建配置文件
我们需要两个配置文件,centos65.tdl 和centos6.ks
看一个具体的Oz的tdl文件,就全部明白

<template>
  <name>qemu-centos65</name>
  <os>
    <name>CentOS-6</name>
    <version>5</version>
    <arch>x86_64</arch>
    <install type='iso'>
      <iso>file:///data/md0/iso/CentOS-6.5-x86_64-minimal.iso</iso>
    </install>
    <rootpw>123123</rootpw>
  </os>
  <disk>
    <size>20</size>
  </disk>
  <description>CentOS 6.5 x86_64</description>
  <packages>
    <package name='acpid'/>
    <package name='cloud-utils-growpart'/>
    <package name='cloud-init'/>
    <package name='parted'/>
    <package name='unzip'/>
    <package name='NetworkManager-*'/>
  </packages>
  <repositories>
    <repository name='aliyun-Base'>
      <url>http://mirrors.aliyun.com/centos/$releasever/os/$basearch/</url>
      <signed>no</signed>
    </repository>
    <repository name='epel'>
      <url>http://mirrors.aliyun.com/epel/6/$basearch</url>
      <signed>no</signed>
    </repository>
  </repositories>
  <commands>
    <command name='install_qga'>
cd /root
tar xf qga.20171124.tar.gz
cd qga
bash ./install_qga_local.sh
    </command>

    <command name='install_linux_root_resize'>
cd /root
unzip linux-rootfs-resize-master.zip
cd linux-rootfs-resize-master
bash ./install
   </command>

   <command name='profile'>
echo "NOZEROCONF=yes" >> /etc/sysconfig/network
ln -s /boot/grub/grub.conf /etc/grub.conf
rm -rf /etc/udev/rules.d/70-persistent-net.rules
touch /etc/udev/rules.d/75-persistent-net-generator.rules
chmod +x /var/lib/cloud/scripts/per-boot/resetroot
   </command>

   <command name='services'>
service sshd restart
service iptables stop
service ip6tables stop
service acpid start
service NetworkManager start
chkconfig iptables off
chkconfig ip6tables off
chkconfig acpid on
chkconfig NetworkManager on
chkconfig cloud-init on
chkconfig cloud-final on
chkconfig cloud-config on
chkconfig cloud-init-local on
   </command>

   <command name='clear-logs'>
rm -rf /root/*
rm -rf /var/log/anaconda*
rm -rf /var/log/message
rm -rf /var/log/messages
rm -rf /etc/yum.repos.d/aliyun-Base.repo
rm -rf /etc/yum.repos.d/epel.repo
yum clean all
yum makecache
>/var/log/boot.log
>/var/log/messages
>/var/log/cloud-init-output.log
>/var/log/yum.log
   </command>

  </commands>
    <files>
        <file name="/root/qga.20171124.tar.gz" type="url">
            file:///data/nvme0n1/OZ-build-image/scripts/qga.20171124.tar.gz
        </file>
        <file name="/root/linux-rootfs-resize-master.zip" type="url">
            file:///data/nvme0n1/OZ-build-image/scripts/linux-rootfs-resize-master.zip
        </file>
        <file name="/var/lib/cloud/scripts/per-boot/resetroot" type="url">
            file:///data/nvme0n1/OZ-build-image/scripts/resetroot
        </file>
        <file name="/etc/cloud/cloud.cfg" type="url">
            file:///data/nvme0n1/OZ-build-image/scripts/cloud.cfg_centos6
        </file>
    </files>
</template>
执行安装程序,默认安装,会自动划分lvm分区,如果指定分区需修改ks文件
补充ks文件,centos6通用。

install
text
key --skip
keyboard us
lang en_US.UTF-8
skipx
rootpw Ct@2017Yun!@$%.CN
firewall --disabled
authconfig --enableshadow --enablemd5
selinux --disabled
logging --level=info
reboot
services --disabled="avahi-daemon,iscsi,iscsid,firstboot,kdump" --enabled="network,sshd,rsyslog,tuned"
timezone --utc Asia/Shanghai
network  --bootproto=dhcp --device=eth0 --onboot=on
bootloader --location=mbr --append="console=tty0 console=ttyS0,115200" --location=mbr --driveorder="sda" --timeout=1
zerombr yes
clearpart --all

part / --fstype ext4 --size=2048 --grow

%post

cat > /etc/sysconfig/network-scripts/ifcfg-eth0 << EOF
DEVICE="eth0"
BOOTPROTO="dhcp"
ONBOOT="yes"
TYPE="Ethernet"
USERCTL="yes"
PEERDNS="yes"
IPV6INIT="no"
PERSISTENT_DHCLIENT="1"
EOF


echo "ttyS0" >> /etc/securetty
cat <<EOF > /etc/init/ttyS0.conf
start on stopped rc RUNLEVEL=[2345]
stop on starting runlevel [016]
respawn
instance /dev/ttyS0
exec /sbin/agetty /dev/ttyS0 115200 vt100-nav
EOF

#sed_profile
sed -i 's/#PermitRootLogin yes/PermitRootLogin yes/g' /etc/ssh/sshd_config
sed -i 's/#UseDNS yes/UseDNS no/g' /etc/ssh/sshd_config
sed -i 's/GSSAPIAuthentication yes/GSSAPIAuthentication no/g' /etc/ssh/sshd_config

#yum clean all
rm -rf /root/*
rm -rf /var/log/anaconda*
rm -rf /var/log/message
>/var/log/boot.log
>/var/log/messages
>/var/log/cloud-init-output.log
>/var/log/yum.log
%end
%packages --nobase --excludedocs
oz-install -p -u -d3 -a centos65.ks centos65.tdl -x centos65-libvirt.xml
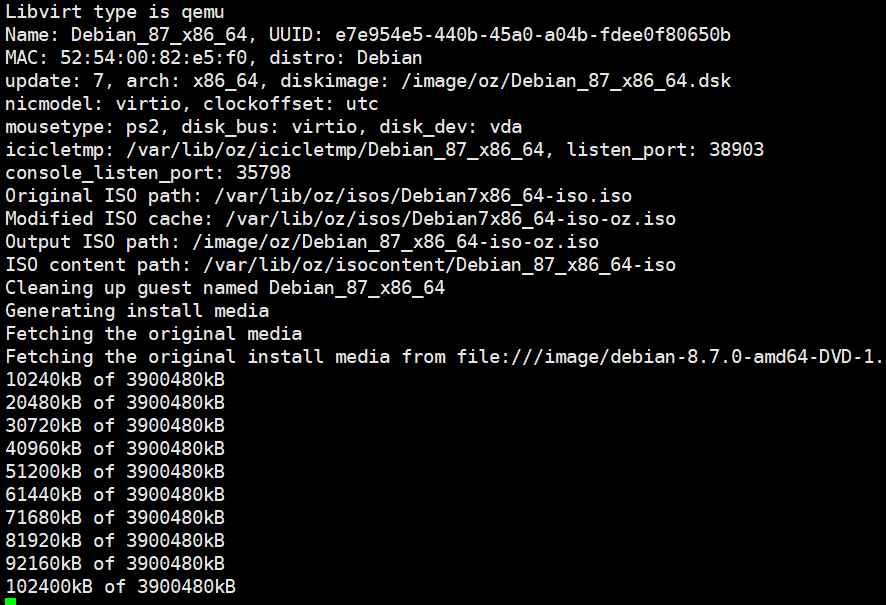
安装程序截图,跑完执行virsh list会看到生成的running的虚机,并生成虚机的xml文件

<domain type="kvm">
  <name>centos65-openstack</name>
  <memory>1048576</memory>
  <currentMemory>1048576</currentMemory>
  <uuid>712aa3fa-b07c-42be-a024-3fde453a3d01</uuid>
  <clock offset="utc"/>
  <vcpu>1</vcpu>
  <features>
    <acpi/>
    <apic/>
    <pae/>
  </features>
  <os>
    <type>hvm</type>
    <boot dev="hd"/>
  </os>
  <on_poweroff>destroy</on_poweroff>
  <on_reboot>destroy</on_reboot>
  <on_crash>destroy</on_crash>
  <devices>
    <graphics type="vnc" port="-1" listen="0.0.0.0"/>
    <interface type="bridge">
      <source bridge="virbr0"/>
      <mac address="52:54:00:2b:03:04"/>
      <model type="virtio"/>
    </interface>
    <input bus="ps2" type="mouse"/>
    <serial type="pty">
      <target port="0"/>
    </serial>
    <serial type="tcp">
      <source host="127.0.0.1" mode="bind" service="47017"/>
      <protocol type="raw"/>
      <target port="1"/>
    </serial>
    <disk device="disk" type="file">
      <target bus="virtio" dev="vda"/>
      <source file="/data/nvme0n1/oz/images/centos65-openstack.dsk"/>
      <driver type="raw" name="qemu"/>
    </disk>
    <channel type="unix">
      <source path="/var/lib/libvirt/qemu/org.qemu.guest_agent.0.centos65-openstack.sock" mode="bind"/>
      <target type="virtio" name="org.qemu.guest_agent.0"/>
    </channel>
  </devices>
</domain>


