
前端一般通过Ajax来调用,后端调用的方式还是挺多的,比如HttpURLConnection,HttpClient,Spring的RestTemplate
服务端代码如下:
服务端接口请求的URL:http://localhost:8080/rest/user/getUser/xiaoming/18,设定请求方式为GET
package com.demo.restful.service.impl;

import com.demo.restful.model.User;
import com.demo.restful.service.UserService;

import javax.ws.rs.GET;
import javax.ws.rs.Path;
import javax.ws.rs.PathParam;
import javax.ws.rs.Produces;
import javax.ws.rs.core.MediaType;

/**
 * @Author:
 * @Date: 2019/1/8 11:37
 */
@Path("user")
public class UserServiceImpl implements UserService {

    @Override
    @GET
    @Path("getUser/{name}/{age}")
    @Produces(MediaType.APPLICATION_JSON)
    public String getUser(@PathParam("name") String name,@PathParam("age") Integer age) {
        return new User(name,age).toString();
    }
}
客户端的三种请求方式如下:
注:以下demo都是以GET请求为例
1.HttpURLConnection(首先需要引入httpclient包)
<dependency>
   <groupId>org.apache.httpcomponents</groupId>
   <artifactId>httpclient</artifactId>
   <version>4.5.6</version>
</dependency>
测试代码
package com.demo.restful;

import java.io.BufferedReader;
import java.io.InputStreamReader;
import java.net.HttpURLConnection;
import java.net.URL;

/**
 * @Author:
 * @Date: 2019/1/9 11:12
 */
public class HttpUrlConnectionTest {
    public static void main(String[] args) throws Exception {
        String url = "http://localhost:8080/rest/user/getUser/xiaoming/18";
        URL serverUrl = new URL(url);
        HttpURLConnection connection = (HttpURLConnection) serverUrl.openConnection();
        connection.setRequestMethod("GET");
        if (connection.getResponseCode() != 200) {
            throw new RuntimeException(
                    "HTTP GET Request Failed with Error code : "
                            + connection.getResponseCode());
        }
        BufferedReader responseBuffer = new BufferedReader(
                new InputStreamReader((connection.getInputStream())));
        String output;
        System.out.println("Output from Server:  \n");
        while ((output = responseBuffer.readLine()) != null) {
            System.out.println(output);
        }
        connection.disconnect();
    }
}
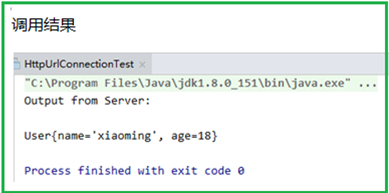
测试结果
2.HttpClient(首先需要引入httpclient包,POM同上)
测试代码
package com.demo.restful;

import org.apache.http.HttpEntity;
import org.apache.http.HttpResponse;
import org.apache.http.client.HttpClient;
import org.apache.http.client.methods.HttpGet;
import org.apache.http.impl.client.HttpClients;

import java.io.BufferedReader;
import java.io.InputStreamReader;
import java.util.stream.Collectors;

/**
 * @Author:
 * @Date: 2019/1/9 11:42
 */
public class HttpClientTest {

    public static void main(String[] args) throws Exception {
        HttpClient httpClient = HttpClients.createDefault();
        HttpGet httpGet = new HttpGet("http://localhost:8080/rest/user/getUser/xiaoming/18");

        HttpResponse execute = httpClient.execute(httpGet);
        HttpEntity entity = execute.getEntity();
        System.out.println(entity);
        String result = new BufferedReader(new InputStreamReader(entity.getContent()))
                .lines().collect(Collectors.joining("\n"));
        System.out.println(result);
    }
}
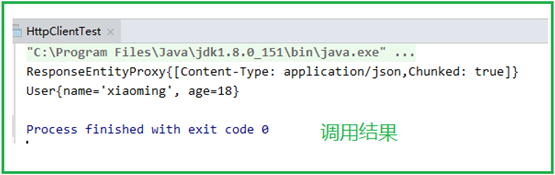
测试结果
3.RestTemplate(首先需要引入spring-webmvc包)
<!-- https://mvnrepository.com/artifact/org.springframework/spring-web -->
<dependency>
   <groupId>org.springframework</groupId>
   <artifactId>spring-webmvc</artifactId>
   <version>5.1.3.RELEASE</version>
</dependency>
测试代码
第一步:配置web.xml
<web-app>
  <display-name>Archetype Created Web Application</display-name>
  <servlet>
    <servlet-name>restful-client</servlet-name>
    <servlet-class>org.springframework.web.servlet.DispatcherServlet</servlet-class>
    <init-param>
      <param-name>contextConfigLocation</param-name>
      <param-value>spring.xml</param-value>
    </init-param>
  </servlet>
  <servlet-mapping>
    <servlet-name>restful-client</servlet-name>
    <url-pattern>/</url-pattern>
  </servlet-mapping>
</web-app>
第二步:配置Spring注解扫描
<?xml version="1.0" encoding="UTF-8"?>
<beans xmlns="http://www.springframework.org/schema/beans" xmlns:xsi="http://www.w3.org/2001/XMLSchema-instance"
xmlns:context="http://www.springframework.org/schema/context"
xsi:schemaLocation="
http://www.springframework.org/schema/beans
http://www.springframework.org/schema/beans/spring-beans-3.0.xsd
http://www.springframework.org/schema/context
http://www.springframework.org/schema/context/spring-context-3.0.xsd">
<!-- 启用注解 -->
<context:component-scan base-package="com.demo.restful.controller"/>
</beans>
第三步:编写controller
package com.demo.restful.controller;

import org.springframework.beans.factory.annotation.Autowired;
import org.springframework.context.annotation.Bean;
import org.springframework.stereotype.Controller;
import org.springframework.web.bind.annotation.*;
import org.springframework.web.client.RestTemplate;

/**
 * @Author:
 * @Date: 2019/1/9 14:56
 */
@Controller
public class RestTemplateController {

    @Autowired
    private RestTemplate restTemplate;

    //手动将RestTemplate加入Spring容器中
    @Bean
    public RestTemplate restTemplate(){
        return new RestTemplate();
    }

    @RequestMapping("/getUser.json")
    @ResponseBody
    public String getUser(){
        String url = "http://localhost:8080/rest/user/getUser/xiaoming/18";
        String forObject = restTemplate.getForObject(url, String.class);
        return forObject;
    }
}
浏览器运行结果


 浙公网安备 33010602011771号