ssh - Hibernate 入门
使用 eclipse 来搭建的一个简易框架,用起来还是及其方便的,配置也极为简单。不过在钻研过程中,却走了很多路,这里总结一下最后成果。
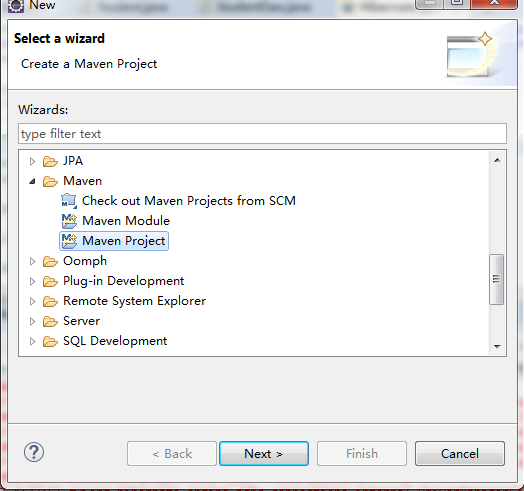
首先使用要创建一个 maven project ,直接编写配置 pom.xml 自己就下载依赖了,特别好用~

然后选择工作目录:

选择模板类型:

接着下一步填写相应信息,点击 finish 就 ok 啦!
然后我们来编写 pom.xml 依赖:需要声明使用 Hibernate 5库:
<project xmlns="http://maven.apache.org/POM/4.0.0" xmlns:xsi="http://www.w3.org/2001/XMLSchema-instance"
    xsi:schemaLocation="http://maven.apache.org/POM/4.0.0 http://maven.apache.org/xsd/maven-4.0.0.xsd">
    <modelVersion>4.0.0</modelVersion>

    <groupId>com.test</groupId>
    <artifactId>HibernateQuickStart</artifactId>
    <version>0.0.1-SNAPSHOT</version>
    <packaging>jar</packaging>

    <name>HibernateQuickStart</name>
    <url>http://maven.apache.org</url>

    <properties>
        <project.build.sourceEncoding>UTF-8</project.build.sourceEncoding>
    </properties>

    <dependencies>
        <dependency>
            <groupId>junit</groupId>
            <artifactId>junit</artifactId>
            <version>3.8.1</version>
            <scope>test</scope>
        </dependency>

        <!-- Hibernate Core -->
        <!-- http://mvnrepository.com/artifact/org.hibernate/hibernate-core -->
        <dependency>
            <groupId>org.hibernate</groupId>
            <artifactId>hibernate-core</artifactId>
            <version>5.2.2.Final</version>
        </dependency>


        <!-- MySQL JDBC driver -->
        <!-- http://mvnrepository.com/artifact/mysql/mysql-connector-java -->
        <dependency>
            <groupId>mysql</groupId>
            <artifactId>mysql-connector-java</artifactId>
            <version>5.1.34</version>
        </dependency>

        <!-- SQLServer JDBC driver (JTDS) -->
        <!-- http://mvnrepository.com/artifact/net.sourceforge.jtds/jtds -->
        <dependency>
            <groupId>net.sourceforge.jtds</groupId>
            <artifactId>jtds</artifactId>
            <version>1.3.1</version>
        </dependency>
    </dependencies>
</project>
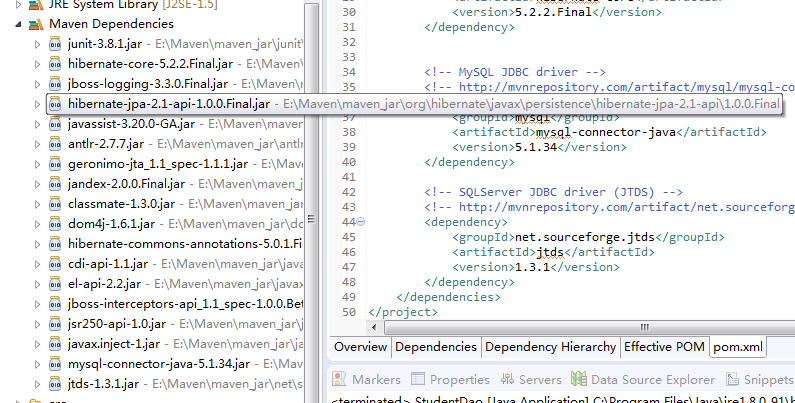
然后它会自动下载。。。:

src/main/java 下,我们需要 hibernate.cfg.xml 配置
<?xml version="1.0" encoding="UTF-8"?>
<!DOCTYPE hibernate-configuration PUBLIC
    "-//Hibernate/Hibernate Configuration DTD 3.0//EN"
    "http://hibernate.sourceforge.net/hibernate-configuration-3.0.dtd">
<hibernate-configuration>
    <session-factory>
        <property name="connection.url">jdbc:mysql://localhost:3340/mydb</property>
        <property name="connection.driver_class">com.mysql.jdbc.Driver</property>
        <property name="connection.username">root</property>
        <property name="connection.password">111111</property>
         <property name="hibernate.dialect">org.hibernate.dialect.MySQLDialect</property>
        <property name="hibernate.show_sql">true</property>
        <property name="hibernate.format_sql">true</property>

        <mapping resource="Student.hbm.xml"/>
    </session-factory>
</hibernate-configuration>
这里注意修改自己本地的数据库相关信息。
同级目录下还需要写一个“持久性实体类”,好像是这么叫的,反正我理解就是这个类对应了数据库中的一张表:
public class Student {
    private int id;
    private String name;

    public Student() {}
    public Student(String name, int id) {
        this.id = id;
        this.name = name;
    }

    public int getId () {
        return id;
    }
    public void setId (int id) {
        this.id = id;
    }

    public String getName () {
        return name;
    }
    public void setName (String name) {
        this.name = name;
    }
}
接着创建一个 Student.hbm.xml 来配合实体类使用,具体可以看文档详细介绍,这里只搭个能用的环境先~
<?xml version="1.0" encoding="UTF-8"?>
<hibernate-mapping>
    <class name="Student" table="student">
        <id name="id" column="S_ID" type="int"></id>
        <property name="name" column="S_NAME" type="string"></property>
    </class>
</hibernate-mapping>
在数据库创建一张对应的表:

最后,一个数据访问层的 java 类:
import org.hibernate.Session;
import org.hibernate.SessionFactory;
import org.hibernate.cfg.Configuration;

public class StudentDao {
    public static void main (String[] args) {
        Configuration conf = new Configuration();
        conf.configure("hibernate.cfg.xml");
        //创建工厂
        SessionFactory sf = conf.buildSessionFactory();
        //取得session
        Session session = sf.openSession();
        //开始事务
        session.beginTransaction();
        Student student= new Student("ice", 1);
        session.save(student);
        System.out.println("保存成功");
        session.getTransaction().commit();
        session.close();
        sf.close();
    }
}
debug~


【推荐】国内首个AI IDE,深度理解中文开发场景,立即下载体验Trae
【推荐】编程新体验,更懂你的AI,立即体验豆包MarsCode编程助手
【推荐】抖音旗下AI助手豆包,你的智能百科全书,全免费不限次数
【推荐】轻量又高性能的 SSH 工具 IShell:AI 加持,快人一步
· AI与.NET技术实操系列:基于图像分类模型对图像进行分类
· go语言实现终端里的倒计时
· 如何编写易于单元测试的代码
· 10年+ .NET Coder 心语,封装的思维:从隐藏、稳定开始理解其本质意义
· .NET Core 中如何实现缓存的预热?
· 分享一个免费、快速、无限量使用的满血 DeepSeek R1 模型,支持深度思考和联网搜索!
· 基于 Docker 搭建 FRP 内网穿透开源项目(很简单哒)
· ollama系列01:轻松3步本地部署deepseek,普通电脑可用
· 25岁的心里话
· 按钮权限的设计及实现