vue cli3超详细创建多页面配置
1.首先按照vue cli3 给的入门文档下载个vue cli3 如果之前下载了vue cli2的要先卸载之前的

2.检查安装是否成功

3.ok,现在环境搭建好了,新建项目
vue create hello-world
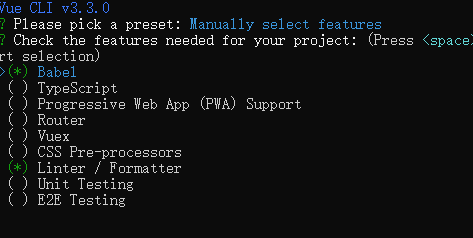
你会被提示选取一个preset,选你需要什么模块呢?
你可以选default(默认)的包含了基本的 Babel + ESLint 设置的 preset,也可以选Manually("手动选择特性”)来选取需要的特性。
个人推荐选第二个 手动的配置 (空格是选取,a是全选)
选好之后回车进入下一步
接下来就是你询问你选择的模块的配置内容,像下面的我选了vue的路由 它会提示我是否用历史模式,看需求吧。小白可以一直回车就好了,最后有几个需要注意的

上边这俩意思问你像,babel,postcss,eslint这些配置文件放哪? 第一个是:放独立文件放置 第二个是:放package.json里 这里推荐放单独配置文件,选第一个
然后就静静等待下载模板了
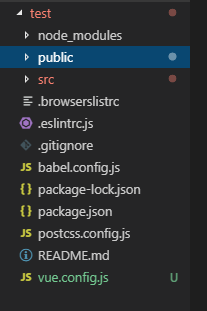
下载好之后是这样的,(vue.config.js文件是我加进去的,vue cli3后没有了,其实这是为后面的多页面做的准备)
现在可以 cd 到目标文件夹下 执行 npm run serve 就可以跑起来了。
下面是配置多页面过程
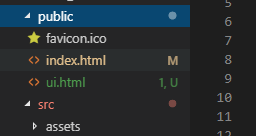
首先把下面的东西从原来的位置放到一个新的文件夹里。(这里最重要的还是main.js)
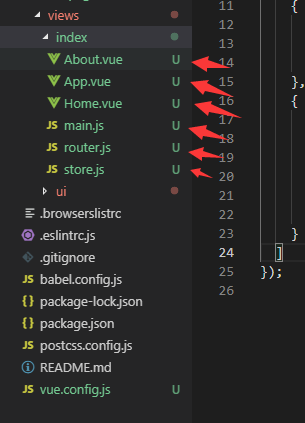
这样我就创建了两个页面了。(当然了,要把里面文件的引用位置改下)
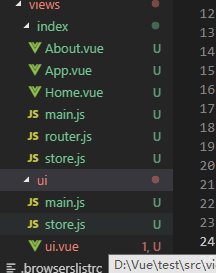
接下来就是vue cli3官方给出的多页面配置 ,在vue.config.js里写上这些。(subpage,chunks选项可以没有)
chunks如果有最后的参数必须是你页面的名称(比如我第一个页面是定义的是ui,就要写ui)
module.exports = {
  pages: {
    ui: {
      // page 的入口
      entry: "src/views/index/main.js",
      // 模板来源
      template: "public/index.html",
      // 在 dist/index.html 的输出
      filename: "index.html",
      // 当使用 title 选项时,
      // template 中的 title 标签需要是 <title><%= htmlWebpackPlugin.options.title %></title>
      title: "Index Page",
      // 在这个页面中包含的块,默认情况下会包含
      // 提取出来的通用 chunk 和 vendor chunk。
      chunks: ["chunk-vendors", "chunk-common", "ui"]
    },
    hh: {
      // page 的入口
      entry: "src/views/ui/main.js",
      // 模板来源
      template: "public/ui.html",
      // 在 dist/index.html 的输出
      filename: "ui.html",
      // 当使用 title 选项时,
      // template 中的 title 标签需要是 <title><%= htmlWebpackPlugin.options.title %></title>
      title: "Index Page",
      // 在这个页面中包含的块,默认情况下会包含
      // 提取出来的通用 chunk 和 vendor chunk。
      chunks: ["chunk-vendors", "chunk-common", "hh"]
    },
    // 当使用只有入口的字符串格式时,
    // 模板会被推导为 `public/subpage.html`
    // 并且如果找不到的话,就回退到 `public/index.html`。
    // 输出文件名会被推导为 `subpage.html`。
    subpage: "src/subpage/main.js"
  }
};
还有注意模板来源,网页必须在对应的位置创建个html文件
接下来就是编写代码了
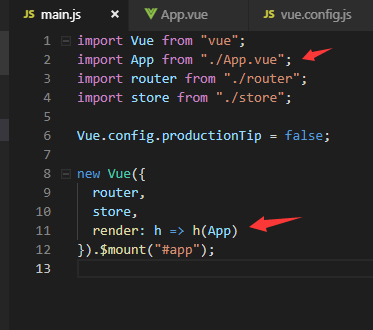
main.js入口文件的写法如下(render渲染这个模板)
App.vue模板写法(以下是我改写的)
<template>
  <div id="app">
    <div id="nav">
      <router-link to="/">Home</router-link>
      <router-link to="/about">About</router-link>
      <div>
        <a href="ui.html">跳转新的页面</a>
      </div>

    </div>
    <router-view/>
  </div>
</template>

<script>
export default {
  data() {
    return {};
  },
  mounted() {
    console.log(this);
    console.log(this.$router);
  }
};
</script>
<style>
#app {
  font-family: "Avenir", Helvetica, Arial, sans-serif;
  -webkit-font-smoothing: antialiased;
  -moz-osx-font-smoothing: grayscale;
  text-align: center;
  color: #2c3e50;
}
#nav {
  padding: 30px;
}

#nav a {
  font-weight: bold;
  color: #2c3e50;
}

#nav a.router-link-exact-active {
  color: #42b983;
}
</style>
可以注意到跳转新页面a标签的href属性
好了到这里就结束了跳转页面自己动手了。
最后总结一遍
入口文件就是用来渲染模板跟其他vue之类的操作,挂载到html页面的(比如路由。状态管理等)

 浙公网安备 33010602011771号