SUMO经验(二)- 设计更为复杂的网络
本项目记录sumo建立一个更为复杂网络的过程,SUMO版本:1.11.0,Python 3.7,使用Pycharm ide。主要参考官方文档:https://sumo.dlr.de/docs/Tutorials/quick_start.html
本文写于2022-01-16
1 创建网络
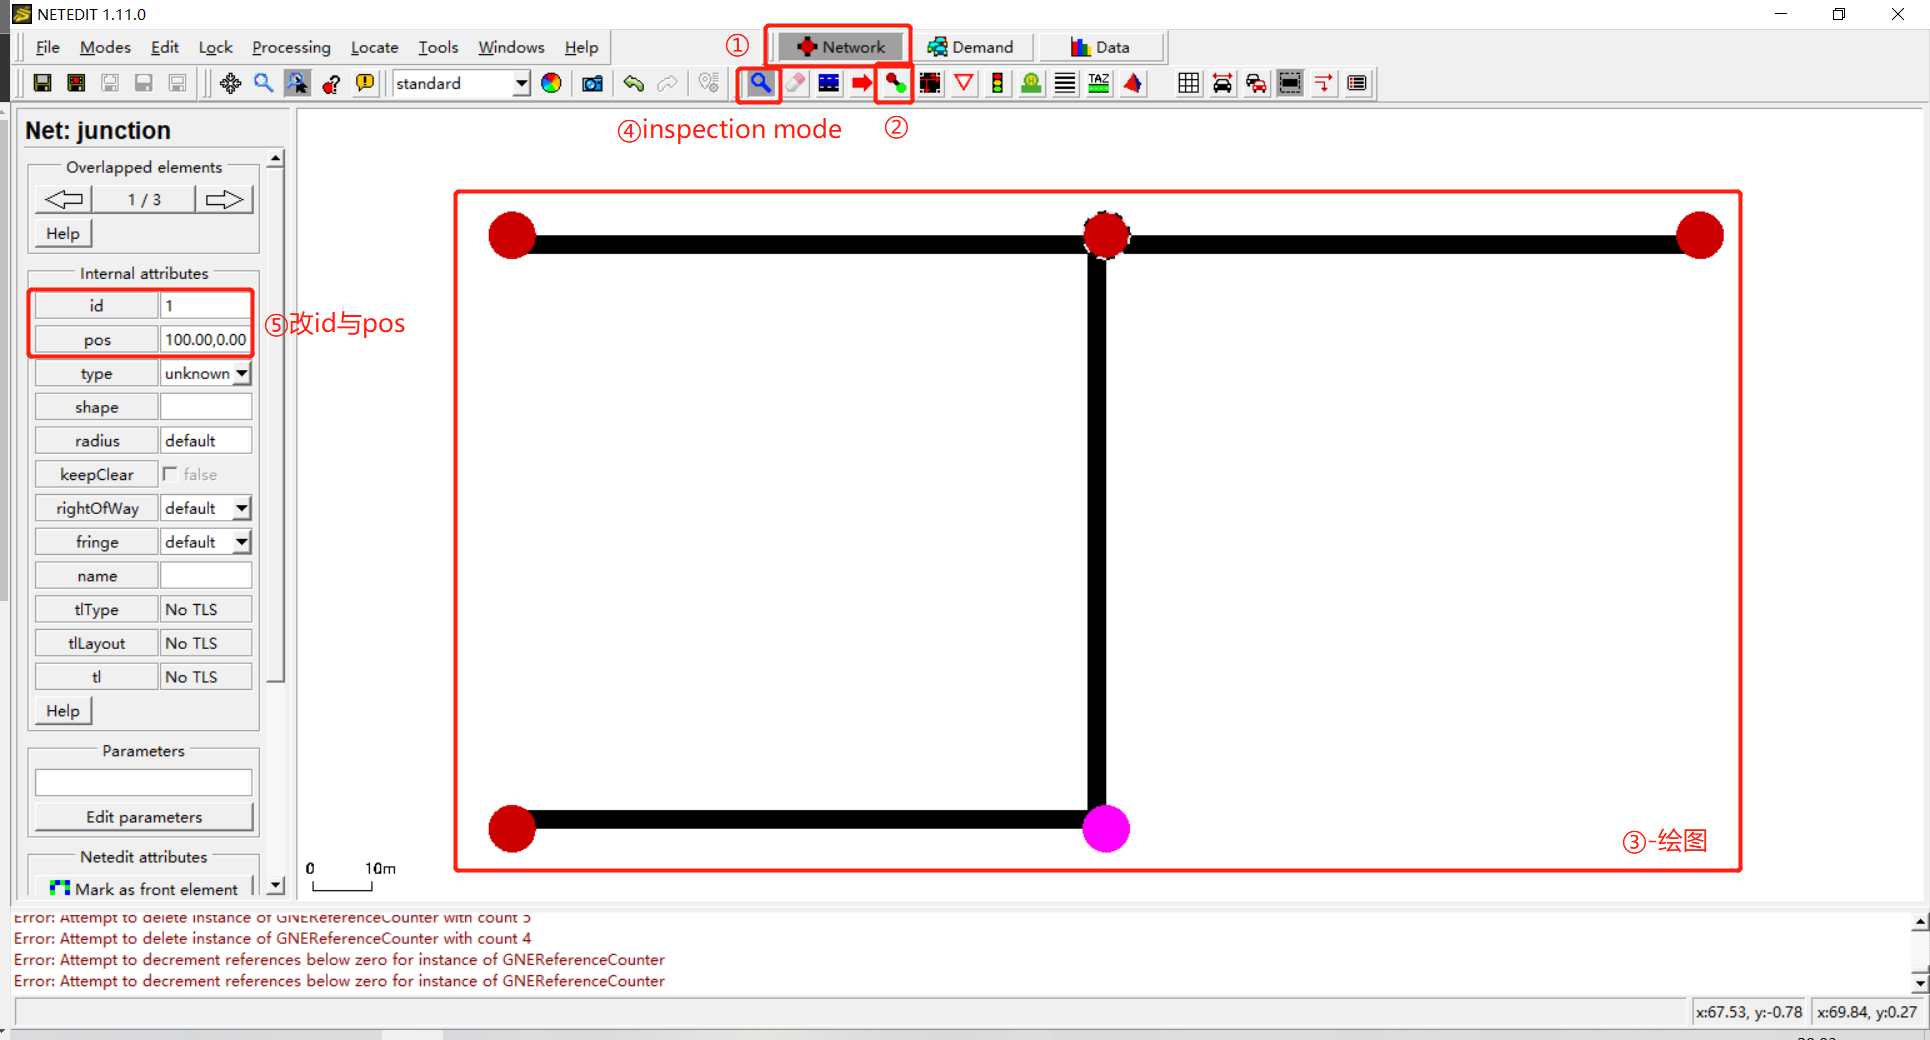
我们来创建一个更为复杂的网络,需要设定junction与edge的一些常用参数,首先还是按照SUMO经验(一)的方式,建立一个如图所示的网络:
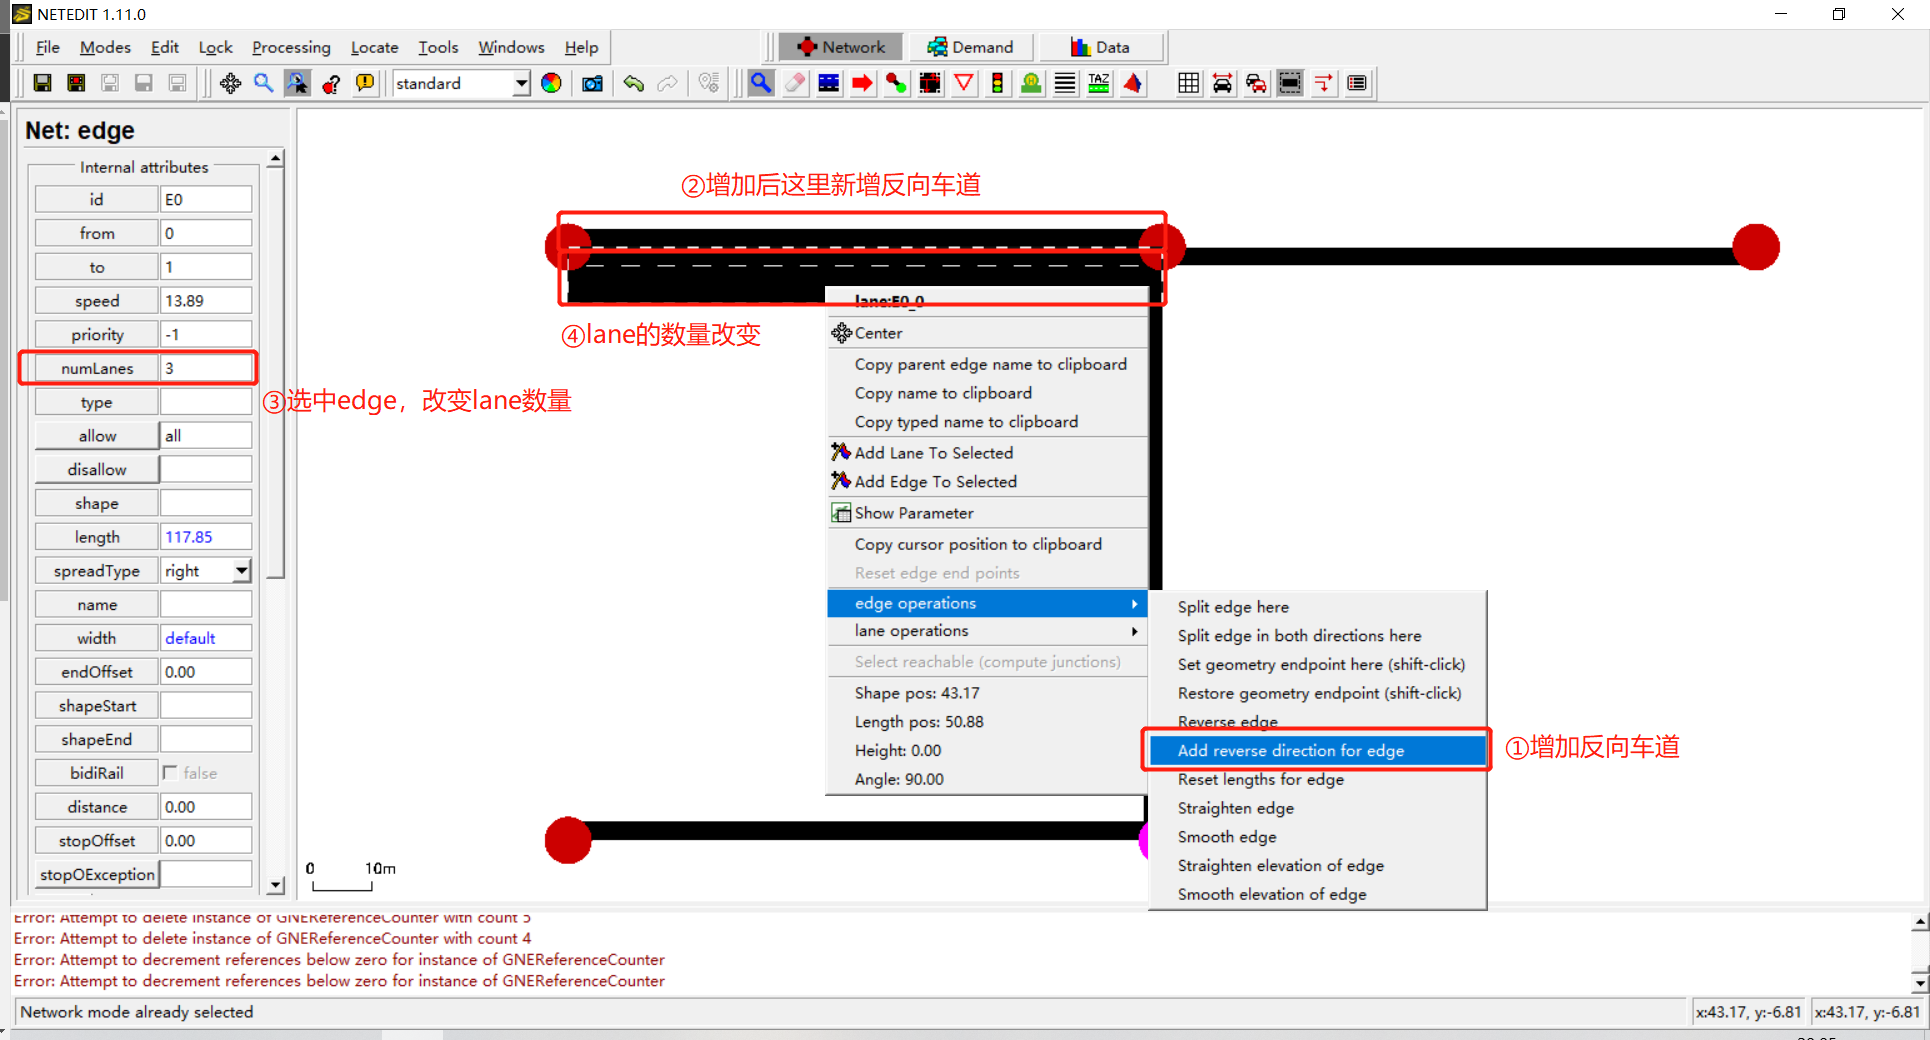
然后一番操作,实现了“增加反向车道”、“改变车道数量”

随便设置设置节点的位置(我这里设置每一个相距100m),随便设置一下numOfLane,得到下图

2 编写demand文件
demand当然也可以按照之前的方式设置,但是我们这里采取另一种方式 - 编写 demand.rou.xml 文件,直接设置route以及vehicle。可以在netedit.exe文件中查看自己的edge名称,我这里分别为

所以设置helloDemand文件为:
<?xml version="1.0" encoding="UTF-8"?>

<!-- generated on 2022-01-16 08:45:57 by Eclipse SUMO netedit Version 1.11.0 -->

<routes xmlns:xsi="http://www.w3.org/2001/XMLSchema-instance" xsi:noNamespaceSchemaLocation="http://sumo.dlr.de/xsd/routes_file.xsd">
    <route edges="E0 E1 E2" color="yellow" id="route_0"/>
    <route edges="E0 -E3" color="yellow" id="route_1"/>
    <vehicle id="vehicle_0" depart="0.00" route="route_1"/>
    <vehicle id="vehicle_1" depart="10.00" route="route_0"/>
    <vehicle id="vehicle_2" depart="0.00" route="route_1"/>
    <vehicle id="vehicle_3" depart="5.00" route="route_0"/>
    <vehicle id="vehicle_4" depart="10.00" color="blue" route="route_1"/>
</routes>
然后编写仿真文件,hello.sumocfg如下,大意就是载入net-file以及route-files
<?xml version="1.0" encoding="UTF-8"?>

<!-- generated on 2022-01-16 08:46:16 by Eclipse SUMO GUI Version 1.11.0
-->

<configuration xmlns:xsi="http://www.w3.org/2001/XMLSchema-instance" xsi:noNamespaceSchemaLocation="http://sumo.dlr.de/xsd/sumoConfiguration.xsd">

    <input>
        <net-file value="F:\PycharmProgram\sumo_helloWorld\hello.net.xml"/>
        <route-files value="F:\PycharmProgram\sumo_helloWorld\helloDemand.rou.xml"/>
    </input>

</configuration>
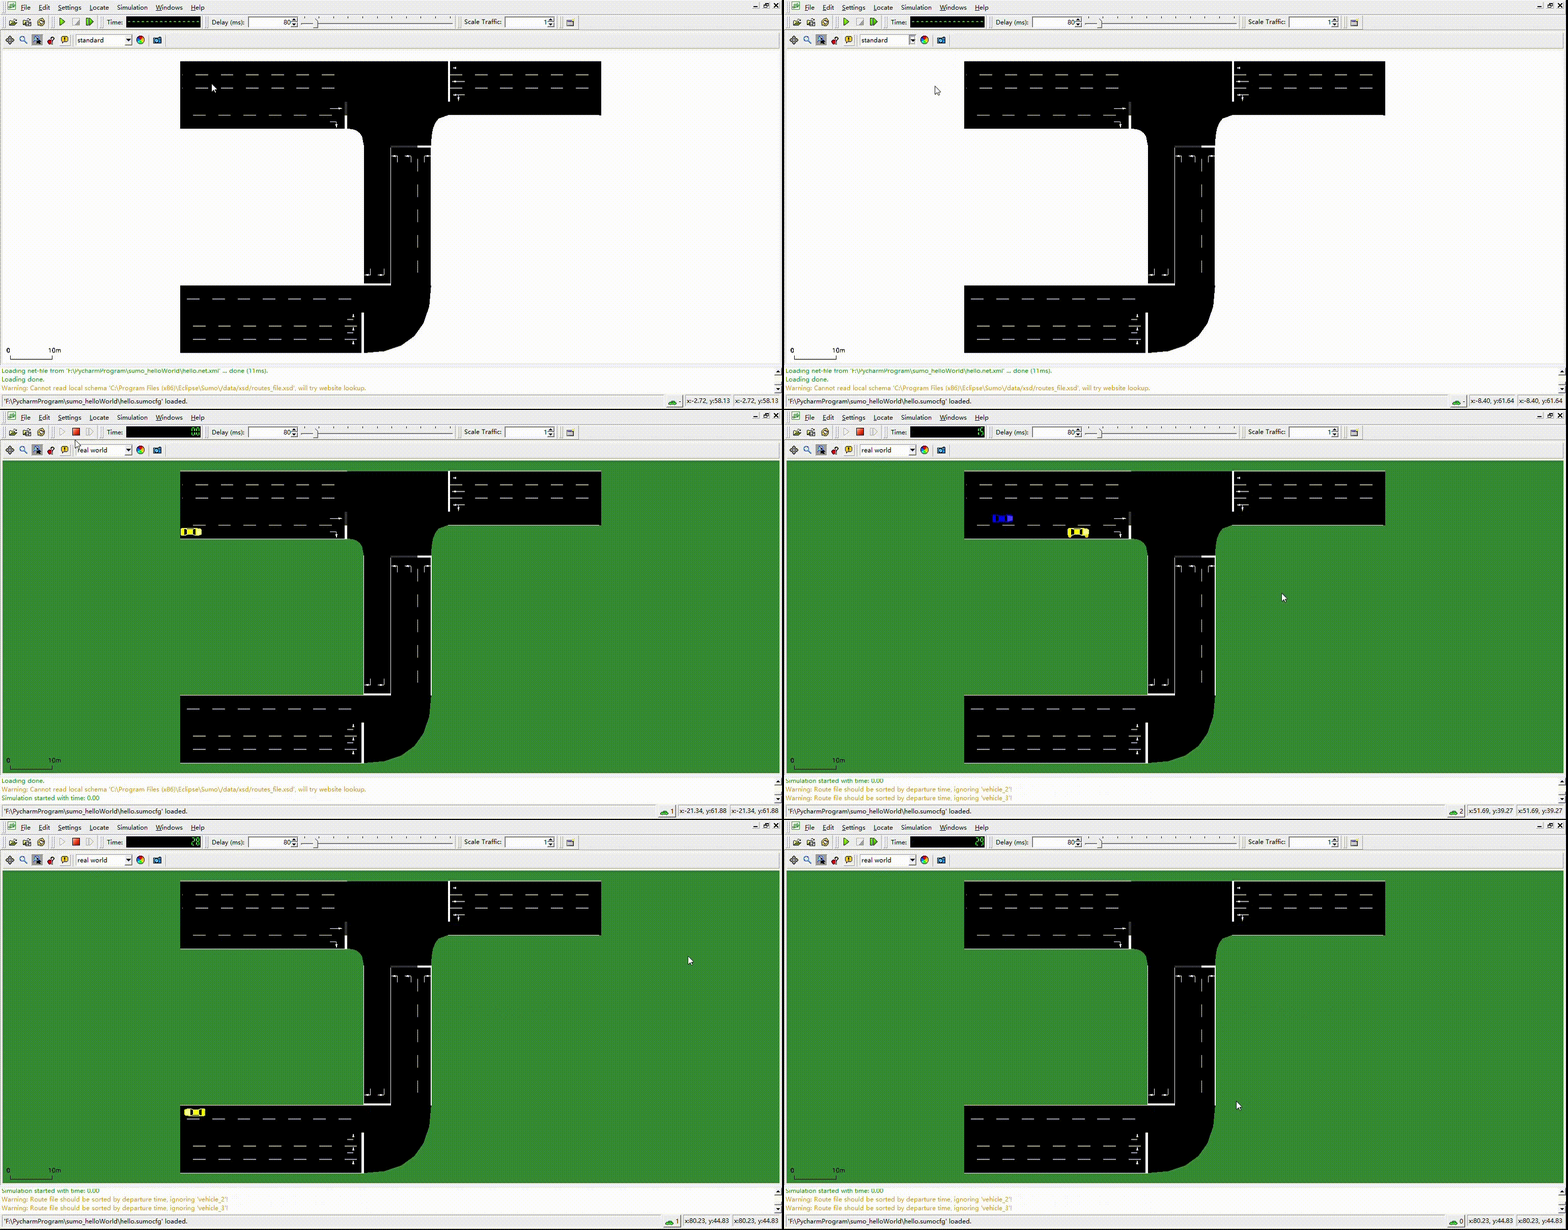
点开sumo-gui,load simulation,调整延迟以及显示模式(real world/ standard...),然后运行即可。

Appendix: 遇到问题
1 sumo-gui中报错,显示cannot load simulation,细看发现是说,edge E0 与 E2无法连接。打开netedit.exe发现,在demand->route creation选项中,E0与E2确实是无法连接的,选中E0,E2会是紫色,代表edge conflict。该问题目前不知道怎么回事,解决方案是重新建一遍网络。


