Java3D的环境配置
2007-09-27 23:54 和尚释然 阅读(4461) 评论(7) 编辑 收藏 举报安装步骤:
1.下载Java JDK,并安装它。目前的最新版是1_5_0_07,文件名为jdk-1_5_0_07-windows-i586-p.exe,文件大小约为34MB,从http://192.18.108.138/ECom/EComTicketServlet/BEGINCC371BB88AD6EB024CA824E5078E9C56/-2147483648/1612698399/1/732086/731822/1612698399/2ts+/westCoastFSEND/jdk-1.5.0_07-oth-JPR/jdk-1.5.0_07-oth-JPR:2/jdk-1_5_0_07-windows-i586-p.exe下载。
2.设置环境变量。就我的电脑为例:
JDK安装路径是C:\Program Files\Java\jdk1.5.0。
设置环境变量:
JAVA_HOME = C:\Program Files\Java\jdk1.5.0;
PATH = %JAVA_HOME%\bin;%JAVA_HOME%\jre\bin;"C:\Program Files\Microsoft DirectX SDK (August 2006)\Utilities\Bin\x86";C:\Program Files\PC Connectivity Solution\;D:\oracle\ora92\bin;C:\Program Files\Oracle\jre\1.3.1\bin;C:\Program Files\Oracle\jre\1.1.8\bin;C:\Program Files\Borland\Delphi7\Bin;C:\Program Files\Borland\Delphi7\Projects\Bpl\;%SystemRoot%\system32;%SystemRoot%;%SystemRoot%\System32\Wbem;C:\Program Files\ATI Technologies\ATI.ACE\;C:\Program Files\IDM Computer Solutions\UltraEdit-32;C:\Program Files\Microsoft SQL Server\80\Tools\BINN;C:\Program Files\Python22;C:\Program Files\MySQL\MySQL Server 5.0\bin;E:\3dsmax5\backburner2\;C:\Program Files\Common Files\Autodesk Shared\
CLASSPATH = .;%JAVA_HOME%\lib;%JAVA_HOME%\lib\tools.jar
3.下载Java3D,目前的最新版是1.4.0_01 ,文件名为java3d-1_4_0_01-windows-i586.exe,大小约为 2.77 MB,从 http://192.18.108.149/ECom/EComTicketServlet/BEGIN380C9A6CAFAA00614B92D56EB6694EAA/-2147483648/1612707939/1/735290/735278/1612707939/2ts+/westCoastFSEND/java3d-1.4.0_01-oth-JPR/java3d-1.4.0_01-oth-JPR:5/java3d-1_4_0_01-windows-i586.exe下载。
默认安装就行了。
4.测试Java3D.
我们就用记事本写一个Java3D程序:
import com.sun.j3d.utils.universe.*;
import com.sun.j3d.utils.geometry.ColorCube;
import javax.media.j3d.*;
import javax.vecmath.*;
import java.awt.GraphicsConfiguration;
/**
* Simple Java 3D example program to display a spinning cube.
*/
public class HelloUniverse extends javax.swing.JFrame {
private SimpleUniverse univ = null;
private BranchGroup scene = null;
public BranchGroup createSceneGraph() {
// Create the root of the branch graph
BranchGroup objRoot = new BranchGroup();
// Create the TransformGroup node and initialize it to the
// identity. Enable the TRANSFORM_WRITE capability so that
// our behavior code can modify it at run time. Add it to
// the root of the subgraph.
TransformGroup objTrans = new TransformGroup();
objTrans.setCapability(TransformGroup.ALLOW_TRANSFORM_WRITE);
objRoot.addChild(objTrans);
// Create a simple Shape3D node; add it to the scene graph.
objTrans.addChild(new ColorCube(0.4));
// Create a new Behavior object that will perform the
// desired operation on the specified transform and add
// it into the scene graph.
Transform3D yAxis = new Transform3D();
Alpha rotationAlpha = new Alpha(-1, 4000);
RotationInterpolator rotator =
new RotationInterpolator(rotationAlpha, objTrans, yAxis,
0.0f, (float) Math.PI*2.0f);
BoundingSphere bounds =
new BoundingSphere(new Point3d(0.0,0.0,0.0), 100.0);
rotator.setSchedulingBounds(bounds);
objRoot.addChild(rotator);
// Have Java 3D perform optimizations on this scene graph.
objRoot.compile();
return objRoot;
}
private Canvas3D createUniverse() {
// Get the preferred graphics configuration for the default screen
GraphicsConfiguration config =
SimpleUniverse.getPreferredConfiguration();
// Create a Canvas3D using the preferred configuration
Canvas3D c = new Canvas3D(config);
// Create simple universe with view branch
univ = new SimpleUniverse(c);
// This will move the ViewPlatform back a bit so the
// objects in the scene can be viewed.
univ.getViewingPlatform().setNominalViewingTransform();
// Ensure at least 5 msec per frame (i.e., < 200Hz)
univ.getViewer().getView().setMinimumFrameCycleTime(5);
return c;
}
/**
* Creates new form HelloUniverse
*/
public HelloUniverse() {
// Initialize the GUI components
initComponents();
// Create Canvas3D and SimpleUniverse; add canvas to drawing panel
Canvas3D c = createUniverse();
drawingPanel.add(c, java.awt.BorderLayout.CENTER);
// Create the content branch and add it to the universe
scene = createSceneGraph();
univ.addBranchGraph(scene);
}
// ----------------------------------------------------------------
/** This method is called from within the constructor to
* initialize the form.
* WARNING: Do NOT modify this code. The content of this method is
* always regenerated by the Form Editor.
*/
// <editor-fold defaultstate="collapsed" desc=" Generated Code ">//GEN-BEGIN:initComponents
private void initComponents() {
drawingPanel = new javax.swing.JPanel();
setDefaultCloseOperation(javax.swing.WindowConstants.EXIT_ON_CLOSE);
setTitle("HelloUniverse");
drawingPanel.setLayout(new java.awt.BorderLayout());
drawingPanel.setPreferredSize(new java.awt.Dimension(250, 250));
getContentPane().add(drawingPanel, java.awt.BorderLayout.CENTER);
pack();
}// </editor-fold>//GEN-END:initComponents
/**
* @param args the command line arguments
*/
public static void main(String args[]) {
java.awt.EventQueue.invokeLater(new Runnable() {
public void run() {
new HelloUniverse().setVisible(true);
}
});
}
// Variables declaration - do not modify//GEN-BEGIN:variables
private javax.swing.JPanel drawingPanel;
// End of variables declaration//GEN-END:variables
}
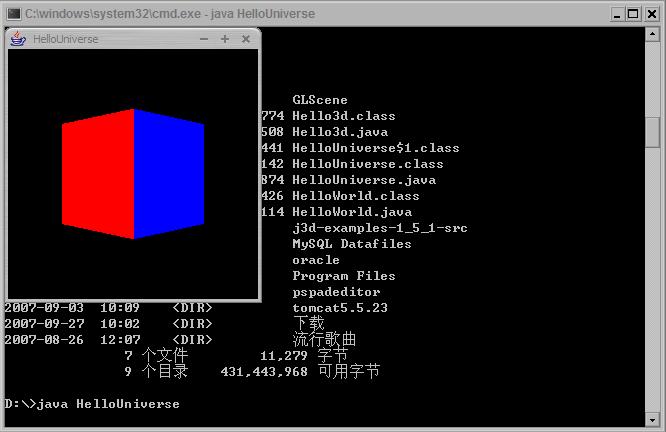
然后把它把保存为HelloUniverse.java,然后用javac HelloUniverse.java编译,最后用java HelloUniverse运行就会出现一个旋转的立方体。

希望大家以后多多交流。
作者:顾恩礼
出处:http://www.cnblogs.com/guenli/
本文版权归作者和博客园共有,欢迎转载,但未经作者同意必须保留此段声明,且在文章页面明显位置给出原文连接,否则保留追究法律责任的权利。

