
springboot集成mybatis-generator
首先上下成功后的效果:
配置非常简单,我们是通过maven插件来进行的,一共只需要3步:
第一步添加mysql依赖和mysql的maven插件:
由于是非常简单的spring+mysql的原始项目,我直接上整个pom文件吧:
<project xmlns="http://maven.apache.org/POM/4.0.0" xmlns:xsi="http://www.w3.org/2001/XMLSchema-instance"
  xsi:schemaLocation="http://maven.apache.org/POM/4.0.0 http://maven.apache.org/xsd/maven-4.0.0.xsd">
  <modelVersion>4.0.0</modelVersion>

  <groupId>com.shh.index</groupId>
  <artifactId>shh-index</artifactId>
  <version>1.0-SNAPSHOT</version>
  <packaging>jar</packaging>

  <parent>
    <groupId>org.springframework.boot</groupId>
    <artifactId>spring-boot-starter-parent</artifactId>
    <version>1.5.3.RELEASE</version>
  </parent>

  <name>shh-index</name>
  <url>http://maven.apache.org</url>

  <properties>
    <project.build.sourceEncoding>UTF-8</project.build.sourceEncoding>
  </properties>

  <dependencies>
    <dependency>
      <groupId>junit</groupId>
      <artifactId>junit</artifactId>
      <version>3.8.1</version>
      <scope>test</scope>
    </dependency>

    <dependency>
      <groupId>org.springframework.boot</groupId>
      <artifactId>spring-boot-starter-web</artifactId>
    </dependency>

    <!--Mybatis-->
    <dependency>
      <groupId>org.mybatis</groupId>
      <artifactId>mybatis</artifactId>
      <version>3.3.1</version>
    </dependency>
    <dependency>
      <groupId>org.mybatis</groupId>
      <artifactId>mybatis-spring</artifactId>
      <version>1.2.4</version>
    </dependency>

  </dependencies>

  <build>
    <plugins>
      <plugin>
        <groupId>org.springframework.boot</groupId>
        <artifactId>spring-boot-maven-plugin</artifactId>
      </plugin>
      <plugin>
        <groupId>org.apache.maven.plugins</groupId>
        <artifactId>maven-compiler-plugin</artifactId>
        <configuration>
          <proc>none</proc>
        </configuration>
      </plugin>
      <plugin>
        <groupId>org.mybatis.generator</groupId>
        <artifactId>mybatis-generator-maven-plugin</artifactId>
        <version>1.3.2</version>
        <configuration>
          <verbose>true</verbose>
          <overwrite>true</overwrite>
        </configuration>
      </plugin>
      <plugin>
        <groupId>org.mybatis.generator</groupId>
        <artifactId>mybatis-generator-maven-plugin</artifactId>
        <version>1.3.2</version>
      </plugin>
    </plugins>
  </build>

</project>
第二步,配置生成代码的配置文件:
src/main/resources/generatorConfig.xml (默认会自动读取改路径下的这个文件)
<?xml version="1.0" encoding="UTF-8" ?> <!DOCTYPE generatorConfiguration PUBLIC "-//mybatis.org//DTD MyBatis Generator Configuration 1.0//EN" "http://mybatis.org/dtd/mybatis-generator-config_1_0.dtd" > <generatorConfiguration> <classPathEntry location="/Users/shangyanshuo/Documents/generation/2017/workspaces/ideasp/shh-index/src/main/resources/mysql-connector-java-5.1.38.jar"/> <context id="context1" targetRuntime="MyBatis3"> <jdbcConnection driverClass="com.mysql.jdbc.Driver" connectionURL="jdbc:mysql://127.0.0.1:3306/shh_data?useUnicode=true&characterEncoding=UTF-8" userId="root" password=""/> <javaModelGenerator targetPackage="com.shh.index.models" targetProject="/Users/shangyanshuo/Documents/generation/2017/workspaces/ideasp/shh-index/src/main/java"/> <sqlMapGenerator targetPackage="mappers" targetProject="/Users/shangyanshuo/Documents/generation/2017/workspaces/ideasp/shh-index/src/main/resources"/> <javaClientGenerator targetPackage="com.shh.index.dao" targetProject="/Users/shangyanshuo/Documents/generation/2017/workspaces/ideasp/shh-index/src/main/java/" type="XMLMAPPER"/> <table tableName="shh_player"></table> </context> </generatorConfiguration>
这一步里同时还要把mysql-connector-java-5.1.38.jar下载下来放到resources文件夹下。强行凑三步,哈哈。
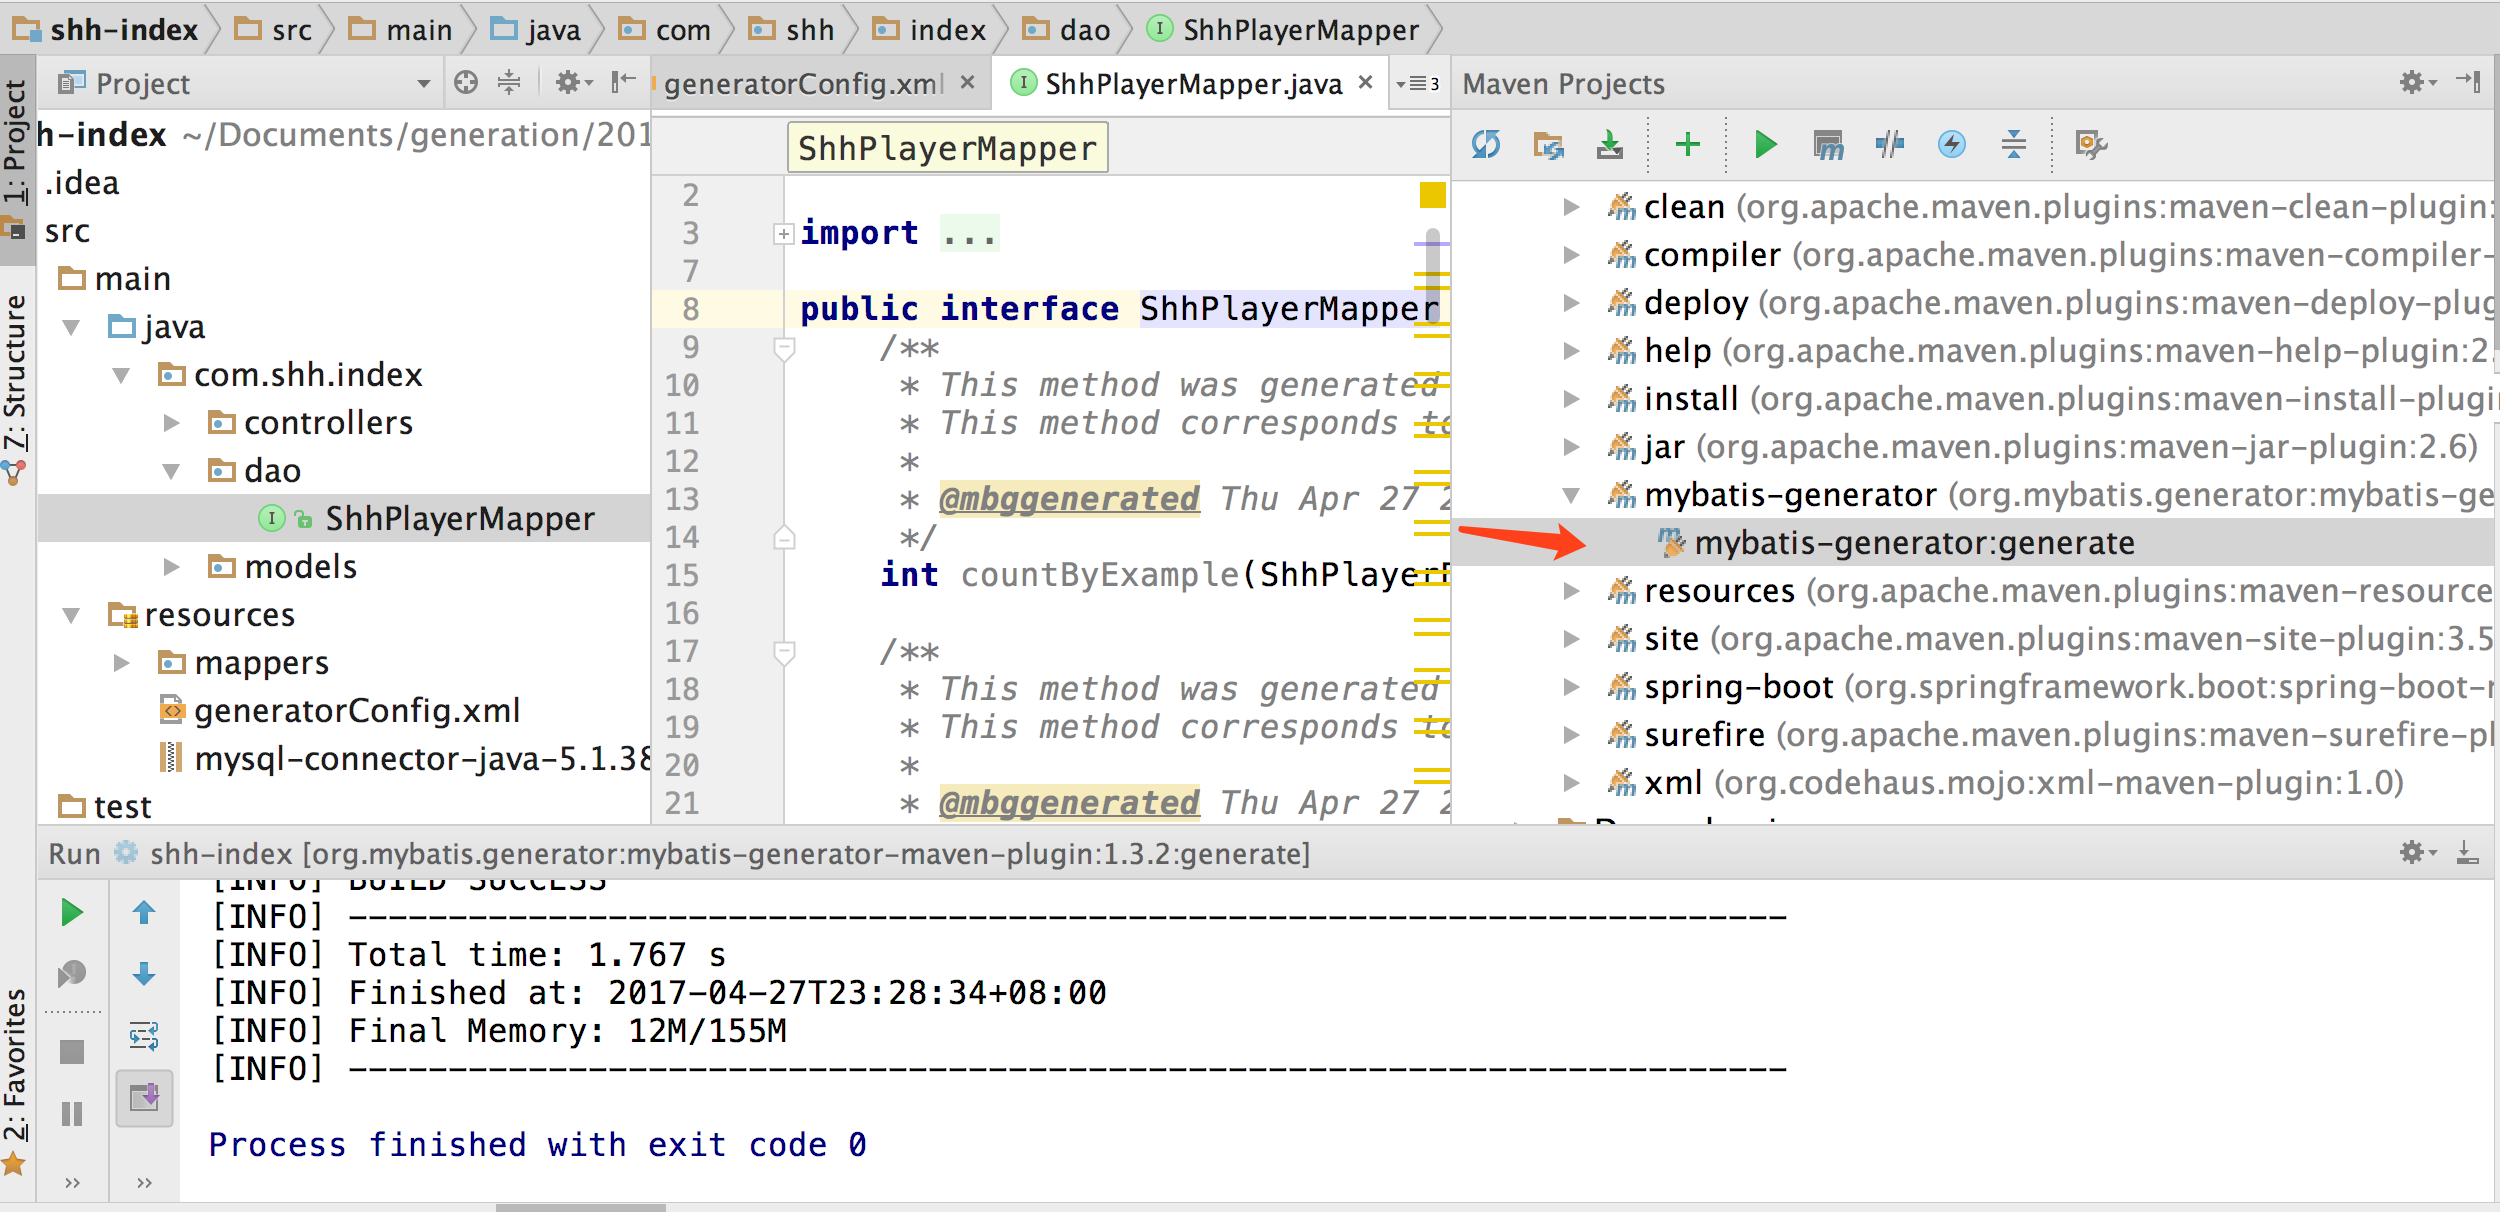
第三步:运行插件
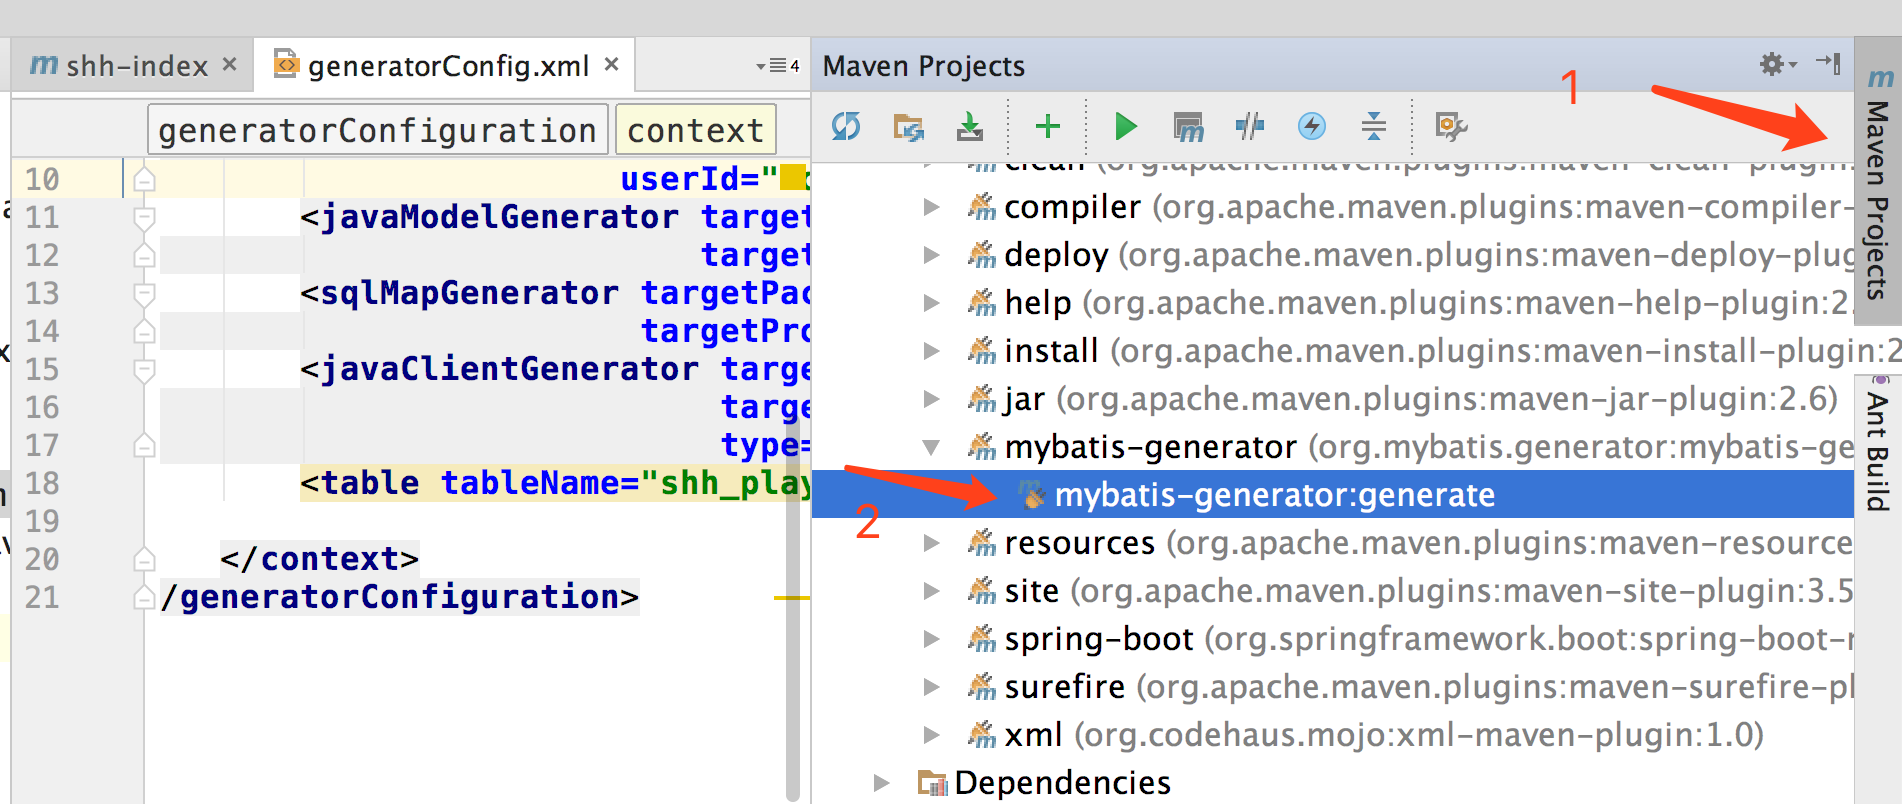
备注:
如果是eclipse项目则只有第三步的启动插件的方式不一样:
项目 右键--》run as --》 maven bulid --》弹出对话框 --》在goals中输入mybatis-generator:generate 或者 点击select --》选择你的mybatis插件 --》apply --》run
