JAVA NIO 之ByteBuffer的mark、position、limit、flip、reset,get方法介绍
参考博客:http://blog.csdn.net/sunzhenhua0608/article/details/31778519
先来一个demo:
import java.nio.ByteBuffer;

public class ByteBufferDemo {

    public static void main(String[] args){
        String str = "helloWorld";
        ByteBuffer buff  = ByteBuffer.wrap(str.getBytes());
        System.out.println("position:"+buff.position()+"\t limit:"+buff.limit());
        //读取两个字节
        byte[] abytes = new byte[1];
        buff.get(abytes);
        System.out.println("get one byte to string:" + new String(abytes));
        //Reads the byte at this buffer's current position, and then increments the position.
        buff.get();
        System.out.println("获取两个字节(两次get()方法调用)后");
        System.out.println("position:"+buff.position()+"\t limit:"+buff.limit());
        //Sets this buffer's mark at its position. like ByteBuffer.this.mark=position
        buff.mark();
        System.out.println("mark()...");
        System.out.println("position:"+buff.position()+"\t limit:"+buff.limit());

        //当读取到码流后,进行解码。首先对ByteBuffer进行flip操作,
        //它的作用是将缓冲区当前的limit设置为position,position设置为0
        //flip方法将Buffer从写模式切换到读模式。调用flip()方法会将position设回0,并将limit设置成之前position的值。
     // 这里的flip()方法,在详细的描述一下,其事这里是理解position和limit这两个属性的关键。
     //用于后续对缓冲区的读取操作。然后根据缓冲区可读的字节个数创建字节数组,
        //调用ByteBuffer的get操作将缓冲区可读的字节(获取position到limit的字节)
        //数组复制到新创建的字节数组中,最后调用字符串的构造函数创建请求消息体并打印。
        buff.flip();
        System.out.println("flip()...");
        System.out.println("position:"+buff.position()+"\t limit:"+buff.limit());

        byte[] tbyte = new byte[1];
        buff.get(tbyte);
        System.out.println("get one byte to string:" + new String(tbyte));
        System.out.println("position:"+buff.position()+"\t limit:"+buff.limit());

        //BufferUnderflowException 测试
//        byte[] trbyte = new byte[2];
//        buff.get(trbyte);

    }

}
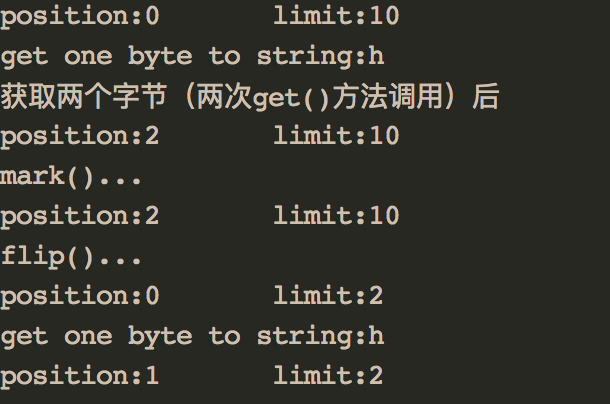
输出:


