

C#中使用命名管道进行进程通信的实例
1 新建解决方案NamedPipeExample
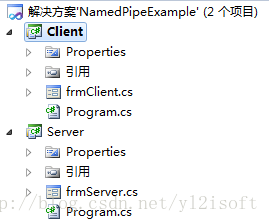
在解决方案下面新建两个项目:Client和Server,两者的输出类型均为“Windows 应用程序”。整个程序的结构如下图所示。
2 实现项目Client
Client仅包含一个名为“客户端”的窗体,如下图所示。

编写窗体后端代码,如下所示。
1 2 3 4 5 6 7 8 9 10 11 12 13 14 15 16 17 18 19 20 21 22 23 24 25 26 27 28 29 30 31 32 33 34 35 36 37 38 39 40 41 42 43 44 45 46 47 | using System;using System.IO;using System.IO.Pipes;using System.Security.Principal;using System.Windows.Forms; namespace Client{ public partial class frmClient : Form { NamedPipeClientStream pipeClient = new NamedPipeClientStream("localhost", "testpipe", PipeDirection.InOut, PipeOptions.Asynchronous, TokenImpersonationLevel.None); StreamWriter sw = null; public frmClient() { InitializeComponent(); } private void frmClient_Load(object sender, EventArgs e) { try { pipeClient.Connect(5000); sw = new StreamWriter(pipeClient); sw.AutoFlush = true; } catch (Exception ex) { MessageBox.Show("连接建立失败,请确保服务端程序已经被打开。"); this.Close(); } } private void btnSend_Click(object sender, EventArgs e) { if (sw != null) { sw.WriteLine(this.txtMessage.Text); } else { MessageBox.Show("未建立连接,不能发送消息。"); } } }} |
3 实现项目Server
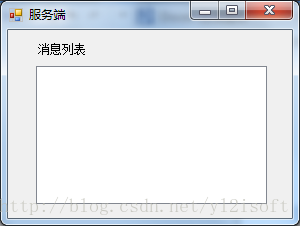
Server项目仅包含一个名为“服务端”的窗体,如下图所示。
编写窗体后端代码,如下所示。
1 2 3 4 5 6 7 8 9 10 11 12 13 14 15 16 17 18 19 20 21 22 23 24 25 26 27 28 29 30 31 32 33 34 35 | using System;using System.IO;using System.IO.Pipes;using System.Threading;using System.Windows.Forms; namespace Server{ public partial class frmServer : Form { NamedPipeServerStream pipeServer = new NamedPipeServerStream("testpipe", PipeDirection.InOut,1,PipeTransmissionMode.Message,PipeOptions.Asynchronous); public frmServer() { InitializeComponent(); } private void frmServer_Load(object sender, EventArgs e) { ThreadPool.QueueUserWorkItem(delegate { pipeServer.BeginWaitForConnection((o) => { NamedPipeServerStream pServer = (NamedPipeServerStream)o.AsyncState; pServer.EndWaitForConnection(o); StreamReader sr = new StreamReader(pServer); while (true) { this.Invoke((MethodInvoker)delegate { lsvMessage.Items.Add(sr.ReadLine()); }); } }, pipeServer); }); } }} |
4 运行程序
运行Server.exe与Client.exe程序,效果如下图所示。
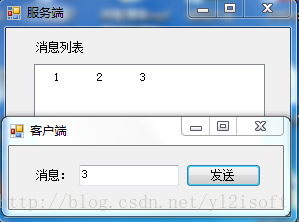
实例中共发送三次消息,分别传递数据1,2,3。
本例中演示的客户端和服务端程序均位于本地机器,使用命名管道可以与网络上的其他进程进行通信。
5、若要重复连接服务端,改造如下
1 2 3 4 5 6 7 8 9 10 11 12 13 14 15 16 17 18 19 20 21 22 23 24 25 26 27 28 29 30 | void ccc() { try { pipeServer = new NamedPipeServerStream("testPipe", PipeDirection.InOut, 1, PipeTransmissionMode.Message, PipeOptions.Asynchronous); ThreadPool.QueueUserWorkItem(delegate { pipeServer.BeginWaitForConnection((o) => { NamedPipeServerStream pServer = (NamedPipeServerStream)o.AsyncState; pServer.EndWaitForConnection(o); StreamReader sr = new StreamReader(pServer); string s = sr.ReadLine(); pServer.Dispose(); pipeServer.Dispose(); if (s != null) { this.Dispatcher.Invoke((System.Windows.Forms.MethodInvoker)delegate { if (this.Visibility != Visibility.Hidden) return; this.Visibility = System.Windows.Visibility.Visible; this.ShowInTaskbar = true; this.Activate(); ccc(); }); } }, pipeServer); }); } catch { } } |


【推荐】国内首个AI IDE,深度理解中文开发场景,立即下载体验Trae
【推荐】编程新体验,更懂你的AI,立即体验豆包MarsCode编程助手
【推荐】抖音旗下AI助手豆包,你的智能百科全书,全免费不限次数
【推荐】轻量又高性能的 SSH 工具 IShell:AI 加持,快人一步
· 被坑几百块钱后,我竟然真的恢复了删除的微信聊天记录!
· 没有Manus邀请码?试试免邀请码的MGX或者开源的OpenManus吧
· 【自荐】一款简洁、开源的在线白板工具 Drawnix
· 园子的第一款AI主题卫衣上架——"HELLO! HOW CAN I ASSIST YOU TODAY
· Docker 太简单,K8s 太复杂?w7panel 让容器管理更轻松!