CSS浮动与清除浮动
文档流
css中的块级元素在页面中是独占一行的,自上而下排列,也就是我们所说的流,通常我们称之为文档流或标准流。
 1 <html>
 2 <head>
 3     <style>
 4         div {width:100px;height:100px;}
 5     </style>
 6 </head>
 7 <body style="background-color: eee">
 8     <div style="background-color:red">div1</div>
 9     <div style="background-color:green">div2</div>
10     <div style="background-color:blue">div3</div>
11 </body>
12 </html>

浮动
使元素脱离文档流,按照指定的方向(左或右发生移动),直到它的外边缘碰到包含框或另一个浮动框的边框为止。起初,W3C规定出来的浮动实际并不是为了布局所用,当时是为了做文字环绕才使用到浮动,后来有人用它来做布局,发现不错而一炮走红。
float:left; 左浮动
float:right;右浮动
 1 <html>
 2 <head>
 3     <style>
 4         div {width:100px;height:100px;}
 5     </style>
 6 </head>
 7 <body style="background-color: eee">
 8     <div style="background-color:red;float:left">div1</div>
 9     <div style="background-color:green;float:right">div2</div>
10     <div style="background-color:blue;float:left">div3</div>
11 </body>
12 </html>

脱离标准流
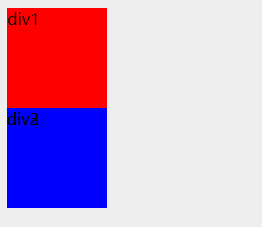
如果这时有不浮动的元素,会被浮动的元素盖住,因为浮动的元素已经脱离了标准流,浮动的元素已经和标准流不在同一层次上了。下图中绿色div就被红色div盖住了。
 1 <html>
 2 <head>
 3     <style>
 4         div {width:100px;height:100px;}
 5     </style>
 6 </head>
 7 <body style="background-color: eee">
 8     <div style="background-color:red;float:left">div1</div>
 9     <div style="background-color:green">div2</div>
10     <div style="background-color:blue">div3</div>
11 </body>
12 </html>
无法摆脱标准流
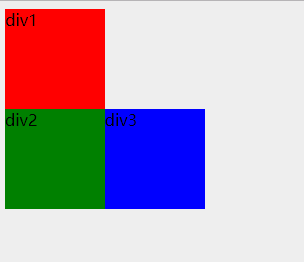
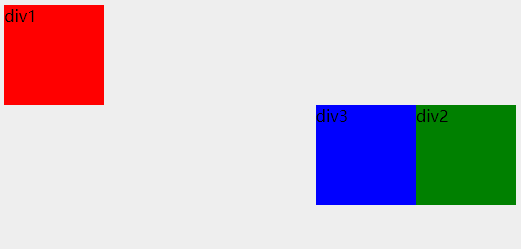
浮动能够脱离标准流,但又不能摆脱标准流,这时css中最绕的一个知识点。第一个div如果不浮动,那么就会占据标准流中的位置,即使下边的元素什么状态,都不能覆盖上来,只能在之下的空间玩耍。也就是说,垂直的元素,上边元素浮动下边元素为标准流,则上边元素可覆盖下边元素,反之,不可。
 1 <html>
 2 <head>
 3     <style>
 4         div {width:100px;height:100px;}
 5     </style>
 6 </head>
 7 <body style="background-color: eee">
 8     <div style="background-color:red;">div1</div>
 9     <div style="background-color:green;float:left;">div2</div>
10     <div style="background-color:blue;float:left;">div3</div>
11 </body>
12 </html>
 1 <html>
 2 <head>
 3     <style>
 4         div {width:100px;height:100px;}
 5     </style>
 6 </head>
 7 <body style="background-color: eee">
 8     <div style="background-color:red;">div1</div>
 9     <div style="background-color:green;float:right;">div2</div>
10     <div style="background-color:blue;float:right;">div3</div>
11 </body>
12 </html>
清除浮动场景1:元素遮盖-clear:both
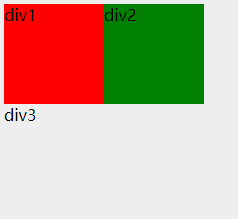
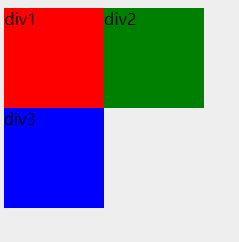
通过上边的例子,我们知道,如果上边的元素浮动,下边的元素就会顶上去。但很多时候,我们希望把几个元素浮动成一行后,下边的元素不被浮动的元素覆盖,这就需要清除浮动了。
调整前:蓝色元素被浮动元素盖住了
 1 <html>
 2 <head>
 3     <style>
 4         div {width:100px;height:100px;}
 5         .clearfix {clear: both;}
 6     </style>
 7 </head>
 8 <body style="background-color: eee">
 9     <div style="background-color:red;float:left;">div1</div>
10     <div style="background-color:green;float:left;">div2</div>
11     <div style="background-color:blue;">div3</div>
12 </body>
13 </html>
调整后:蓝色元素显示出来了
 1 <html>
 2 <head>
 3     <style>
 4         div {width:100px;height:100px;}
 5         .clearfix {clear: both;}
 6     </style>
 7 </head>
 8 <body style="background-color: eee">
 9     <div style="background-color:red;float:left;">div1</div>
10     <div style="background-color:green;float:left;">div2</div>
11     <div style="background-color:blue;" class="clearfix">div3</div>
12 </body>
13 </html>
清除浮动场景2:高度塌陷-overflow-auto
当有div嵌套时,子div如果浮动,那么父div就会成为无内容的元素。
调整前:父元素的内容为空,显示不出东西
 1 <html>
 2 <head>
 3     <style>
 4         .small {width:100px;height:100px;}
 5         .big {width:200px;height:200px;}
 6         .clearfix {clear: both;}
 7     </style>
 8 </head>
 9 <body style="background-color: eee;">
10     <div style="background-color:red;">
11         <div style="background-color:green;float:left" class="small">div1</div>
12         <div style="background-color:blue;float:left" class="small">div2</div>
13     </div>
14 </body>
15 </html>
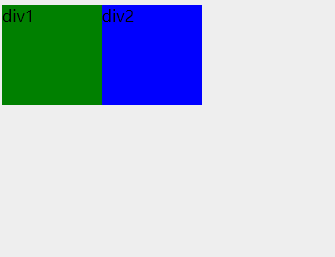
调整后:外边包裹div的背景色能够显示出来
 1 <html>
 2 <head>
 3     <style>
 4         .small {width:100px;height:100px;}
 5         .big {width:200px;height:200px;}
 6         .clearfix {overflow:auto;}
 7     </style>
 8 </head>
 9 <body style="background-color: eee;">
10     <div style="background-color:red;" class="clearfix">
11         <div style="background-color:green;float:left" class="small">div1</div>
12         <div style="background-color:blue;float:left" class="small">div2</div>
13     </div>
14 </body>
15 </html>

在父元素上设置overflow这个属性,如果父元素的这个属性设置为auto或者是hidden,父元素就会扩展包含浮动,这个方法有着比较好的语义性,因为它不需要额外的元素,但是,要记住一点,overflow属性不是为了清除浮动而定义的,要小心不要覆盖住内容或者触发了不需要的滚动条。
bootstrap中的clearfix
由上边可以看出,其实清除浮动有两种场景,那么就应该写一个通用的css。开源的项目就是方便,好多前人留下了日常用到的工具类,下面是bootstrap中的清除浮动。
1 .clearfix{*zoom:1}  /* IE/7/6*/
2 .clearfix:before,.clearfix:after{display:table;line-height:0;content:""}
3 .clearfix:after{clear:both}
