
Spring Boot 整合 WebService服务
参考自: SpringBoot 整合 webservice 示例
1. 添加依赖
不需要导入web依赖, 因为web-services中已包含此依赖.
    <dependencies>
        <dependency>
            <groupId>org.springframework.boot</groupId>
            <artifactId>spring-boot-starter</artifactId>
        </dependency>

        <dependency>
            <groupId>org.springframework.boot</groupId>
            <artifactId>spring-boot-starter-test</artifactId>
            <scope>test</scope>
            <exclusions>
                <exclusion>
                    <groupId>org.junit.vintage</groupId>
                    <artifactId>junit-vintage-engine</artifactId>
                </exclusion>
            </exclusions>
        </dependency>

        <!--springboot 整合 webservice 依赖-->
        <dependency>
            <groupId>org.springframework.boot</groupId>
            <artifactId>spring-boot-starter-web-services</artifactId>
        </dependency>
        <!--cxf 核心依赖-->
        <dependency>
            <groupId>org.apache.cxf</groupId>
            <artifactId>cxf-rt-transports-http</artifactId>
            <version>3.4.3</version>
        </dependency>
        <!--jaxws 协议的 cxf webservice依赖 -->
        <dependency>
            <groupId>org.apache.cxf</groupId>
            <artifactId>cxf-rt-frontend-jaxws</artifactId>
            <version>3.4.4</version>
        </dependency>
    </dependencies>
2. 创建接口, 在接口上添加@WebService, 在接口中的方法上添加@WebMethod
package com.example.demo.service;

import javax.jws.WebMethod;
import javax.jws.WebService;

//与接口中的命名空间一致,一般是接口的包名倒(要与实现类定义的值相同,否则利用动态代理创建客户端,无法调用接口方法)
@WebService(name = "HelloService", targetNamespace = "http://service.demo.example.com")
public interface HelloService {
    @WebMethod
    String hello();
	/*如果方法需要参数, 则使用@WebParam. 如:
	String hello(@WebParam(name = "name") String name);
	*/
}
3. 创建接口的实现类, 在类上添加@WebService和@Service
package com.example.demo.service.impl;

import com.example.demo.service.HelloService;
import org.springframework.stereotype.Service;

import javax.jws.WebService;

@Service
@WebService(serviceName = "HelloService", //这里用的是serviceName, 而不是name! 实现类的serviceName = name的name
        targetNamespace = "http://service.demo.example.com",// 与接口中的命名空间一致,一般是接口的包名倒着写.
        endpointInterface = "com.example.demo.service.HelloService")// 接口地址
public class HelloServiceImpl implements HelloService {
    @Override
    public String hello() {
        return "hello!";
    }
}
4. 编写WebService的配置类
package com.example.demo.config;

import com.example.demo.service.HelloService;
import org.apache.cxf.Bus;
import org.apache.cxf.bus.spring.SpringBus;
import org.apache.cxf.jaxws.EndpointImpl;
import org.apache.cxf.transport.servlet.CXFServlet;
import org.springframework.boot.web.servlet.ServletRegistrationBean;
import org.springframework.context.annotation.Bean;
import org.springframework.context.annotation.Configuration;

import javax.annotation.Resource;
import javax.xml.ws.Endpoint;

@Configuration
public class WebServiceConfig {

    @Resource
    private HelloService helloService;

    @Bean
    public ServletRegistrationBean cxfServlet() {
        return new ServletRegistrationBean(new CXFServlet(), "/ws/*");
    }

    @Bean(name = Bus.DEFAULT_BUS_ID)
    public SpringBus springBus() {
        return new SpringBus();
    }

    /**
     * 注册WebService接口到webservice服务
     *
     * @return
     */
    @Bean(name = "helloServiceEndpoint")
    public Endpoint setEndpoint() {
        EndpointImpl endpoint = new EndpointImpl(springBus(), helloService);
        endpoint.publish("/hello");//设置接口注册地址
        return endpoint;
    }
}
测试
访问 http://localhost:8080/ws 会显示WebService中的服务. 这个"ws"在上面代码中. return new ServletRegistrationBean(new CXFServlet(), "/ws/*");

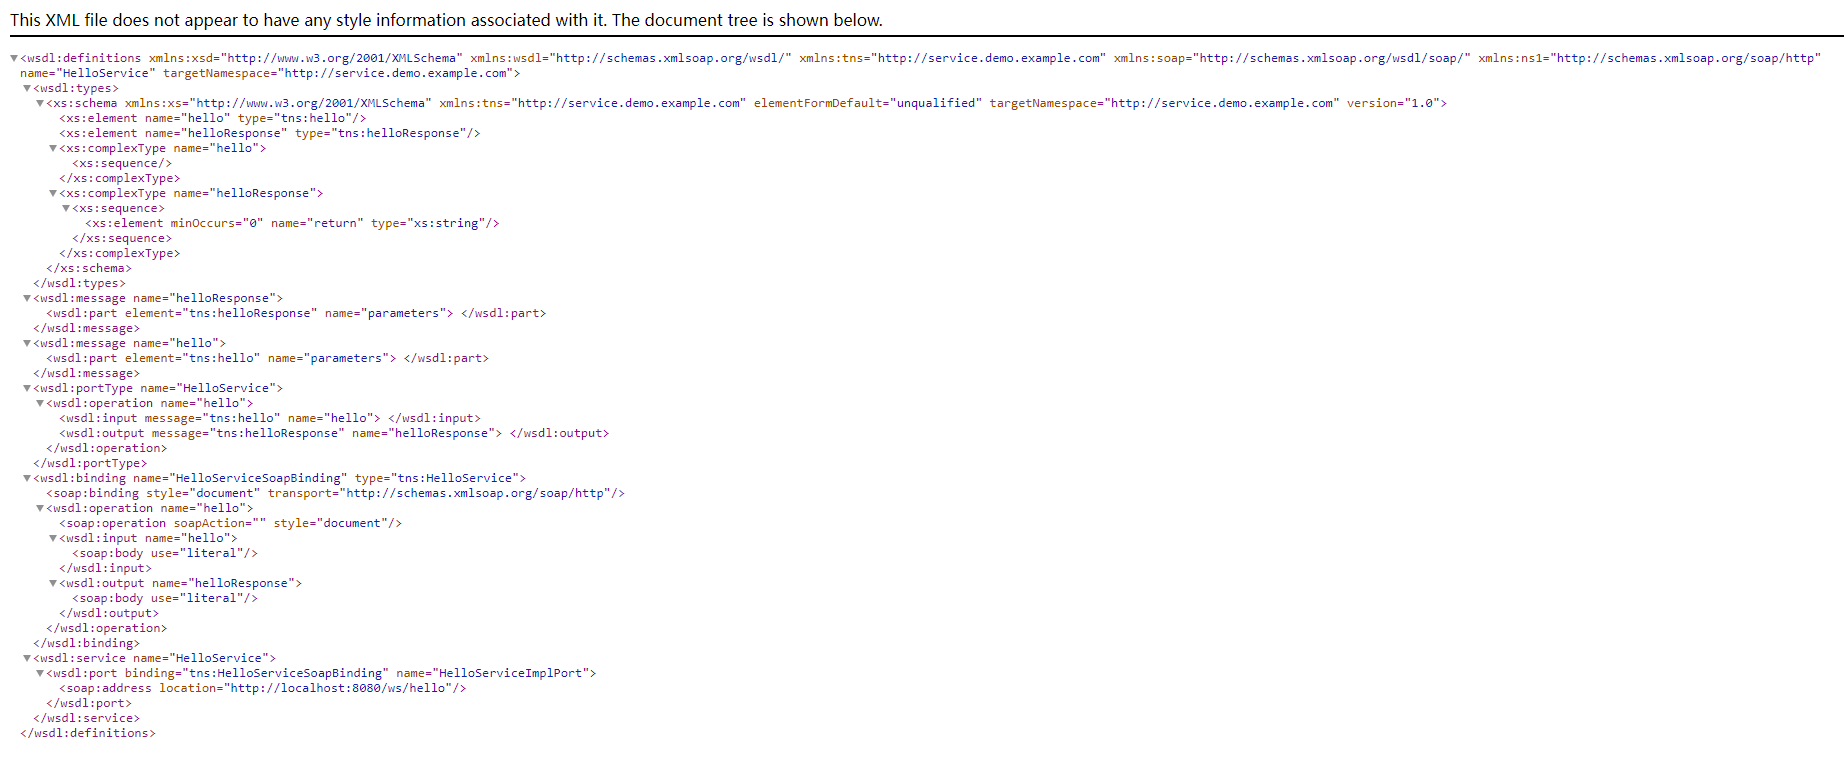
访问的地址为: http://localhost:8080/ws/hello?wsdl
注意, 需要添加"?wsdl".
得到的结果为:


【推荐】国内首个AI IDE,深度理解中文开发场景,立即下载体验Trae
【推荐】编程新体验,更懂你的AI,立即体验豆包MarsCode编程助手
【推荐】抖音旗下AI助手豆包,你的智能百科全书,全免费不限次数
【推荐】轻量又高性能的 SSH 工具 IShell:AI 加持,快人一步
· 震惊!C++程序真的从main开始吗?99%的程序员都答错了
· 【硬核科普】Trae如何「偷看」你的代码?零基础破解AI编程运行原理
· 单元测试从入门到精通
· 上周热点回顾(3.3-3.9)
· winform 绘制太阳,地球,月球 运作规律