OpenSSH9.6p1的EL7版本rpm安装包制作
CentOS7下rpm包安装方式升级至OpenSSH9.6p1安全版本
本文内容参考:https://mp.weixin.qq.com/s/XHyHJjwnO4P2XO5WUS4Ehw 进行实践完成
1.备份当前的YUM仓库配置文件,以防需要恢复:
cp /etc/yum.repos.d/CentOS-Base.repo /etc/yum.repos.d/CentOS-Base.repo.backup
2.配置网易yum源:
wget http://mirrors.163.com/.help/CentOS7-Base-163.repo -O /etc/yum.repos.d/CentOS-Base.repo
3.清除YUM缓存并使新的配置生效:
yum clean all
yum makecache
yum update
4.准备CentOS7编译环境
yum groupinstall -y "Development Tools"
yum install -y imake rpm-build pam-devel krb5-devel zlib-devel libXt-devel libX11-devel gtk2-devel
5.下载编译打包的shell脚本包并解压
GitHub地址:https://github.com/boypt/openssh-rpms
wget https://github.com/boypt/openssh-rpms/archive/refs/heads/main.zip
解压
unzip main.zip -d /opt
cd /opt/openssh-rpms-main/
代码结构
compile.sh:编译脚本
el5、el6、el7:对应CentOS5、6、7三个系统,编译相关的参数由SPECS目录下的openssh.spec控制;编译好的rpm包放在RPMS目录下
pullsrc.sh:openssh相关源码下载脚本
version.env:定义了openssh及openssl源码的版本信息
6.修改pullsrc.sh脚本参数
脚本23行修改为:source ./version.env
检查脚本中wget 是否有忽略 SSL 证书验证,选项为:--no-check-certificate (示例:wget --no-check-certificate $OPENSSLMIR/$OPENSSLSRC)
新版本一般不用修改,默认已添加
检查openssh源码中有没有ssh-copy-id
vim /opt/openssh-rpms-main/el7/SPECS/openssh.spec
搜索相关ssh-copy-id 参数,能搜到即有,新版本默认都有
7.拉取源码包,修改version.env,将变量中的版本修改为要升级的版本
通过脚本方式下载:./pullsrc.sh
自行下载:下载升级的版本包放到 downloads 目录下
openssh 源码包下载地址:http://ftp.openbsd.org/pub/OpenBSD/OpenSSH/portable/
openssl 源码包下载地址:https://www.openssl.org/source/
perl 源码包下载地址: https://www.perl.org/get.html

8.编译打包
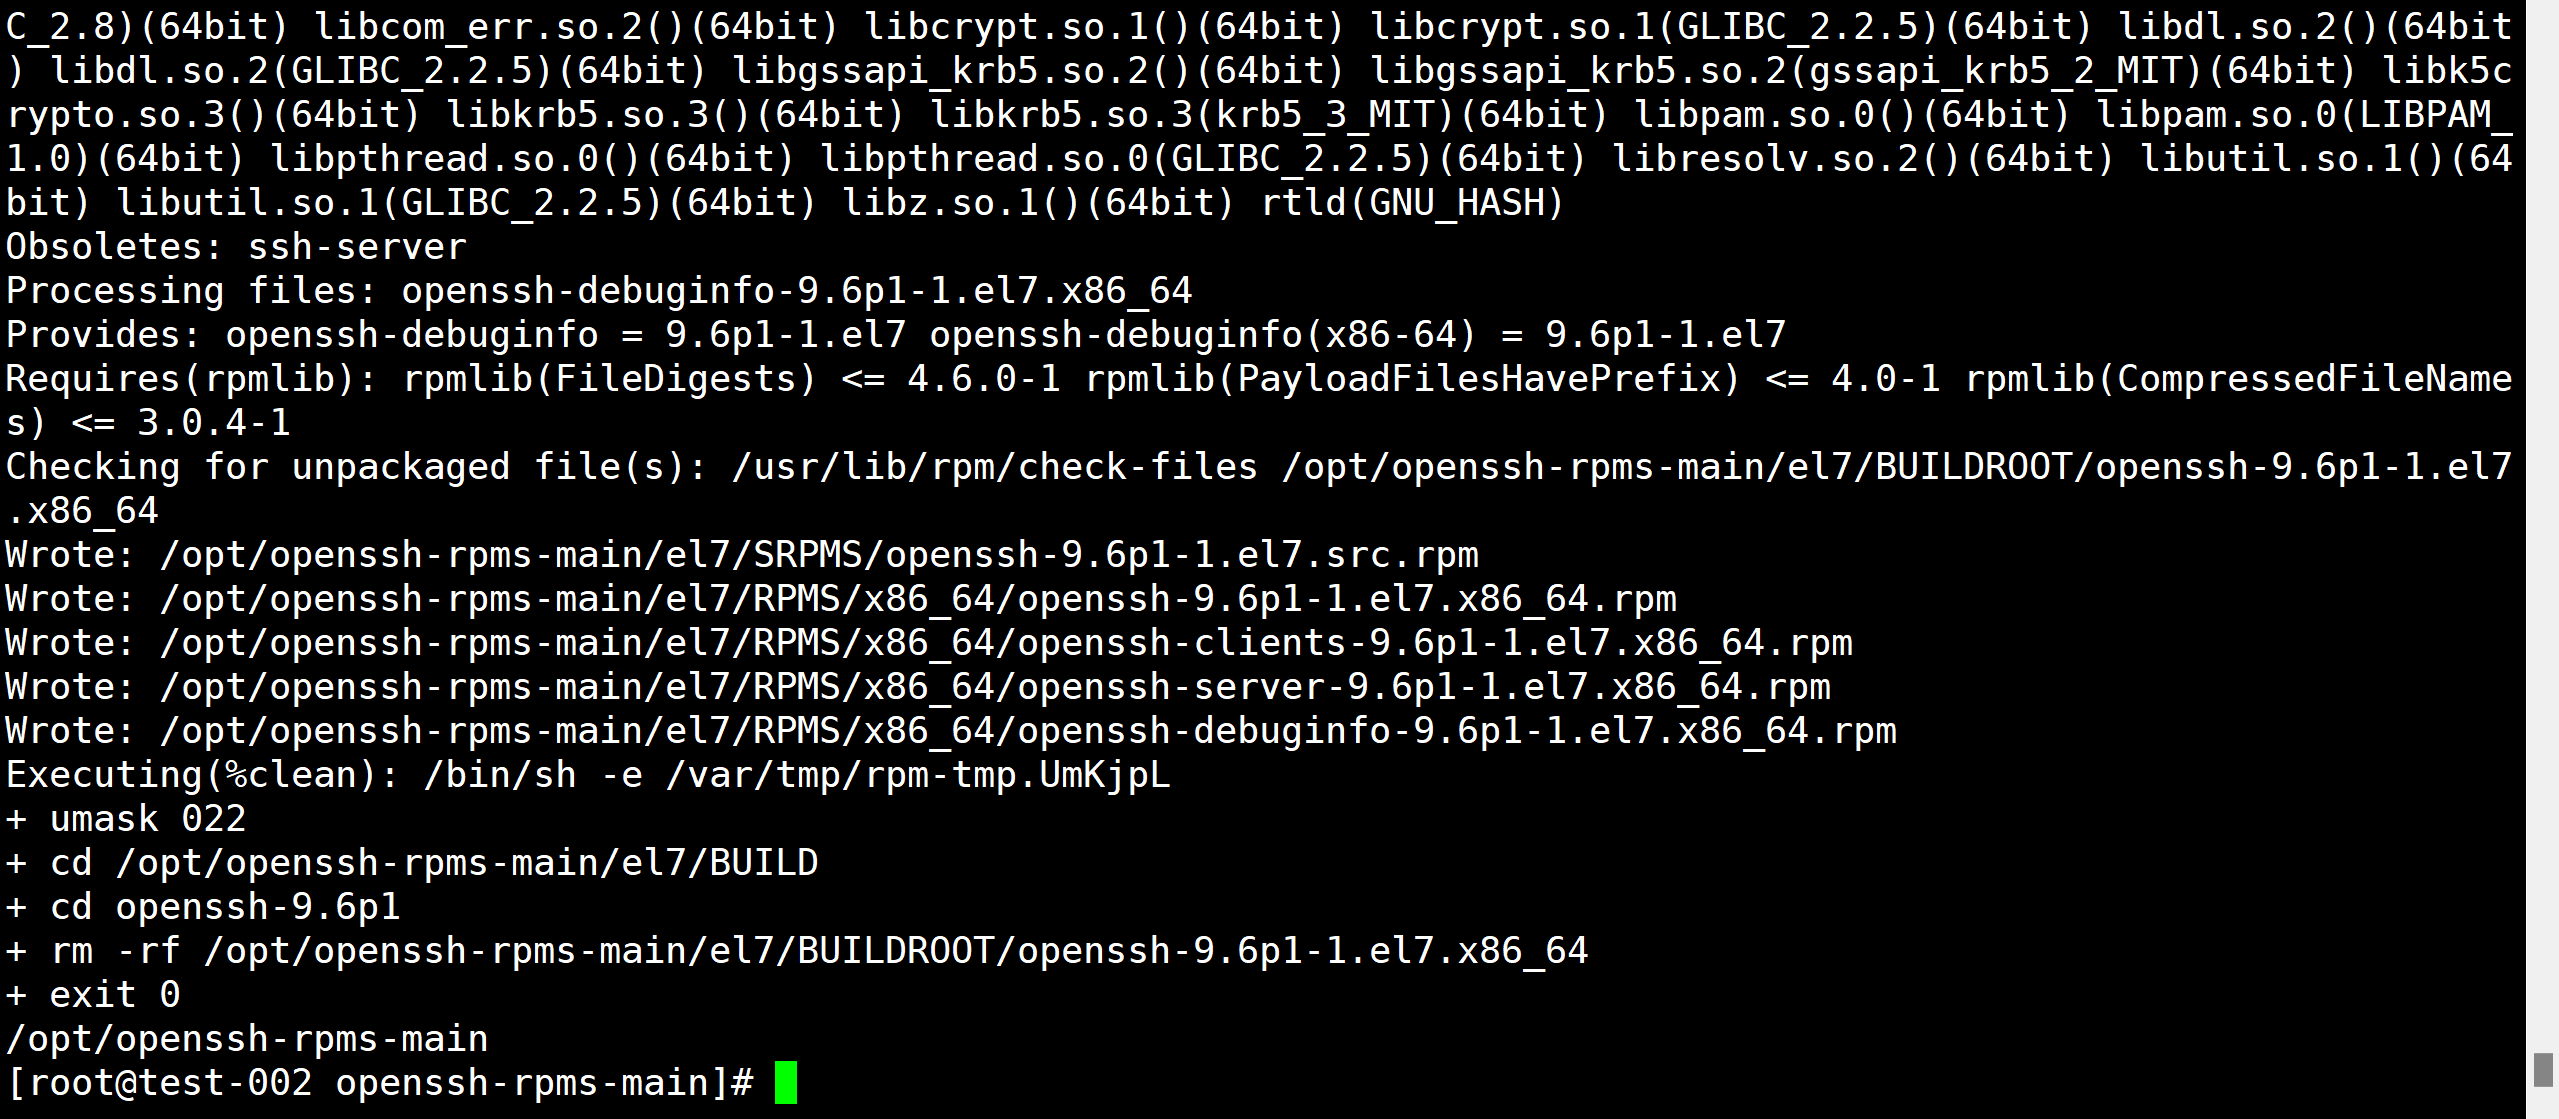
./compile.sh
执行结果如下:


9.升级测试
升级前备份配置文件/etc/ssh/sshd_config
cp /etc/ssh/sshd_config{,.bak}
安装rpm包进行升级,*debuginfo*.rpm 无需安装
# cd /opt/openssh-rpms-main/el7/RPMS/x86_64/
# yum localinstall ./*
# ssh -V
OpenSSH_9.6p1, OpenSSL 1.1.1w  11 Sep 2023

10.升级后重启sshd服务问题处理
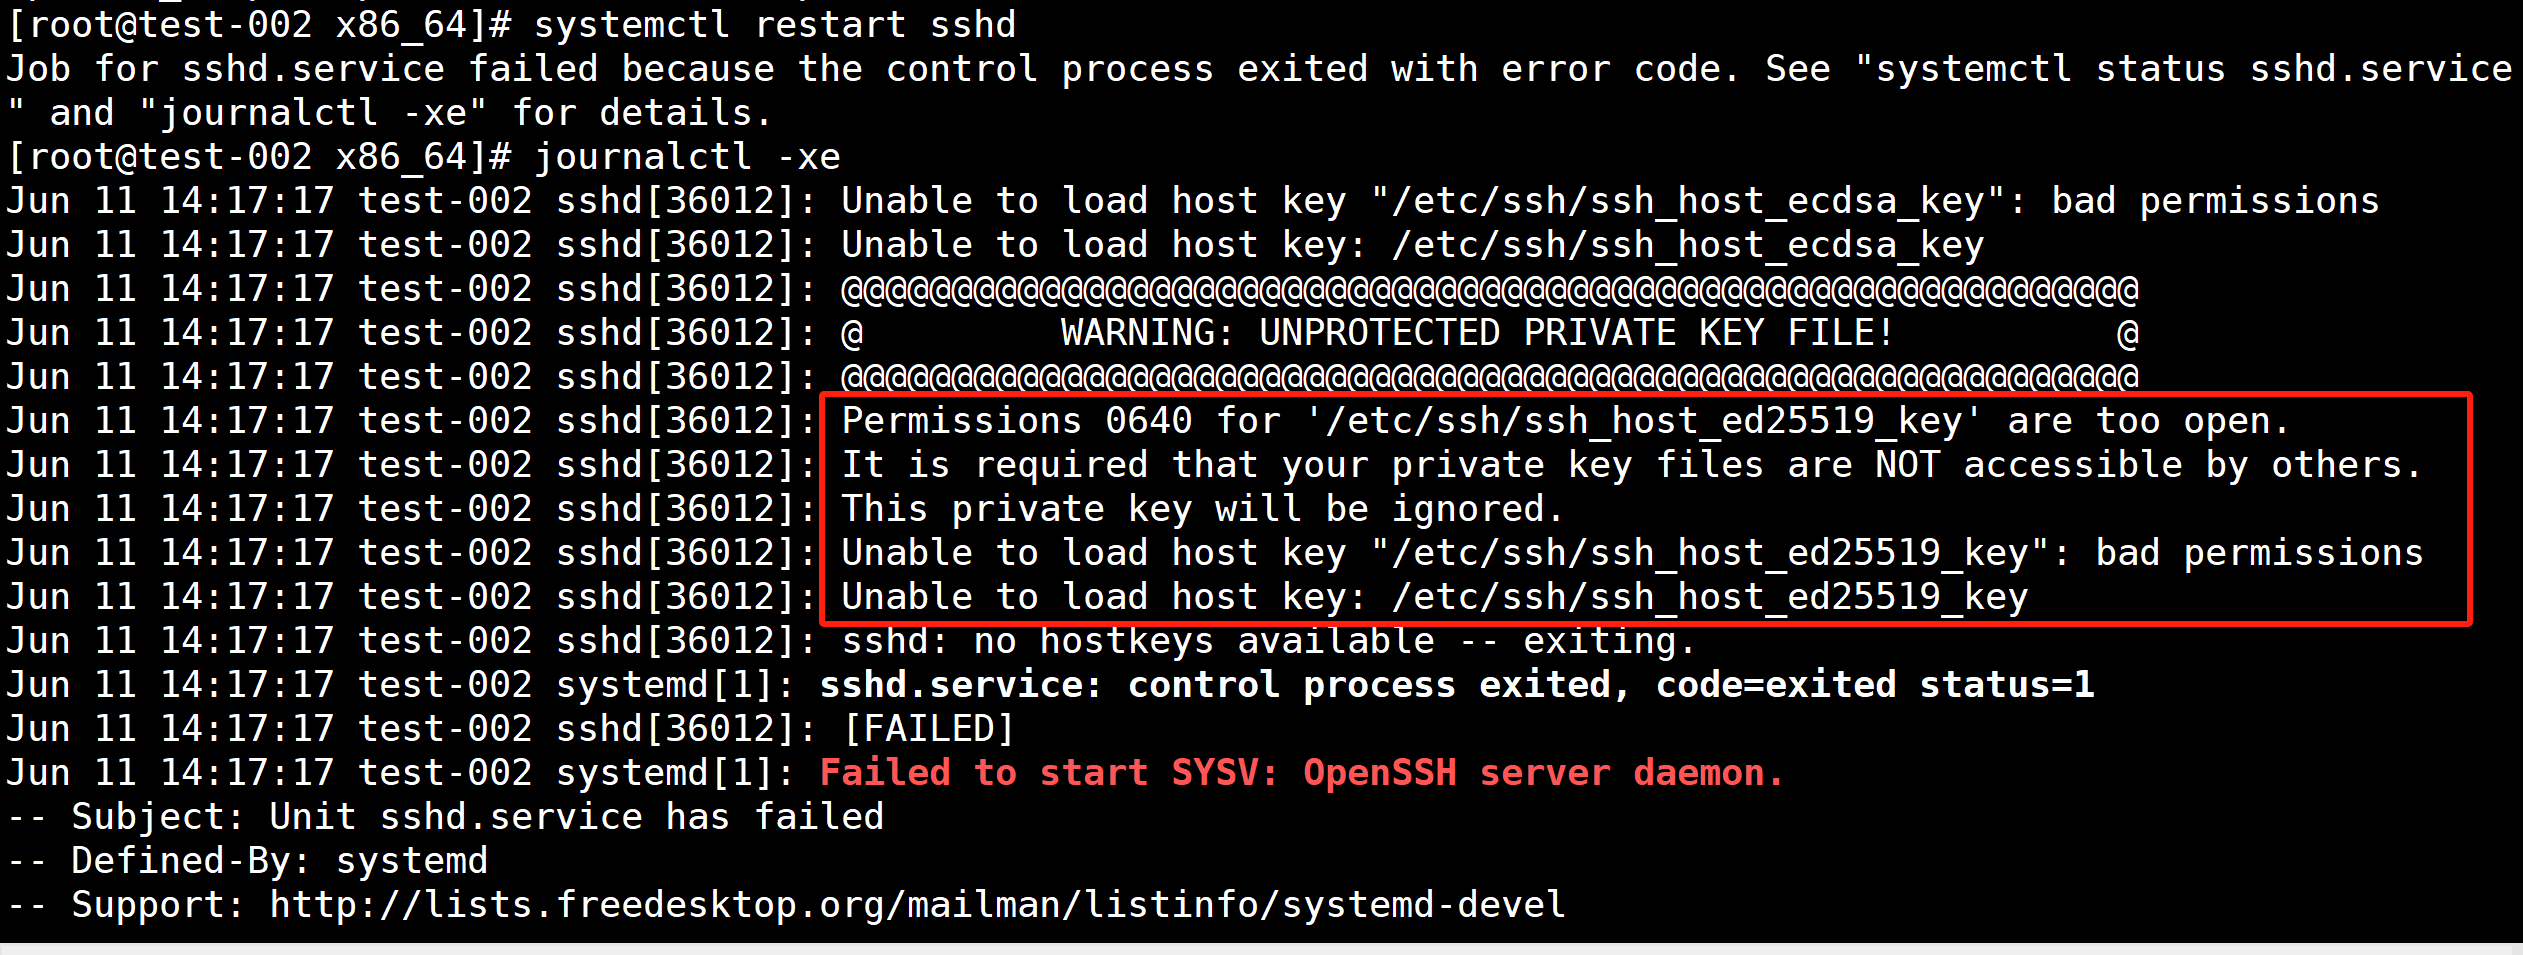
1)服务重启失败
# systemctl restart sshd
Job for sshd.service failed because the control process exited with error code. See "systemctl status sshd.service" and "journalctl -xe" for details.

提示权限不正确,私钥文件权限太开放,解决方法:
chmod 600 /etc/ssh/ssh_host_ecdsa_key
chmod 600 /etc/ssh/ssh_host_ed25519_key
2)root登录被拒绝
日志内容:

检查 /etc/ssh/sshd_config 配置文件,不允许root登录,解决方法:
vim /etc/ssh/sshd_config
PermitRootLogin yes ## 打开这行注释,保存退出重启sshd服务即可


 浙公网安备 33010602011771号