

浅谈如何使用Scrapligo控制网络设备
转自:https://zhuanlan.zhihu.com/p/641358349
最近拥抱了一下Golang,发现对比Python,Golang对于函数的输入,输出都有较为严格的要求,可读性会比Python好一点点,写Python的时候确实很爽,但是后续维护代码的时候没有什么安全感,主要体现在函数的输入输出不知道是个啥。公司里的代码大部分函数都没有做类型规定。错误处理方面,抛出err的方式用习惯了也还好。对比Java这种到哪都要挂一个JVM以及一堆环境的语言,Golang编译成一下就可以打个包上k8s管理了。更加方便。
叠个甲:没有拉踩的意思,我没写过JAVA。只是觉得相对来说会更加方便。没有哪个语言不好的意思。我很菜,JAVA环境都搭不起来。电脑也跑不动。
先看官方页面
项目地址在:这里
目录结构清晰明了
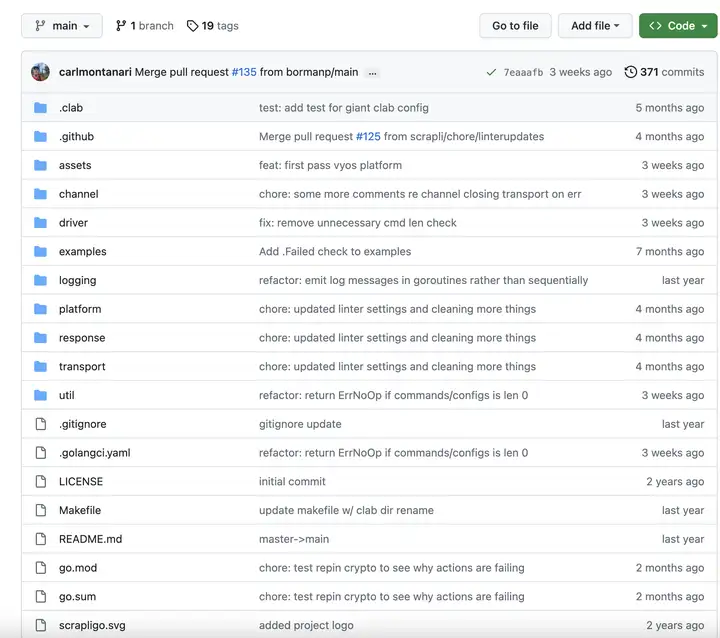
不过和python不同的是,相对于python有community版本的,go好像并没有什么人提供community版。他自己支持的设备在assets/platforms里。
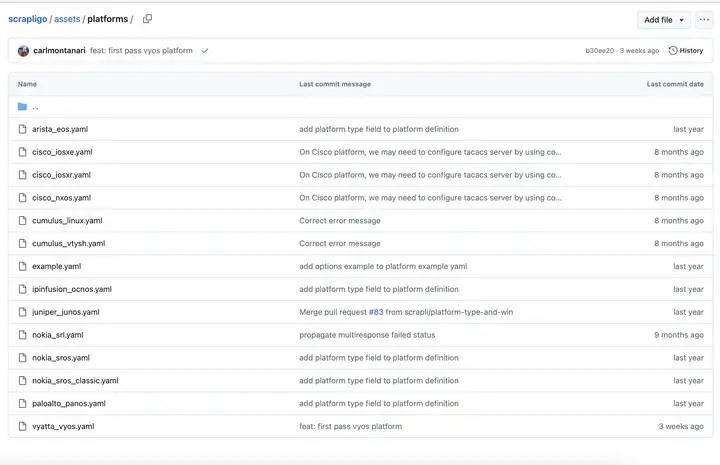
如上图,可以看到并没有huawei或者hp的字样。
当我正想找这个老哥问问的时候,发现issue中有人和我有同样的问题
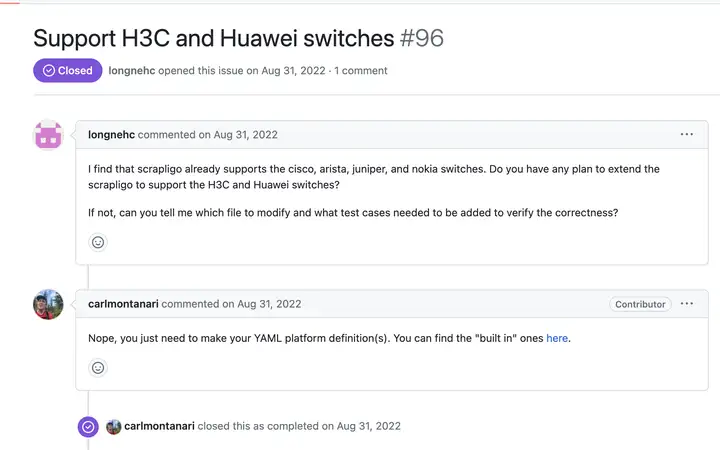
这个here就是assets/platforms的页面。大概意思是现在需要自己写yaml文件,配置一些参数然后就相当于自己定义了一个平台(Platform)了。平台理解为厂商就行了。
看看官方用例
官方用例的代码长这样:
package main

import (
  "fmt"
  "github.com/scrapli/scrapligo/driver/options"
  "github.com/scrapli/scrapligo/platform"
)

func main() {
    p, err := platform.NewPlatform(
        // cisco_iosxe refers to the included cisco iosxe platform definition
        "cisco_iosxe",
        "sandbox-iosxe-latest-1.cisco.com",
        options.WithAuthNoStrictKey(),
        options.WithAuthUsername("developer"),
        options.WithAuthPassword("C1sco12345"),
    )
    if err != nil {
        fmt.Printf("failed to create platform; error: %+v\n", err)

		return
    }

    d, err := p.GetNetworkDriver()
    if err != nil {
        fmt.Printf("failed to fetch network driver from the platform; error: %+v\n", err)

        return
    }

    err = d.Open()
    if err != nil {
        fmt.Printf("failed to open driver; error: %+v\n", err)

        return
    }

    defer d.Close()

    r, err := d.SendCommand("show version")
    if err != nil {
        fmt.Printf("failed to send command; error: %+v\n", err)
        return
    }

    fmt.Printf(
        "sent command '%s', output received (SendCommand):\n %s\n\n\n",
        r.Input,
        r.Result,
    )
}
大概意思是先定义平台,然后用GetNetworkDriver方法拿到驱动。之后就可以发命令了。
那么我们先看看platform.NewPlatform是啥
// NewPlatform returns an instance of Platform from the platform definition f where f may be
// a string representing a filepath or URL, or a byte slice of an already loaded YAML definition.
// The host and any provided options are stored and will be applied when fetching the generic or
// network driver via the GetGenericDriver or GetNetworkDriver methods.
func NewPlatform(f interface{}, host string, opts ...util.Option) (*Platform, error) {
	var pd *Definition

	var err error

	switch t := f.(type) {
	case string:
		pd, err = loadPlatformDefinition(t)
	case []byte:
		pd, err = loadPlatformDefinitionFromBytes(t)
	}

	if err != nil {
		return nil, err
	}

	p := pd.Default
	p.platformType = pd.PlatformType

	err = setDriver(host, p, opts...)
	if err != nil {
		return nil, err
	}

	return p, nil
}
可以看到这个NewPlatform是接受一个interface(理解为万能类型就可以了,interface可以是任何类型),一个host和一些选项。回复的是一个Platform类型。如下所示
type Platform struct {
	platformType string

	// DriverType generic||network
	DriverType string `json:"driver-type" yaml:"driver-type"`

	FailedWhenContains []string       `json:"failed-when-contains" yaml:"failed-when-contains"`
	OnOpen             onXDefinitions `json:"on-open"              yaml:"on-open"`
	OnClose            onXDefinitions `json:"on-close"             yaml:"on-close"`

	PrivilegeLevels              network.PrivilegeLevels `json:"privilege-levels"                yaml:"privilege-levels"`
	DefaultDesiredPrivilegeLevel string                  `json:"default-desired-privilege-level" yaml:"default-desired-privilege-level"`
	NetworkOnOpen                onXDefinitions          `json:"network-on-open"                 yaml:"network-on-open"`
	NetworkOnClose               onXDefinitions          `json:"network-on-close"                yaml:"network-on-close"`

	Options optionDefinitions `json:"options" yaml:"options"`

	genericDriver *generic.Driver
	networkDriver *network.Driver
}
然后如果这个传进去的变量f是个字符的话他会使用loadPlatformDefinition这个函数
func loadPlatformDefinition(f string) (*Definition, error) {
	b, err := loadPlatformDefinitionFromAssets(f)
	if err != nil {
		b, err = util.ResolveAtFileOrURL(f)
		if err != nil {
			return nil, err
		}
	}

	return loadPlatformDefinitionFromBytes(b)
}
其实本质就是读一个yaml文件
func loadPlatformDefinitionFromAssets(f string) ([]byte, error) {
	if !strings.HasSuffix(f, ".yaml") {
		f += ".yaml"
	}

	return assets.Assets.ReadFile(fmt.Sprintf("platforms/%s", f))
}
那么理论上来说我们抄一抄这个yaml文件就行了。
正好官方有一个example.yaml。我们来看看啥样的。
自定义yaml文件
先看看官方的example。
---
# platform-type is the "name" or "type" of the platform -- it should match the name of the yaml file
# if it is an embedded asset, it should be of the format vendor_os, i.e. cisco_iosxe, or nokia_srl.
platform-type: 'scrapligo_example'
default:
  # driver-type can be either "generic" or "network" for the corresponding scrapli driver base class
  driver-type: 'network'

  # privilege-levels is a map/dict of privilege level name : privilege level data
  privilege-levels:
    example:
      name: 'example'
      # pattern represents the regex that is used to map a prompt to a privilege level
      pattern: '(?im)^[\w.\-@/:]{1,63}\([\w.\-@/:+]{0,32}\)#$'
      # not contains is a list of strings that if seen in the prompt means we are *not* in this prompt
      # level -- this is useful to make regexs simpler and to not need lookarounds (because cant in go
      # with std library anyway)
      not-contains:
        - 'tcl)'
      # the "previous" or "lower" privilege level that you normally would deescalate to from this
      # priv
      previous-priv: 'privilege-exec'
      # the command used to deescalate from this privilege level to the "previous-priv"
      deescalate: 'end'
      # the command used to escalate *into* this privilege level (from the previous-priv)
      escalate: 'configure terminal'
      # true/false there is escalation authentication (like enable secret)
      escalate-auth: false
      # option regex pattern to use to find the escalation prompt
      escalate-prompt:

  # default desired priv is the "main" privilege level scrapli operates in -- the one you would
  # normally send "commands" (not configs) in, in cisco/eos land that is privilege-exec
  default-desired-privilege-level: 'privilege-exec'

  # a list of strings that if seen in output indicates the command/config failed
  failed-when-contains:
    - '% Ambiguous command'
    - '% Incomplete command'
    - '% Invalid input detected'
    - '% Unknown command'

  # textfsm-platform - only applicable in scrapli python, maps this platform to the ntc-templates
  # platform string for ntc-templates/textfsm integration
  textfsm-platform: 'cisco_iosxe'

  # list of operations to run in the "on-open" phase of connection establishment. this can include as
  # many operations as you'd like, or of course you could just do this in code manually yourself. the
  # idea here is to disable paging and any fancy prompt things before doing "real" scrapli work.
  # the available operation types are:
  #   channel.write:
  #     description:
  #       writes data to the channel at whatever privilege level you are currently in. does not send
  #       a return/new-line, just writes what you ask it to
  #     args:
  #       input: the input to write
  #   channel.return:
  #     description: sends a return, thats it
  #   acquire-priv:
  #     description: acquire a privilege level
  #     args:
  #       target: the target privilege level name, if not provided will be default desired privilege
  #   driver.send-command:
  #     description: send a command like "normal"
  #     args:
  #       command: the command to send
  network-on-open:
    - operation: 'acquire-priv' # targets default desired priv by default
    - operation: 'driver.send-command'
      command: 'terminal width 512'
    - operation: 'driver.send-command'
      command: 'terminal length 0'

  # list of any operations to run in the "on-close" phase of things. typically this will just be
  # something like "exit" and a return to terminate the session
  network-on-close:
    - operation: 'acquire-priv'
    - operation: 'channel.write'
      input: 'exit'
    - operation: 'channel.return'

  # options is a list of options that contain a option name and a value, see platform/options.go
  # for the available options
  options:
    - option: port
      value: 2022
注释其实写的很明白了 我们主要关注以下几个点。这里我直接把我自己写好的华为yaml的贴出来供大家参考
---

platform-type: 'huawei'
default:
  driver-type: 'network'
  privilege-levels:
    exec:
      name: 'exec'
      pattern: '<[~\w.\-/:\+]{1,100}>'
      deescalate:
      escalate:
      escalate-auth: false
      escalate-prompt:
    configuration:
      name: 'configuration'
      pattern: '\[[\*~\w.\-/:\+]{1,100}\]\s?'
      previous-priv: 'exec'
      deescalate: 'quit'
      escalate: 'system-view'
      escalate-auth: false
      escalate-prompt:
  # default desired priv is the "main" privilege level scrapli operates in -- the one you would
  # normally send "commands" (not configs) in, in cisco/eos land that is privilege-exec
  default-desired-privilege-level: 'exec'

  # a list of strings that if seen in output indicates the command/config failed
  failed-when-contains:
    - 'Error: Unrecognized command found'

  # textfsm-platform - only applicable in scrapli python, maps this platform to the ntc-templates
  # platform string for ntc-templates/textfsm integration
  textfsm-platform: 'huawei'

  # list of operations to run in the "on-open" phase of connection establishment. this can include as
  # many operations as you'd like, or of course you could just do this in code manually yourself. the
  # idea here is to disable paging and any fancy prompt things before doing "real" scrapli work.
  # the available operation types are:
  #   channel.write:
  #     description:
  #       writes data to the channel at whatever privilege level you are currently in. does not send
  #       a return/new-line, just writes what you ask it to
  #     args:
  #       input: the input to write
  #   channel.return:
  #     description: sends a return, thats it
  #   acquire-priv:
  #     description: acquire a privilege level
  #     args:
  #       target: the target privilege level name, if not provided will be default desired privilege
  #   driver.send-command:
  #     description: send a command like "normal"
  #     args:
  #       command: the command to send
  network-on-open:
    - operation: 'driver.send-command'
      command: 'screen-length 0 temporary'

  # list of any operations to run in the "on-close" phase of things. typically this will just be
  # something like "exit" and a return to terminate the session

  # options is a list of options that contain a option name and a value, see platform/options.go
  # for the available options
#  options:
#    - option: port
# value: 22- platform-type:平台的名字。这个随意。
- driver-type: 官方定义了几种driver-type。我知道的有network和netconf。这边通过ssh或者telnet登上去就用network吧
- privilege-levels: 进去以后是什么权限,这个自己定义就行了
- exec: 进去以后是exec权限,华为好像叫用户视图和配置视图?名字反正随意 你可以叫user或者system之类的。只是个名字而已
- pattern: 在这个模式下的提示符正则。比如华为一进去是<设备名> 输入system-view以后是[~设备名]。这个要注意。
- deescalate: 退出这个视图的命令。因为再退就退出去了 。所以没有
- escalate: 提权到这个视图的命令。因为这是一进去的默认模式,权限最低。不需要提权。所以没有。
- escalate-auth: 提权要不要输密码。不用。比如说思科的你进去要输密码enable还要输一次密码,这个时候提权就要密码了,这个参数要是true
- escalate-prompt: 提权的提示符,华为没有。比如说思科你敲enable以后他会显示Password: 那么这个需要用正则匹配,好让程序知道要输入密码了。
自己试一试
直接上代码
package main

import (
	"fmt"
	"github.com/scrapli/scrapligo/driver/options"
	"github.com/scrapli/scrapligo/platform"
	"regexp"
)

func main() {
	usernamepattern, _ := regexp.Compile("Username:")
	passwordpattern, _ := regexp.Compile("Password:")
	p, err := platform.NewPlatform("platforms/vrp.yaml", "设备ip地址", options.WithAuthUsername("用户名"),
		options.WithAuthPassword("密码"), options.WithAuthNoStrictKey(), options.WithTransportType("telnet"),
		options.WithPort(23), options.WithUsernamePattern(usernamepattern), options.WithPasswordPattern(passwordpattern))
	if err != nil {
		fmt.Println("1111")
		fmt.Println(err)
	}
	d, err := p.GetNetworkDriver()
	if err != nil {
		fmt.Println("2222")
		fmt.Println(err)
	}
	err = d.Open()
	if err != nil {
		fmt.Println("4444")
		fmt.Println(err)
	}
	d.OnOpen(d)
	r, _ := d.SendCommand("display version")
	s, _ := d.SendConfig("display version")
	fmt.Println(r.Result)
	fmt.Println(s.Result)
	d.Close()
}
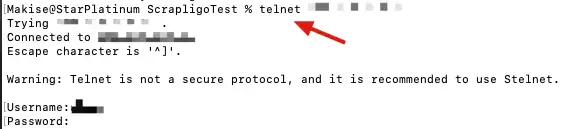
结果:
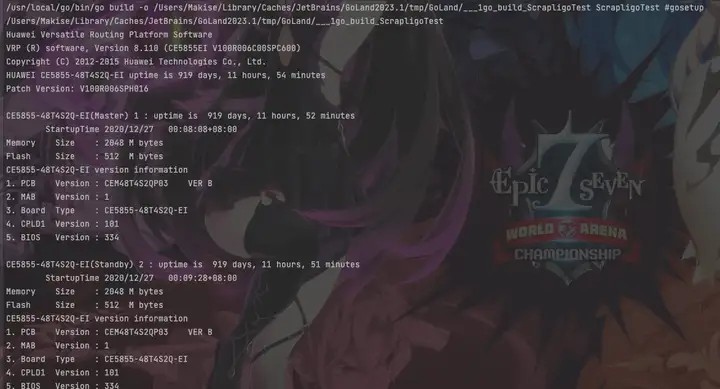
其实就是两次display version。
至于下面这些选项,
options.WithUsernamePattern
options.WithPasswordPattern
options.WithTransportType("telnet")
options.WithPort(23)
其实就是登录的参数。办公网把SSH干掉了所以我只能用telnet测试了。端口号指定一下,然后着重说一下options.WithUsernamePattern和options.WithPasswordPattern这两个参数。你需要写两个正则告诉程序什么时候输入用户名和密码。当他匹配到options.WithUsernamePattern的内容的时候他会输入用户名并且会回车。密码同理。
telnet登录和ssh登录不一样。这里我只是做测试写了个最简单的。读者感兴趣可以自行尝试其他的。

PS:正则的坑比较多。最好自己先测一下能否匹配上


【推荐】国内首个AI IDE,深度理解中文开发场景,立即下载体验Trae
【推荐】编程新体验,更懂你的AI,立即体验豆包MarsCode编程助手
【推荐】抖音旗下AI助手豆包,你的智能百科全书,全免费不限次数
【推荐】轻量又高性能的 SSH 工具 IShell:AI 加持,快人一步
· DeepSeek 开源周回顾「GitHub 热点速览」
· 物流快递公司核心技术能力-地址解析分单基础技术分享
· .NET 10首个预览版发布:重大改进与新特性概览!
· AI与.NET技术实操系列(二):开始使用ML.NET
· 单线程的Redis速度为什么快?