voc数据集转换成coco数据集

image

前言

作为本系列第一篇文章,我分享一个模型训练过程中常用到的工具,voc数据集转coco数据集。
在我做一些算法学习的时候,需要将voc数据集转coco放到yolo当中训练,但是在网上找了很多个都不是很好用,要不是会报错,要不是根本不能跑起来。为了节省在学习算法小伙伴的时间,我分享我在工作常常用的voc转coco的脚本。

voc 格式分析

为了能够更好理解脚本,首先对voc数据集的格式做一个简单分析。
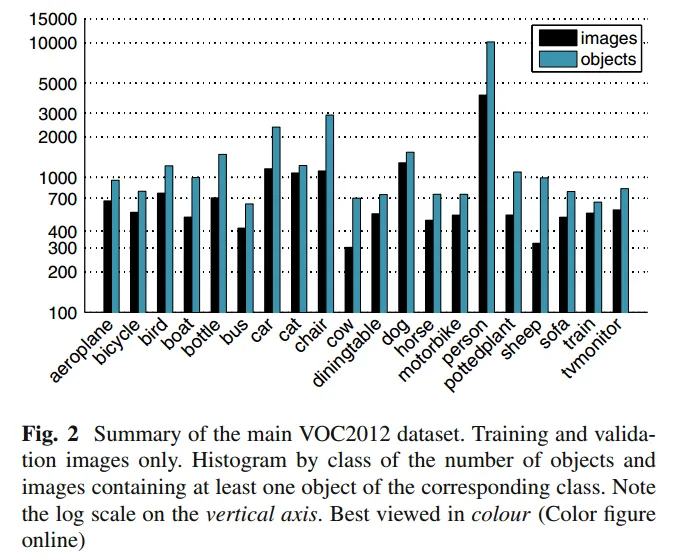
voc 全称 The PASCAL Visual Object Classes,它由Visual Object Classes(可视对象类)和挑战(Challenge)等竞赛项目开发, 开始于2005年,结束于2012年最后一届 。
VOC数据集包含许多不同类型的图像,每个图像都标注了一些可视对象,如人,汽车,狗等。这些标注包括每个对象的位置,大小和类别等信息。
常见的voc数据集是voc2007 和voc 2012,当然在模型训练过程肯定都会自己标注数据集,导出为voc格式。
image

voc 数据集的格式:

<annotation>
  <folder>17</folder> # 图片所处文件夹
  <filename>77258.bmp</filename> # 图片名
  <path>~/frcnn-image/61/ADAS/image/frcnn-image/17/77258.bmp</path>
  <source>  #图片来源相关信息
    <database>Unknown</database>  
  </source>
  <size> #图片尺寸
    <width>640</width>
    <height>480</height>
    <depth>3</depth>
  </size>
  <segmented>0</segmented>  #是否有分割label
  <object> 包含的物体
    <name>car</name>  #物体类别
    <pose>Unspecified</pose>  #物体的姿态
    <truncated>0</truncated>  #物体是否被部分遮挡(>15%)
    <difficult>0</difficult>  #是否为难以辨识的物体, 主要指要结体背景才能判断出类别的物体。虽有标注, 但一般忽略这类物体
    <bndbox>  #物体的bound box
      <xmin>2</xmin>     #左
      <ymin>156</ymin>   #上
      <xmax>111</xmax>   #右
      <ymax>259</ymax>   #下
    </bndbox>
  </object>
</annotation>

重要的信息包括:filename, size, object 等。除此之外,还有一个主要注意的点就是标注的坐标,xmin,ymin,xmax,ymax是标注的四个角,分别代表:

  • xmin: 左上角x轴坐标
  • ymin:左上角y周坐标
  • xmax: 右下角x轴坐标
  • ymax:右下角y轴坐标

coco 格式分析

COCO的 全称是Common Objects in COntext,是微软团队提供的一个可以用来进行图像识别的数据集。MS COCO数 据集中的图像分为训练、验证和测试集。

假设有以下两个图像文件:

  • image1.jpg
  • image2.jpg

coco格式数据集:annotations.json

{
    "images": [
        {
            "id": 1,
            "file_name": "image1.jpg",
            "width": 640,
            "height": 480
        },
        {
            "id": 2,
            "file_name": "image2.jpg",
            "width": 800,
            "height": 600
        }
    ],
    "annotations": [
        {
            "id": 1,
            "image_id": 1,
            "category_id": 1,
            "bbox": [50, 50, 100, 100],
            "area": 10000,
            "segmentation": [ 
                [
                    50, 50, 50, 150, 150, 50
                ]
            ],
            "iscrowd": 0
        },
        {
            "id": 2,
            "image_id": 2,
            "category_id": 2,
            "bbox": [150, 200, 200, 150],
            "area": 30000,
            "segmentation": [
                [
                    150, 200, 150, 350, 350, 200
                ]
            ],
            "iscrowd": 0
        }
    ],
    "categories": [
        {
            "id": 1,
            "name": "cat",
            "supercategory": "animal"
        },
        {
            "id": 2,
            "name": "dog",
            "supercategory": "animal"
        }
    ]
}

coco 数据集字段解析

coco 数据集是一个json文件,一共包括5个部分。

{
    "info": info,               # 数据集的基本信息
    "licenses": [license],      # 许可证
    "images": [image],          #  图片信息,名字和宽高
    "annotations": [annotation],  # 标注信息 
    "categories": [category]    # 标签信息
}
info{                           # 数据集信息描述
    "year": int,                # 数据集年份
    "version": str,             # 数据集版本
    "description": str,         # 数据集描述
    "contributor": str,         # 数据集提供者
    "url": str,                 # 数据集下载链接
    "date_created": datetime,   # 数据集创建日期
}
license{
    "id": int,
    "name": str,
    "url": str,
} 
image{      # images是一个list,存放所有图片(dict)信息。image是一个dict,存放单张图片信息 
    "id": int,                  # 图片的ID编号(每张图片ID唯一)
    "width": int,               # 图片宽
    "height": int,              # 图片高
    "file_name": str,           # 图片名字
    "license": int,             # 协议
    "flickr_url": str,          # flickr链接地址
    "coco_url": str,            # 网络连接地址
    "date_captured": datetime,  # 数据集获取日期
}
annotation{ # annotations是一个list,存放所有标注(dict)信息。annotation是一个dict,存放单个目标标注信息。
    "id": int,                  # 目标对象ID(每个对象ID唯一),每张图片可能有多个目标
    "image_id": int,            # 对应图片ID
    "category_id": int,         # 对应类别ID,与categories中的ID对应
    "segmentation": RLE or [polygon],   # 实例分割,对象的边界点坐标[x1,y1,x2,y2,....,xn,yn]
    "area": float,              # 对象区域面积
    "bbox": [xmin,ymin,width,height], # 目标检测,对象定位边框[x,y,w,h]
    "iscrowd": 0 or 1,          # 表示是否是人群
}
categories{                     # 类别描述
    "id": int,                  # 类别对应的ID(0默认为背景)
    "name": str,                # 子类别名字
    "supercategory": str,       # 主类别名字
}

需要注意的是coco数据集标注的坐标。xmin ymin width height和voc有很大差异,分别代表:

  • xmin 左上角x轴坐标
  • ymin 左上角y轴坐标
  • width 图片像素宽
  • heidht 图片像素高

脚本使用

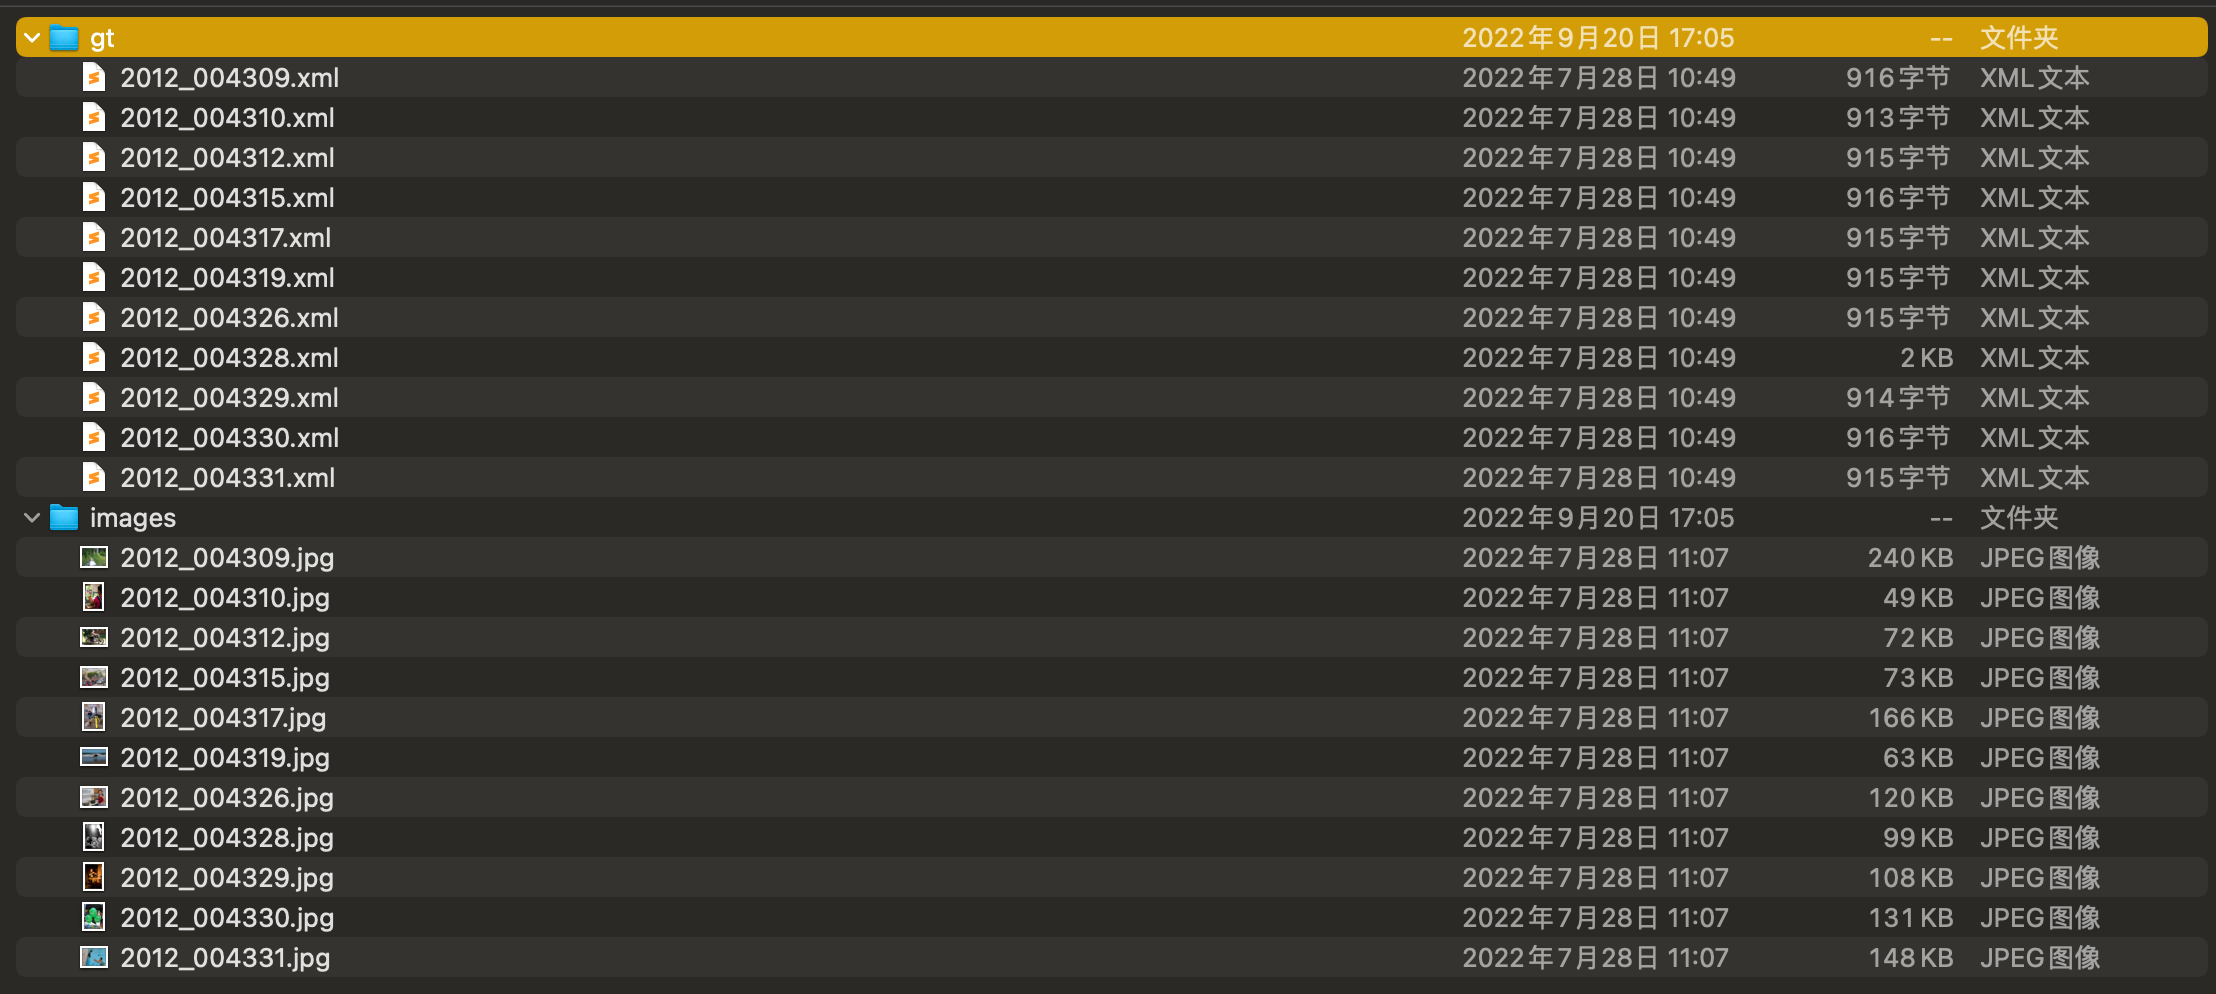
通常在yolo模型检测训练时需要的数据集是coco格式或者yolo格式,那么就需要将voc转成coco。通常在生成任务中实用的voc数据集的文件和官方数据集格式略有差异。所以首先需要说明,使用该脚本之前需要将voc文件调整成如下格式:
image

数据集包含两个文件夹,包括gt和images。gt是xml文件保存的目录,images是图片保存的目录。而且xml文件和images同名,只是后缀不一样。

import os
import json
from xml.etree import ElementTree as ET
from collections import defaultdict


class VocToCoco:

    def __init__(self, voc_gt_dir: str, output_coco_path: str) -> None:
        self.voc_gt_dir = voc_gt_dir
        self.output_coco_path = output_coco_path
        self.categories_count = 1
        self.images = []
        self.categories = {}
        self.annotations = []
        self.data = defaultdict(list)

    # 图片处理
    def images_handle(self, root: ET.Element, img_id: int) -> None:
        filename = root.find('filename').text.strip()
        width = int(root.find('size').find('width').text)
        height = int(root.find('size').find('height').text)

        self.images.append({
            'id': int(img_id),
            'file_name': filename,
            'height': height,
            'width': width,
        })

    # 标签转换
    def categories_handle(self, category: str) -> None:
        if category not in self.categories:
            self.categories[category] = {'id': len(self.categories) + 1, 'name': category}

    # 标注转换
    def annotations_handle(self, bbox: ET.Element, img_id: int, category: str) -> None:
        x1 = int(bbox.find('xmin').text)
        y1 = int(bbox.find('ymin').text)
        x2 = int(bbox.find('xmax').text)
        y2 = int(bbox.find('ymax').text)

        self.annotations.append({
            'id': self.categories_count,
            'image_id': int(img_id),
            'category_id': self.categories[category].get('id'),
            'bbox': [x1, y1, x2 - x1, y2 - y1],
            'iscrowd': 0
        })
        self.categories_count += 1

    def parse_voc_annotation(self) -> None:

        for img_id, filename in enumerate(os.listdir(self.voc_gt_dir), 1):
            xml_file = os.path.join(self.voc_gt_dir, filename)
            tree = ET.parse(xml_file)
            root = tree.getroot()

            self.images_handle(root, img_id)

            for obj in root.iter('object'):
                category = obj.find('name').text
                self.categories_handle(category)

                bbox = obj.find('bndbox')
                self.annotations_handle(bbox, img_id, category)

        self.data['images'] = self.images
        self.data['categories'] = list(self.categories.values())
        self.data['annotations'] = self.annotations

        with open(self.output_coco_path, 'w') as f:
            json.dump(self.data, f)


if __name__ == "__main__":
    # Example usage
    voc_gt_dir = 'person_验证集_voc/gt'
    img_dir = 'person_验证集_voc/images'
    output_coco_path = 'person_验证集_voc/annocation_coco.json'

    voc2coco = VocToCoco(voc_gt_dir, output_coco_path)
    voc2coco.parse_voc_annotation()

脚本的主要逻辑:

  1. 遍历所有voc数据集
  2. 获取所有标签信息,去重保存在self.categories
  3. 获取所有图片元数据,保存在self.images
  4. 获取所有标注信息,保存在self.annotations
  5. 将以上三个容器保存到字典中,并将字典保存为一个json文件
posted @ 2024-04-27 21:22  金色旭光  阅读(842)  评论(0编辑  收藏  举报