【WPF】MVVM实践(下)
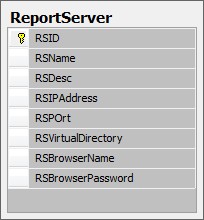
首先看一下ReportServer的表结构,非常简单:

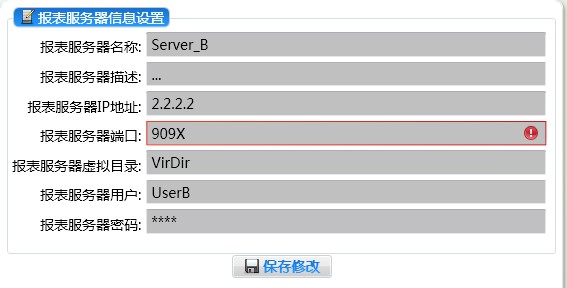
项目中的Model文件,除了有对应数据库表的字段的属性外,因为还实现了IDataErrorInfo接口,所以在Model中还会对属性值进行有效性验证,在最终用户界面上表现的结果是(端口号要求只能为数字):

这就是ReportServerModel实现接口IDataErrorInfo的作用了,部分代码:
 代码
代码string IDataErrorInfo.Error // 该属性其实是不会被调用到的
{
get { return null; }
}
string IDataErrorInfo.this[string propertyName]
{
// 这里调用了自定义的GetValidationError函数,具体代码参考附件源码
get { return this.GetValidationError(propertyName); }
}
#endregion
项目的View部分,ReportServerWindow.xaml.cs文件在UserControl_Loaded时绑定了DataContext:
{
RSWindowViewModel viewModel = new RSWindowViewModel();
base.DataContext = viewModel;
}
于是,就可以在ReportServerWindow.xaml绑定相应的属性了~
(* 注:ReportServerWindow.xaml使用ReportServerWindowResources.xaml作为资源文件)
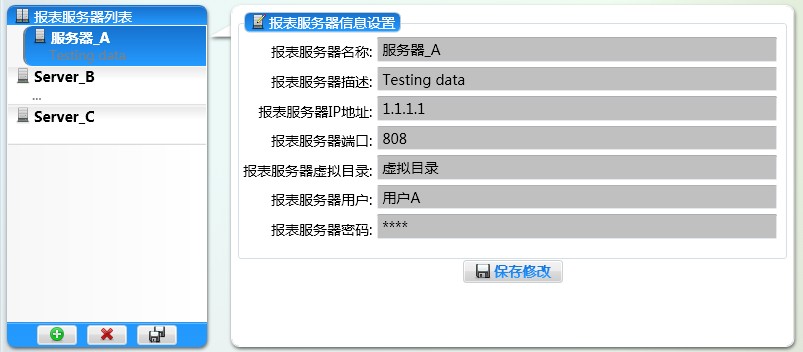
看看最终界面效果:

左边是表示所有ReportServer的ListBox,设置其:
DataContext="{StaticResource ReportServerSet}" ItemsSource="{Binding}"
右边是显示选中的ReportServer的详细信息,(在ReportServerWindow.xaml中)绑定了多个属性:
<TextBox Grid.Column="1" Grid.Row="0" Name="tbRSName"
Text="{Binding Path=ReportServerName, UpdateSourceTrigger=PropertyChanged, ValidatesOnDataErrors=true}">
<!--设置UpdateSourceTrigger、ValidatesOnDataErrors两个属性,实现验证失败时的提示-->
</TextBox>
<TextBox Grid.Column="1" Grid.Row="1" Name="tbRSDesc"
Text="{Binding Path=ReportServerDesc}">
</TextBox>
……
左下角『绿色+』Button为添加ReportServer,设置其:
Command="{Binding AddNewReportServer}"
『红色X』Button为删除选定的ReportServer,设置其:
Command="{Binding DeleteReportServer}"
『双磁盘』Button为保存所有(新添加或修改过的ReportServer),设置其:
Command="{Binding SaveAllNewReportServers}"
右边下方的『单磁盘』Button则为保存当前选中的ReportServer,设置其:
Command="{Binding SaveCommand}"
至此,View部分的数据绑定已经设置完毕!
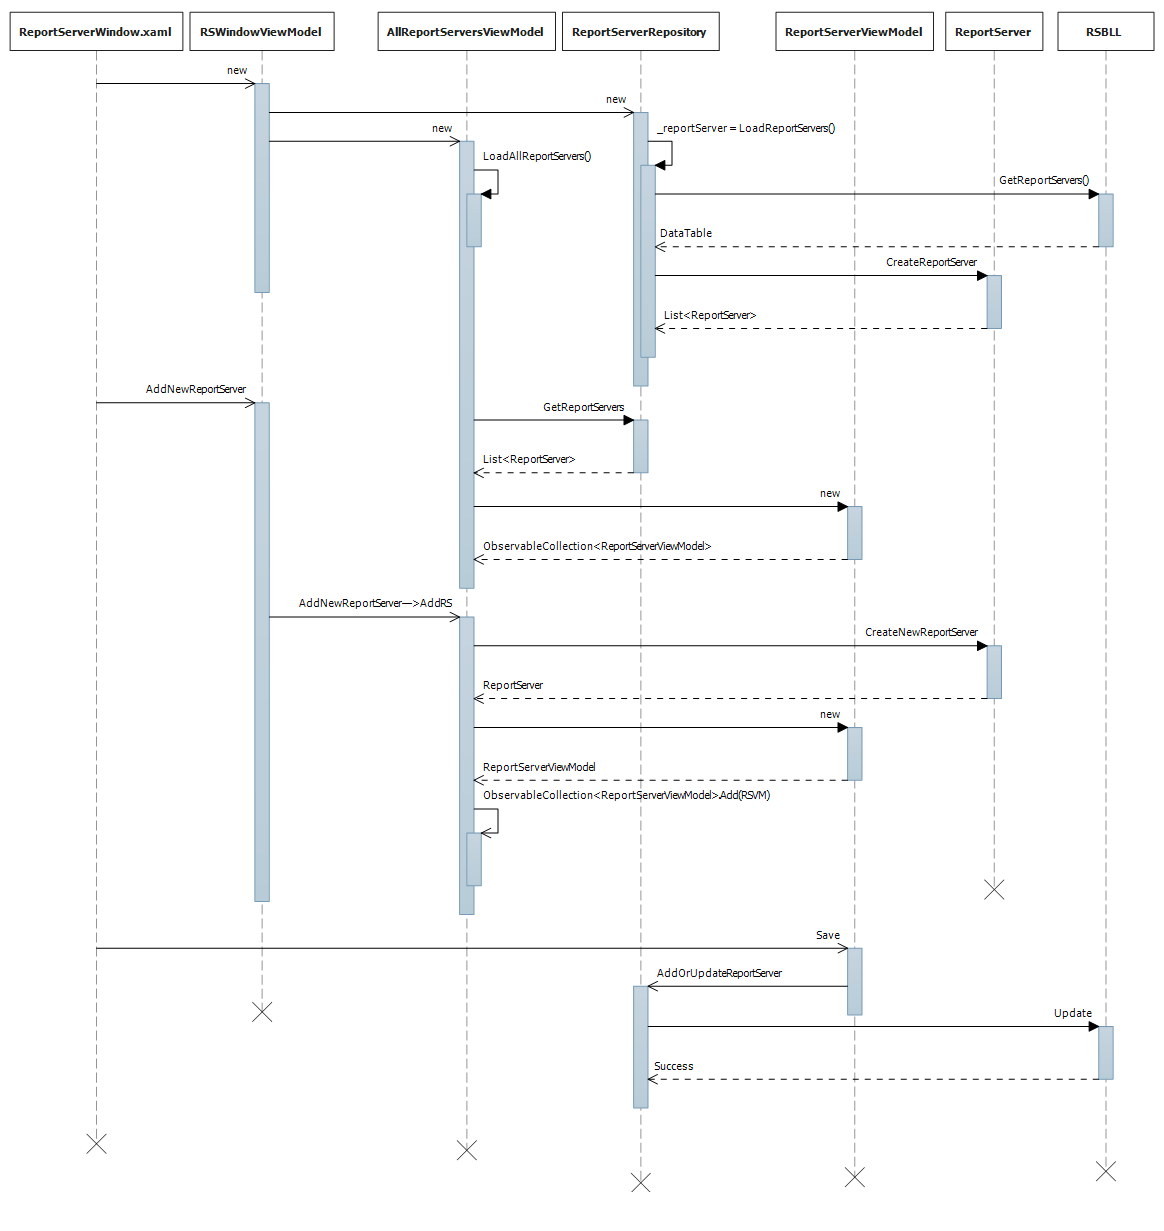
以下序列图表示了『程序启动时的数据初始化』、『保存按钮』的调用关系:

其中ReportServerWindow.xaml直接调用了ReportServerViewModel的Save()方法,实际上是
{Binding Source={StaticResource ReportServerSet}}起主要作用!这使得TextBox等控件可以绑定到ReportServerViewModel数据源上。
(完)
* 附:源代码(模块无法独立运行)


