

zabbix4.0-编译安装:LNMP(php7.3)+zabbix4.0
官网:
mariadb:https://mariadb.org/
libzip:https://libzip.org/download/
包版本
nginx-1.20.1.tar.gz
php-7.3.31.tar.gz
cmake-3.21.3.tar.gz
libzip-1.8.0.tar.gz
mariadb包yum安装:
zabbix-4.0.34.tar.gz
安装目录/opt,上传目录/root
安装好本地base包,和epel源。
操作系统版本:centos7.9
安装Nginx
1.下载安装nginx
#yum install -y wget gcc gcc-c++ make pcre pcre-devel zlib zlib-devel openssl openssl-devel
#tar -zxf  ~/nginx-1.20.1.tar.gz  ;cd ~/nginx-1.20.1
#./configure --prefix=/opt/nginx
#make && make install
#/opt/nginx/sbin/nginx -V
2.使用systemctl管理nginx,并开启Nginx

#vim /usr/lib/systemd/system/nginx.service
[Unit]
Description=nginx
After=network.target
[Service]
Type=forking
ExecStart=/opt/nginx/sbin/nginx
[Install]
WantedBy=multi-user.target

开启Nginx
#systemctl start nginx
#systemctl status nginx
#systemctl enable nginx
安装PHP
1.下载,安装php需要的组件
注意:高版本的php需要的某些依赖包,centos本身base源里版本过低,需要另外去下载。
#yum -y install epel-release
#yum -y install  gcc gcc-c++ make pcre pcre-devel zlib zlib-devel openssl openssl-devel libxml2 libxml2-devel libcurl libcurl-devel libjpeg libjpeg-devel libpng libpng-devel freetype freetype-devel openldap openldap-devel libmcrypt libmcrypt-devel

安装php依赖cmake(base包版本老,新版php需要更高版本的cmake):
# tar -zxf cmake-3.21.3.tar.gz;cd cmake-3.21.3
#./bootstrap
#make && make install

安装php依赖libzip(base包版本老,新版php需要更高版本的libzip):libzip1.8需要cmake3.0.2以上
#cd /opt;tar -zxvf libzip-1.8.0.tar.gz
#cd libzip-1.8.0
#mkdir build ; cd build
#whereis cmake
#/usr/local/bin/cmake  ..
#make && make install
#vi /etc/ld.so.conf
    /usr/local/lib64
    /usr/local/lib
    /usr/lib
    /usr/lib64
#ldconfig -v  (使上一步修改生效)
###解决报错
###error: off_t undefined; check your library configuration
2.解决依赖问题后,开始编译安装php
#tar -zxf ~/php-7.3.31.tar.gz;cd   ~/php-7.3.31
#cd ~/php-7.3.31
#./configure --prefix=/opt/php --with-config-file-path=/opt/php/etc --enable-ctype --with-mysql=mysqlnd --with-mysqli=mysqlnd --with-freetype-dir --with-jpeg-dir --with-png-dir --with-zlib --with-libxml-dir=/usr --enable-xml --disable-rpath --enable-bcmath --enable-shmop --enable-sysvsem --enable-inline-optimization --with-curl --enable-mbregex --enable-mbstring --with-mcrypt --with-gd --enable-gd-native-ttf --with-openssl --with-mhash --enable-pcntl --enable-sockets --with-ldap-sasl --with-xmlrpc --enable-zip --enable-soap --with-gettext --enable-fpm
#make && make install
3.复制,重命名相应的文件。
#cp /opt/php/etc/php-fpm.conf.default  /opt/php/etc/php-fpm.conf
#cp /opt/php/etc/php-fpm.d/www.conf.default  /opt/php/etc/php-fpm.d/www.conf
4.将php-fpm服务加入到systemctl管理中
#vim /usr/lib/systemd/system/php-fpm.service
[Unit]
Description=php-fpm
After=network.target
[Service]
Type=forking
ExecStart=/opt/php/sbin/php-fpm
[Install]
WantedBy=multi-user.target

#systemctl start php-fpm
#systemctl enable php-fpm
注意:nginx的默认配置无法处理php程序/usr/local/nginx/html/test.php
关于nginx+php的问题
注意:nginx的默认配置无法处理php程序/usr/local/nginx/html/test.php。
在nginx配置文件中添加某些参数,使nginx可以识别php。
#vim /usr/local/nginx/conf/nginx.conf
location / {
            root   html;
            index  index.html index.htm index.php;
        }
location ~ \.php$ {
            root           html;
            fastcgi_pass   127.0.0.1:9000;
            fastcg
fastcgi_index  index.php;                           不添加该参数,会发现不了php文件
            fastcgi_param  SCRIPT_FILENAME  $document_root$fastcgi_script_name; #/scripts$fastcgi_script_name;
            include        fastcgi_params;
        }
#/opt/nginx/sbin/nginx -s reload

验证:#vim /usr/local/nginx/html/test.php
<?php
  echo "taobao zabbix";
?>
然后到网站去验证,看能否正常显示该页面。
安装mariadb
1.yum下载mariadb,并启动
# yum install -y mariadb-server mariadb mariadb-devel
#systemctl start mariadb
2.mariadb的一些初始化配置,并设置root密码。修改mariadb配置文件
#mysql_secure_installation
#vim /etc/my.cnf
[mysqld]
datadir=/var/lib/mysql
socket=/var/lib/mysql/mysql.sock
bind-address=0.0.0.0
port=3306
user=mysql
skip-name-resolve
long_query_time=2
slow_query_log_file=/var/lib/mysql/mysql-slow.log
expire_logs_days=2
innodb-file-per-table=1
innodb_flush_log_at_trx_commit = 2
log_warnings = 1
max_allowed_packet      = 512M
connect_timeout = 60
net_read_timeout = 120
log_bin=/var/lib/mysql/mariadb-bin

[mysqld_safe]
log-error=/var/log/mariadb/mariadb.log
pid-file=/var/run/mariadb/mariadb.pid
3.重启mariadb,并测试root能否连接数据库
#systemctl enable mariadb
#mysql -uroot -h127.0.0.1 -p
安装zabbix
zabbix_server端配置
1.编译安装zabbix
#yum install -y libevent-devel wget tar gcc gcc-c++ make net-snmp-devel libxml2-devel libcurl-devel
#useradd -s /sbin/nologin zabbix
#tar -zxf zabbix-4.0.34.tar.gz
#cd  zabbix-4.0.34
#/configure --prefix=/usr/local/zabbix --enable-server --enable-agent --with-mysql=/usr/local/mysql/bin/mysql_config --with-net-snmp --with-libcurl --with-libxml2
###此编译对应的是mysql源码编译安装后
#make && make install
注意::若是mariadb是yum安装的,则对于"--with-mysql参数需要指定的mysql_config文件,Yum安装mariadb-server、mariadb包是没有的,需要再下载mariadb-devel包",
下载#yum inatall -y mariadb-devel
然后#rpm -ql mariadb-devel|grep "mysql_config"

然后再编译:#./configure --prefix=/usr/local/zabbix --enable-server --enable-agent --with-mysql=/usr/bin/mysql_config --with-net-snmp --with-libcurl --with-libxml2
若--with-mysql后不指定参数,则在编译时会提示报错

2.登录mariadb数据库,创建zabbix数据库和对应的用户,并导入相应的sql文件。
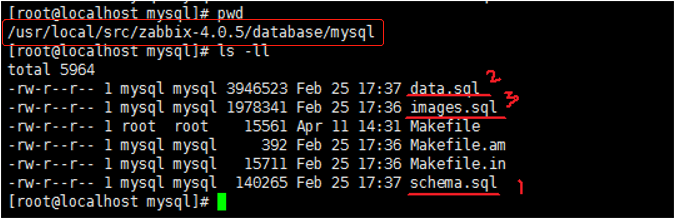
#mysql -h 127.0.0.1 -uroot -pzabbixpwd -A
  > create database zabbix character set utf8 collate utf8_bin;
  > grant all privileges on zabbix.* to zabbix@'127.0.0.1' identified by 'zabbixpwd';
  >flush privileges;
  >set names utf8;
  >use zabbix;
  >source /root/zabbix-4.0.34/database/mysql/schema.sql;
  >source /root/zabbix-4.0.34/database/database/mysql/data.sql;
  >source /root/zabbix-4.0.34/database/mysql/images.sql;
相关的sql文件在zabbix源码包中:如图(参考图)
3.编辑zabbix_server的配置文件,并修改权限
#vim /opt/zabbix/etc/zabbix_server.conf
LogFile=/opt/zabbix/zabbix_server.log
DBHost=127.0.0.1
DBName=zabbix
DBUser=zabbix
DBPassword=zabbixpwd
DBPort=3306
Timeout=30
AlertScriptsPath=/opt/zabbix/alertscripts
ExternalScripts=/opt/zabbix/externalscripts
LogSlowQueries=3000
#chown zabbix:zabbix -R /opt/zabbix/
4.使用systemctl管理zabbix,并启动
#vim /usr/lib/systemd/system/zabbix_server.service
[Unit]
Description=zabbix_server
After=mariadb.target  (mariadb服务启动后再启动)
[Service]
Type=forking
ExecStart=/opt/zabbix/sbin/zabbix_server
[Install]
WantedBy=multi-user.target

#systemctl start zabbix_server
#systemctl status zabbix_server
#systemctl enable zabbix_server
zabbix_web端配置
准备步骤,创建、复制相应的文件和目录
#mkdir /opt/nginx/html/zabbix
#cp -a /root/zabbix-4.0.34/frontends/php/* /opt/nginx/html/zabbix/
#cp /root/php-7.3.23/php.ini-production  /opt/php/etc/php.ini
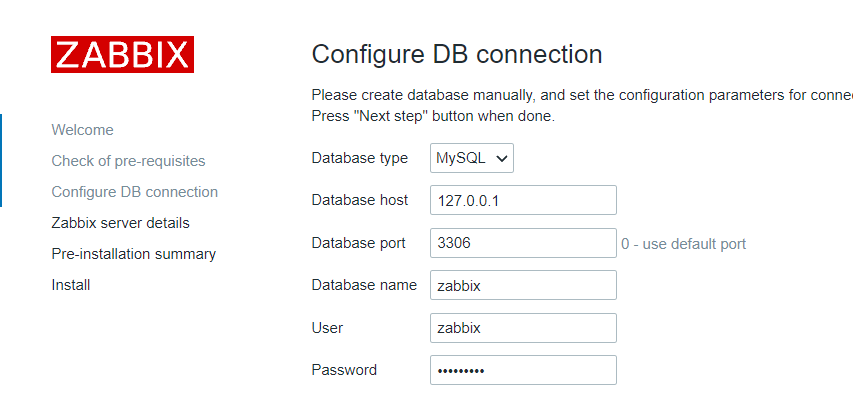
#打开网站http://zabbix_serverIP地址/zabbix
注意:若Check of pre-requisites页面有该错误,重新编译安装PHP。
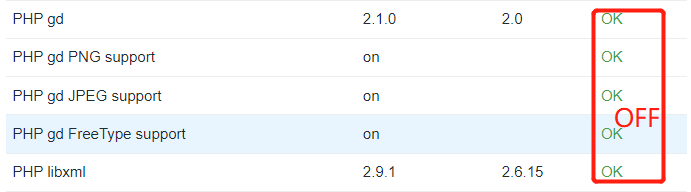
然后根据"Check of pre-requisites"页面提示修改其他参数:
#vim /opt/php/etc/php.ini
         post_max_size = 32M
         max_execution_time = 350
         max_input_time = 350
         date.timezone = Asia/Shanghai
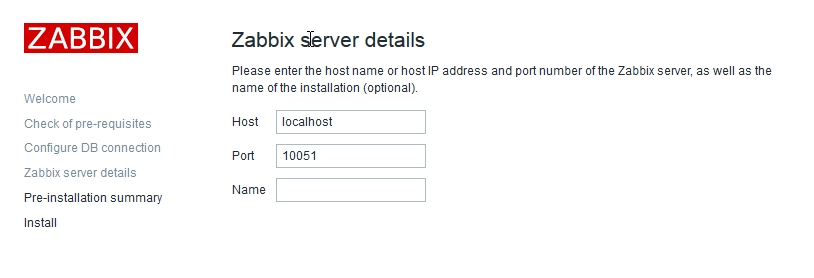
进行下一步
下一步
然后根据提示,下载该文件,并复制到指定目录中
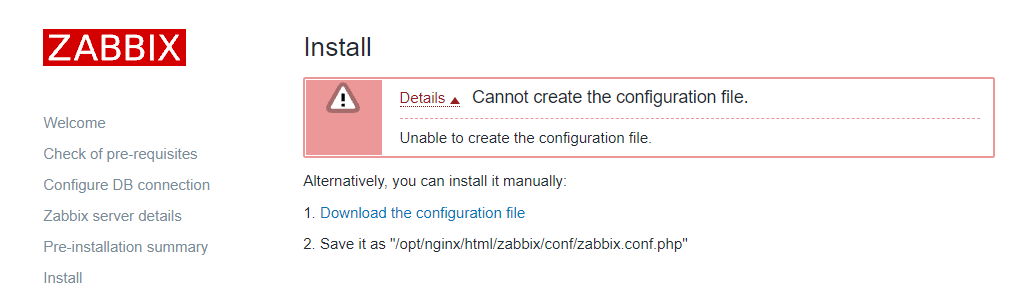
即下载该文件后,上传到指定目录下
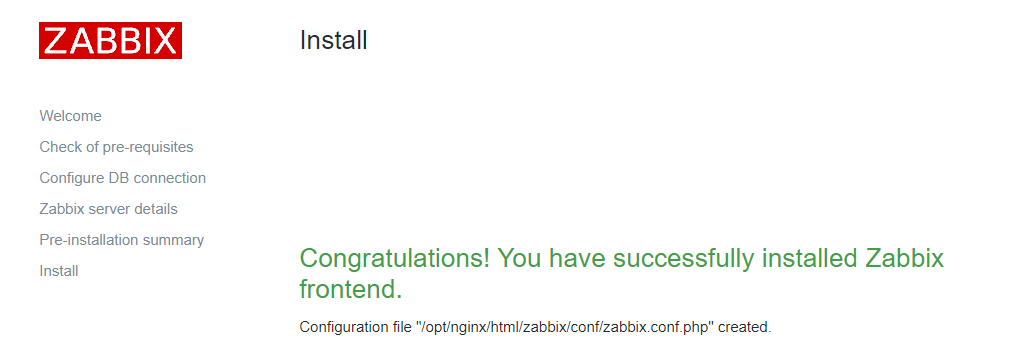
#cp /root/zabbix.conf.php /opt/nginx/html/zabbix/conf/zabbix.conf.php
然后点击完成。
成功。
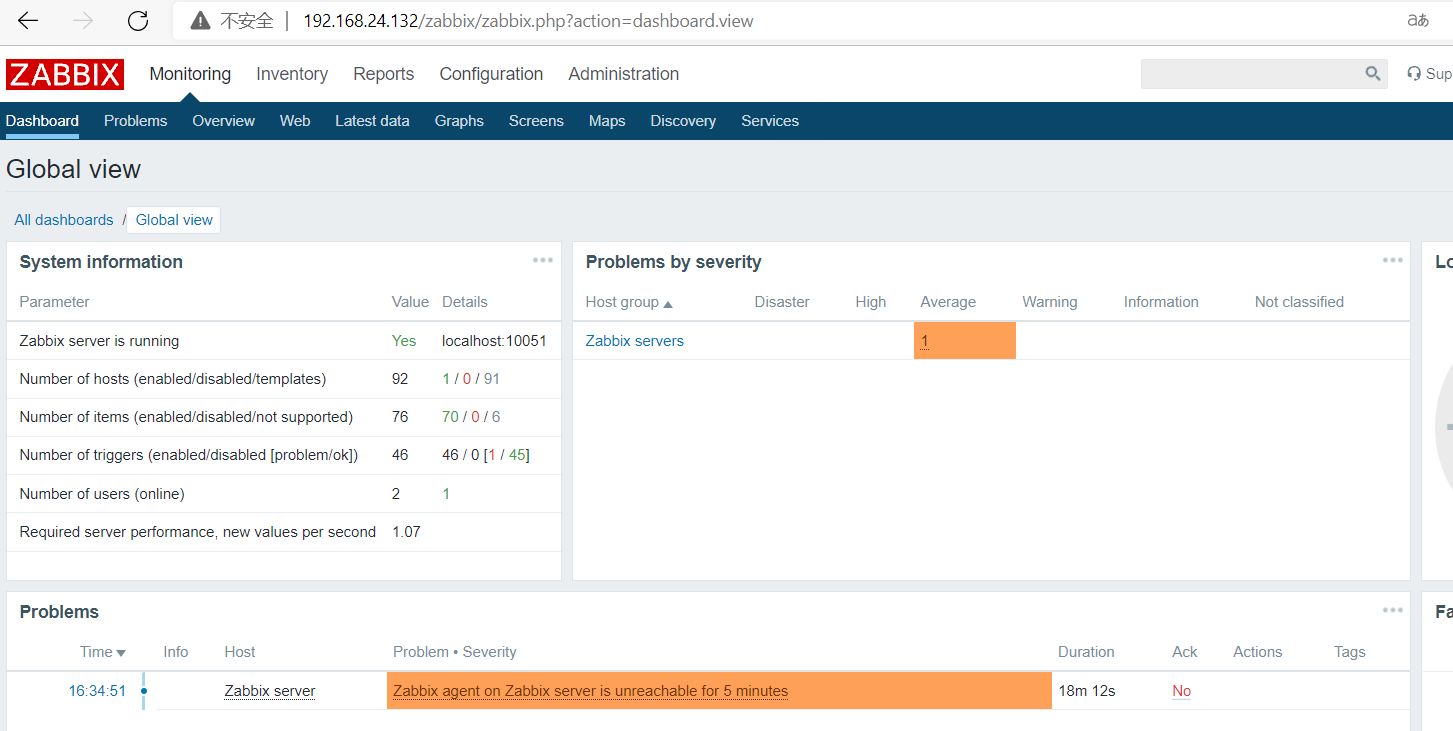
成功,进入界面,之后就是部署agent,自己部署了。


【推荐】国内首个AI IDE,深度理解中文开发场景,立即下载体验Trae
【推荐】编程新体验,更懂你的AI,立即体验豆包MarsCode编程助手
【推荐】抖音旗下AI助手豆包,你的智能百科全书,全免费不限次数
【推荐】轻量又高性能的 SSH 工具 IShell:AI 加持,快人一步
· .NET Core 中如何实现缓存的预热?
· 从 HTTP 原因短语缺失研究 HTTP/2 和 HTTP/3 的设计差异
· AI与.NET技术实操系列:向量存储与相似性搜索在 .NET 中的实现
· 基于Microsoft.Extensions.AI核心库实现RAG应用
· Linux系列:如何用heaptrack跟踪.NET程序的非托管内存泄露
· TypeScript + Deepseek 打造卜卦网站:技术与玄学的结合
· Manus的开源复刻OpenManus初探
· 三行代码完成国际化适配,妙~啊~
· .NET Core 中如何实现缓存的预热?
· 如何调用 DeepSeek 的自然语言处理 API 接口并集成到在线客服系统