NoSQL实验
一 MySQL数据库操作
安装
参考厦大数据库实验室博客
一般安装好Ubuntu后,第一次登录时无法登录,可以去更新root用户的密码,网上的很多教程我都试过了,总体来讲可以分为两步
- 登录mysql,网上的两种方法都是可行的。
一是终止服务,打开终端,输入mysqld --skip-grant-tables,然后新建终端直接输入mysql登录,然后按照下面链接的方法修改密码
二是找到/etc/mysql/debian.cnf,利用里面的用户和密码登录,然后修改密码 - 修改密码
就是三条语句,网上的一些教程只有一条语句,没有刷新是不对的。
解决MySql忘记root密码和修改密码的问题
Student学生表
| Name | English | Math | Computer |
|---|---|---|---|
| zhangsan | 69 | 86 | 77 |
| lisi | 55 | 100 | 88 |
1. 根据上面给出的表格,利用MySQL5.6设计出student学生表格;
create table Student ( Name varchar(10), English int, Math int, Computer int);
insert Student values("zhansan",69,86,77);
insert Student values("lisi",55,100,88);
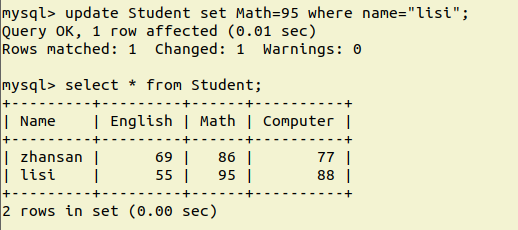
a) 设计完后,用select语句输出所有的相关信息,并给出截图;
select * from Student;

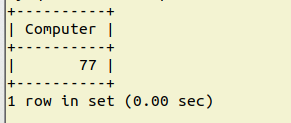
b) 查询zhangsan的Computer成绩,并给出截图;
select Computer from Student where Name="zhansan";
c) 修改lisi的Math成绩,改为95.给出截图.
update Student set Math=95 where name="lisi"
2.根据上面已经设计出的student表,用MySQL的JAVA客户端编程;
a) 添加数据:English:45 Math:89 Computer:100
| scofield | 45 | 89 | 100 |
|---|---|---|---|
| b) 获取scofield的English成绩信息 | |||
| 要将驱动程序放入项目的BuildPath中,然后在编程中建立与数据库的连接,接着执行事务,最后关闭返回的结果集、事务和连接。 |
import java.sql.Connection;
import java.sql.DriverManager;
import java.sql.ResultSet;
import java.sql.SQLException;
import java.sql.Statement;

public class Prac {
   static final String DRIVER = "com.mysql.jdbc.Driver";
   static final String DB = "jdbc:mysql://localhost:3306/mysql?useUnicode=true&characterEncoding=utf-8";

   static final String USER = "root";
   static final String PASSWD = "root";

   public static void main(String[] args) {
   	Connection conn = null;
   	Statement stmt = null;
   	ResultSet rs = null;

   	try {
   		//加在驱动程序
   		Class.forName(DRIVER);
   		System.out.println("连接数据库......");

   		//打开连接
   		conn = DriverManager.getConnection(DB,USER,PASSWD);
   		//执行一个查询
   		stmt = conn.createStatement();
   		String sql1 = "select name,English from Student where name='scofiled'";
   		String sql2 = "insert Student values('scofiled',45,89,100)";
   		stmt.executeUpdate(sql2);
   		//获得结果集
   		rs = stmt.executeQuery(sql1);
   		System.out.println("Name\tEnglish");
   		while(rs.next())
   			System.out.println(rs.getString(1)+"\t"+rs.getInt(2));
   	}catch(Exception e) {
   		e.printStackTrace();
   	}finally{
   		try {
   			if(rs!=null)
   				rs.close();
   			if(stmt!=null)
   				stmt.close();
   			if(conn!=null)
   				conn.close();
   			} catch (SQLException e) {
   				e.printStackTrace();
   			}
   		System.out.println("执行完成");
   		}
   	}
}

二 HBase数据库操作
安装
见上一篇博客(本篇置顶有链接
Student学生表

1.根据上面给出的表格,用Hbase Shell模式设计student学生表格。
put 'Student','zhangsan','score:English','69'
put 'Student','zhangsan','score:Math','86'
put 'Student','zhangsan','score:Computer','77'
put 'Student','lisi','score:English','55'
put 'Student','lisi','score:Math','100'
put 'Student','lisi','score:Computer','88'
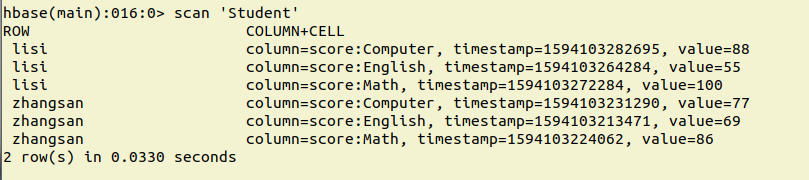
a)设计完后,用scan指令浏览表的相关信息,给出截图。
scan 'Student'
b)查询zhangsan 的Computer成绩,给出截图。
get 'Student','zhangsan','score','Computer'

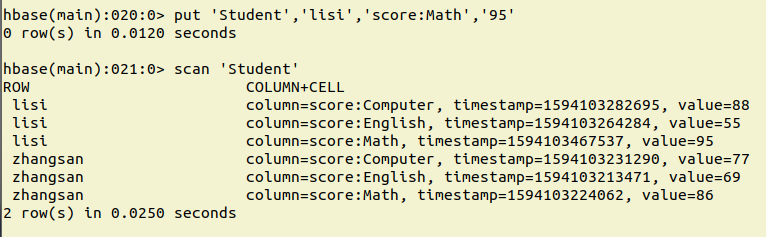
c)修改lisi的Math成绩,改为95,给出截图。
put 'Student','lisi','score:Math','95'
2.根据上面已经设计出的student,用Hbase API编程。
a)添加数据:English:45 Math:89 Computer:100
| scofield | 45 | 89 | 100 |
|---|---|---|---|
| b)获取scofield的English成绩信息 |
import java.io.IOException;

import org.apache.hadoop.conf.Configuration;
import org.apache.hadoop.hbase.Cell;
import org.apache.hadoop.hbase.CellUtil;
import org.apache.hadoop.hbase.HBaseConfiguration;
import org.apache.hadoop.hbase.TableName;
import org.apache.hadoop.hbase.client.Admin;
import org.apache.hadoop.hbase.client.Connection;
import org.apache.hadoop.hbase.client.ConnectionFactory;
import org.apache.hadoop.hbase.client.Get;
import org.apache.hadoop.hbase.client.Put;
import org.apache.hadoop.hbase.client.Result;
import org.apache.hadoop.hbase.client.Table;

public class PracNoSQL {
	private static Configuration conf;
	private static Connection conn;
	private static Admin admin;
	public static void main(String[] args) throws IOException {
		//init
		conf = HBaseConfiguration.create();

		try {
			conf.set("hbase.roodir", "hdfs://localhost:9000/hbase");
			conn = ConnectionFactory.createConnection(conf);
			admin = conn.getAdmin();
		} catch (IOException e) {
			e.printStackTrace();
		}

		TableName tableName = TableName.valueOf("Student");
		if(!admin.tableExists(tableName)) {
			System.out.println("该表不存在");
			System.exit(1);
		}
		Table table = conn.getTable(tableName);
		System.out.print("开始添加数据....");
		String[] course = {"English","Math","Computer"};
		int[] grade = {45,89,100};
		for(int i=0;i<3;i++)
		{
			Put put = new Put("scofield".getBytes());
			put.add("score".getBytes(), course[i].getBytes(), String.valueOf(grade[i]).getBytes());
			table.put(put);
		}
		System.out.println("添加成功");

		System.out.print("获取数据中....");
		Get get = new Get("scofield".getBytes());
		get.addColumn("score".getBytes(), "English".getBytes());
		Result res = table.get(get);
		System.out.println("成功");
		Cell[] cells = res.rawCells();
		for(Cell cell:cells)
			System.out.println("RowKey:"+new String(CellUtil.cloneRow(cell))+"\t"
					+"colFamily:"+new String(CellUtil.cloneFamily(cell))+"\t"
					+"col:"+new String(CellUtil.cloneQualifier(cell))+"\t"
					+"value:"+new String(CellUtil.cloneValue(cell)));

		//close
		try {
			if(admin!=null)
				admin.close();
			if(conn!=null)
				conn.close();
		} catch (IOException e) {
			// TODO Auto-generated catch block
			e.printStackTrace();
		}

	}

}

三 Redis数据库操作
安装
Student 键值对:
zhangsan:{
English: 69
Math: 86
Computer: 77
}
lisi:{
English: 55
Math: 100
Computer: 88
}
1. 根据上面给出的键值对,用Redis的哈希结构设计出上述表格;(键值可以用student.zhangsan,student.lisi来表示两个键值属于同一个表格)
HMSET student.zhangsan English 69 Math 86 Computer 77
HMSET student.lisi English 55 Math 100 Computer 88
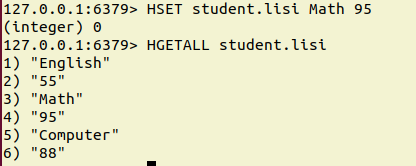
a) 设计完之后,用hgetall命令分别输出zhangsan和lisi的成绩信息,并截图;
HGETALL student.zhangsan
HGETALL student.lisi

b) 用hget命令查询zhangsan 的Computer成绩,给出截图。
Hget student.zhangsan Computer

c) 修改lisi的Math成绩,改为95,给出截图。
HSET student.lisi Math 95
2. 根据上面已经设计出的student表格,用Redis的JAVA客户端编程(jedis)
a ) 添加数据:
scofield:{
English: 45
Math: 89
Computer: 100
}
b) 获取scofield的English成绩信息
redis有比较多的java客户端,这里选择的是jedis。在使用的时候要先下载jedis的最新版本并且导入到java项目的BuildPath里面去。
import redis.clients.jedis.Jedis;
public class prac {
public static void main(String[] args) {
Jedis jedis = new Jedis("localhost");
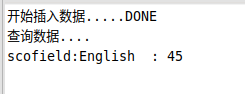
System.out.print("开始插入数据.....");
jedis.hset("student.scofield", "English","45");
jedis.hset("student.scofield", "Math","89");
jedis.hset("student.scofield", "Computer","100");
System.out.println("DONE");
System.out.println("查询数据....");
String value = jedis.hget("student.scofield", "English");
System.out.println("scofield:English : "+value);
}
}

四 MongoDB数据库操作
安装
参考厦大数据库实验室博客
我采用的是离线安装的模式,所以启动和结束与在线安装是不同的。
Student文档如下:
{
“name”: “zhangsan”,
“score”: {
“English”: 69,
“Math”: 86,
“Computer”: 77
}
}
{
“name”: “lisi”,
“score”: {
“English”: 55,
“Math”: 100,
“Computer”: 88
}
}
1. 根据上面给出的文档,用Mongo shell设计出student集合.
use School
db.createCollection('student')
db.student.insert({name:'zhangsan',score:{English:69,Math:86,Computer:77}})
db.student.insert({name:'lisi',score:{English:55,Math:100,Computer:88}})
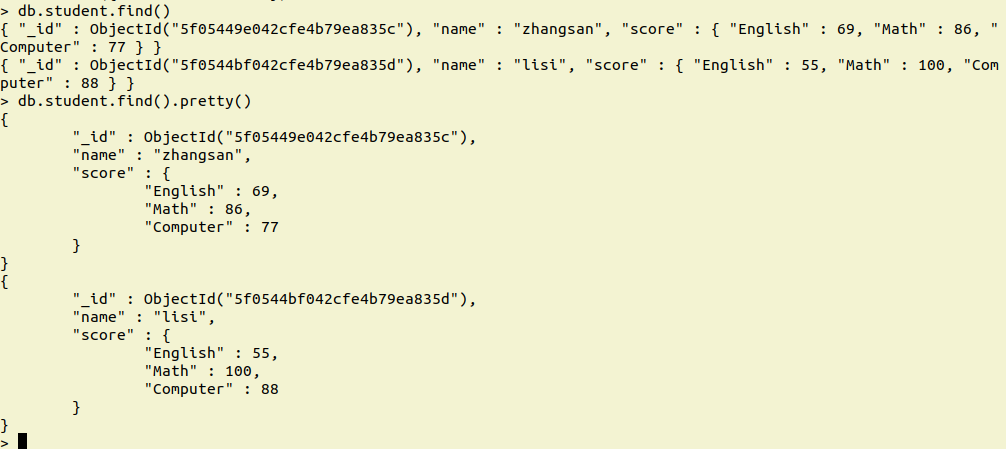
a) 设计完后,用find()方法输出两个学生的信息,给出截图;
db.student.find()
db.student.find().pretty()
b) 用find函数查询zhangsan 的所有成绩(只显示score列),给出截图。
db.student.find({name:'zhangsan'},{'score':1})

c) 修改lisi的Math成绩,改为95,给出截图。
db.student.update({name:'lisi'},{$set:{'score.Math':95}})

2. 根据上面已经设计出的student集合,用MongoDB的JAVA客户端编程
a) 添加数据:English:45 Math:89 Computer:100
{
“name”: “scofield”,
“score”: {
“English”: 45,
“Math”: 89,
“Computer”: 100
}
}
b) 获取scofield的所有成绩成绩信息(只显示score列)
import java.util.ArrayList;
import java.util.List;

import org.bson.Document;
import com.mongodb.MongoClient;
import com.mongodb.client.MongoCollection;
import com.mongodb.client.MongoCursor;
import com.mongodb.client.MongoDatabase;
import com.mongodb.client.model.Filters;

public class TestMongoDB {

    public static void main(String[] args) {
        MongoCollection<Document> collection = getCollection("School","student");
        insert(collection);
        find(collection);
    }

    public static MongoCollection<Document> getCollection(String dbname,String collectionname){
        MongoClient  mongoClient=new MongoClient("localhost",27017);
        MongoDatabase mongoDatabase = mongoClient.getDatabase(dbname);
        MongoCollection<Document> collection = mongoDatabase.getCollection(collectionname);
        return collection;
    }
    public static void insert(MongoCollection<Document> collection){
        try{
            Document doc=new Document("name","scofield").append("score", new Document("English",45).append("Math",89).append("Computer",100));
            collection.insertMan(doc);
            System.out.println("插入成功");
        }catch(Exception e){
            System.err.println( e.getClass().getName() + ": " + e.getMessage() );
        }
    }
    public static void find(MongoCollection<Document> collection){
        try{
            MongoCursor<Document>  cursor= collection.find(new Document("name","scofield")).projection(new Document("score",1)).iterator();
            while(cursor.hasNext()){
                System.out.println(cursor.next().toJson());
            }
        }catch(Exception e){
            System.err.println( e.getClass().getName() + ": " + e.getMessage() );
        }
    }
}
总结
- 多种数据库都只是粗浅地学习了一下,让自己觉得非常不舒服,希望能有时间做出项目,并在项目中学习各种数据库的使用。
- NoSQL 数据库否定了One Fits All,带来了很多新的数据库类型。

 浙公网安备 33010602011771号