
Nginx记录
Nginx在线安装
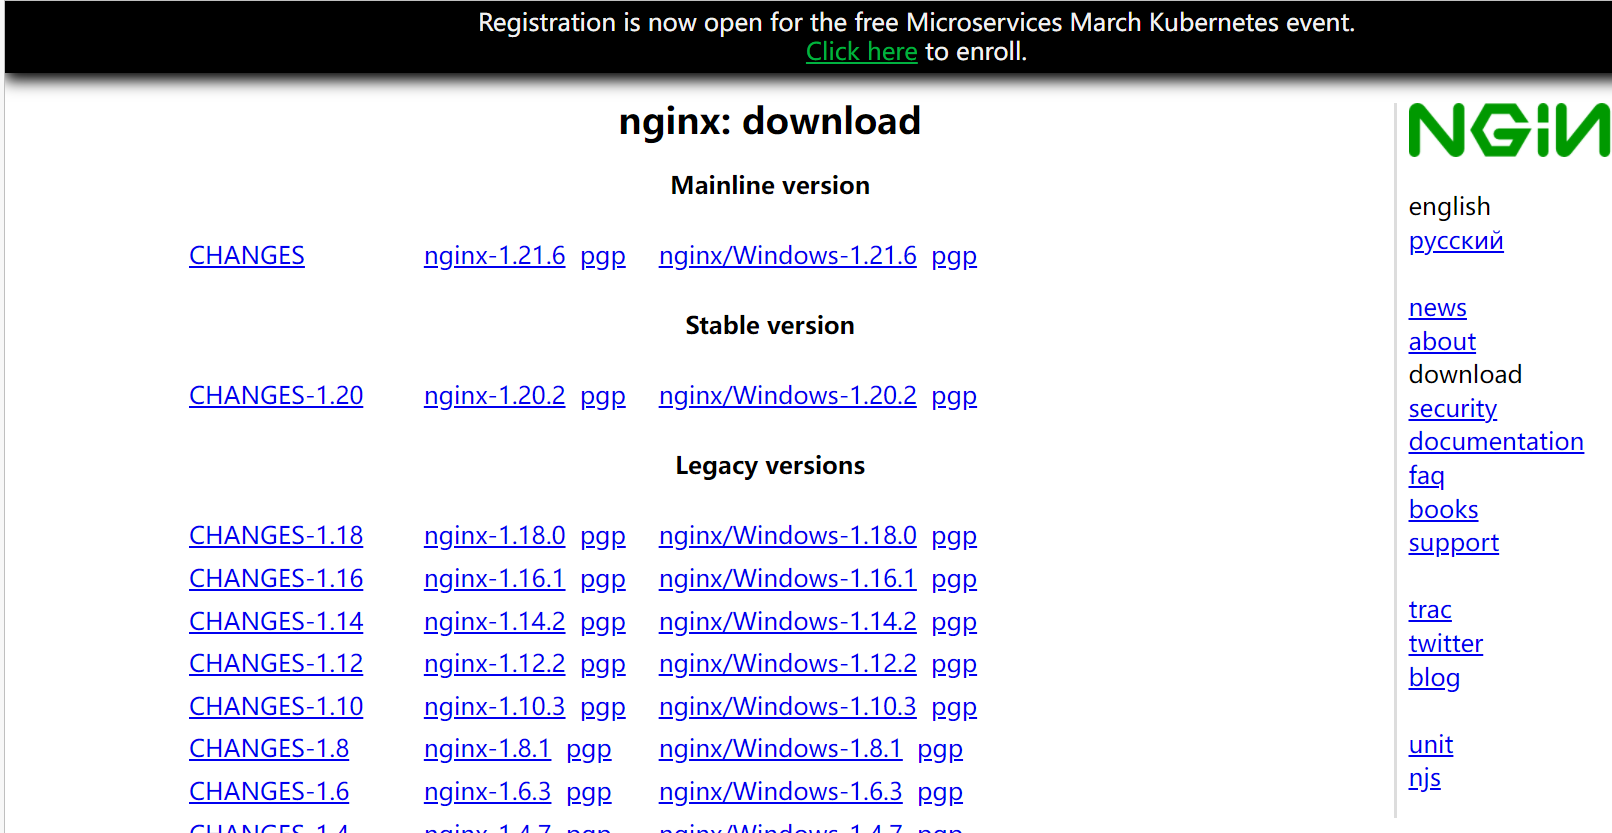
- nginx下载地址:http://nginx.org/en/download.html
- 安装前置条件包
#	安装gcc-c++编译器
yum install -y zlibyum install gcc-c++
yum install -y openssl openssl-devel zlib-devel

#	安装pcre包
yum install -y pcre pcre-devel

#	安装zlib包
yum install -y zlib zlib-devel
-
在官网点击下载对应的nginx版本,之后上传程序到/usr/local目录下
-
nginx 安装
#	进入到/usr/local目录,解压nginx安装包
tar -zxvf nginx-1.14.2.tar.gz

#	进入到刚解压的nginx目录
cd nginx-1.14.2

#	编译nginx
#	--with-http_ssl_module	添加ssl模块
#	--with-stream	添加stream模块用于端口代理
./configure --prefix=/usr/local/nginx --sbin-path=/usr/local/nginx/sbin/nginx --conf-path=/usr/local/nginx/conf/nginx.conf --pid-path=/usr/local/nginx/pid/nginx.pid --with-http_ssl_module --with-stream

#	安装nginx
make
make install

#	进入到启动文件目录
cd /usr/local/nginx/sbin

#	启动nginx
./nginx

#查看nginx版本
[root@localhost sbin]# ./nginx -V
nginx version: nginx/1.14.2
built by gcc 4.8.5 20150623 (Red Hat 4.8.5-44) (GCC)
built with OpenSSL 1.0.2k-fips  26 Jan 2017
TLS SNI support enabled
configure arguments: --prefix=/usr/local/nginx --sbin-path=/usr/local/nginx/sbin/nginx --conf-path=/usr/local/nginx/conf/nginx.conf --pid-path=/usr/local/nginx/pid/nginx.pid --with-http_ssl_module --with-stream

#关闭防火墙,或者防火墙放开80端口访问,nginx默认启动端口为80端口
systemctl stop firewalld.service #停止firewall
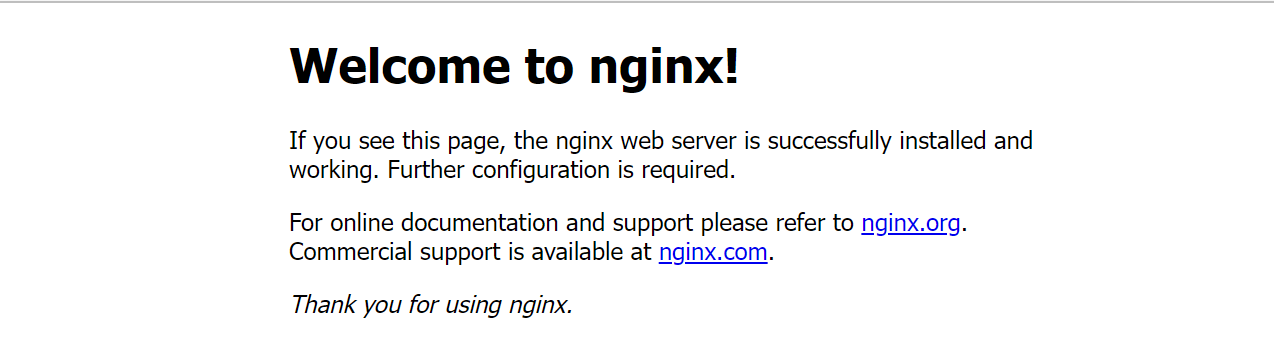
- 在网页访问 http://ip:80/ 端口测试是否成功,如果访问提示拒绝权限不够等等,可以将目录nginx权限提升为755
Ngin离线安装
- 在本地虚拟机可以连接外网的yum 下进行,安装前置条件包
#	--downloadonly   只下载安装,--downloaddir=/tmp/offline_rpm 指定的下载目录
#	a.首先下载gcc-c++编译器rpm包
yum install -y zlibyum install gcc-c++ --downloadonly --downloaddir=/tmp/offline_rpm

#	b.第二次在执行方便后面的软件包下载
yum install -y zlibyum install gcc-c++

#	c.同上a.第一次先下载rpm包
yum install -y openssl openssl-devel zlib-devel --downloadonly --downloaddir=/tmp/offline_rpm

#	d.同上b.
yum install -y openssl openssl-devel zlib-devel

#	e.下载安装pcre包
#	a~d都执行的话这里应该会提示已安装最新的包
yum install -y pcre pcre-devel --downloadonly --downloaddir=/tmp/offline_rpm
yum install -y pcre pcre-devel

#	f.下载安装zlib包
#	a~d都执行的话这里应该会提示已安装最新的包
yum install -y zlib zlib-devel --downloadonly --downloaddir=/tmp/offline_rpm
yum install -y zlib zlib-devel
- 创建本地yum仓库,使用createrepo来创建repository仓库,如果系统里没有该命令的话需要先进行createrepo的安装
 #	下载createrepo
 yum install -y createrepo

 #	创建本地yum仓库
 createrepo /tmp/offline_rpm
- 离线服务器yum仓库配置
#	a.将 offline_rpm 文件夹传输至 内网主机 /tmp 下
#  b.将/etc/yum.repos.d 下面所有repo文件进行转移至bak文件夹下。(如果没有就自己新建一个bak目录)
#  c.新建一个repo文件,vi /etc/yum.repos.d/new.repo
#  d.写入如下内容并保存
[New]
name=New
baseurl=file:///tmp/offline_rpm
gpgcheck=0
enabled=1

#	e.清理缓存。yum clean all
- 重复Nginx在线安装的2~5步骤
nginx版本升级
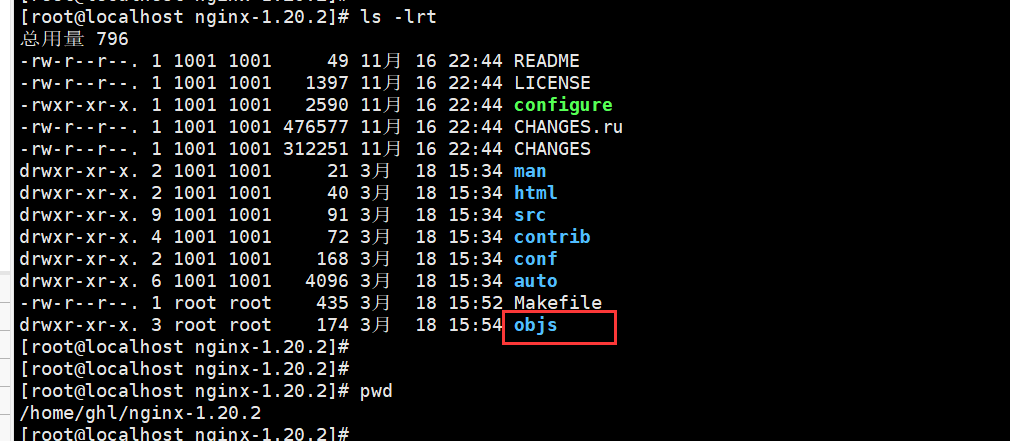
- 将最新版本的nginx安装包放到一个指定目录/home/ghl,之后解压文件。我这里用的是nginx-1.20.2.tar.gz 版本,解压完后就是nginx-1.20.2
[root@localhost ghl]# tar -zxvf nginx-1.20.2.tar.gz
[root@localhost ghl]# ls -lrt
总用量 1040
drwxr-xr-x. 8 1001 1001     158 11月 16 22:44 nginx-1.20.2
-rw-r--r--. 1 root root 1062124 3月  18 14:31 nginx-1.20.2.tar.gz
[root@localhost ghl]#
[root@localhost ghl]# pwd
/home/ghl
[root@localhost ghl]#
- 进入到之前安装nginx目录使用./nginx -V保存编译执行的命令
[root@localhost ghl]# cd /usr/local/nginx/sbin/
[root@localhost sbin]#
[root@localhost sbin]# ./nginx  -V
nginx version: nginx/1.14.2
built by gcc 4.8.5 20150623 (Red Hat 4.8.5-44) (GCC)
built with OpenSSL 1.0.2k-fips  26 Jan 2017
TLS SNI support enabled
configure arguments: --prefix=/usr/local/nginx --sbin-path=/usr/local/nginx/sbin/nginx --conf-path=/usr/local/nginx/conf/nginx.conf --pid-path=/usr/local/nginx/pid/nginx.pid --with-http_ssl_module --with-stream
- 之后回到1.20版本的解压路径,在启动命令最后添加:--with-http_sub_module
[root@localhost ghl]# cd /home/ghl/nginx-1.20.2
[root@localhost nginx-1.20.2]#
[root@localhost nginx-1.20.2]# ls -lrt
总用量 792
-rw-r--r--. 1 1001 1001     49 11月 16 22:44 README
-rw-r--r--. 1 1001 1001   1397 11月 16 22:44 LICENSE
-rwxr-xr-x. 1 1001 1001   2590 11月 16 22:44 configure
-rw-r--r--. 1 1001 1001 476577 11月 16 22:44 CHANGES.ru
-rw-r--r--. 1 1001 1001 312251 11月 16 22:44 CHANGES
drwxr-xr-x. 2 1001 1001     21 3月  18 15:34 man
drwxr-xr-x. 2 1001 1001     40 3月  18 15:34 html
drwxr-xr-x. 9 1001 1001     91 3月  18 15:34 src
drwxr-xr-x. 4 1001 1001     72 3月  18 15:34 contrib
drwxr-xr-x. 2 1001 1001    168 3月  18 15:34 conf
drwxr-xr-x. 6 1001 1001   4096 3月  18 15:34 auto


#	执行nginx编译
./configure --prefix=/usr/local/nginx --sbin-path=/usr/local/nginx/sbin/nginx --conf-path=/usr/local/nginx/conf/nginx.conf --pid-path=/usr/local/nginx/pid/nginx.pid --with-http_ssl_module --with-stream --with-http_sub_module
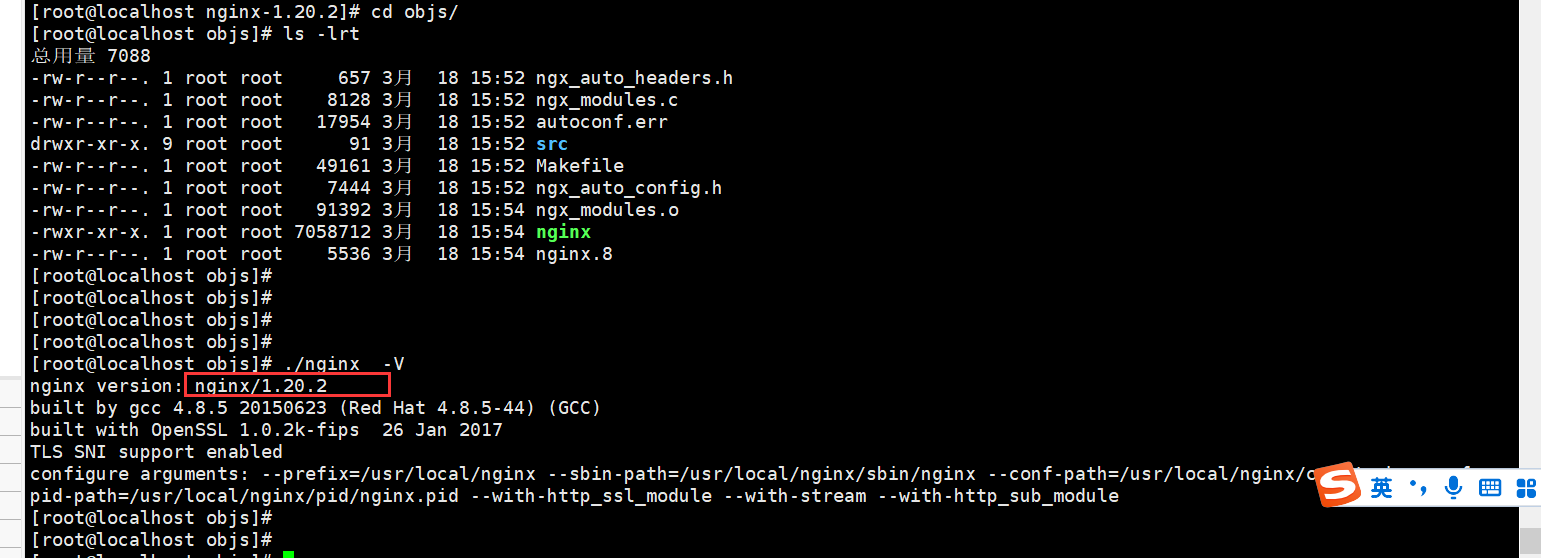
- 之后执行make命令,但不要执行make install切记切记。执行完成后会在目录下生成一个objs文件,进入到objs目录下会有一个新的nginx文件。
- 备份旧的1.14.2版本的nginx启动文件,使用这个1.20.2版本的nginx启动文件替换掉原来的1.14.2版本的nginx启动文件重新启动即可。

 浙公网安备 33010602011771号