【原】iOS学习之图片拉伸处理(类似qq的气泡)
原理是拉伸里面的内容,将边保护起来
方法1:
①[image resizableImageWithCapInsets:UIEdgeInsetsMake(30, 30, 30, 30)];

②[image resizableImageWithCapInsets:UIEdgeInsetsMake(30, 30, 30, 30) resizingMode:UIImageResizingModeStretch];

 typedef NS_ENUM(NSInteger, UIImageResizingMode) {

    UIImageResizingModeTile,(瓦片)

    UIImageResizingModeStretch,(伸展)

 };
上述的方法是将图片没有保护的部分进行拉伸。
①直接传入保护的范围,没有设置图拉伸的模式,默认为UIImageResizingModeTile(瓦片式)就是将图片以原来的大小就行平铺显示
②设置图片拉伸的模式
方法2:
[image stretchableImageWithLeftCapWidth:image.size.width * 0.5 topCapHeight:image.size.height * 0.5];
苹果原始就存在的方法,已经被舍弃,这个方法只会拉伸中间 1*1 的区域
一般传入的值为图片大小的一半
计算公式为:
// left(传入)
// top(传入)
// width
// height
// right = width - left - 1;(计算)
// 1 = width - left - right;
// bottom = height - top - 1;(计算)
// 1 = height - top - bottom;
方法3:
不需要写代码
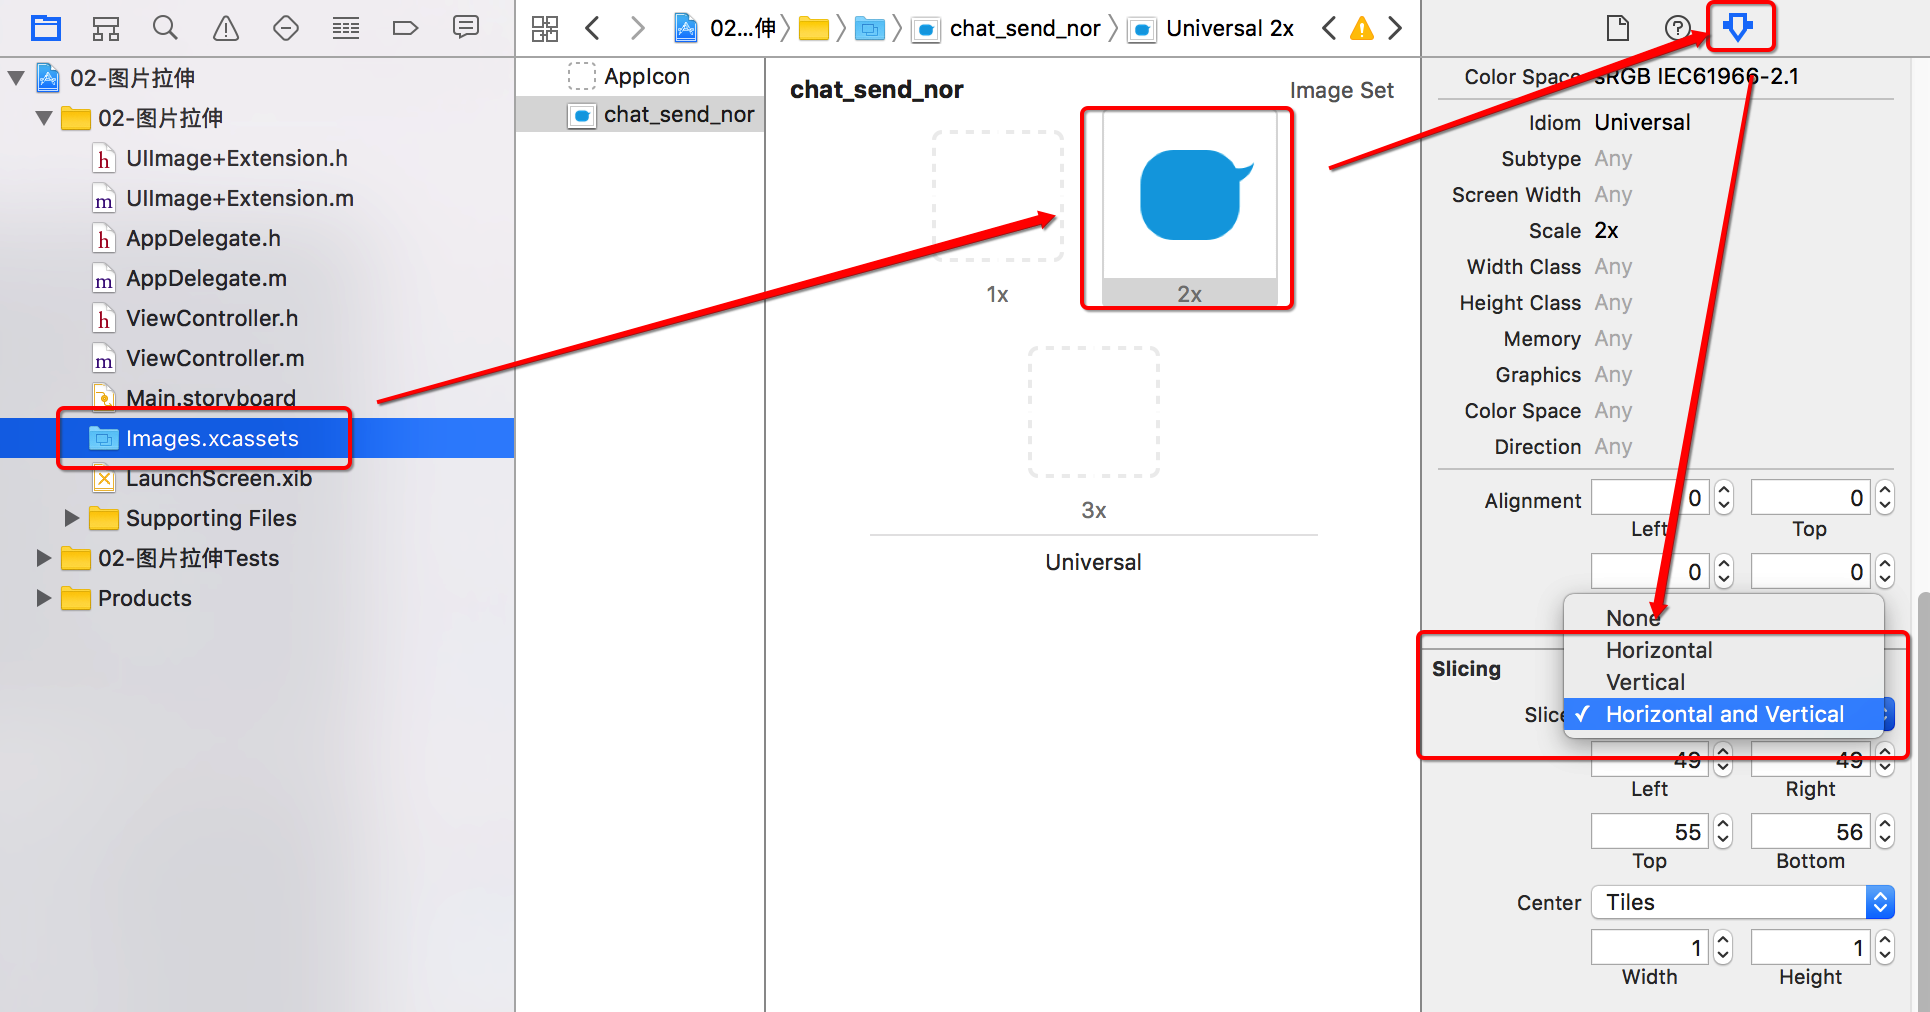
将图片拖拽到images.xcassets,具体设置步骤如下图:

将图片按照上图方法设置后,图片会一直可以拉伸


