APP自动化-异常截图2-利用内存空间(list)
先在package目录下建立一个文件,如:什么情况下可以操作内存空间.py
里面建立一个列表:list1 = []
因为conftest可以在很多层级都存在
比如:我们在testcase目录下的conftest-1文件中没有pytest异常截图的那段代码(最下面注释掉的部分)


 1 #!/usr/bin/env python
 2 # -*- coding: utf-8 -*-
 3 # @Time    : 2023/5/15 16:57
 4 # @Author  : gezirui
 5 # @File    : conftest.py
 6 # @Software: PyCharm
 7
 8
 9 import pytest
10
11 from appium.webdriver import Remote  # 导入远程包
12 from appium.webdriver.common.appiumby import AppiumBy as By  # 引用appium的驱动常规AppiumBy 引入By模块,别名为BY
13 from selenium.webdriver.support.wait import WebDriverWait  # 引入Selenium的WebDriverWait服务
14 from selenium.webdriver.support import expected_conditions as EC  # 引入Selenium的expected_conditions服务别名为ec
15 from appium.webdriver.common.touch_action import TouchAction  # 引入触摸事件方法导包为TouchAction
16
17
18 @pytest.fixture()  # pytest夹具使用,pytest中构建供用例使用的数据
19 def driver():
20     caps = {}
21     caps["platformName"] = "Android"
22     caps["appium:deviceName"] = "emulator-5554"
23     caps["appium:platformVersion"] = "7.1.2"
24     caps["appium:appPackage"] = "com.zhao.myreader"
25     caps["appium:appActivity"] = "com.zhao.myreader.ui.home.MainActivity"
26     caps["appium:notReset"] = "True"
27
28     url = "127.0.0.1:4723/wd/hub"
29
30     global driver                       # 第一种,使用提升作用域完成
31     driver = Remote(url, caps)
32     wait = WebDriverWait(driver, 2)
33
34     return driver, wait
35
36
37 @pytest.fixture()  # pytest夹具使用,pytest中构建供用例使用的数据
38 def by():
39     return By  # 这里的By是上面引入的AppiumBy包,为了避免循环递归,函数改为小写by
40
41
42 @pytest.fixture()  # pytest夹具使用,pytest中构建供用例使用的数据
43 def ec():
44     return EC  # 这里的By是上面引入的expected_conditions AS EC包,为了避免循环递归,函数改为小写by
45
46
47 # @pytest.hookimpl(hookwrapper=True)  # 写死的
48 # def pytest_runtest_makereport(item, call):  # 写死的
49 #     # pytest会将找到的用例存在迭代器中
50 #     outcome = yield  # 通过这个方法接受所有用例的结果
51 #     result = outcome.get_result()
52 #     # print("用例的标识数据:", result)
53 #     if result.when == "call":
54 #         print("用例的执行结果:", result)
55 #         if result.outcome == "failed":
56 #             """进行截图"""
57 #             driver.save_screenshot("异常截图.png")  # driver可以全局变量driver来
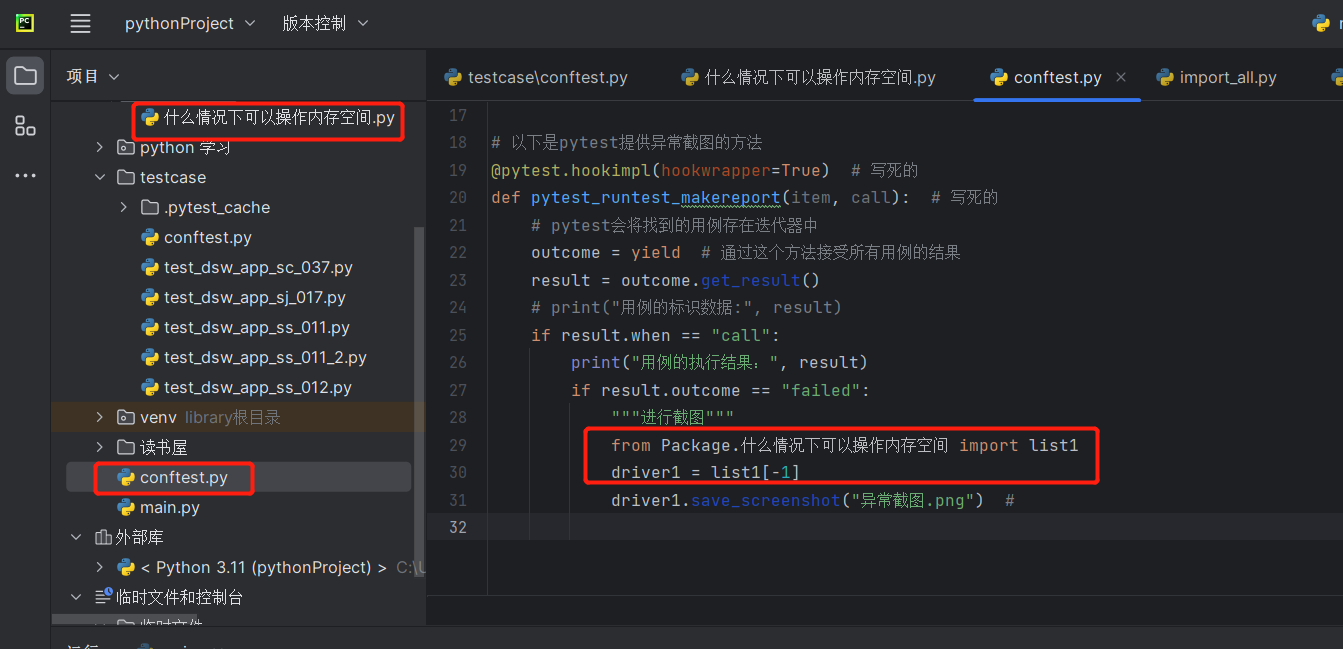
比如,再project最外层创建一个conftest-2的文件,里面只有以下代码,pytest提供的异常截图的conftest设置
 1 import pytest
 2
 3 # 以下是pytest提供异常截图的方法
 4 @pytest.hookimpl(hookwrapper=True)  # 写死的
 5 def pytest_runtest_makereport(item, call):  # 写死的
 6     # pytest会将找到的用例存在迭代器中
 7     outcome = yield  # 通过这个方法接受所有用例的结果
 8     result = outcome.get_result()
 9     # print("用例的标识数据:", result)
10     if result.when == "call":
11         print("用例的执行结果:", result)
12         if result.outcome == "failed":
13             """进行截图"""
14             driver.save_screenshot("异常截图.png")  #
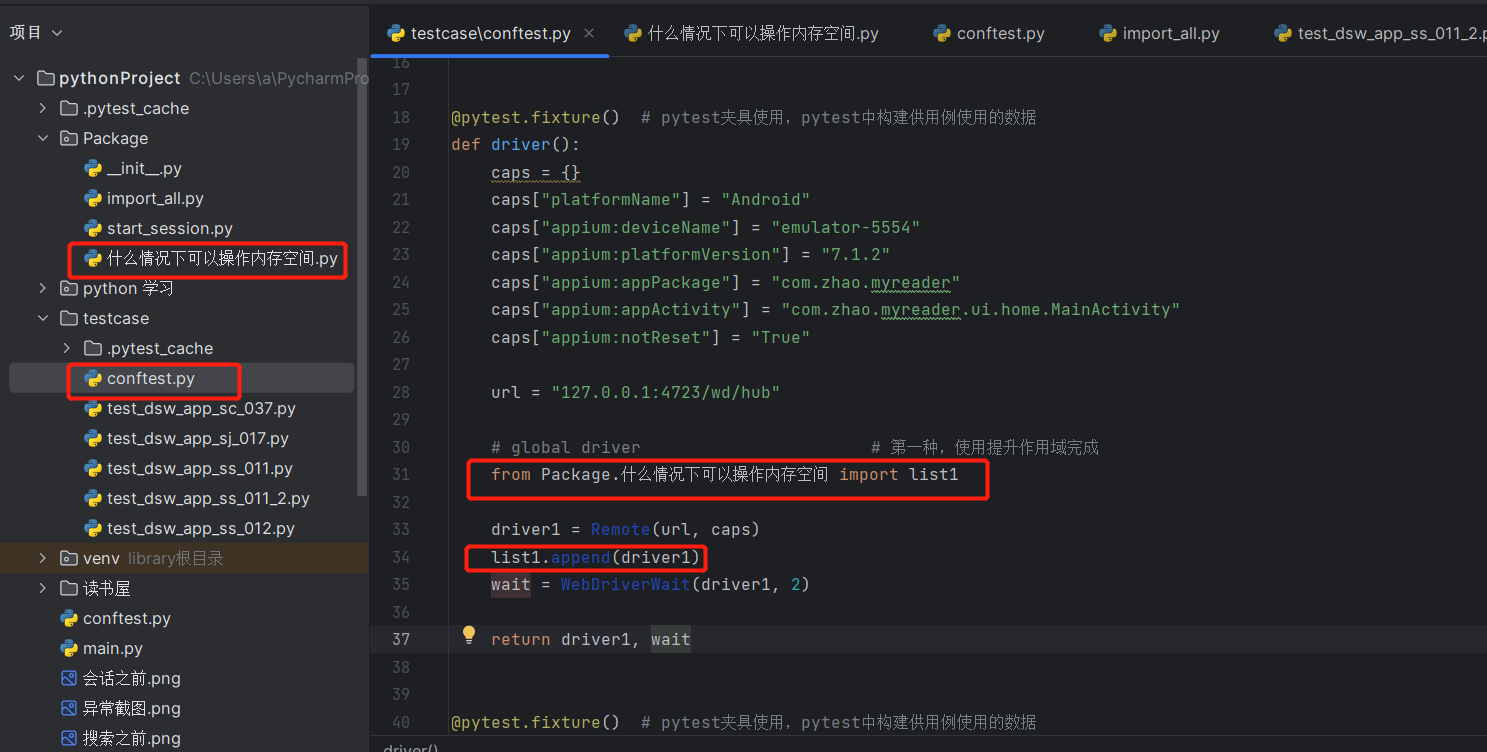
这个时候conftest-1的global driver无法传递到conftest-2的,这个时候就在conftest-1文件中注释global driver,然后把Package下的list1导入进来
然后在driver1 = Remote(url, caps) 下添加 list1.append(driver1)
然后在conftest-2中的截图之前导包list1[-1] # -1代表最新
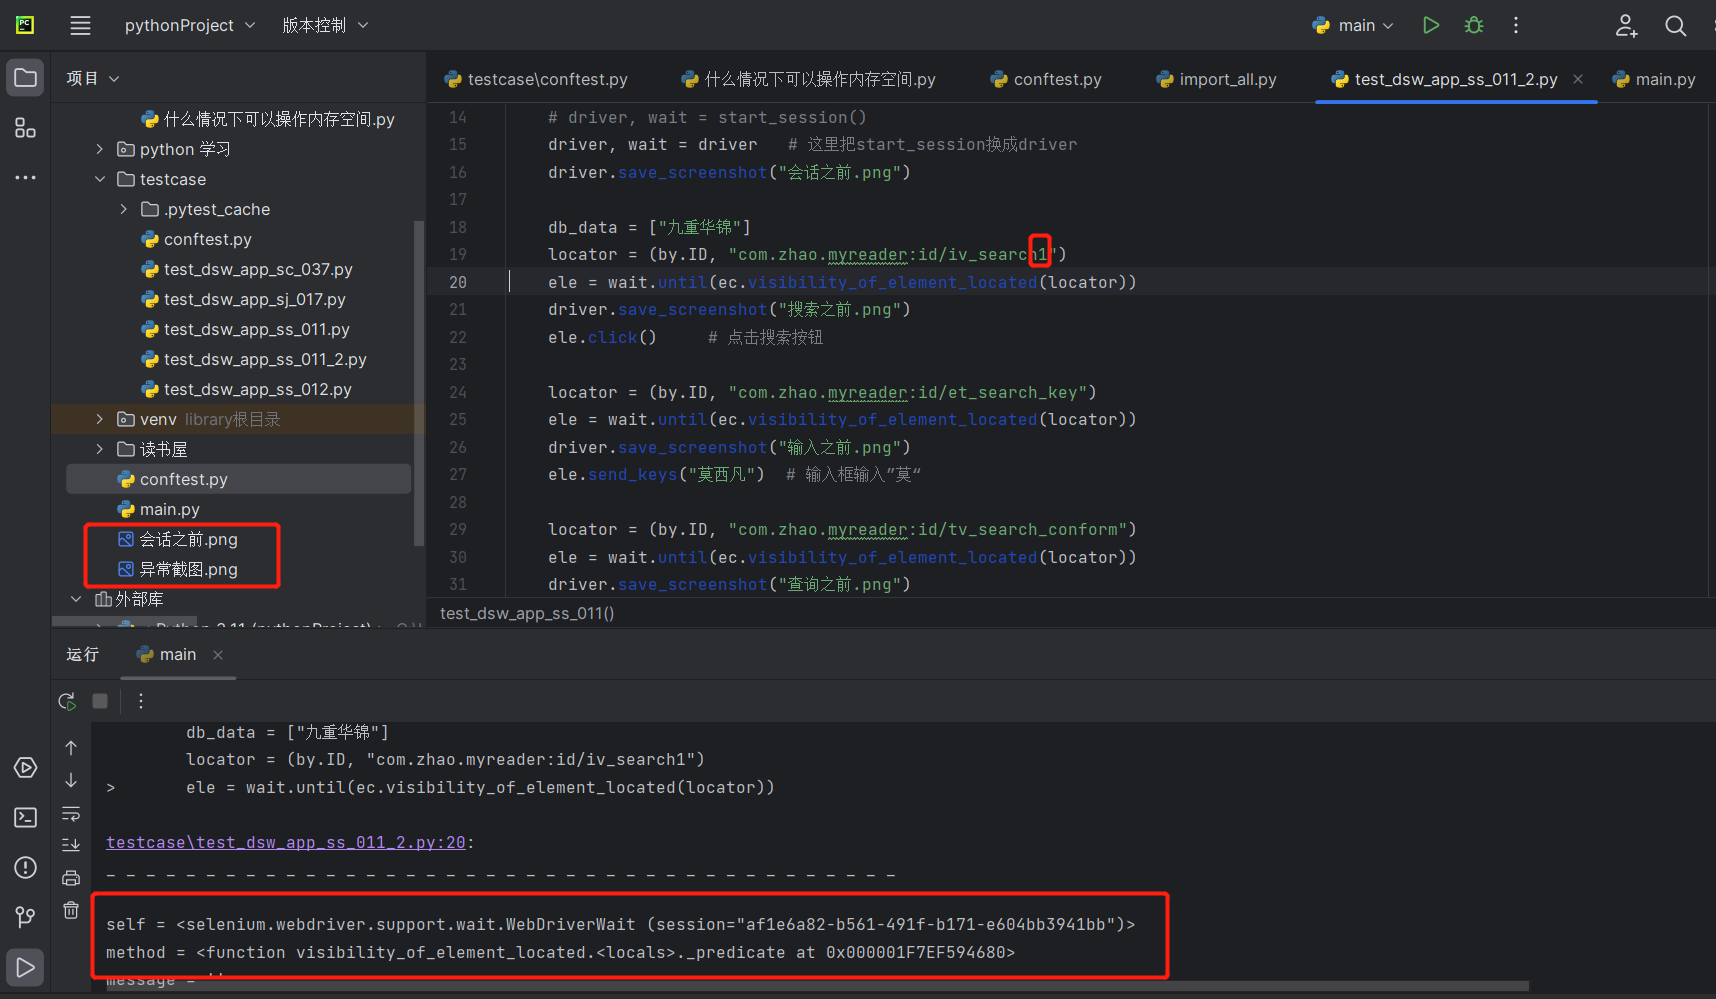
这个时候执行main文件,故意设置找不到元素,执行后,异常截图

 浙公网安备 33010602011771号