本地配置hadoop3.0.0开发环境
This page summarizes the steps to install Hadoop 3.0.0 on your Windows environment. Reference page:
Install Latest Hadoop 3.2.1 on Windows 10 Step by Step Guide
Tools and Environment
- GIT Bash
- Command Prompt
- Windows 10
Download Binary Package
Download the latest binary from the following site:
In my case, I am saving the file to folder: F:\DataA nalytics
UnZip binary package
Open Git Bash, and change directory (cd) to the folder where you save the binary package and then unzip:
$ cd F:\DataAnalytics
fahao@Raymond-Alienware MINGW64 /f/DataAnalytics
$ tar -xvzf  hadoop-3.0.0.tar.gz
In my case, the Hadoop binary is extracted to: F:\DataAnalytics\hadoop-3.0.0
Setup environment variables
Make sure the following environment variables are set correctly:
- JAVA_HOME: pointing to your Java JDK installation folder.
- HADOOP_HOME: pointing to your Hadoop folder in the previous step.
Then add ‘%JAVA_HOME%/bin’ and ‘%HADOOP_HOME%/bin’ into Path environment variable like the following screenshot:
Verify your setup
You should be able to verify your settings via the following command:
F:\DataAnalytics\hadoop-3.0.0>hadoop -version
java version "1.8.0_161"
Java(TM) SE Runtime Environment (build 1.8.0_161-b12)
Java HotSpot(TM) 64-Bit Server VM (build 25.161-b12, mixed mode)
HDFS configurations
Edit file hadoop-env.cmd
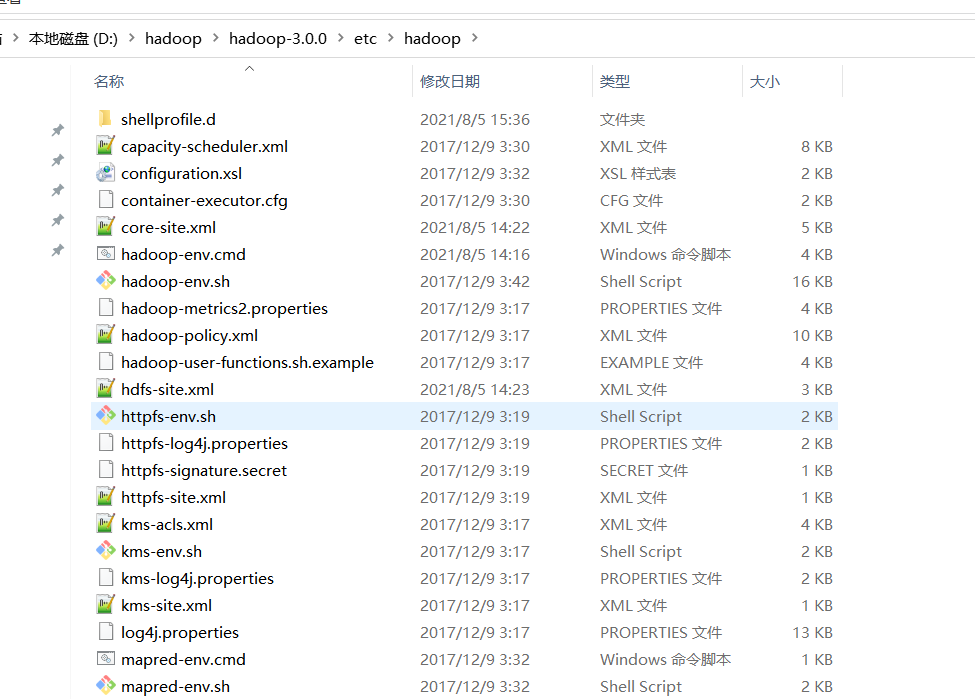
Change this file in %HADOOP_HOME%/etc/hadoop directory to add the following lines at the end of file:
set HADOOP_PREFIX=%HADOOP_HOME%
set HADOOP_CONF_DIR=%HADOOP_PREFIX%\etc\hadoop
set YARN_CONF_DIR=%HADOOP_CONF_DIR%
set PATH=%PATH%;%HADOOP_PREFIX%\bin
Edit file core-site.xml
Make sure the following configurations are existing:
<configuration>
   <property>
     <name>fs.defaultFS</name>
     <value>hdfs://0.0.0.0:19000</value>
   </property>
</configuration>
By default, the above property configuration doesn’t exist.
Edit file hdfs-site.xml
Make sure the following configurations are existing (you can change the file path to your own paths):
<configuration>
   <property>
     <name>dfs.replication</name>
     <value>1</value>
   </property>
   <property>
     <name>dfs.name.dir</name>
     <value>file:///F:/DataAnalytics/dfs/namespace_logs</value>
   </property>
   <property>
     <name>dfs.data.dir</name>
     <value>file:///F:/DataAnalytics/dfs/data</value>
   </property>
</configuration>
The above configurations setup the HFDS locations for storing namespace, logs and data files.
Edit file workers
Ensure the following content is existing:
localhost
YARN configurations
Edit file mapred-site.xml
Edit mapred-site.xml under %HADOOP_HOME%\etc\hadoop and add the following configuration, replacing %USERNAME% with your Windows user name.
<configuration>
   <property>
      <name>mapreduce.job.user.name</name>
      <value>%USERNAME%</value>
    </property>
   <property>
      <name>mapreduce.framework.name</name>
      <value>yarn</value>
    </property>
  <property>
     <name>yarn.apps.stagingDir</name>
     <value>/user/%USERNAME%/staging</value>
   </property>
  <property>
     <name>mapreduce.jobtracker.address</name>
     <value>local</value>
   </property>
</configuration>
Edit file yarn-site.xml
Make sure the following entries are existing:
<configuration>
   <property>
     <name>yarn.server.resourcemanager.address</name>
     <value>0.0.0.0:8020</value>
   </property>
  <property>
     <name>yarn.server.resourcemanager.application.expiry.interval</name>
     <value>60000</value>
   </property>
  <property>
     <name>yarn.server.nodemanager.address</name>
     <value>0.0.0.0:45454</value>
   </property>
  <property>
     <name>yarn.nodemanager.aux-services</name>
     <value>mapreduce_shuffle</value>
   </property>
  <property>
     <name>yarn.nodemanager.aux-services.mapreduce.shuffle.class</name>
     <value>org.apache.hadoop.mapred.ShuffleHandler</value>
   </property>
  <property>
     <name>yarn.server.nodemanager.remote-app-log-dir</name>
     <value>/app-logs</value>
   </property>
  <property>
     <name>yarn.nodemanager.log-dirs</name>
     <value>/dep/logs/userlogs</value>
   </property>
  <property>
     <name>yarn.server.mapreduce-appmanager.attempt-listener.bindAddress</name>
     <value>0.0.0.0</value>
   </property>
  <property>
     <name>yarn.server.mapreduce-appmanager.client-service.bindAddress</name>
     <value>0.0.0.0</value>
   </property>
  <property>
     <name>yarn.log-aggregation-enable</name>
     <value>true</value>
   </property>
  <property>
     <name>yarn.log-aggregation.retain-seconds</name>
     <value>-1</value>
   </property>
  <property>
     <name>yarn.application.classpath</name>
     <value>%HADOOP_CONF_DIR%,%HADOOP_COMMON_HOME%/share/hadoop/common/*,%HADOOP_COMMON_HOME%/share/hadoop/common/lib/*,%HADOOP_HDFS_HOME%/share/hadoop/hdfs/*,%HADOOP_HDFS_HOME%/share/hadoop/hdfs/lib/*,%HADOOP_MAPRED_HOME%/share/hadoop/mapreduce/*,%HADOOP_MAPRED_HOME%/share/hadoop/mapreduce/lib/*,%HADOOP_YARN_HOME%/share/hadoop/yarn/*,%HADOOP_YARN_HOME%/share/hadoop/yarn/lib/*</value>
   </property>
</configuration>
Initialize environment variables
Run hadoop-env.cmd to setup environment variables. For my case, the file path is:
%HADOOP_HOME%\etc\hadoop\hadoop-env.cmd
Format file system
Run the following command to format the file system:
hadoop namenode -format
The command should print out some logs like the following (the highlighted path may vary base on your HDFS configurations):
2018-02-18 21:29:41,501 INFO namenode.FSImage: Allocated new BlockPoolId: BP-353327356-172.24.144.1-1518949781495
2018-02-18 21:29:41,817 INFO common.Storage: Storage directory F:\DataAnalytics\dfs\namespace_logs has been successfully formatted.
2018-02-18 21:29:41,826 INFO namenode.FSImageFormatProtobuf: Saving image file F:\DataAnalytics\dfs\namespace_logs\current\fsimage.ckpt_0000000000000000000 using no compression
2018-02-18 21:29:41,934 INFO namenode.FSImageFormatProtobuf: Image file F:\DataAnalytics\dfs\namespace_logs\current\fsimage.ckpt_0000000000000000000 of size 390 bytes saved in 0 seconds.
2018-02-18 21:29:41,969 INFO namenode.NNStorageRetentionManager: Going to retain 1 images with txid >= 0
Start HDFS daemons
Run the following command to start the NameNode and DataNode on localhost.
%HADOOP_HOME%\sbin\start-dfs.cmd
The above command line will open two Command Prompt Windows: one for namenode and another for datanode.
To verify, let’s copy a file to HDFS:
%HADOOP_HOME%\bin\hdfs dfs -put file:///F:/DataAnalytics/test.txt /
And then list the files in HDFS:
%HADOOP_HOME%\bin\hdfs dfs -ls /
You should get some result similiar to the following screenshot:
Start YARN daemons
Start YARN through the following command:
%HADOOP_HOME%\sbin\start-yarn.cmd
Similar to HDFS, two windows will open:
To verify, we can run the following sample job to count word count:
%HADOOP_HOME%\bin\yarn jar %HADOOP_HOME%\share\hadoop\mapreduce\hadoop-mapreduce-examples-3.0.0.jar wordcount /test.txt /out
Web UIs
Resource manager
You can also view your job status through YRAN website. The default path is http://localhost:8088
NameNode UI
Default URL: http://localhost:9870
DataNode UI
Through name node, you can find out all the data nodes. For my case, i only have single data node with UI URL as http://localhost:9864
Errors and fixes
java.io.FileNotFoundException: Could not locate Hadoop executable: … \hadoop-3.0.0\bin\winutils.exe
Refer to the following page to fix the problem:
https://wiki.apache.org/hadoop/WindowsProblems
java.lang.UnsatisfiedLinkError: org.apache.hadoop.io.nativeio.NativeIO$Windows.access0(Ljava/lang/String;I)
This error is the same as the above one.
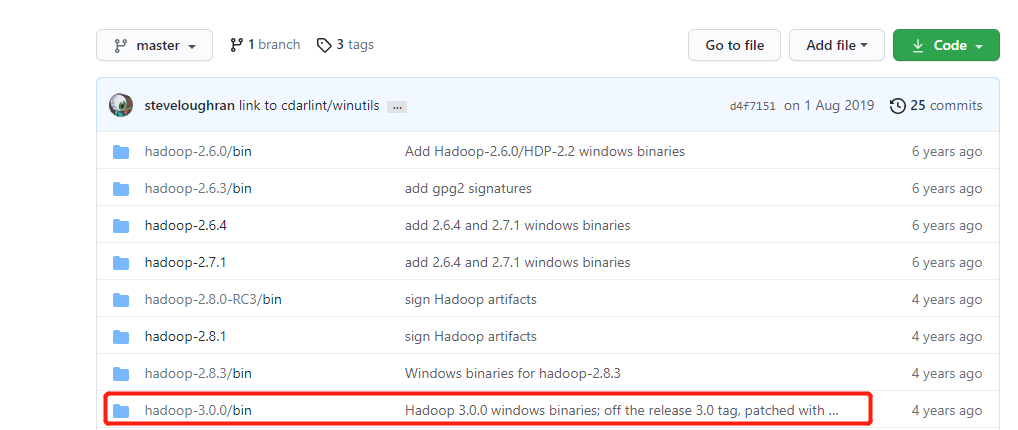
Refer to ‘Windows binaries for Hadoop versions (built from the git commit ID used for the ASF relase) ‘
https://github.com/steveloughran/winutils
For this example, I am using Hadoop 3.0.0.
https://github.com/steveloughran/winutils/tree/master/hadoop-3.0.0/bin
To fix it, copy over the above directory to %HADOOP_HOME%/bin.
总结:
1.https://archive.apache.org/dist/hadoop/common/ 下载对应hadoop版本的tar.gz包
2. https://github.com/steveloughran/winutils 下载对应的winutils
3.下载的对应bin目录文件覆盖到hadoop/bin目录


4.配置环境变量
HADOOP_HOME
HADOOP_CONF_DIR


5.将线上环境中的core-site.xml、hdfs-site.xml、mapred-site.xml、yarn-site.xml配置文件覆盖到etc/hadoop目录下

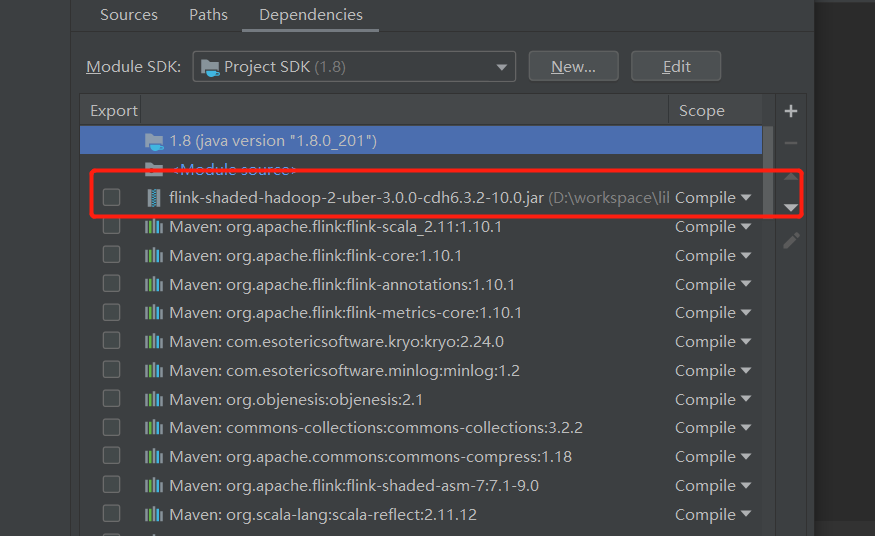
6.将flink-shaded-hadoop-2-uber-3.0.0-cdh6.3.2-10.0.jar包添加到IDE的依赖中

转载:https://kontext.tech/column/hadoop/246/install-hadoop-300-in-windows-single-node


【推荐】国内首个AI IDE,深度理解中文开发场景,立即下载体验Trae
【推荐】编程新体验,更懂你的AI,立即体验豆包MarsCode编程助手
【推荐】抖音旗下AI助手豆包,你的智能百科全书,全免费不限次数
【推荐】轻量又高性能的 SSH 工具 IShell:AI 加持,快人一步
· 开发者必知的日志记录最佳实践
· SQL Server 2025 AI相关能力初探
· Linux系列:如何用 C#调用 C方法造成内存泄露
· AI与.NET技术实操系列(二):开始使用ML.NET
· 记一次.NET内存居高不下排查解决与启示
· 开源Multi-agent AI智能体框架aevatar.ai,欢迎大家贡献代码
· Manus重磅发布:全球首款通用AI代理技术深度解析与实战指南
· 被坑几百块钱后,我竟然真的恢复了删除的微信聊天记录!
· 没有Manus邀请码?试试免邀请码的MGX或者开源的OpenManus吧
· 园子的第一款AI主题卫衣上架——"HELLO! HOW CAN I ASSIST YOU TODAY