系统服务控制
系统服务控制
系统服务控制(centos7)
systemctl 控制类型 服务名称
控制类型
start:启动
stop:停止
restart:重新启动
reload:重新加载
status:查看服务状态
enable --now:开机自启并立即开启
disable --now:开机自动关闭并立即关闭
linux系统的运行级别
查看运行级别
runlevel命令
systemctl工具

临时切换运行级别
init命令

设置永久运行级别
systemstl工具

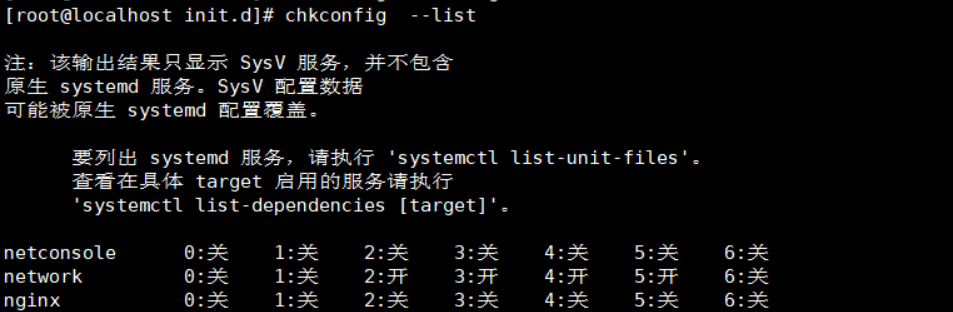
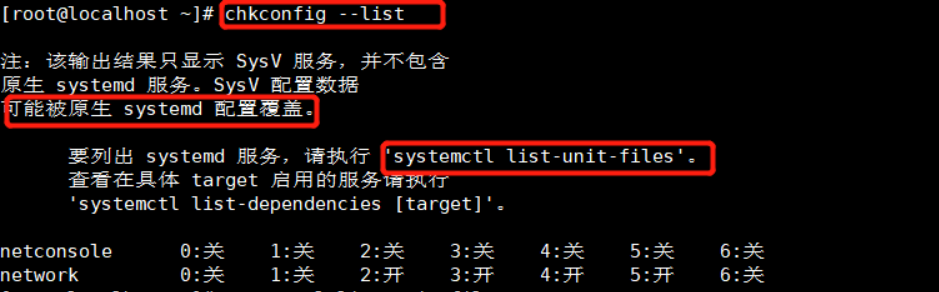
chkconfig工具(centos6)
目前已经不用了 ,它是centos6的功能,但是也要了解,跟systemctl类似
格式:chkconfig --list [服务名称]
chkconfig --list #列出所以服务
chkconfig --add 服务名称 #添加服务
chkconfig --level 级别 服务名 on/off #自动开启或关闭某个服务的级别
执行chkconfig --add命令必须在etc/init.d目录下写入脚本并且加上执行权限chound x
实验
编译安装nginx,写脚本,将nginx加入服务
1.将源码包拉进虚拟机
[root@localhost init.d]# rz -E#     将nginx源码包拉进虚拟机
rz waiting to receive.
[root@localhost init.d]# ls#这可以看到源码包已存在
functions  netconsole  network  nginx-1.12.0.tar.gz  README
解压tar
[root@localhost ~]# tar xvf nginx-1.12.0.tar.gz -C /data
#调用gzip解压到data目录下
3.安装依赖包
[root@localhost ~]# yum -y install pcre-devel zlib-devel gcc gcc-c++ make
4.切换到解压的目录启用模块
[root@localhost ~]# cd /data/nginx-1.12.0/#切换目录
[root@localhost nginx-1.12.0]# ./configure \
> --prefix=/usr/local/nginx \
#安装路径
> --user=nginx \
#指定用户名  指定谁来管理他
> --group=nginx \
#指定用户组
> --with-http_stub_status_module
#启用此模块支持状态统计
5.添加用户
[root@localhost nginx-1.12.0]# useradd  -M -s /sbin/nologin nginx
#添加用户nginx不生成家目录不建立宿主目录指定shell环境
6.编译安装
[root@localhost nginx-1.12.0]# make && make install #编译安装
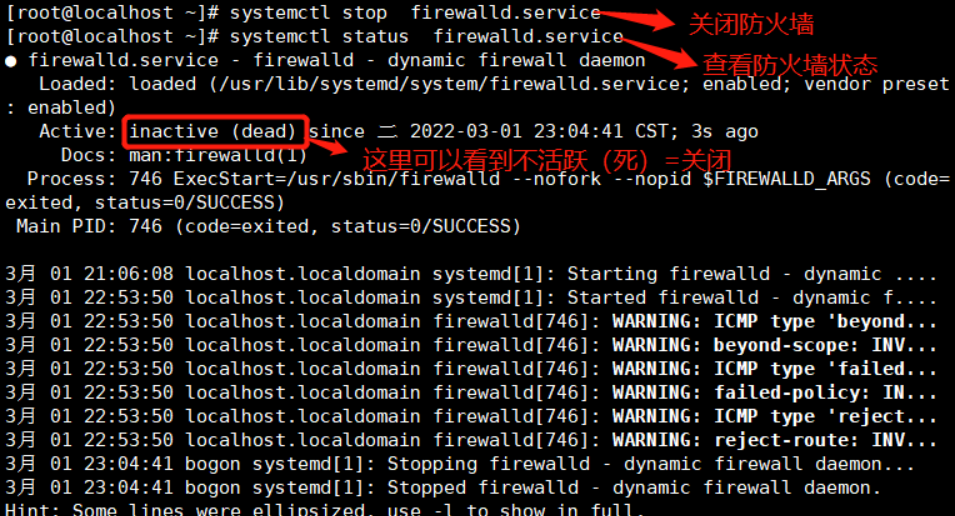
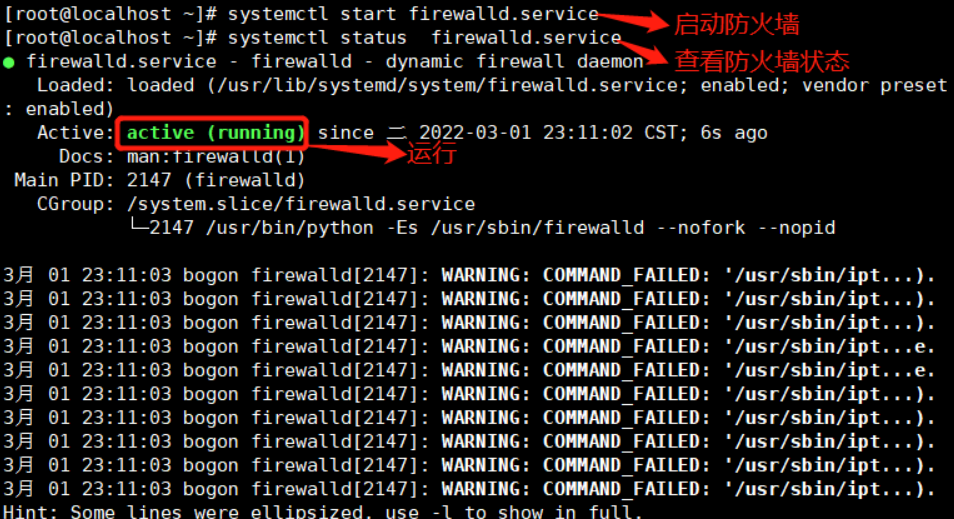
7.关闭防火墙
[root@localhost nginx-1.12.0]# systemctl stop firewalld.service #关闭防火墙
[root@localhost nginx-1.12.0]# setenforce 0   #临时生效
8.启动服务
[root@localhost sbin]# cd /usr/local/nginx/sbin/ #切换到安装位置
[root@localhost sbin]# /usr/local/nginx/sbin/nginx #用绝对路径启动
[root@localhost sbin]# ss -ntap| grep nginx 查看系统中nginx的服务进程
LISTEN     0      128          *:80                       *:*                   users:(("nginx",pid=5954,fd=6),("nginx",pid=5953,fd=6))
9.这时在网页上输入虚拟机的IP地址,便可以看到nginx服务

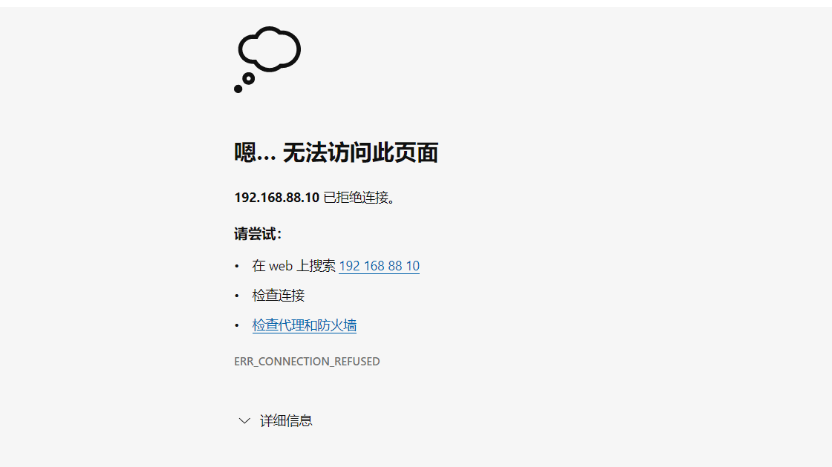
10.我们想要使用服务来管理他需要写文件,先把他关掉,只能杀进程
[root@localhost sbin]# cat /usr/local/nginx/logs/nginx.pid   #查看nginx的pid
5953
[root@localhost sbin]# kill -3 5953    #杀进程
这是网页服务无法打开
[root@localhost sbin]# cd /etc/init.d/  #切换目录
[root@localhost init.d]# vim nginx#写入执行脚本
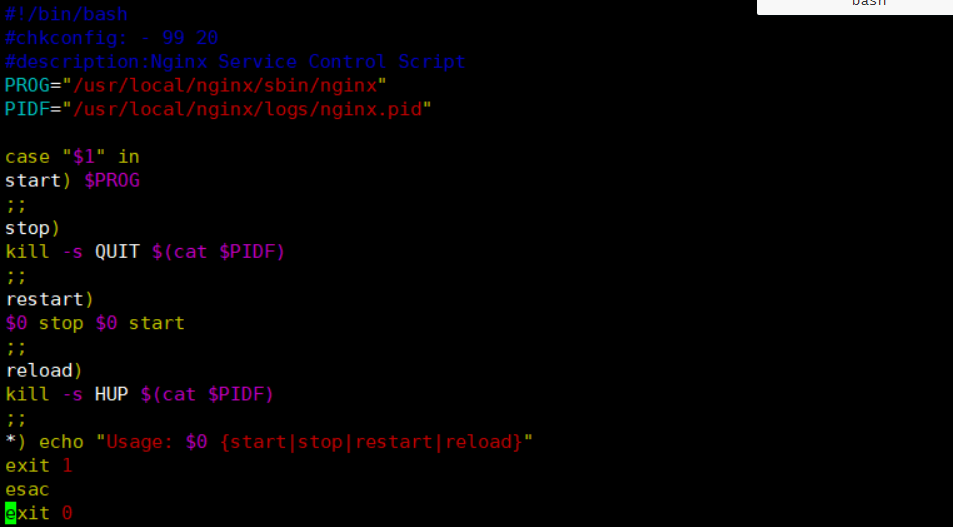
[root@localhost init.d]# chmod +x nginx  #加如可执行权限
[root@localhost init.d]# chkconfig  --add nginx  #将nginx加入服务