【React】: React的生命周期
概述

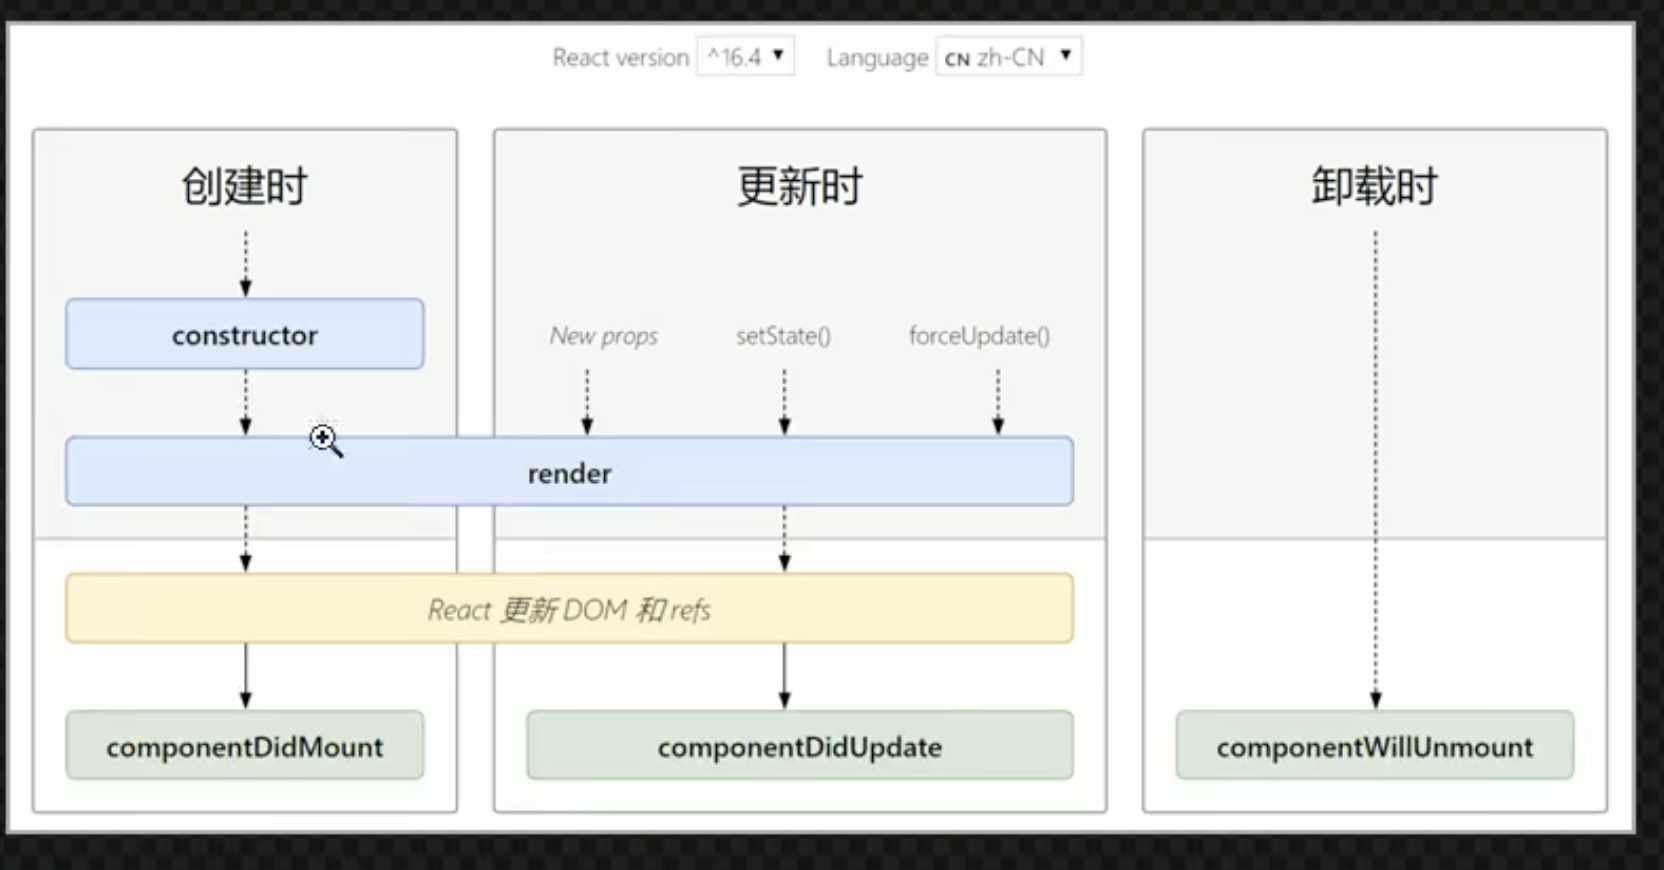
同时有:

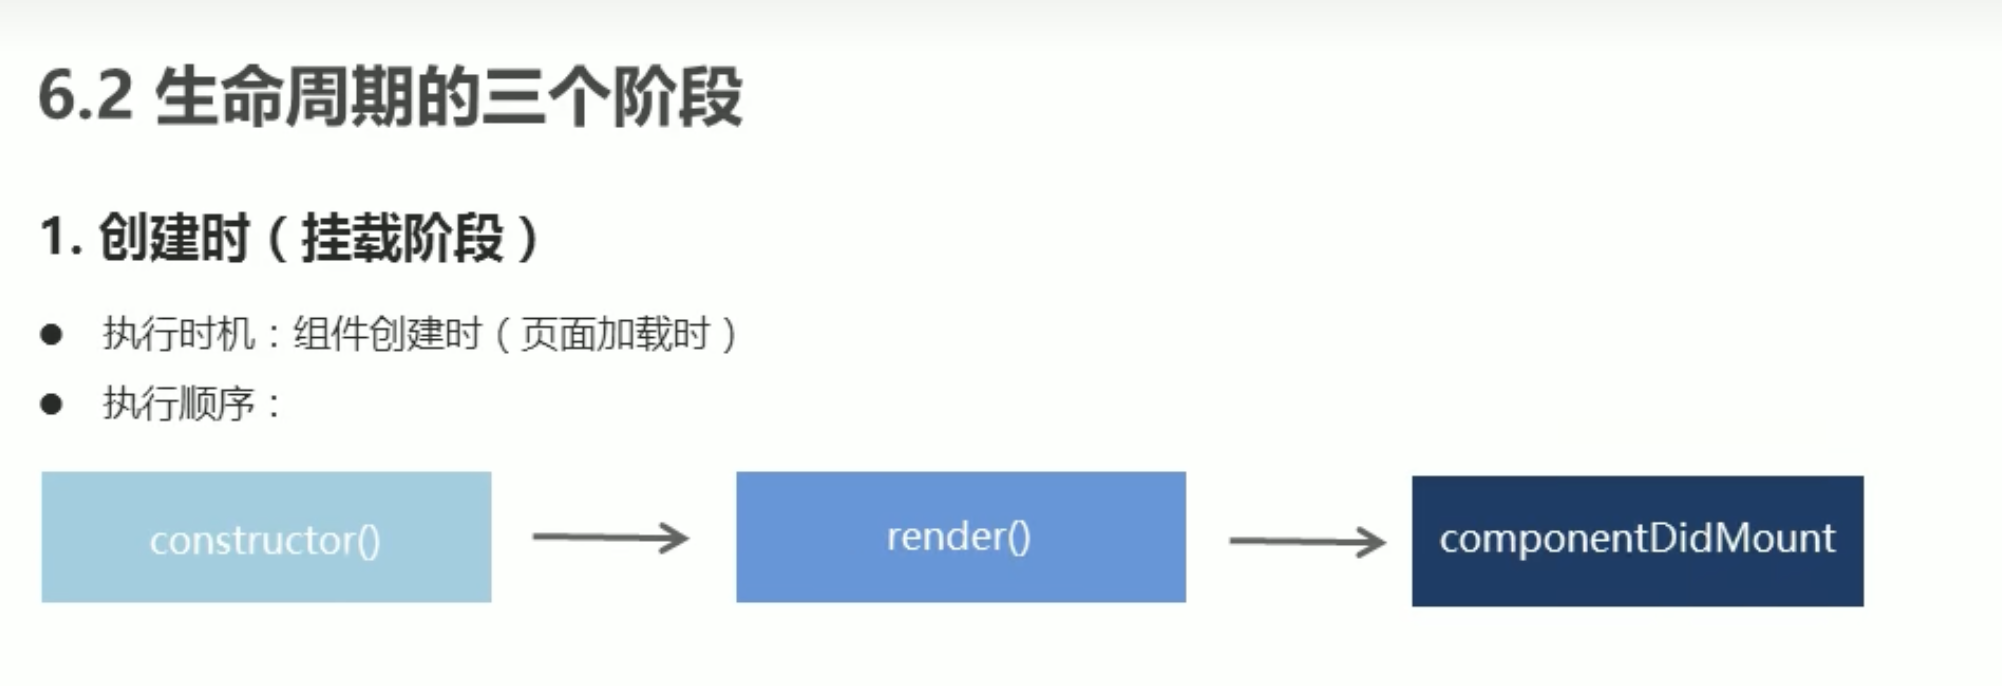
1.1 创建时 的生命周期执行顺序
编写以下代码,从而验证constructor,render,componentDidMount的顺序:
class App5 extends React.Component
{
  constructor(props)
  {
    super(props)

    console.warn("生命周期钩子函数:constructor")
  }

  componentDidMount()
  {
    console.warn("生命周期钩子函数:componentDidMount")
  }

  render()
{
  console.warn("生命周期钩子函数:render")
  return (
<div>
<h3></h3>
<h1>统计豆豆被打的次数:</h1>
<button id='btn'>打豆豆</button>
</div>

  )
}
}

ReactDOM.render(<App5/>,document.getElementById('root9'))
在开发者工具中发现执行顺序为:


当然我们对这三个状态还有以下总结:

备注:不能在render里调用setstate的原因是:在render里既能够更新状态,也会更新ui,具体可以参考前面的生命周期图,render里调用setstate,而setstate也会继续调用render,这样就会导致递归调用,从而导致error。
一定要在render里进行调用setstate,我们可以采用箭头函数,同时可以将this从render当中抽离出来,这样相当于在生命周期的“更新时”再继续更新Ui,代码如下:
class AppThree extends React.Component
{

  state={
    count:0
  }

  //组件当中的state,可以通过this.state来进行调用
  //使用setState,来修改数据,直接使用this.state.count+1,来修改是行不通的
  //备注:如果直接使用事件抽离的方法,把render函数当中的逻辑抽离出来,但是在当前class的其他
  //的函数当中,是无法调用到this的。 因此在其他函数中无法调用this.setState是肯定的。

  render(){
    return (
      <div>
        <h1>计数器</h1>

        <button onClick={() => {
          this.setState({
            count:this.state.count+1
          })

        } }>
        +1</button>
        <div>这是一个有状态组件当中的数据count。{this.state.count}</div>
      </div>
    )
  }

}
这样就可以保证这里的this不是指的render里的this,而是render外部的this。当然还可以将这个this.setstate的逻辑进行抽离出来:
class AppSix extends React.Component
{


  state={
    count:0
  }

  onIncrement = () =>
  {
    this.setState({
      count:this.state.count+1
    })
  }

  render(){
    return (
      <div>
        <h1>计数器</h1>
        {/*在react当中,onclick方法都需要用花括号括起来,再来表示其中的方法,这里的箭头函数可以直接实现调用,只是没有对这个箭头函数
        进行命名,也就是令 hello = () => this.onIncrement(),是否命名都一样的
        */}
        <button onClick={this.onIncrement}>+1</button>
    )
  }

}


ReactDOM.render(<AppSix />, document.getElementById('event_six'))
对于componentDidMount,我们可以在里面进行网络请求和dom操作,因为它是等渲染完成后,才开始进行这个生命进程。
1.2 更新时的生命周期
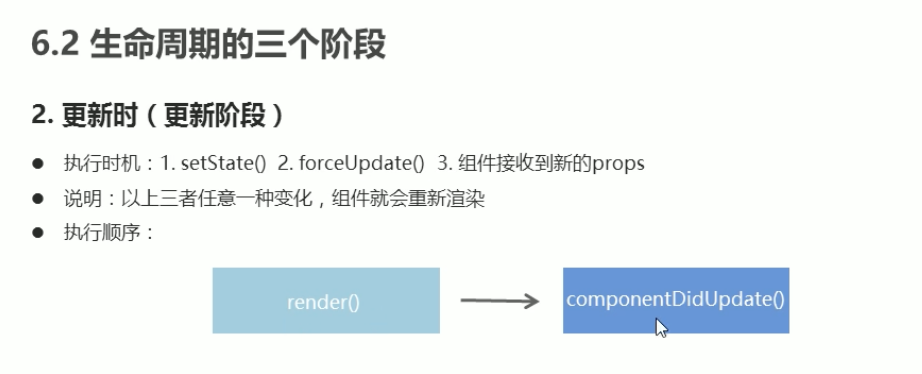
在更新时,也就是值的初始的渲染都完成了,在渲染完成后,用户如果点击了界面,网页如何使用钩子函数对不同状态下的网页进行检测和更新。有三种情况都会导致组件进行重新渲染,分别是调用:
- New props(新参数被调用)
- setState()
- forceUpdate() : 也就是强制更新
class App6 extends React.Component{

constructor(props)
{
  super(props)

  this.state={
    count:0
  }
}

handleClick= () =>
{
  this.setState({
    count:this.state.count+1
  })
}


render()
{
  return (
    <div>
      <h3>5.2 更新时的生命周期</h3>
      <Counter2 count={this.state.count }/>
      <button onClick={this.handleClick}>打豆豆</button>
    </div>

  )

}

}

class Counter2 extends React.Component
{
  render()
  {
    return <h3>统计豆豆被打的次数:{this.props.count}</h3>
  }


}


ReactDOM.render(<App6/>,document.getElementById('root10'))
这里用到了子组件counter2,并且子组件接受到了参数props,因此在接受到了参数props后,确实会对ui进行更新,也就是进行重新渲染,我们点击一次按钮,子组件都会接受到一次参数,这样打豆豆的次数就会发生变化。
我们可以看到ComponentDidUpdate()是在render函数之后,才开始执行的,因此有以下的的图片:

1.3 卸载时的生命周期

我们在打完豆豆超过3次后,子组件消失,因此可以使用compomentWillUnmount函数,执行清理工作。代码如下:
class App6 extends React.Component{

constructor(props)
{
  super(props)

  this.state={
    count:0
  }
}

handleClick= () =>
{
  this.setState({
    count:this.state.count+1
  })
}


render()
{
  return (
    <div>
      <h3>5.2 更新时的生命周期</h3>
        {
          this.state.count > 3 ? (
            <p>豆豆被打死了</p>

          ) :(
            <Counter2 count={this.state.count }/>
          )

        }


      <button onClick={this.handleClick}>打豆豆</button>
    </div>

  )

}

}

class Counter2 extends React.Component
{
  render()
  {
    console.warn("子组件--更新时--render函数被渲染")
    return <h3>统计豆豆被打的次数:{this.props.count}</h3>
  }

  componentDidUpdate()
  {
    console.warn("子组件--更新时--componentDidUpdate函数被渲染")

  }

  componentWillUnmount()
  {
    //我们在父组件当中规定了这个子组件在超过3次之后销毁,因此销毁后应该调用这个函数
    console.warn("子组件--生命周期钩子函数: componentWillUnmount")
  }


}


ReactDOM.render(<App6/>,document.getElementById('root10'))
我们在发现子组件消失后,确实compomentWillUnmount函数被执行了,warning被打印出。


【推荐】国内首个AI IDE,深度理解中文开发场景,立即下载体验Trae
【推荐】编程新体验,更懂你的AI,立即体验豆包MarsCode编程助手
【推荐】抖音旗下AI助手豆包,你的智能百科全书,全免费不限次数
【推荐】轻量又高性能的 SSH 工具 IShell:AI 加持,快人一步
· 10年+ .NET Coder 心语 ── 封装的思维:从隐藏、稳定开始理解其本质意义
· 地球OL攻略 —— 某应届生求职总结
· 提示词工程——AI应用必不可少的技术
· Open-Sora 2.0 重磅开源!
· 字符编码:从基础到乱码解决
2019-06-12 Python当中的array数组对象