java应用测试报告生成(一): sonarqube配合Jenkins生成测试报告及覆盖率
环境准备:
1.Jenkins集成环境(安装 sonarqube插件)
2.安装sonarqube服务(下载sonarqube安装包并解压,目录到"sonarqube-5.4/bin/linux-x86-64"下运行命令"./sonar.sh start"启动服务)
启动服务后jps看到如下结果
33878 Jps
15191 SearchServer
15134 WrapperSimpleApp
15455 WebServer
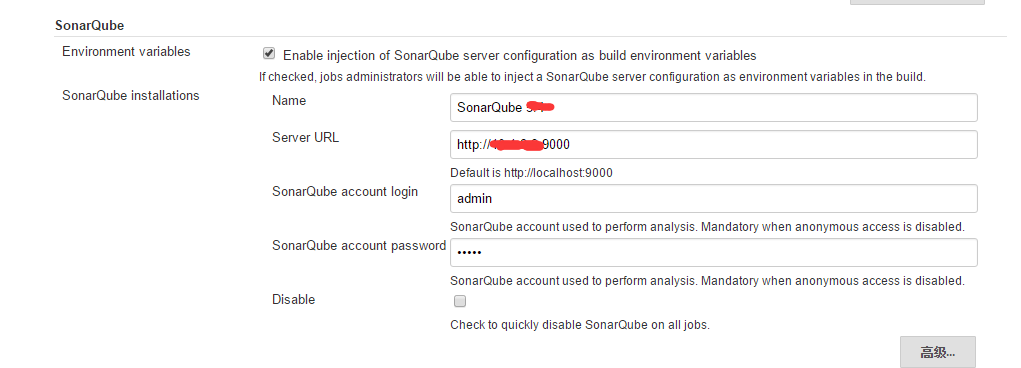
Jenkins配置:
项目配置:
项目pom.xml添加如下配置(添加及配置jacoco插件):
    <build>
        <plugins>
            <plugin>
                <artifactId>maven-compiler-plugin</artifactId>
                <version>3.1</version>
                <configuration>
                    <source>1.7</source>
                    <target>1.7</target>
                </configuration>
            </plugin>
            <plugin>
                <groupId>org.jacoco</groupId>
                <artifactId>jacoco-maven-plugin</artifactId>
                <executions>
                    <execution>
                        <id>pre-test</id>
                        <goals>
                            <goal>prepare-agent</goal>
                        </goals>
                    </execution>
                    <execution>
                        <id>post-test</id>
                        <phase>test</phase>
                        <goals>
                            <goal>report</goal>
                        </goals>
                    </execution>
                </executions>
            </plugin>
            <plugin>
                <groupId>org.apache.maven.plugins</groupId>
                <artifactId>maven-compiler-plugin</artifactId>
                <version>3.1</version>
                <configuration>
                    <encoding>UTF-8</encoding>
                </configuration>
            </plugin>
            <plugin>
                <groupId>org.mortbay.jetty</groupId>
                <artifactId>jetty-maven-plugin</artifactId>
                <version>8.1.16.v20140903</version>
                <configuration>
                    <stopPort>9966</stopPort>
                    <stopKey>foo</stopKey>
                    <scanIntervalSeconds>10</scanIntervalSeconds>
                    <webApp>
                        <contextPath>/p_test</contextPath>
                    </webApp>
                </configuration>
            </plugin>
        </plugins>
        <pluginManagement>
            <plugins>
                <plugin>
                    <groupId>org.jacoco</groupId>
                    <artifactId>jacoco-maven-plugin</artifactId>
                    <version>0.7.5.201505241946</version>
                </plugin>
            </plugins>
        </pluginManagement>
    </build>
    <!--覆盖率 -->
    <profiles>
        <profile>
            <id>coverage-per-test</id>
            <build>
                <plugins>
                    <plugin>
                        <groupId>org.apache.maven.plugins</groupId>
                        <artifactId>maven-surefire-plugin</artifactId>
                        <version>2.9</version>
                        <configuration>
                            <!--忽略某个目录的测试代码 -->
                            <includes>
                                <include>**/*Test.java</include>
                            </includes>
                            <properties>
                                <property>
                                    <name>listener</name>
                                    <value>org.sonar.java.jacoco.JUnitListener</value>
                                </property>
                            </properties>
                            <systemPropertyVariables>
                                <jacoco-agent.destfile>target/jacoco.exec</jacoco-agent.destfile>
                            </systemPropertyVariables>
                        </configuration>
                    </plugin>
                </plugins>
            </build>
            <dependencies>
                <dependency>
                    <groupId>org.sonarsource.java</groupId>
                    <artifactId>sonar-jacoco-listeners</artifactId>
                    <version>3.8</version>
                    <scope>test</scope>
                </dependency>
                <dependency>
                    <groupId>org.jacoco</groupId>
                    <artifactId>org.jacoco.agent</artifactId>
                    <version>0.7.5.201505241946</version>
                    <scope>test</scope>
                </dependency>
            </dependencies>
        </profile>
    </profiles>
</project>
项目运行无误就可以提交Jenkins了,找到Jenkins的该项目配置,在add post-build steps 中选择"Invoke Standalone SonarQube Analysis"
在Analysis properties中添加如下内容:
# must be unique in a given SonarQube instance
sonar.projectKey=p_test
# this is the name displayed in the SonarQube UI
sonar.projectName=p_test
sonar.projectVersion=1.0
# Path is relative to the sonar-project.properties file. Replace "\" by "/" on Windows.
# Since SonarQube 4.2, this property is optional if sonar.modules is set.
# If not set, SonarQube starts looking for source code from the directory containing
# the sonar-project.properties file.
# Encoding of the source code. Default is default system encoding
#sonar.sourceEncoding=UTF-8
sonar.svn.username=***
sonar.svn.password.secured=***
sonar.java.coveragePlugin=jacoco
sonar.sources=src/main/java
sonar.tests=src/test/java/
sonar.binaries=target/classes
sonar.junit.reportsPath=target/surefire-reports
sonar.surefire.reportsPath=target/surefire-reports
注意填写访问代码源的账号和密码,其他如果需要可以更改项目名,收集报告的目录等:
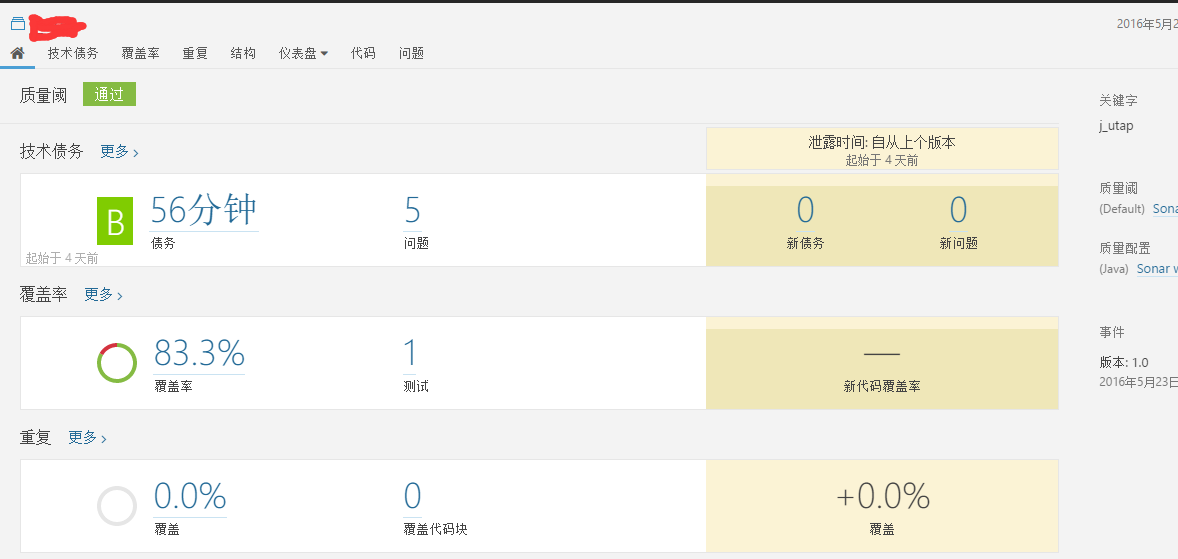
编译项目,点击sonarqube按钮可以进入查看页面:
点击测试可以继续看到测试的方法以及通过情况.

