Spring Cloud+Nacos+Feign实现服务提供者和消费者代码
Nacos是阿里巴巴开源的动态服务发现、配置管理和服务管理平台中间件,一个搞定了注册中心和配置中心。
Nacos的安装不再赘述,可以看官网的手册,也比较简单。
下面结合Feign怎么实现基于Nacos实现服务的提供者和消费者。
项目结构如下:
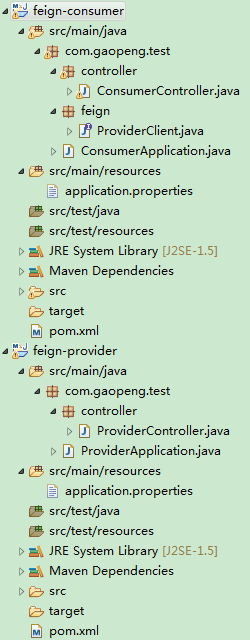
feign-provider 是服务提供者:
先搭建一个springboot工程:
添加依赖:
<dependency>
  <groupId>com.alibaba.cloud</groupId>
  <artifactId>spring-cloud-starter-alibaba-nacos-discovery</artifactId>
  <version>2.2.1.RELEASE</version>
</dependency>
配置文件application.properties添加配置:
server.port=8070
spring.application.name=service-provider
spring.cloud.nacos.discovery.server-addr=127.0.0.1:8848
启动类:
package com.gaopeng.test.controller;

import org.springframework.web.bind.annotation.RequestMapping;
import org.springframework.web.bind.annotation.RequestMethod;
import org.springframework.web.bind.annotation.ResponseBody;
import org.springframework.web.bind.annotation.RestController;

@RestController
public class ProviderController {

    @RequestMapping(value = "/hello", method = RequestMethod.GET)
    @ResponseBody
    public String get() {

        System.out.println("hello hello .......");
        return "hello world feign";
    }
}
添加测试Controller:
package com.gaopeng.test.controller;

import org.springframework.web.bind.annotation.RequestMapping;
import org.springframework.web.bind.annotation.RequestMethod;
import org.springframework.web.bind.annotation.ResponseBody;
import org.springframework.web.bind.annotation.RestController;

@RestController
public class ProviderController {

    @RequestMapping(value = "/hello", method = RequestMethod.GET)
    @ResponseBody
    public String get() {

        return "hello world feign";
    }
}
至此,服务提供者搭建完成。
feign-consumer是服务消费者:
先搭建一个springboot工程:
添加依赖,注意,因为要使用feign调用服务提供者,要添加相应依赖:
<dependency>
  <groupId>com.alibaba.cloud</groupId>
  <artifactId>spring-cloud-starter-alibaba-nacos-discovery</artifactId>
  <version>2.2.1.RELEASE</version>
</dependency>
  <dependency>
  <groupId>org.springframework.cloud</groupId>
  <artifactId>spring-cloud-starter-openfeign</artifactId>
  <version>2.2.2.RELEASE</version>
</dependency>
配置文件application.properties添加配置:
server.port=8080
spring.application.name=service-consumer
spring.cloud.nacos.discovery.server-addr=127.0.0.1:8848
启动类:
package com.gaopeng.test;

import org.springframework.boot.SpringApplication;
import org.springframework.boot.autoconfigure.SpringBootApplication;
import org.springframework.cloud.client.discovery.EnableDiscoveryClient;
import org.springframework.cloud.openfeign.EnableFeignClients;

@SpringBootApplication
@EnableDiscoveryClient
@EnableFeignClients
public class ConsumerApplication {

    public static void main(String[] args) {

        SpringApplication.run(ConsumerApplication.class, args);
    }

}
添加feign的client:
package com.gaopeng.test.feign;

import org.springframework.cloud.openfeign.FeignClient;
import org.springframework.web.bind.annotation.RequestMapping;
import org.springframework.web.bind.annotation.RequestMethod;

@FeignClient("service-provider")
public interface ProviderClient {

    @RequestMapping(value = "/hello", method = RequestMethod.GET)
    String sayHello();
}
添加测试Controller:
package com.gaopeng.test.controller;

import org.springframework.beans.factory.annotation.Autowired;
import org.springframework.web.bind.annotation.RequestMapping;
import org.springframework.web.bind.annotation.RequestMethod;
import org.springframework.web.bind.annotation.ResponseBody;
import org.springframework.web.bind.annotation.RestController;

import com.gaopeng.test.feign.ProviderClient;

@RestController
@RequestMapping("consumer")
public class ConsumerController {

    @Autowired
    private ProviderClient providerClient;

    @RequestMapping(value = "/hello-consumer", method = RequestMethod.GET)
    public String sayHello() {

        return providerClient.sayHello();
    }
}
服务消费者搭建完成。
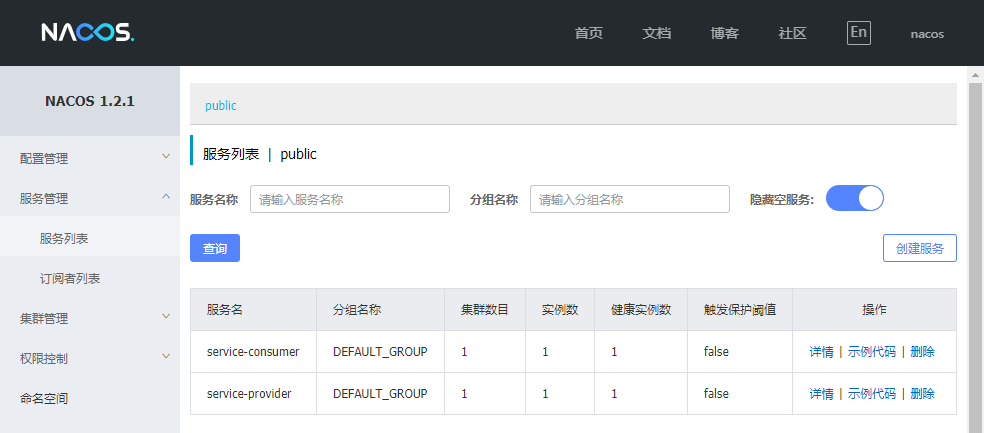
准备工作完成,启动nacos、服务提供者,服务消费者。全部启动成功后,就可以在nacos的控制台界面里看到两个已经注册进去的服务:
直接使用浏览器访问:http://127.0.0.1:8080/consumer/hello-consumer,得到如下结果:


 浙公网安备 33010602011771号