SpringCloud Netflix(三):Eureka注册与发现
在微服务架构里说过微服务架构有四大问题,其一就是 这么多服务,如何管理?
而Eureka就是Netflix提供给我们来管理众多服务的。
Eureka是一个基于REST(Representational State Transfer)的服务,主要用于AWS云中定位服务,以实现中间层服务器的负载平衡和故障转移。
在Netflix,Eureka除了在中端负载平衡中发挥关键作用外,还用于以下目的。
为了帮助Netflix Asgard—一个使云部署更容易的开源服
在遇到问题时快速回滚版本,避免重新启动100个实例,这可能需要很长时间。
在滚动推送中,为了避免在出现问题时向所有实例传播新版本。
为了我们的cassandra部署,将实例从流量中取出进行维护。
为了我们的memcached缓存服务来识别环中的节点列表。
出于各种其他原因,用于携带有关服务的其他特定于应用程序的元数据。

Eureka使用实例
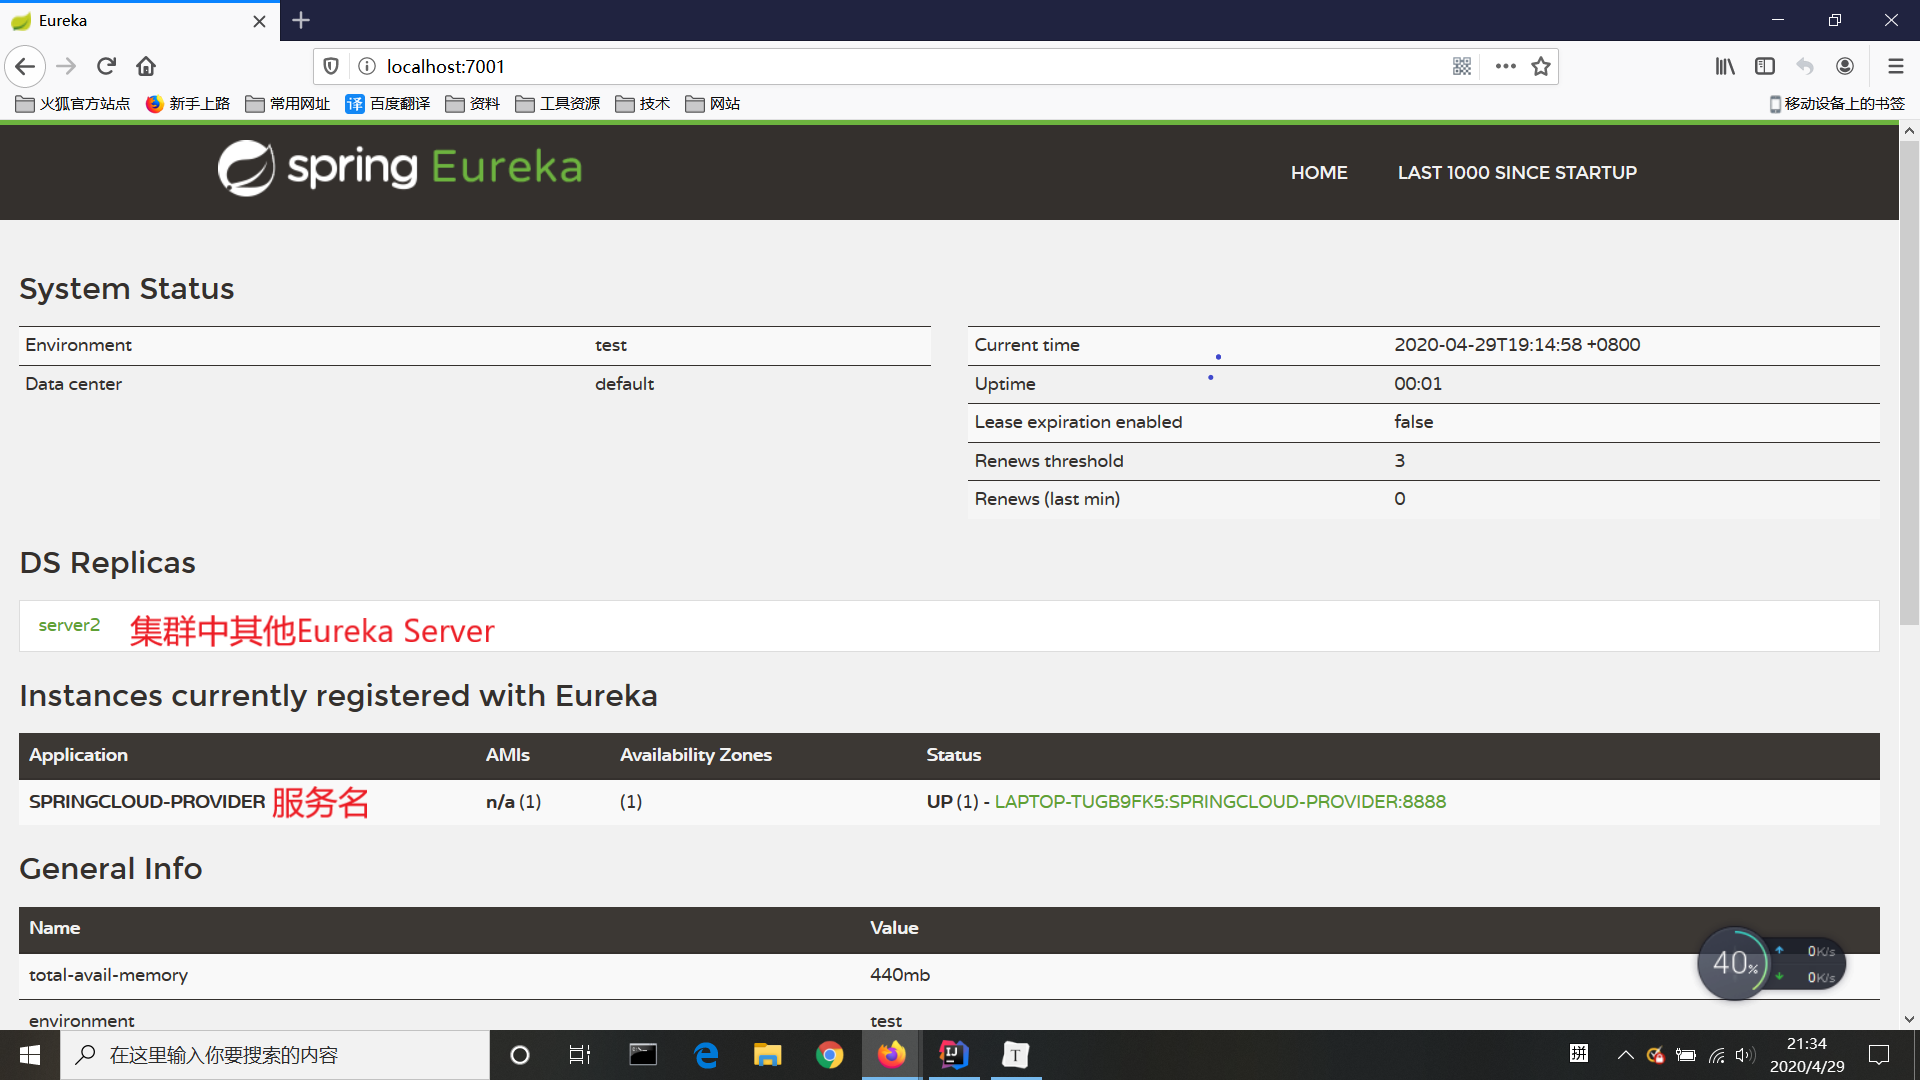
1. 创建Eureka Server
添加 eureka-server 依赖
<dependency>
    <groupId>org.springframework.cloud</groupId>
    <artifactId>spring-cloud-starter-netflix-eureka-server</artifactId>
    <version>1.4.7.RELEASE</version>
</dependency>
添加配置
server:
  port: 7001

eureka:
  instance:
    hostname: server1
  client:
    register-with-eureka: false # 是否将自己注册到Eureka Server, 默认为true
    fetch-registry: false # 是否从Eureka Server获取注册信息,默认为true
    service-url:
      defaultZone: http://localhost:7001/eureka/
@SpringBootApplication
@MapperScan("com.example.springcloud.mapper")
@EnableEurekaServer //声明该应用为Eureka Server
public class Eureka7001 {
    public static void main(String[] args) {
        SpringApplication.run(Eureka7001.class, args);
    }
}
2.创建Eureka Client(即服务提供者)
在之前的服务提供者的基础上,添加 eureka 依赖
<dependency>
    <groupId>org.springframework.cloud</groupId>
    <artifactId>spring-cloud-starter-netflix-eureka-client</artifactId>
    <version>1.4.7.RELEASE</version>
</dependency>
添加配置
server:
  port: 8888

spring:
  application:
    name: springcloud-provider #注册中心中的服务名
  datasource:
    driver-class-name: com.mysql.jdbc.Driver
    url: jdbc:mysql://localhost:3306/db01?useUnicode=true&characterEncoding=utf-8&allowMultiQueries=true&serverTimezone=Asia/Shanghai
    username: root
    password: "123456"
    type: com.alibaba.druid.pool.DruidDataSource

eureka:
  client:
    service-url:
      defaultZone: http://localhost:7001/eureka/ #对应Eureka Server的defaultZone
@SpringBootApplication
@EnableEurekaClient //声明该应用为Eureka Client
public class Provider_8888 {
    public static void main(String[] args) {
        SpringApplication.run(Provider_8888.class,args);
    }
}
3.消费者
server:
  port: 80

eureka:
  client:
    register-with-eureka: false
    service-url:
      defaultZone: http://localhost:7001/eureka/ #对应Eureka Server的defaultZone
通过服务名调用服务者
package com.example.springcloud.controller;

import com.example.springcloud.domain.User;
import org.springframework.beans.factory.annotation.Autowired;
import org.springframework.web.bind.annotation.PathVariable;
import org.springframework.web.bind.annotation.RequestMapping;
import org.springframework.web.bind.annotation.RestController;
import org.springframework.web.client.RestTemplate;

import java.util.List;

@RestController
@RequestMapping("/consumer")
public class IndexController {

    @Autowired
    private RestTemplate restTemplate;

     // “http://服务名/[controller类上的RequestMapping]”,服务名是服务者配置里的spring.application.name
    // 如果服务提供者controller类上不加RequestMapping,[]里的路径可去掉
    private static final String URL = "http://SPRINGCLOUD-PROVIDER/user/";

    @RequestMapping("/user/{id}")
    public User getUserById(@PathVariable("id")Integer id) {
        return restTemplate.getForObject(URL+id, User.class);
    }

    @RequestMapping("/user/list")
    public List<User> getAllUser(){
        return restTemplate.getForObject(URL, List.class);
    }

    @RequestMapping("/user/add")
    public int addUser(User dept){
        return restTemplate.postForObject(URL+"add", dept, Integer.class);
    }

}
@SpringBootApplication(exclude = {DataSourceAutoConfiguration.class})
@EnableEurekaClient //声明该应用为Eureka Client
public class Consumer {
    public static void main(String[] args) {
        SpringApplication.run(Consumer.class, args);
    }
}

Eureka集群
server:
  port: 7002

eureka:
  instance:
    hostname: server2 #在注册中心中的Eureka Server名
  client:
    register-with-eureka: false # 是否将自己注册到Eureka Server, 默认为true
    fetch-registry: false # 是否从Eureka Server获取注册信息,默认为true
    service-url:
      defaultZone: http://localhost:7001/eureka/ #对集群中其他Eureka Server,多个用逗号分开
把之前的Eureka Server的配置中的defaultZone也改成
server:
  port: 7001

eureka:
  instance:
    hostname: server1 #在注册中心中的Eureka Server名
  client:
    register-with-eureka: false # 是否将自己注册到Eureka Server, 默认为true
    fetch-registry: false # 是否从Eureka Server获取注册信息,默认为true
    service-url:
      defaultZone: http://localhost:7002/eureka/ #对集群中其他Eureka Server,多个用逗号分开
2.更改服务者和消费者的配置中的defaultZone
eureka:
  client:
    register-with-eureka: false
    service-url:
      defaultZone: http://localhost:7001/eureka/,http://localhost:7002/eureka/ #对集群中所有Eureka Server,多个用逗号分开
自我保护机制
默认情况下,如果 Eureka Server 在一定的 90s 内没有接收到某个微服务实例的心跳,会注销该实例。但是在微服务架构下服务之间通常都是跨进程调用,网络通信往往会面临着各种问题,比如微服务状态正常,网络分区故障,导致此实例被注销。
固定时间内大量实例被注销,可能会严重威胁整个微服务架构的可用性。为了解决这个问题,Eureka 开发了自我保护机制,那么什么是自我保护机制呢?
Eureka Server 在运行期间会去统计心跳失败比例在 15 分钟之内是否低于 85%,如果低于 85%,Eureka Server 即会进入自我保护机制。
Eureka Server 触发自我保护机制后,页面会出现提示:

Eureka Server 进入自我保护机制,会出现以下几种情况:
-
Eureka 不再从注册列表中移除因为长时间没收到心跳而应该过期的服务
-
Eureka 仍然能够接受新服务的注册和查询请求,但是不会被同步到其它节点上(即保证当前节点依然可用)
-
当网络稳定时,当前实例新的注册信息会被同步到其它节点中
Eureka 自我保护机制是为了防止误杀服务而提供的一个机制。当个别客户端出现心跳失联时,则认为是客户端的问题,剔除掉客户端;当 Eureka 捕获到大量的心跳失败时,则认为可能是网络问题,进入自我保护机制;当客户端心跳恢复时,Eureka 会自动退出自我保护机制。
如果在保护期内刚好这个服务提供者非正常下线了,此时服务消费者就会拿到一个无效的服务实例,即会调用失败。对于这个问题需要服务消费者端要有一些容错机制,如重试,断路器等。
通过在 Eureka Server 配置如下参数,开启或者关闭保护机制,生产环境建议打开:
eureka:
  server:
    enable-self-preservation: true


