参考:
这是别人的解决方案。这里自己动手试试,记录一下。

组件代码ColorAssembler2D.js:
cc.Class({
    extends: cc.Component,

    properties: {
        colors: [cc.Color]
    },

    onLoad() {

    },

    onEnable() {
        cc.director.once(cc.Director.EVENT_AFTER_DRAW, this._updateColors, this);
    },

    onDisable() {
        cc.director.off(cc.Director.EVENT_AFTER_DRAW, this._updateColors, this);
        this.node['_renderFlag'] |= cc['RenderFlow'].FLAG_COLOR;
    },

    _updateColors() {
        const cmp = this.getComponent(cc.RenderComponent);
        if (!cmp) return;
        const _assembler = cmp['_assembler'];
        if (!(_assembler instanceof cc['Assembler2D'])) return;
        const uintVerts = _assembler._renderData.uintVDatas[0];
        if (!uintVerts) return;
        const color = this.node.color;
        const floatsPerVert = _assembler.floatsPerVert;
        const colorOffset = _assembler.colorOffset;
        let count = 0;
        for (let i = colorOffset, l = uintVerts.length; i < l; i += floatsPerVert) {
            uintVerts[i] = (this.colors[count++] || color)['_val'];
        }
    },

});
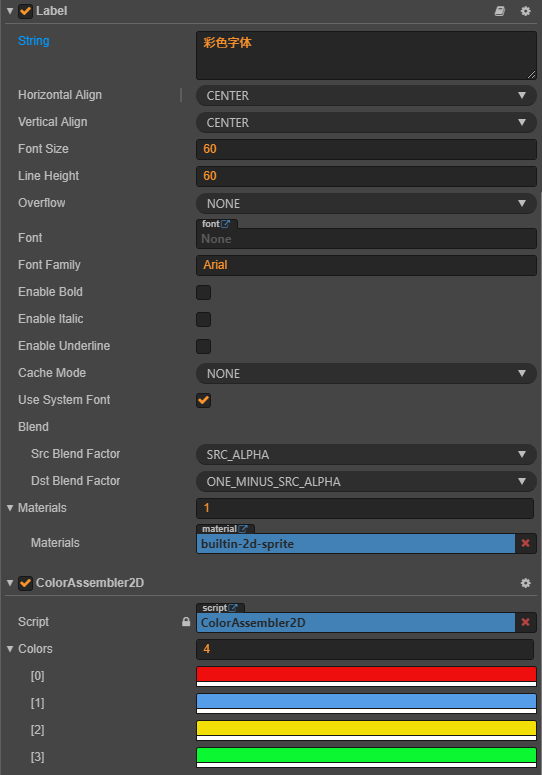
将组件ColorAssembler2D.js绑定到字体或图片上,设置4种颜色

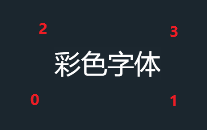
4种颜色对应四个角

运行项目,彩色字体生效

用在图片上同理,下图是原图和使用彩色渐变后效果


例如有个需求,就是普通装备字体是普通颜色,而高级装备是彩色字体。
普通装备时字体淡黑色显示
label.node.getComponent("ColorAssembler2D").onDisable();

label.node.color = new cc.Color().fromHEX("#eeeeee");

label.string = "普通装备"
高级装备彩色显示(要把颜色变成白色)
label.node.color = new cc.Color().fromHEX("#ffffff");

label.node.getComponent("ColorAssembler2D").onEnable();

label.string = "高级装备"


