

前言
基本安装
sudo apt-get install vim vim-scripts vim-doc
vim-scripts是vim的一些基本插件,包括语法高亮的支持、缩进等等。
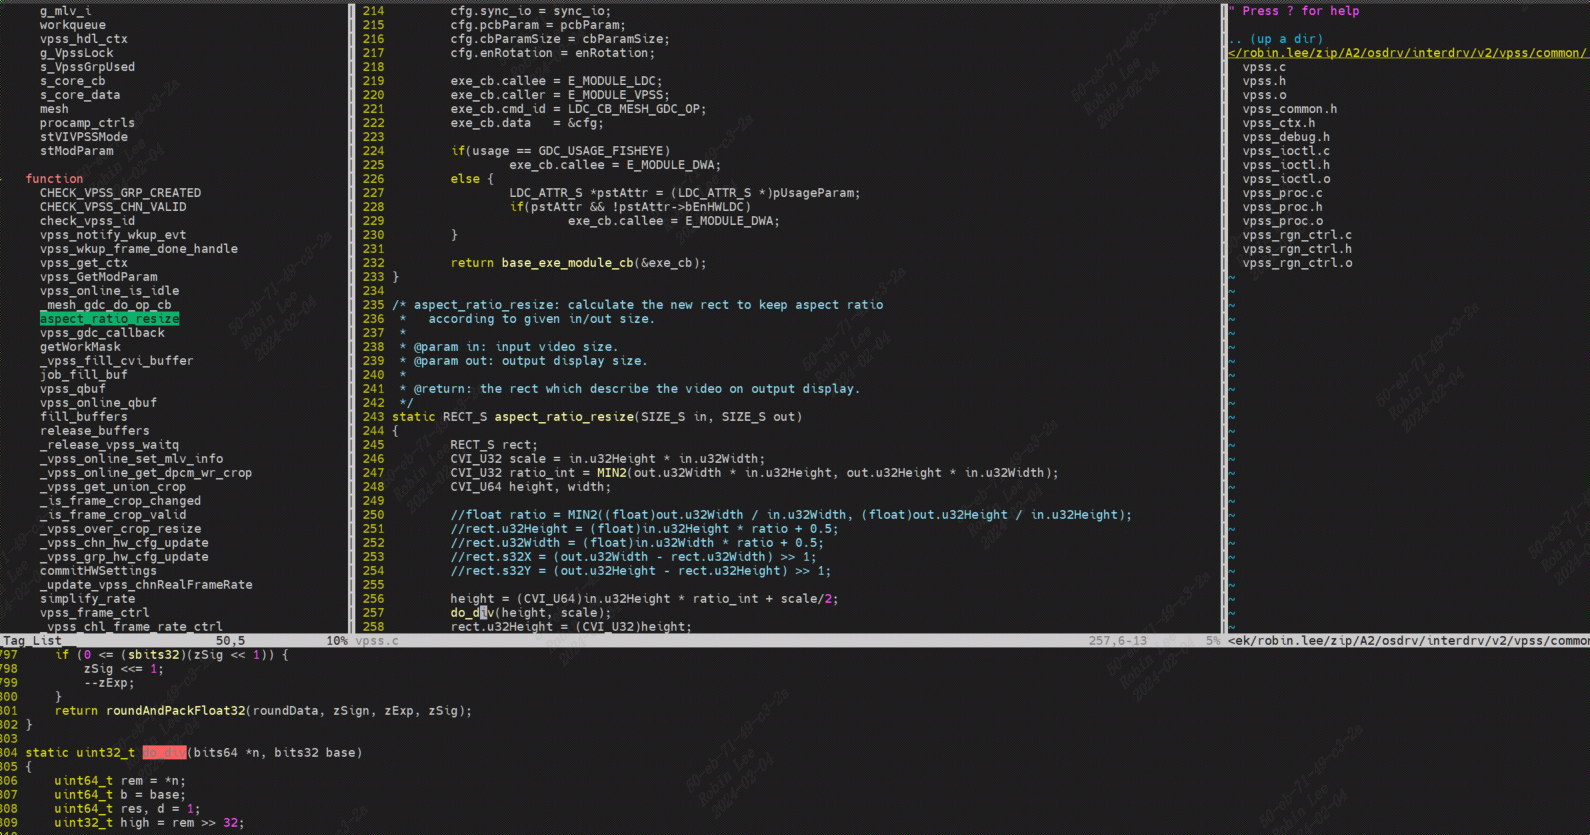
整体配置好后效果如下:
1 ctags + taglist安装配置
1.1 ctag作用
ctags 最先是用来生成C代码的tags文件,后来扩展成可以生成各类语言的tags, 有些语言也有专有的tags生成工具(比如java的jtags, python的 ptags),因此ctag用来进行vim阅读源码时进行函数,变量的快速定位跳转。
1.2 安装ctags
sudo apt-get install ctags
1.3 安装taglist
taglist_46.zip压缩包:解压到~/.vim目录下即可。
https://www.vim.org/scripts/script.php?script_id=273
mkdir ~/.vim
cd ~/.vim
unzip taglist_46.zip
1.4 创建tags文件
$ctags -R --c++-kinds=+p+l+x+c+d+e+f+g+m+n+s+t+u+v --fields=+liaS --extra=+q
如果为了简单,也可以只进行:
$ctags -R *
不过,这种成员变量没有包含在里面。所以可能有些对象的成员时无法跳转。
1.4.1配置选项
  $ ctags -R               #递归的为当前目录及子目录下的所有代码文件生成tags文件 (推荐使用此命令)
  $ ctags filename.c filename1.c file.h  #为当前目录某些源码生成tags文件
  $ ctags *.c *.h              #为当前目录所有.c, .h源码生成tags文件

  为了使得字段补全有效,在生成tags时需要一些额外的参数,推荐的c++参数主要是:ctags -R --c++-kinds=+px --fields=+iaS --extra=+q
  其中:
	选项c++-kinds 用于指定C++语言的 tags记录类型,  --c-kinds用于指定c语言的,  通用格式是  --{language}-kinds
	选项 fileds 用于指定每条标记的扩展字段域
	extra 选项用于增加额外的条目:   f表示为每个文件增加一个条目,  q为每个类增加一个条目
1.5 配置.vimrc
"--------------display-----------------
set nu                          "行号
syntax on                       "语法高亮
set ruler                       "显示当前行和列
set showcmd                     "显示部分命令
set showmode            "最后一行显示当前模式
"set match                      "显示括号匹配
"--------------display-----------------

"---------------input------------------
set smartindent         "自动缩进
set expandtab           "将tab转化为空格
set smarttab            "插入tab使用shiftwidth
set shiftwidth=4        "缩进列数为4
"---------------input------------------

"---------------search-----------------
set hlsearch            "搜索结果高亮显示
"set inccase                    "预览搜索结果
set ignorecase          "不区分大小写
set smartcase           "当有大写字母时区分大小写
"---------------search-----------------

"---------------encoding----------------
set encoding=utf-8              "设置编码格式
set fileencodings=utf-8,gb18030,gbk,gb2312,big5
set termencoding=utf-8


"--------------ctags----------------
set tags=tags;
set autochdir        "通用方式,如果没有找到tags文件,或者没有找到对应的目标,就到父目录中查找,一直向上递归。
"--------------ctags----------------


"--------------taglist----------------
let Tlist_Use_Left_Window=1             "vim左侧窗口显示Taglist
let Tlist_Exit_OnlyWindow=1             "Taglist是最后一个窗口是退出vim
let Tlist_WinWidth=60           "设置Taglist窗口宽度为60
nmap <F2> :Tlist<CR>                    "设置快捷键<F2>打开Taglist
"--------------taglist----------------
2 ctags + taglist使用
2.1 ctags使用
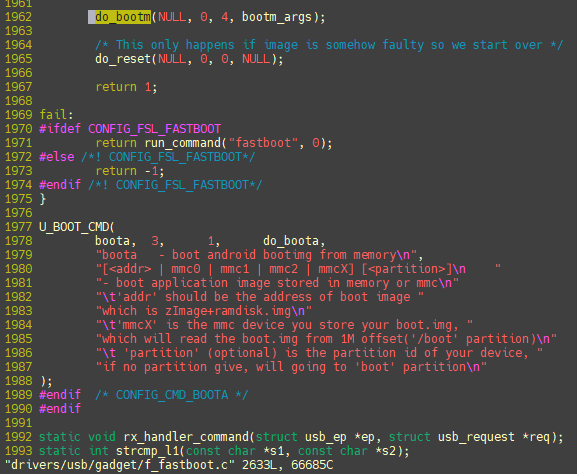
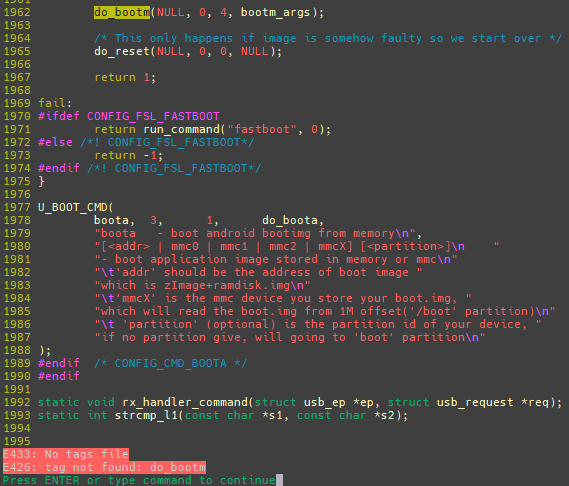
book@100ask:~/ftp/openedv/uboot-2016$ vi drivers/usb/gadget/f_fastboot.c
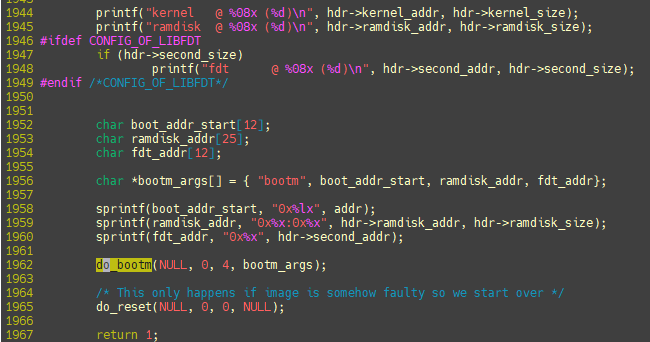
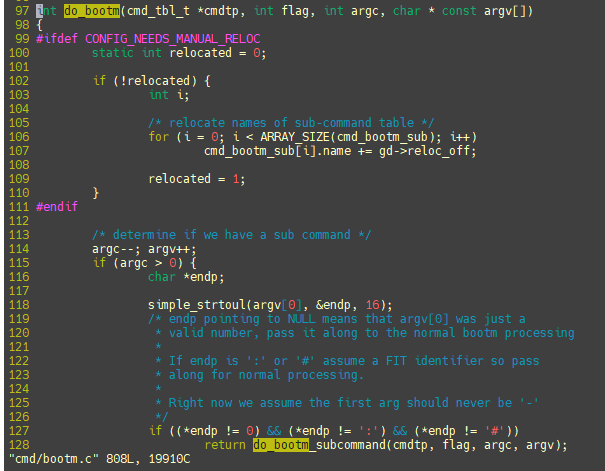
2.1.1 ctrl + ]可以进行函数跳转
2.1.2 ctrl + T可以返回跳转之前位置
2.1.3 加载tags
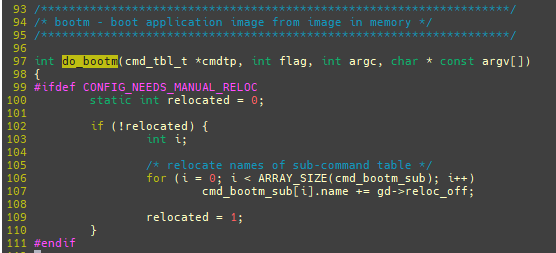
默认从创建tags的目录去启动vim打开文件会自动加载当前目录的tags文件,因此可以直接跳转:
如我是从uboot根目录建立的tags文件,然后:
book@100ask:~/ftp/openedv/uboot-2016$ vi drivers/usb/gadget/f_fastboot.c
这样自动加载tags文件,能够进行跳转。
如果进入其他目录:可以看到就无法打开tags文件。
book@100ask:~/ftp/openedv/uboot-2016$ cd  drivers/usb/gadget/
book@100ask:~/ftp/openedv/uboot-2016/drivers/usb/gadget$ vi f_fastboot.c
vim进入命令模式输入:
:set tags+='/home/book/ftp/openedv/uboot-2016/tags
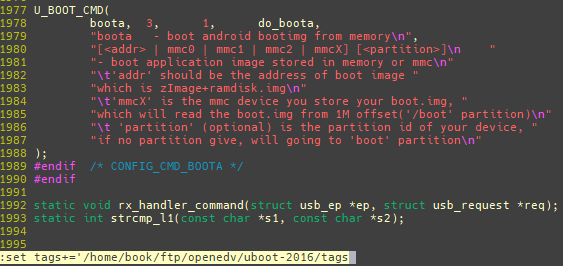
此时就可以正常跳转了。
2.1.4 自动加载tags
在~/.vimrc文件中添加下面两行:
set tags=tags;
set autochdir
通用方式,如果没有找到tags文件,或者没有找到对应的目标,就到父目录中查找,一直向上递归。
这样就可以在不用在tags根路径去使用vim了。如:
book@100ask:~/ftp/openedv/uboot-2016/drivers/usb/gadget$ vi f_fastboot.c
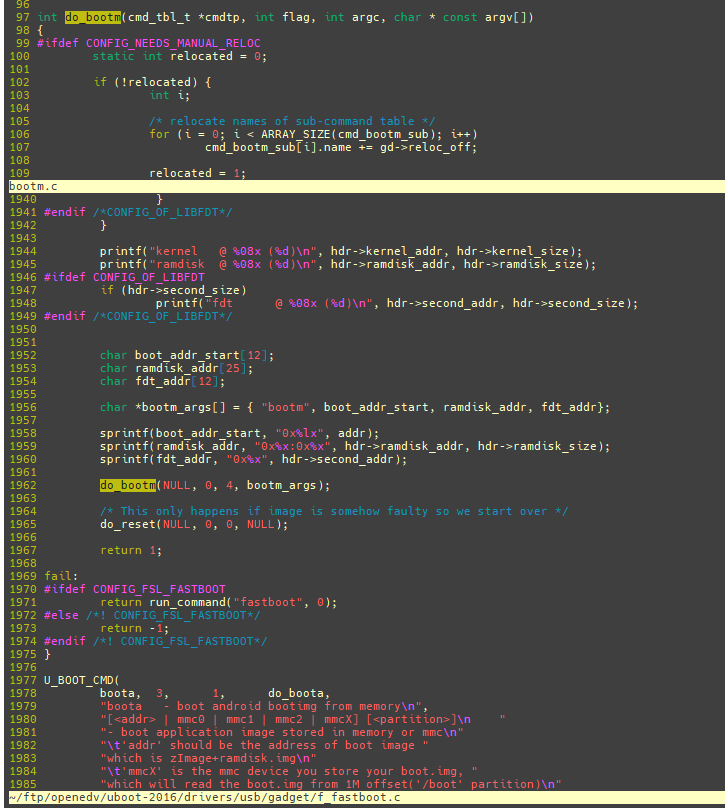
2.1.5 ts 列出所有匹配的标签
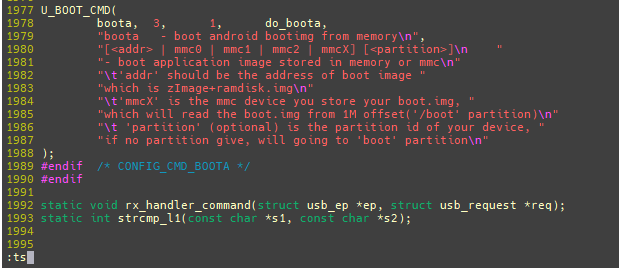
可以看到有2处地方匹配,一个是cmd/bootm.c,一个是include/command.h

2.1.5 Ctrl + W + ]分割当前窗口
输入:q退出分割窗口。
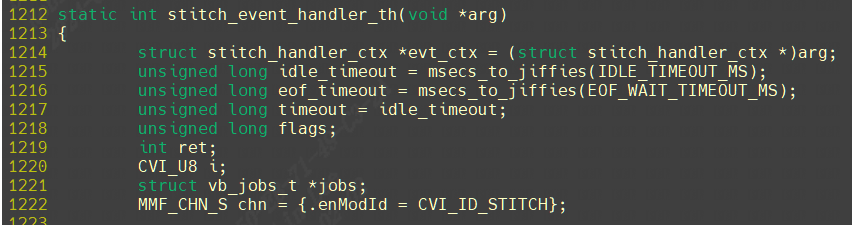
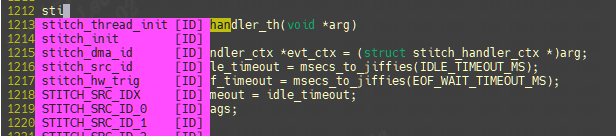
2.1.6 vi –t tag 找到名为 tag 的变量的定义处
例如stitch_event_handler_th函数位于当前tags目录中的stitch/common/stitch.c的第1212行。只需确保在tags中的子目录中任意位置输入:
robin.lee@WORKSTATION5:/robin.lee/zip/A2/osdrv/interdrv/v2/dwa$ vi -t stitch_event_handler_th
2.2 taglist使用
2.2.1 F2键打开关闭Taglist
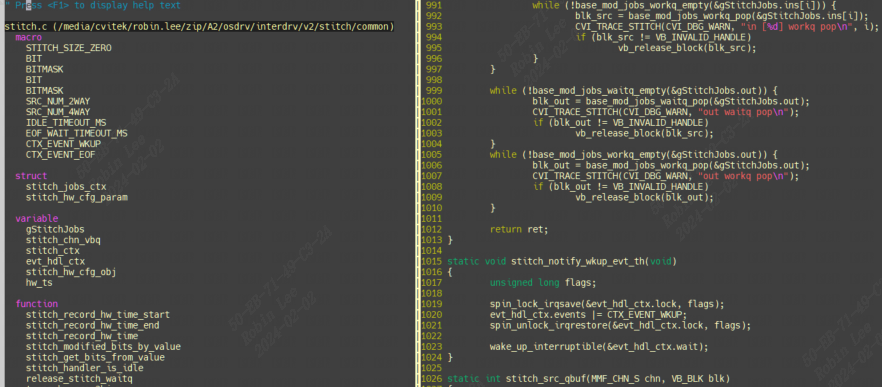
2.2.2 ctrl w w键taglist和vim窗口光标切换

例如光标位置处于vim窗口的第1211行,按下ctrl w w键(w按2次),光标会跳到左边taglist窗口。按上下左右方向键可以查找宏定义,符号,函数等。再次按ctrl w w又会跳到vim的窗口。
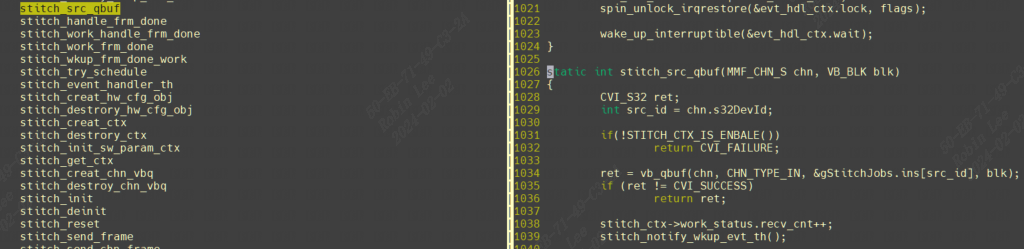
2.2.3 回车键taglist跳转到具体位置

比如现在光标位于taglist界面的stitch_src_qbuf位置,按下回车会跳转到函数定义的具体位置:
3 NERDTree插件
NERDTree是Vim界面显示树形目录的文件管理器插件,可在vim操作界面进行文件打开、目录浏览操作。
3.1 安装配置NERDTree
3.1.1 安装
https://www.vim.org/scripts/script.php?script_id=1658
下载后放到~/.vim目录,解压即可完成安装。
3.1.2 配置
vi ~/.vimrc
添加如下配置:
"--------------NERDTree---------------
let NERDTreeWinPos='right'		"设置窗口在右侧
nmap <F8> :NERDTree<CR>			"设置快捷键F8打开
let NERDTreeWinSize=40		 	"窗口大小为40
"--------------NERDTree---------------
3.2 使用NERDTree
3.2.1 F8键开启关闭右图文件列表

3.2.2 ctrl w w键NERDTree和vim窗口光标切换

光标原本再右边窗口,输入ctrl w w(w按2次)切换到左边vim窗口。
3.2.3 回车键NERDTree跳转到具体位置
同理,和taglist一样,也是光标移动到具体文件后回车即可跳转到具体文件。方向键上下移动选择具体文件。跳转到stitch_ctx.h:

3.2.3 返回上一层目录
选择‘up a dir’,按回车:

返回上一层目录的结果如下:

4 SrcExpl插件(功能鸡肋先不介绍)
SrcExpl(源资源管理器)是一个源代码资源管理器,通过显示函数或类型定义来显示当前选定的关键字或在单独的窗口中声明。该插件旨在重新创建上下文 IDE 中可用的窗口。
结合“Taglist”和“NERD tree”效果更佳。
4.1 SrcExp安装配置
安装:
https://github.com/wenlongche/SrcExpl
https://www.vim.org/scripts/script.php?script_id=2179
下载后放入~/.vim进行解压即可。
配置:
打开~/.vimrc,添加如下配置:
" // The switch of the Source Explorer
nmap <F12> :SrcExplToggle<CR>

" // Set the height of Source Explorer window
let g:SrcExpl_winHeight = 16

" // Set 100 ms for refreshing the Source Explorer
let g:SrcExpl_refreshTime = 500

" // Set "Enter" key to jump into the exact definition context
let g:SrcExpl_jumpKey = "<ENTER>"

" // Set "Space" key for back from the definition context
let g:SrcExpl_gobackKey = "<SPACE>"

" // In order to avoid conflicts, the Source Explorer should know what plugins except
" // itself are using buffers. And you need add their buffer names into below list
" // according to the command ":buffers!"
let g:SrcExpl_pluginList = [
		\ "__Tag_List__",
		\ "_NERD_tree_",
		\ "Source_Explorer"
	\ ]

" // The color schemes used by Source Explorer. There are five color schemes
" // supported for now - Red, Cyan, Green, Yellow and Magenta. Source Explorer
" // will pick up one of them randomly when initialization.
let g:SrcExpl_colorSchemeList = [
		\ "Red",
		\ "Cyan",
		\ "Green",
		\ "Yellow",
		\ "Magenta"
	\ ]

" // Enable/Disable the local definition searching, and note that this is not
" // guaranteed to work, the Source Explorer doesn't check the syntax for now.
" // It only searches for a match with the keyword according to command 'gd'
let g:SrcExpl_searchLocalDef = 1

" // Workaround for Vim bug @https://goo.gl/TLPK4K as any plugins using autocmd for
" // BufReadPre might have conflicts with Source Explorer. e.g. YCM, Syntastic etc.
let g:SrcExpl_nestedAutoCmd = 1

" // Do not let the Source Explorer update the tags file when opening
let g:SrcExpl_isUpdateTags = 0

" // Use 'Exuberant Ctags' with '--sort=foldcase -R .' or '-L cscope.files' to
" // create/update the tags file
let g:SrcExpl_updateTagsCmd = "ctags --sort=foldcase -R ."

" // Set "<F12>" key for updating the tags file artificially
let g:SrcExpl_updateTagsKey = "<F12>"

" // Set "<F3>" key for displaying the previous definition in the jump list
let g:SrcExpl_prevDefKey = "<F3>"

" // Set "<F4>" key for displaying the next definition in the jump list
let g:SrcExpl_nextDefKey = "<F4>"
4.2 SrcExpl使用
4.2.1 F12启动和禁用SrcExpl
5 YouCompleteMe代码补齐插件
5.1 安装配置
先安装编译依赖工具:
sudo apt install build-essential cmake python-dev python3-dev clang
下载YouCompleteMe源码:
git clone https://github.com/Valloric/YouCompleteMe.git ~/.vim/bundle/
cd .vim/bundle/YouCompleteMe
git submodule update --init --recursive
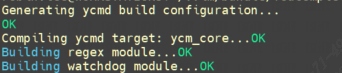
编译安装 YouCompleteMe:
./install.py --clang-completer
安装好后打印如下:
5.2 YouCompleteMe使用
.vimrc添加配置:
let g:ycm_global_ycm_extra_conf = '~/.vim/bundle/YouCompleteMe/third_party/ycmd/cpp/ycm/.ycm_extra_conf.py'
set runtimepath+=~/.vim/bundle/YouCompleteMe
autocmd InsertLeave * if pumvisible() == 0|pclose|endif
inoremap <expr> <CR> pumvisible() ? "\<C-y>" : "\<CR>"
imap <silent><leader><TAB> <Plug>(coc-complete)
vmap <silent><leader><TAB> <Plug>(coc-complete)
nmap <silent><leader><TAB> <Plug>(coc-complete)
vim版本比较低达不到插件YCM的要求从而报错【YouCompleteMe unavailable: requires Vim 8.1.2269+.】,这样也好解决,从github上重新下最新版本的vim即可。命令如下所示:
cd /usr/local/share
sudo git clone https://github.com/vim/vim.git
cd vim/src
sudo ./configure --with-features=huge \
--enable-multibyte \
--enable-rubyinterp=yes \
--enable-pythoninterp=yes \
--enable-python3interp=yes \
--prefix=/usr/local/vim82
之后make和make install一下,命令如下所示:
sudo make
sudo make install
在/usr/bin目录下建立符号链接,命令如下所示:
sudo ln -s /usr/local/vim82/bin/vim /usr/bin/vim82
sudo ln -s /usr/local/vim82/bin/vim /usr/bin/vim
sudo ln -s /usr/local/vim82/bin/vim /usr/bin/vi
补齐效果如下:
输入vim --version信息可以看vim版本号,现已经v9.1,默认应该是8.1的。

vim配色方案:
https://github.com/flazz/vim-colorschemes
设置函数高亮:
vi /usr/share/vim/vim91/syntax/c.vim

"highlight Functions
syn match cFunctions "\<[a-zA-Z_][a-zA-Z_0-9]*\>[^()]*)("me=e-2
syn match cFunctions "\<[a-zA-Z_][a-zA-Z_0-9]*\>\s*("me=e-1
hi cFunctions gui=NONE cterm=bold  ctermfg=40
6 cscope插件
6.1 安装
sudo apt-get install cscope
6.2 配置产生cscope.out
cscope -Rbqk

-R: 在生成索引文件时,搜索子目录树中的代码
-b: 只生成索引文件,不进入cscope的界面
-q: 生成cscope.in.out和cscope.po.out文件,加快cscope的索引速度
-k: 在生成索引文件时,不搜索/usr/include目录
-i: 如果保存文件列表的文件名不是cscope.files时,需要加此选项告诉cscope到哪儿去找源文件列表。可以使用”–“,表示由标准输入获得文件列表。

6.3 配置.vimrc
"""""""""""""""""""""""""""""""""""""""""""""""""""""""""""""""
" cscope setting
"""""""""""""""""""""""""""""""""""""""""""""""""""""""""""""""
if has("cscope")
  set csprg=/usr/bin/cscope
  set csto=1
  set cst
  set nocsverb
  " add any database in current directory
  if filereadable("cscope.out")
	  cs add cscope.out
  endif
  set csverb
endif

nmap <C-@>s :cs find s <C-R>=expand("<cword>")<CR><CR>
nmap <C-@>g :cs find g <C-R>=expand("<cword>")<CR><CR>
nmap <C-@>c :cs find c <C-R>=expand("<cword>")<CR><CR>
nmap <C-@>t :cs find t <C-R>=expand("<cword>")<CR><CR>
nmap <C-@>e :cs find e <C-R>=expand("<cword>")<CR><CR>
nmap <C-@>f :cs find f <C-R>=expand("<cfile>")<CR><CR>
nmap <C-@>i :cs find i ^<C-R>=expand("<cfile>")<CR>$<CR>
nmap <C-@>d :cs find d <C-R>=expand("<cword>")<CR><CR>

set cscopequickfix=s-,c-,d-,i-,t-,e-
6.5 使用
6.5.1 建立数据库连接
:cs add ./cscope.out
6.5.2 查询数据库连接
:cs show

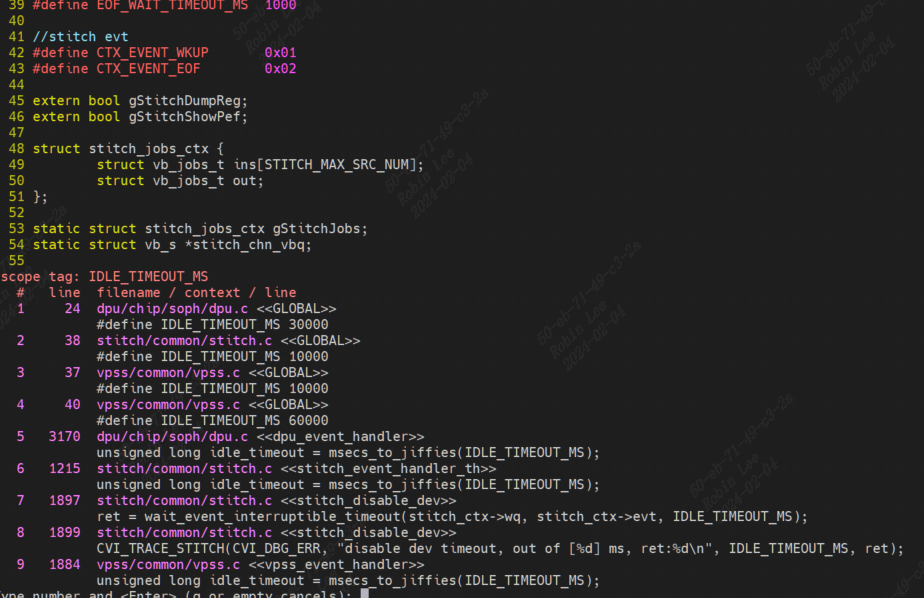
6.5.3 查看引用调用位置
:cs f s symbol #查看symbol和引用的地方, 如:cs find s IDLE_TIMEOUT_MS
7 source insight扩展
7.1 将kernel工程精确快速导入到sourceinsight
https://github.com/tonyho/Generate_Kernel_Uboot_Project_forIDE


【推荐】国内首个AI IDE,深度理解中文开发场景,立即下载体验Trae
【推荐】编程新体验,更懂你的AI,立即体验豆包MarsCode编程助手
【推荐】抖音旗下AI助手豆包,你的智能百科全书,全免费不限次数
【推荐】轻量又高性能的 SSH 工具 IShell:AI 加持,快人一步
· TypeScript + Deepseek 打造卜卦网站:技术与玄学的结合
· 阿里巴巴 QwQ-32B真的超越了 DeepSeek R-1吗?
· 如何调用 DeepSeek 的自然语言处理 API 接口并集成到在线客服系统
· 【译】Visual Studio 中新的强大生产力特性
· 2025年我用 Compose 写了一个 Todo App