launch文件的来龙去脉
在节点少,程序小的情况下可以一个一个节点来启动,测试运行效果,但是当工程规模大,需要的节点多时就显得比较费劲,用.launch文件来启动可以将需要的节点同时启动,不用再一个一个进行。为工程搭建提高了效率,里面还有很多参数灵活使用会带来非常高效的调试。
- 在上个例子ROS 消息通讯——发布者/订阅者的来龙去脉的基础上创建launch文件去启动节点看效果会如何。

1 <launch>
2   <node pkg="ros_tutorials_topic" type="topic_publisher" name="topic_publisher1"/>
3   <node pkg="ros_tutorials_topic" type="topic_subscriber" name="topic_subscriber1"/>
4   <node pkg="ros_tutorials_topic" type="topic_publisher" name="topic_publisher2"/>
5   <node pkg="ros_tutorials_topic" type="topic_subscriber" name="topic_subscriber2"/>
6 </launch>
pkg="ros_tutorials_topic"为对应的功能包的名称;
type="topic_publisher" 节点对应的可执行文件名,一般为.cop的文件名字ros::init(argc,argv,"topic_publisher"); //初始化发布者节点名称对应,
name="topic_publisher1"运行时显示的节点名称,也就是用命令rosnode list 所看到的节点列表里的名称。这儿定义的名字优先会覆盖可执行程序(如.cpp里面init()赋予的节点名)当两者不一样是以name为准。
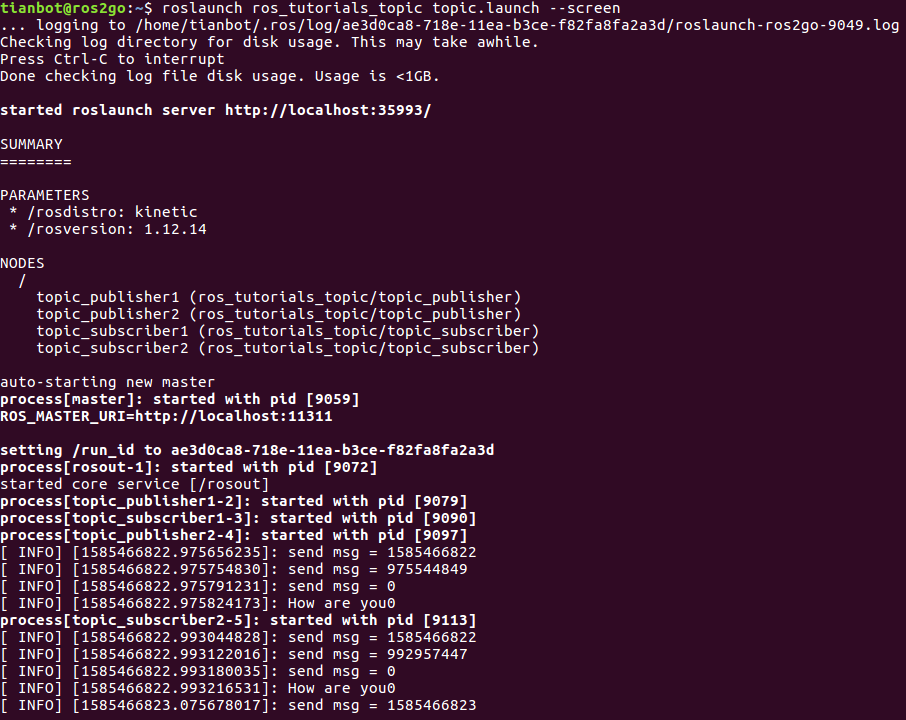
查看运行效果:
1 roslaunch ros_tutorials_topic topic.launch --screen//--screen是将通信消息发送到屏幕端
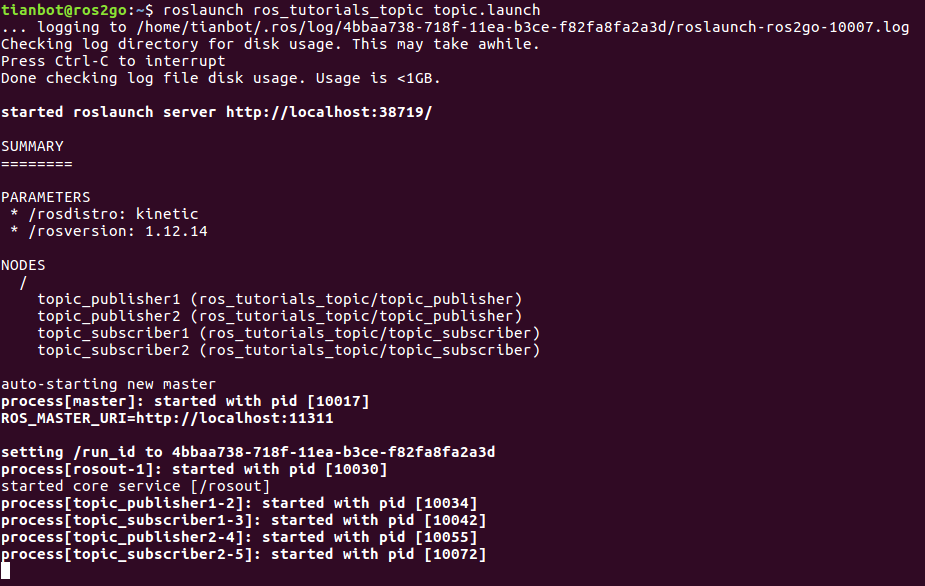
1 roslaunch ros_tutorials_topic topic.launch //没有--screen屏幕上不显示通信的消息,但是会正常收发,只是不在终端显示
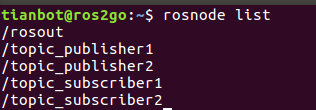
查看节点列表:
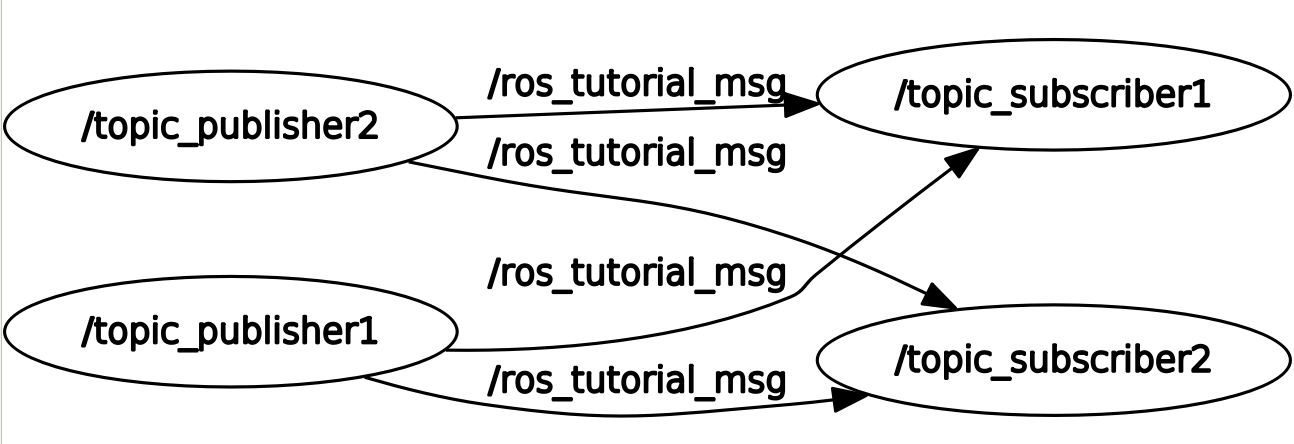
查看节点关系图:rqt_graph,从图中看到两个发布者同时向两个订阅者发布消息,原因是我们只改变了节点的名称,而没有改变要使用的消息名字,下面在launch文件里添加一个命名空间标记就可以解决。
-
respawn="true"当roslaunch启动完所有该启动的节点之后,会监测每一个节点,保证它们正常的运行状态。对于任意节点,当它终止时,roslaunch 会将该节点自动重启 required="true"必要节点,这个出问题了,整个launch结束;注意此属性不可以与respawn="true"一起描述同一个节点
修改后的launch文件如下;output="screen“,用于将话题信息打印到屏幕。roslaunch ros_tutorials_topic topic.launch后面不用加 --screen也可以实现屏幕显示信息。
 1 <launch>
 2  <group ns="ns1">
 3   <node pkg="ros_tutorials_topic" type="topic_publisher" name="topic_publisher" output="screen"/>
 4   <node pkg="ros_tutorials_topic" type="topic_subscriber" name="topic_subscriber" output="screen"/>
 5  </group>
 6  <group ns="ns2">
 7   <node pkg="ros_tutorials_topic" type="topic_publisher" name="topic_publisher" output="screen"/>
 8   <node pkg="ros_tutorials_topic" type="topic_subscriber" name="topic_subscriber" output="screen"/>
 9  </group>
10 </launch>
运行查看:roslaunch ros_tutorials_topic topic.launch

查看节点关系图: 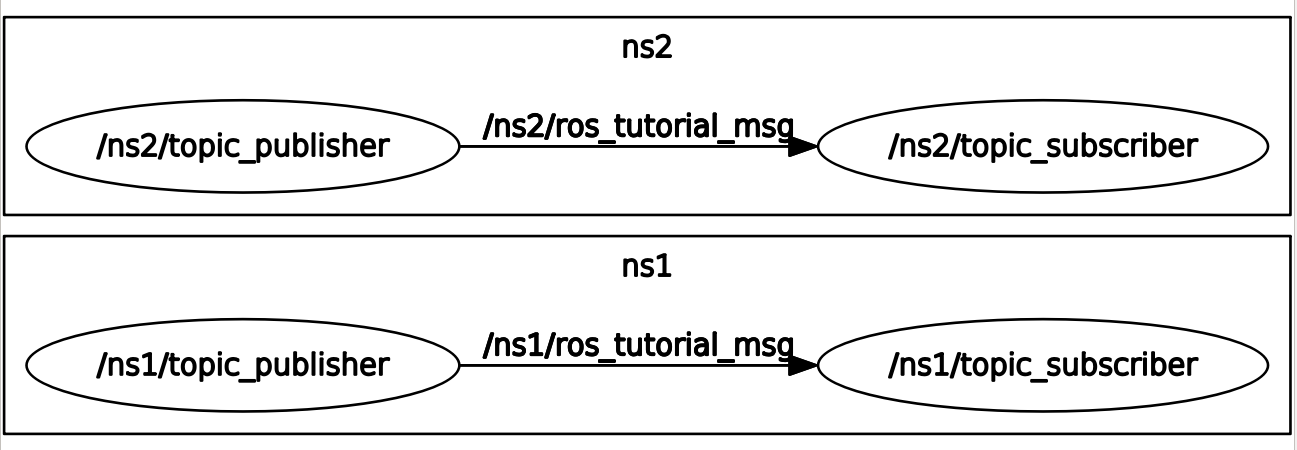
- group标签对node的批量管理,可以同时终止在同一个group中的节点
<group if="1-or-0">
……
……
……
</group>

<group unless="1-or-0">
……
……
……
</group>
第一种情况,当if属性的值为0的时候将会忽略掉<group> </group>之间的标签。第二种恰好相反,当if属性的值为1的时候将会忽略掉<group> </group>之间的标签。但是我们通常不会直接用1或0来定义if标签。因为这样不够灵活。通常会搭配$(arg arg_name)来使用。
-
<remap>重映射
  在上图中我们看到topic_publisher发布的话题是ros_tutorial_msg,topic_subscriber接收的话题同样是ros_tutorial_msg,它们才能形成通讯
ros::Publisher ros_tutorial_pub = nh.advertise<ros_tutorials_topic::MsgTutorial>("ros_tutorial_msg", 100);(在topic_publisher.cpp中)
ros::Subscriber ros_tutorial_sub =nh.subscribe<ros_tutorials_topic::MsgTutorial>("ros_tutorial_msg", 100, msgCallback);
(在topic_subscriber.cpp中),只有这两者对应起来才能,接收和发布的话题相同才能成功通讯。
  然而在使用别人给的功能包时候,自己发送的话题和它接收的可能名称不同,但是内容,格式相同,这时候我们就可以在launch进行重映射。
ros::Publisher ros_tutorial_pub = nh.advertise<ros_tutorials_topic::MsgTutorial>("ros_tutorial_msg", 100);(在topic_publisher.cpp中)
ros::Subscriber ros_tutorial_sub =nh.subscribe<ros_tutorials_topic::MsgTutorial>("remap/ros_tutorial_msg", 100, msgCallback);
(在topic_subscriber.cpp中),这时候订阅者订阅的话题为"remap/ros_tutorial_msg",发布者发布的话题为“ros_tutorial_msg",这时就不能进行通讯,需要发生重映射。
在没有加重映射之前启动节点查看话题会看到如下结果
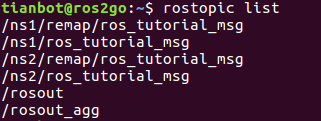
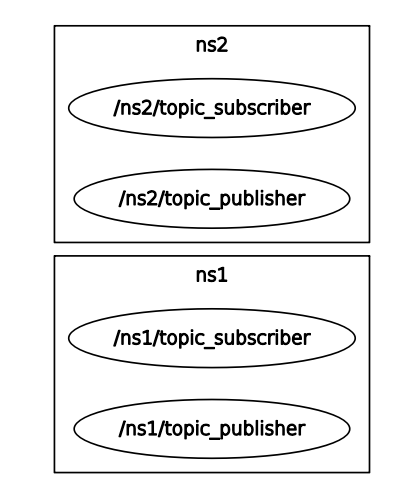 如果把launch文件的话题进行一个重映射如下(最好将映射放到node标签的前面,这样后面所有使用这个话题的节点都可以更新)
<launch>
 <remap from="ros_tutorial_msg" to="remap/ros_tutorial_msg"/>
 <group ns="ns1">
  <node pkg="ros_tutorials_topic" type="topic_publisher" name="topic_publisher" output="screen"/>
  <node pkg="ros_tutorials_topic" type="topic_subscriber" name="topic_subscriber" output="screen"/>
 </group>
 <group ns="ns2">
  <node pkg="ros_tutorials_topic" type="topic_publisher" name="topic_publisher" output="screen"/>
  <node pkg="ros_tutorials_topic" type="topic_subscriber" name="topic_subscriber" output="screen"/>
 </group>
</launch>
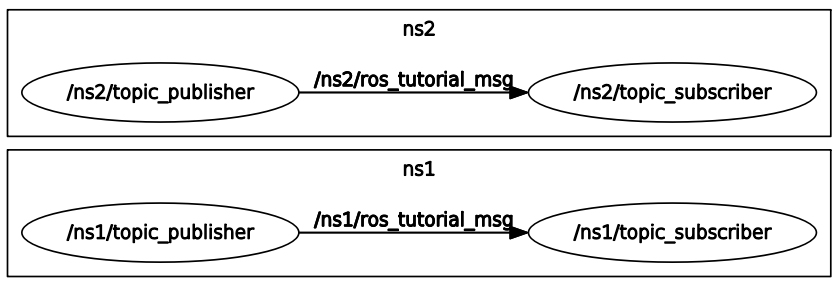
<remap from="ros_tutorial_msg" to="remap/ros_tutorial_msg"/>这样写意味着将ros_tutorial_msg变为remap/ros_tutorial_msg,其实是将发布者发布的话题修改

<remap from="remap/ros_tutorial_msg" to="ros_tutorial_msg"/>这样写意味着将remap/ros_tutorial_msg变为ros_tutorial_msg,其实是将订阅者订阅的话题修改,一般用这种比较多,也容易理解,意思是,我订阅者想订阅一个话题但是你的跟我想要的不同,那么我就将自己的话题映射成与你发布的一样就可以啦。

- 当然也可以将<remap>作为节点的子类包含在节点中(只更新该节点的订阅消息)
<launch>
 <group ns="ns1">
  <node pkg="ros_tutorials_topic" type="topic_publisher" name="topic_publisher" output="screen"/>
  <node pkg="ros_tutorials_topic" type="topic_subscriber" name="topic_subscriber" output="screen"/>
  <remap from="remap/ros_tutorial_msg" to="ros_tutorial_msg"/>
  </node>
 </group>
 <group ns="ns2">
  <node pkg="ros_tutorials_topic" type="topic_publisher" name="topic_publisher" output="screen"/>
  <node pkg="ros_tutorials_topic" type="topic_subscriber" name="topic_subscriber" output="screen"/>
 </group>
</launch>
-
<param>参数的用法:
在参数的用法——利用参数创建节点中我们利用命令(rosparam set /calculation_method 2)改变参数“calculation_method“来实现加减乘除运算,那么现在我们launch参数命令来改变程序中的参数,看看会是什么效果。
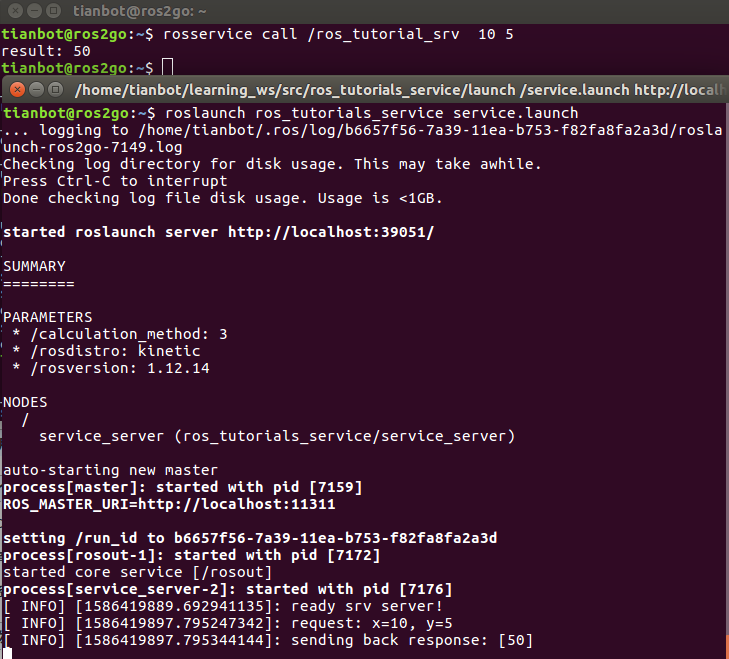
sevice.launch文件如下:顺便启动服务器节点去等待客户端请求
<launch>
  <param name="calculation_method" type="int" value="3" />
  <node pkg="ros_tutorials_service" type="service_server" name="service_server" output="screen"/>

</launch>
同时将这句屏蔽//nh.setParam("calculation_method", PLUS);(在service_server.cpp中),我们从launch文件中给定参数。然后编译运行:
<arg>参数的用法:
arg虽然也是参数命令,但不储存在参数服务器中,不能提供给节点使用,只能在launch文件中使用,用来在运行中或直接在文件中修改launch文件中被arg定义的变量中。param则是储存在参数服务器中,可以被节点使用,这是最本质的区别。
还以现在这个例子来说,<param name="calculation_method" type="int" value="3" />将节点中参数的值赋值为3是进行乘法运算,但是当要进行除法运算时要求将参数变为4,但是在运行时,在launch中变为4,还得编译重新运行,那么用arg来定义一个变量,用这个变量去改变calculation_method的值就实现的运行过程中的改变:launch文件内容变为如下:
<launch>
  <arg name="updata_value" default="1"/>
  <param name="calculation_method" type="int" value="$(arg updata_value)" />
  <node pkg="ros_tutorials_service" type="service_server" name="service_server" output="screen"/>
</launch>
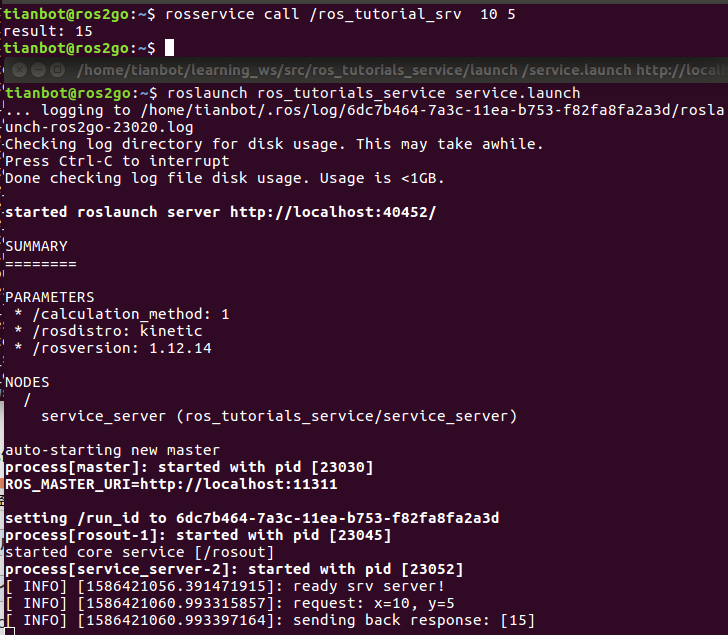
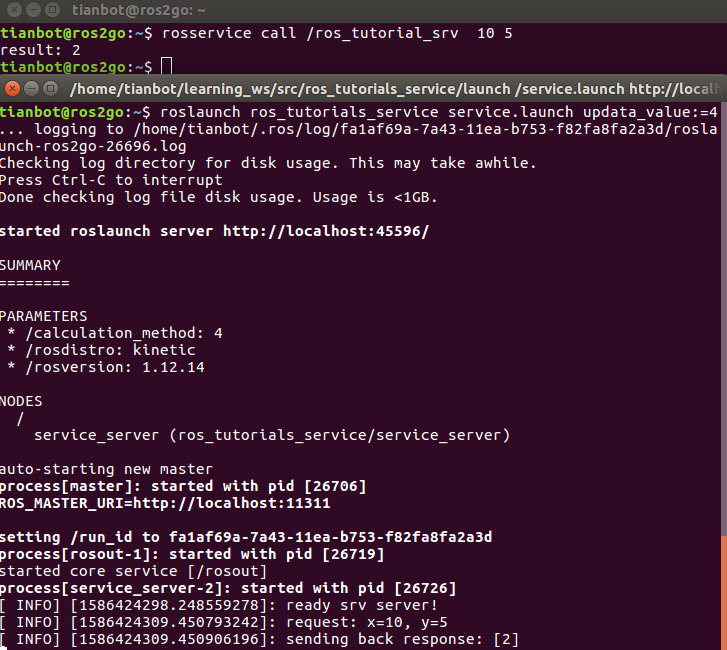
开始默认为1,运行加法运算,那么在运行是我们将其值变为4,执行除法运算:roslaunch ros_tutorials_service service.launch updata_value:=4
<arg name="arg-name" default="arg-value" />  注意default定义的值在roslaunch时才可以改变

<arg name="arg-name" value="arg-value" />    注意value定义的值在roslaunch时不可以改变
- <rosparam>加载一个.yaml的配置文件
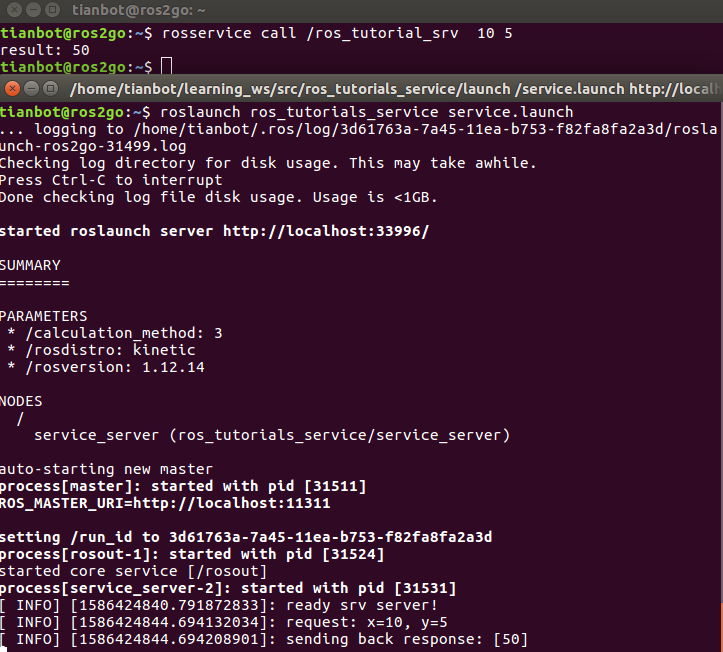
在上面我们实现了在launch文件中修改程序的参数问题。但是想象一下如果有成千上万个参数的时候我们该怎么改,也这样一句句定义是不现实的。那就用rosparam加载一个配置文件来实现。在功能包下面建一个config文件夹,放入参数配置文件service.yaml;内容为calculation_method: 3;(执行乘法运算)


launch文件内容变为:
<launch>

  <node pkg="ros_tutorials_service" type="service_server" name="service_server" output="screen"/>

  <rosparam command="load" file="$(find ros_tutorials_service)/config/service.yaml"/>
</launch>
编译执行效果为:
-
<include>的用法
<include>用于包含其它launch文件,被包含的launch文件将会被一同启动。
<include file="$(find pkg_name)/launch/demo.launch"/>
- 如果要给
<include > 包含进来的launch元素赋值,由于arg是局部的只能改变本launch文件的参数值,因此需要建立一个包含在<include >标签之间的arg.格式如下:
<include file="path-to-launch-file">

      <arg name="arg-name" value="arg-value"/>

      . . .

</include>
- 如果改变
<include > 包含进来的launch元素用的arg名称与本launch文件的一样的话需写为如下格式:位置还放在上面<include >标签之间
<arg name="arg-name" value="$(arg arg-name)" />


