
Ribbon使用
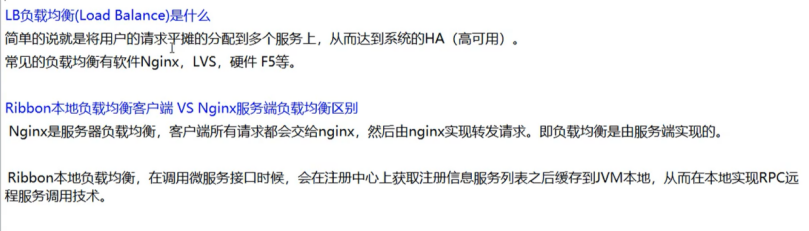
1.Ribbon是什么?

2.订单服务使用Ribbon调用支付服务
上一节我们已经搭建了支付服务,现在我们搭建订单服务
1.pom

我们可以发现
spring-cloud-starter-netflix-eureka-client 这个里面已经集成了Ribbon
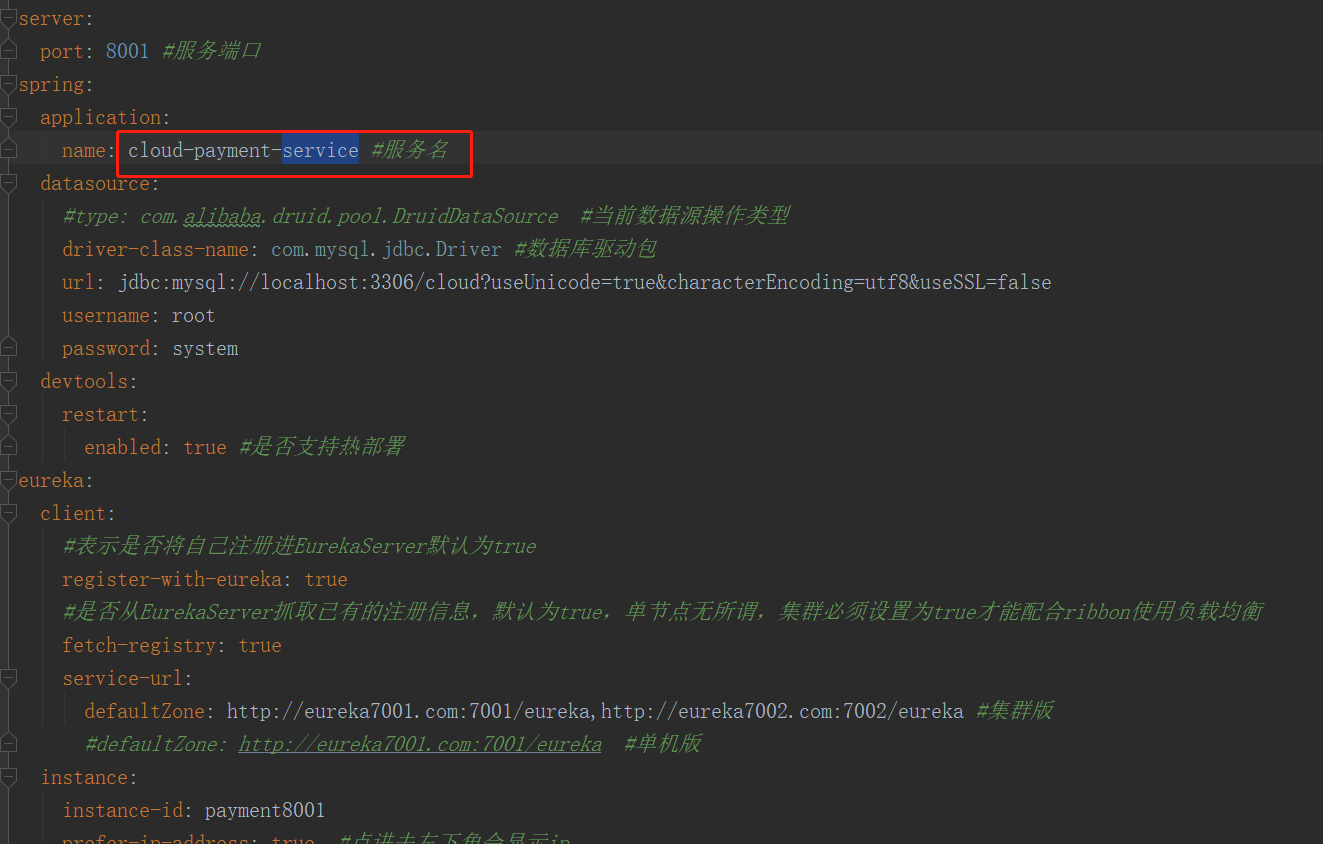
2.yml
server:
  port: 80
spring:
  application:
    name: cloud-consumer-service #服务名
eureka:
  client:
    #表示是否将自己注册进EurekaServer默认为true
    register-with-eureka: true
    #是否从EurekaServer抓取已有的注册信息,默认为true,单节点无所谓,集群必须设置为true才能配合ribbon使用负载均衡
    fetch-registry: true
    service-url:
      defaultZone: http://eureka7001.com:7001/eureka,http://eureka7002.com:7002/eureka #集群版
      #defaultZone: http://localhost:7001/eureka  单机版
3.启动类
@SpringBootApplication
@EnableEurekaClient
@RibbonClient(name = "CLOUD-PAYMENT-SERVICE")
public class OrderMain80 {
    public static void main(String[] args) {
        SpringApplication.run(OrderMain80.class,args);
    }
}
4.控制层
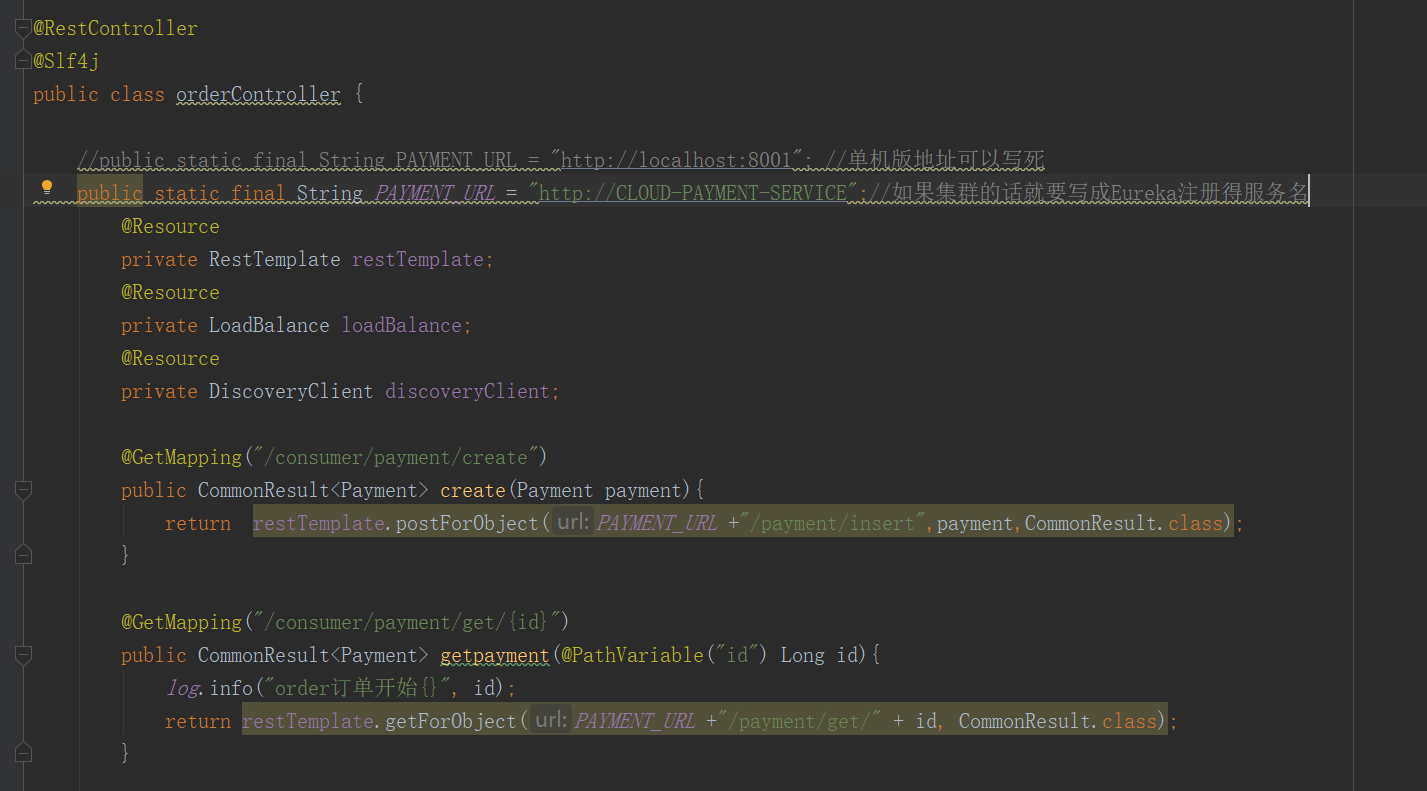
5.使用RestTemplate
@Configuration
public class ApplicationContextConfig {
    @Bean
    @LoadBalanced  //使用默认的Ribbon轮询机制
    public RestTemplate restTemplate(){
        return new RestTemplate();
    }
}

这样就实现了Ribbon +RestTemplate
Ribbon和Eureka整合后可以直接调用服务而不用再关心ip地址和端口号
3.支付服务集群
Ribbon使用了轮询那么就需要 支付方使用集群才能起到负载均衡的作用
8002的配置和8001是一样的。端口的位置改一下就好
服务名一定要一样的,如下所示,说明我们集群搭建成功

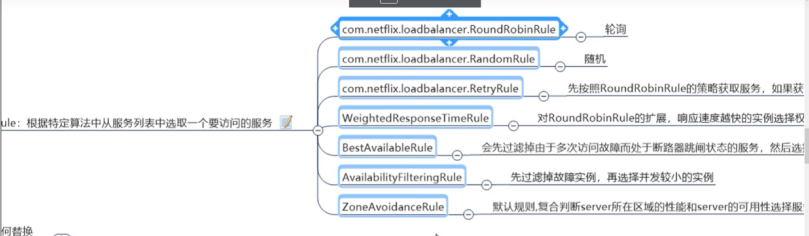
4.自定义负载均衡算法:
方式一:在springboot主程序扫描的包外定义配置类,然后为springboot主程序添加 @RibbonClient 注解引入配置类。
配置类不应该在SpringBoot的包路径下,通过@RibbonClient 注解加载:@Configurationpublic class MySelfRule {
    @Bean
    public IRule myRule(){
        return new RandomRule();//定义为随机
    }
}

springboot主程序:
@SpringBootApplication
@EnableEurekaClient
//在启动该微服务的时候就能去加载我们的自定义Ribbon配置类,从而使配置生效
@RibbonClient(name = "CLOUD-PAYMENT-SERVICE",configuration = MySelfRule.class)
public class OrderMain80 {
    public static void main(String[] args) {
        SpringApplication.run(OrderMain80.class,args);
    }
}
方式二 自定义LoadBalance:

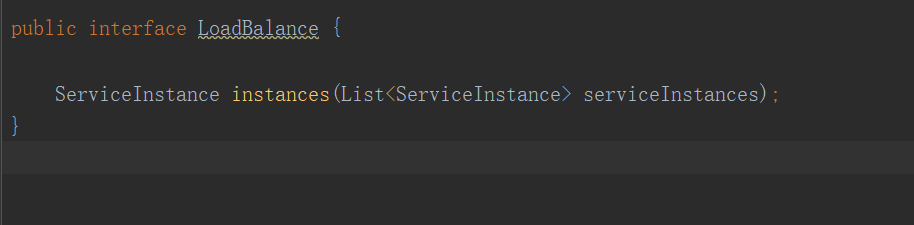

controller层使用

这期结束了,下期再会!
