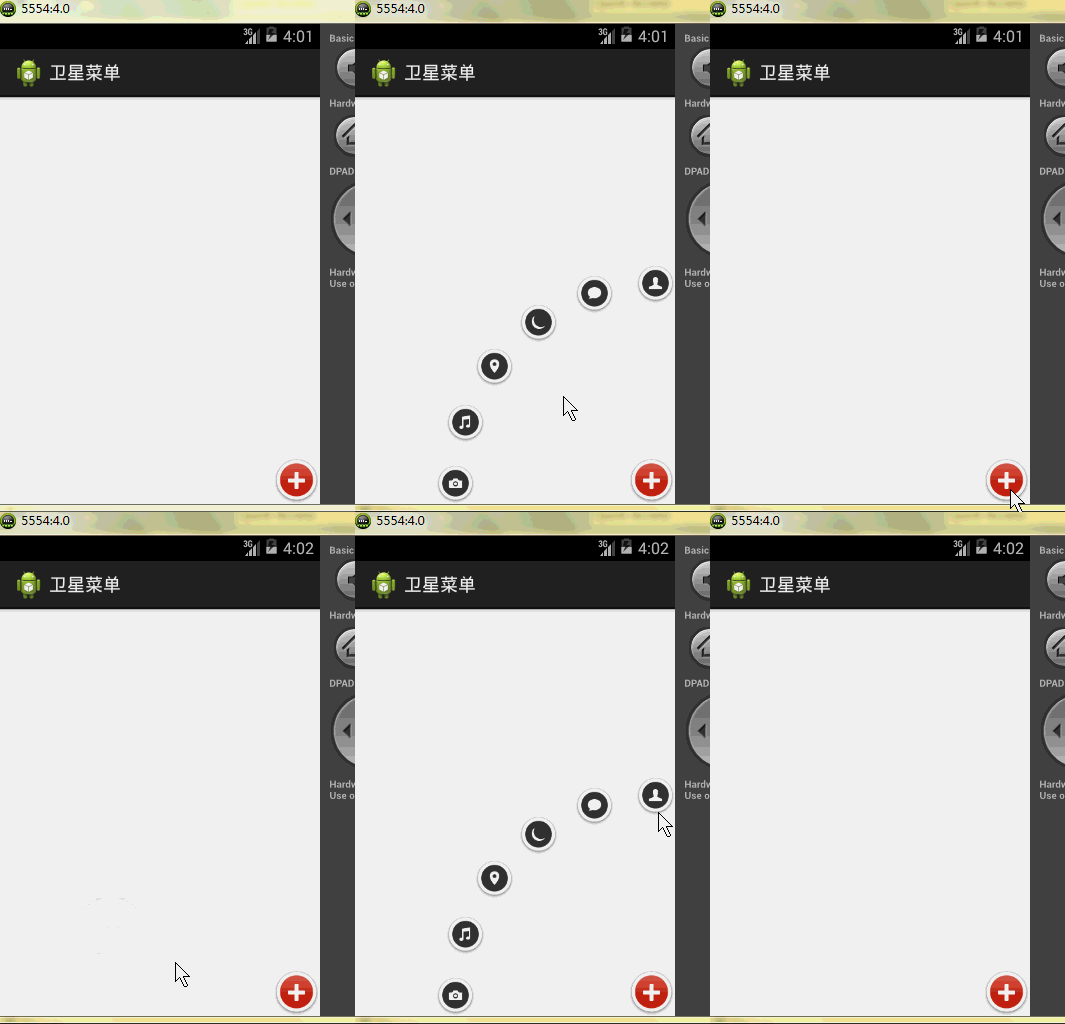
在上一篇文章中,我们给菜单的点击设置了动画,如果你没有阅读过,可以单击下面的链接:
http://www.cnblogs.com/fuly550871915/p/4930699.html
贴出上一篇文章实现的效果图吧。如下:

下面我们要实现的逻辑也很简单,点击菜单,弹出一个提示框。怎么实现呢,只需要在ArcMenu中提供一个回调接口即可。这样子,我们就可以在MainActivity中重写回调方法,然后再ArcMenu中点击菜单时调用即可。
修改ArcMenu中的代码如下:
  1 package com.example.menu;
  2
  3 import android.content.Context;
  4 import android.content.res.TypedArray;
  5 import android.util.AttributeSet;
  6 import android.util.TypedValue;
  7 import android.view.View;
  8 import android.view.View.OnClickListener;
  9 import android.view.animation.Animation;
 10 import android.view.animation.Animation.AnimationListener;
 11 import android.view.animation.AlphaAnimation;
 12 import android.view.animation.AnimationSet;
 13 import android.view.animation.RotateAnimation;
 14 import android.view.animation.ScaleAnimation;
 15 import android.view.animation.TranslateAnimation;
 16 import android.view.ViewGroup;
 17
 18 public class ArcMenu extends ViewGroup implements OnClickListener{
 19     /**
 20      * 菜单按钮
 21      */
 22     private View mCBMenu;
 23     /**
 24      * 菜单的位置,为枚举类型
 25      * @author fuly1314
 26      *
 27      */
 28     private enum Position
 29     {
 30         LEFT_TOP,LEFT_BOTTOM,RIGHT_TOP,RIGHT_BOTTOM
 31     }
 32     /**
 33      * 菜单的状态
 34      * @author fuly1314
 35      *
 36      */
 37     private enum Status
 38     {
 39         OPEN,CLOSE
 40     }
 41     /**
 42      * 菜单为当前位置,默认为RIGHT_BOTTOM,在后面我们可以获取到
 43      */
 44     private Position mPosition = Position.RIGHT_BOTTOM;
 45     /**
 46      * 菜单的当前状态,默认为关闭
 47      */
 48     private Status mCurStatus = Status.CLOSE;
 49
 50     /**
 51      * 菜单的半径,默认为120dp
 52      */
 53
 54     /**
 55      * 提供一个回调接口,用来处理菜单的点击事件,点击后需要处理的事情
 56      */
 57     public interface ArcMenuListener
 58     {
 59         void dealMenuClick(View v);
 60     }
 61     public void setOnArcMenuListener(ArcMenuListener listener){
 62
 63         mListener = listener;
 64     }
 65     private ArcMenuListener mListener;
 66
 67
 68
 69     private int mRadius = (int) TypedValue.applyDimension(TypedValue.COMPLEX_UNIT_DIP, 150,
 70             getResources().getDisplayMetrics());
 71
 72
 73
 74     public ArcMenu(Context context) {
 75         this(context,null);
 76     }
 77     public ArcMenu(Context context, AttributeSet attrs) {
 78         this(context,attrs,0);
 79     }
 80     public ArcMenu(Context context, AttributeSet attrs, int defStyle) {
 81         super(context, attrs, defStyle);
 82
 83         TypedArray ta = context.obtainStyledAttributes(attrs, R.styleable.ArcMenu, defStyle, 0);
 84         //获取到菜单设置的位置
 85         int position = ta.getInt(R.styleable.ArcMenu_position, 3);
 86
 87         switch(position){
 88         case 0:
 89             mPosition = Position.LEFT_TOP;
 90             break;
 91         case 1:
 92             mPosition = Position.LEFT_BOTTOM;
 93             break;
 94         case 2:
 95             mPosition = Position.RIGHT_TOP;
 96             break;
 97         case 3:
 98             mPosition = Position.RIGHT_BOTTOM;
 99             break;
100         }
101
102         //获取到菜单的半径
103         mRadius = (int) ta.getDimension(R.styleable.ArcMenu_radius,
104                 TypedValue.applyDimension(TypedValue.COMPLEX_UNIT_DIP, 120,
105                         getResources().getDisplayMetrics()));
106         ta.recycle();
107
108     }
109
110
111
112     /**
113      * 测量各个子View的大小
114      */
115     protected void onMeasure(int widthMeasureSpec, int heightMeasureSpec)
116     {
117         int count = getChildCount();//获取子view的数量
118
119         for(int i=0;i<count;i++)
120         {
121             //测量子view的大小
122             measureChild(getChildAt(i), widthMeasureSpec, heightMeasureSpec);
123         }
124
125         super.onMeasure(widthMeasureSpec, heightMeasureSpec);
126     }
127
128     /**
129      * 摆放各个子view的位置
130      */
131     protected void onLayout(boolean changed, int l, int t, int r, int b) {
132
133         if(changed)//如果发生了改变,就重新布局
134         {
135             layoutMainMenu();//菜单按钮的布局
136             /**
137              * 下面的代码为菜单的布局
138              */
139             int count = getChildCount();
140
141             for(int i=0;i<count-1;i++)
142             {
143                 View childView = getChildAt(i+1);//注意这里过滤掉菜单按钮,只要菜单选项view
144
145                 childView.setVisibility(GONE);//先让菜单消失
146
147                 int left = (int) (mRadius*Math.cos(Math.PI/2/(count-2)*i));
148                 int top = (int) (mRadius*Math.sin(Math.PI/2/(count-2)*i));
149
150
151
152                 switch(mPosition)
153                 {
154
155                 case LEFT_TOP:
156                     break;
157                 case LEFT_BOTTOM:
158                     top = getMeasuredHeight() - top-childView.getMeasuredHeight();
159                     break;
160                 case RIGHT_TOP:
161                     left = getMeasuredWidth() - left-childView.getMeasuredWidth();
162                     break;
163                 case RIGHT_BOTTOM:
164                     left = getMeasuredWidth() - left-childView.getMeasuredWidth();
165                     top = getMeasuredHeight() - top-childView.getMeasuredHeight();
166                     break;
167                 }
168
169                 childView.layout(left, top, left+childView.getMeasuredWidth(),
170                         top+childView.getMeasuredHeight());
171             }
172         }
173
174
175     }
176     /**
177      * 菜单按钮的布局
178      */
179     private void layoutMainMenu() {
180
181          mCBMenu = getChildAt(0);//获得主菜单按钮
182
183          mCBMenu.setOnClickListener(this);
184
185         int left=0;
186         int top=0;
187
188         switch(mPosition)
189         {
190         case LEFT_TOP:
191             left = 0;
192             top = 0;
193             break;
194         case LEFT_BOTTOM:
195             left = 0;
196             top = getMeasuredHeight() - mCBMenu.getMeasuredHeight();
197             break;
198         case RIGHT_TOP:
199             left = getMeasuredWidth() - mCBMenu.getMeasuredWidth();
200             top = 0;
201             break;
202         case RIGHT_BOTTOM:
203             left = getMeasuredWidth() - mCBMenu.getMeasuredWidth();
204             top = getMeasuredHeight() - mCBMenu.getMeasuredHeight();
205             break;
206         }
207
208         mCBMenu.layout(left, top, left+mCBMenu.getMeasuredWidth(), top+mCBMenu.getMeasuredHeight());
209     }
210     /**
211      * 菜单按钮的点击事件
212      * @param v
213      */
214     public void onClick(View v) {
215         //为菜单按钮设置点击动画
216         RotateAnimation rAnimation = new RotateAnimation(0f, 720f, Animation.RELATIVE_TO_SELF, 0.5f,
217                 Animation.RELATIVE_TO_SELF, 0.5f);
218
219         rAnimation.setDuration(300);
220
221         rAnimation.setFillAfter(true);
222
223         v.startAnimation(rAnimation);
224
225         dealChildMenu(300);//处理菜单选项,比如折叠菜单或者展开菜单
226
227     }
228     /**
229      * 处理菜单选项,比如折叠菜单或者展开菜单
230      * @param duration 菜单选项的动画时间
231      */
232     private void dealChildMenu(int duration)
233     {
234
235         //下面的代码为菜单选项设置动画
236
237         int count = getChildCount();
238
239         for(int i=0;i<count-1;i++)
240         {
241             final View childView = getChildAt(i+1);
242
243             AnimationSet set = new AnimationSet(true);
244
245             //1.首先是平移动画
246             TranslateAnimation tAnimation = null;
247
248             //平移的x方向和y方向的距离
249             int x = (int) (mRadius*Math.cos(Math.PI/2/(count-2)*i));
250             int y = (int) (mRadius*Math.sin(Math.PI/2/(count-2)*i));
251
252
253
254
255             //平移的标志,是平移一个正数还以一个负数
256             int xflag =1;
257             int yflag =1;
258
259             if(mPosition == Position.LEFT_TOP||mPosition == Position.LEFT_BOTTOM)
260             {
261                 xflag = -1;
262             }
263             if(mPosition == Position.LEFT_TOP||mPosition == Position.RIGHT_TOP)
264             {
265                 yflag = -1;
266             }
267
268             if(mCurStatus == Status.CLOSE)//如果当前状态为关闭则应该打开
269             {
270                  tAnimation = new TranslateAnimation(xflag*x, 0,
271                         yflag*y, 0);
272                 tAnimation.setDuration(duration);
273                 tAnimation.setFillAfter(true);
274
275             }else//否则为打开状态,就应该关闭
276             {
277                  tAnimation = new TranslateAnimation( 0,xflag*x,
278                             0,yflag*y);
279                     tAnimation.setDuration(duration);
280                     tAnimation.setFillAfter(true);
281
282             }
283             tAnimation.setStartOffset((i * 100) / count);
284             tAnimation.setAnimationListener(new AnimationListener() {
285
286
287                 public void onAnimationStart(Animation animation) {
288
289
290                 }
291
292
293                 public void onAnimationRepeat(Animation animation) {
294
295
296                 }
297
298
299                 public void onAnimationEnd(Animation animation) {
300
301                     if(mCurStatus == Status.CLOSE)
302                     {
303                         childView.setVisibility(GONE);
304                         childView.setClickable(false);
305                         childView.setFocusable(false);
306                     }
307                     if(mCurStatus == Status.OPEN)
308                     {
309                         childView.setVisibility(VISIBLE);//设置菜单可见
310                         //为打开状态,则菜单是可点击和获得焦点
311                         childView.setClickable(true);
312                         childView.setFocusable(true);
313                     }
314
315                 }
316             });
317
318             //2.然后是旋转动画
319             RotateAnimation rAnimation = new RotateAnimation(0f, 0, Animation.RELATIVE_TO_SELF, 0.5f,
320                     Animation.RELATIVE_TO_SELF, 0.5f);
321             rAnimation.setDuration(duration);
322             rAnimation.setFillAfter(true);//动画结束是画面停留在此动画的最后一帧
323
324
325             set.addAnimation(rAnimation);//一定要注意顺序,先旋转动画,然后再平移
326             set.addAnimation(tAnimation);
327
328             childView.startAnimation(set);
329
330             //为菜单项设置点击事件
331             final int cPos = i+1;
332             childView.setOnClickListener(new OnClickListener() {
333
334                 @Override
335                 public void onClick(View v) {
336
337                     clickAnimation(cPos);//点击动画
338
339                     if(mListener != null)//处理点击事件的逻辑
340                     {
341                         mListener.dealMenuClick(childView);
342                     }
343
344                     changeStatus();
345
346
347                 }
348             });
349
350
351         }
352
353         changeStatus();//动画完成后,要改变状态
354
355     }
356     /**
357      * 改变状态
358      */
359     private void changeStatus() {
360
361         mCurStatus = (mCurStatus == Status.CLOSE?Status.OPEN:Status.CLOSE);
362
363     }
364     /**
365      * 菜单项的点击动画
366      * @param cPos  用来判断当前点击的是哪一个菜单
367      */
368     private void clickAnimation(int cPos) {
369
370         for(int i=0;i<getChildCount()-1;i++)
371         {
372             View childView = getChildAt(i+1);
373
374             if(i+1== cPos)
375             {
376                 AnimationSet set = new AnimationSet(true);
377                 ScaleAnimation sAnimation = new ScaleAnimation(1.0f, 3.0f, 1.0f, 3.0f,
378                         Animation.RELATIVE_TO_SELF, 0.5f,Animation.RELATIVE_TO_SELF, 0.5f);
379                 sAnimation.setFillAfter(true);
380                 AlphaAnimation alAnimation = new AlphaAnimation(1.0f, 0f);
381                 alAnimation.setFillAfter(true);
382
383                 set.addAnimation(sAnimation);
384                 set.addAnimation(alAnimation);
385
386                 set.setDuration(300);
387                 childView.startAnimation(set);
388
389             }else
390             {
391                 AnimationSet set = new AnimationSet(true);
392                 ScaleAnimation sAnimation = new ScaleAnimation(1.0f, 0.0f, 1.0f, 0.0f,
393                         Animation.RELATIVE_TO_SELF, 0.5f,Animation.RELATIVE_TO_SELF, 0.5f);
394                 sAnimation.setFillAfter(true);
395                 AlphaAnimation alAnimation = new AlphaAnimation(1.0f, 0f);
396                 alAnimation.setFillAfter(true);
397
398                 set.addAnimation(sAnimation);
399                 set.addAnimation(alAnimation);
400
401                 set.setDuration(300);
402                 childView.startAnimation(set);
403             }
404             childView.setVisibility(GONE);
405         }
406
407     }
408
409 }
红色部分是我们添加的主要代码。无非就是一个回调接口,没事什么好解释的了。
下面修改MainActivity中的代码即可,如下:
 1 package com.example.menu;
 2
 3 import com.example.menu.ArcMenu.ArcMenuListener;
 4
 5 import android.os.Bundle;
 6 import android.view.View;
 7 import android.widget.Toast;
 8 import android.app.Activity;
 9
10 public class MainActivity extends Activity implements ArcMenuListener {
11
12     private ArcMenu menu;
13     @Override
14     protected void onCreate(Bundle savedInstanceState) {
15         super.onCreate(savedInstanceState);
16         setContentView(R.layout.activity_main);
17
18         menu = (ArcMenu) findViewById(R.id.id_menu);
19         menu.setOnArcMenuListener(this);
20     }
21
22
23     public void dealMenuClick(View v) {
24
25         Toast.makeText(this, "这是"+v.getTag(), Toast.LENGTH_SHORT).show();
26
27     }
28
29 }
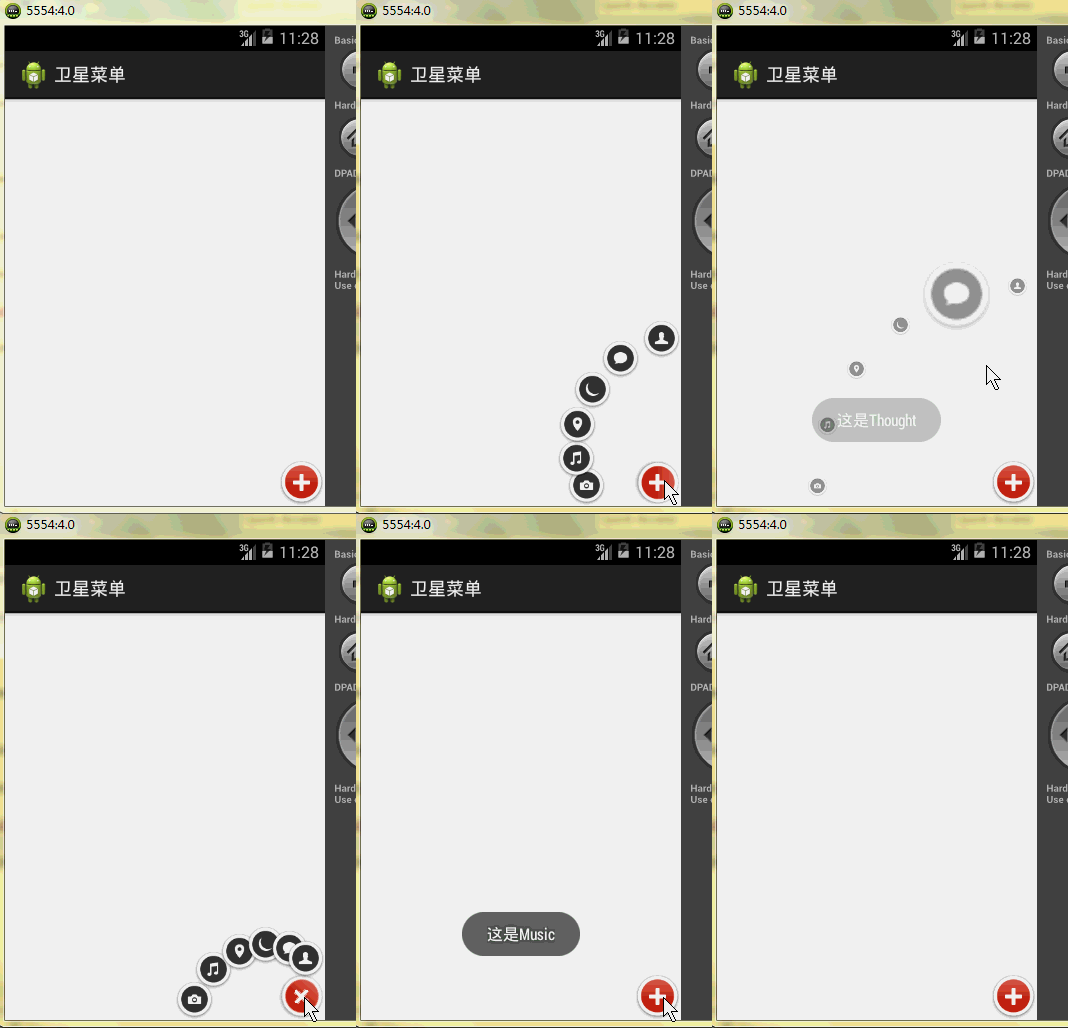
我们看红色部分的代码,重写了回调方法。无非就是获取之前布局中ImageView中设置的tag,然后把它放在提示框中罢了。运行程序效果如下:

至此,我们的这个案例终结了。主要难点就是自定义ViewGroup,相信你通过这个案例,对自定义ViewGroup应该有了很好的了解了。


