kafka安装
本文所用到的是kafka_2.12-2.0.0.tgz,zookeeper-3.4.13.tar.gz
下载:https://archive.apache.org/dist/zookeeper/zookeeper-3.4.13/
https://kafka.apache.org/downloads
早期版本安装kafka 必须先安装zookeeper
1.先安装zookeeper-3.4.13.tar.gz
1.2 安装JDK
没有安装Java JDK的朋友可以直接看这里。《CentOS安装Java JDK》
1.3 安装ZooKeeper
1.3.1 下载ZooKeeper压缩包
wget https://archive.apache.org/dist/zookeeper/zookeeper-3.4.13/zookeeper-3.4.13.tar.gz
1.3.2 解压ZooKeeper压缩包
tar -zxvf zookeeper-3.4.13.tar.gz
1.3.3 删除ZooKeeper压缩包
rm -f zookeeper-3.4.13.tar.gz
1.3.4 拷贝配置文件
cd /usr/local/zookeeper-3.4.13/conf
cp zoo_sample.cfg zoo.cfg
vim zoo.cfg
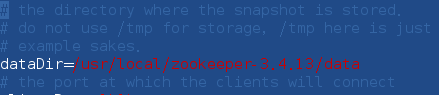
这个zoo.cfg是zookeeper的配置文件,这里我搭的是单机版,如果想搭集群版也是通过修改配置文件即可。

# The number of milliseconds of each tick
tickTime=2000
# The number of ticks that the initial
# synchronization phase can take
initLimit=10
# The number of ticks that can pass between
# sending a request and getting an acknowledgement
syncLimit=5
# the directory where the snapshot is stored.
# do not use /tmp for storage, /tmp here is just
# example sakes.
dataDir=/usr/local/zookeeper-3.4.13/data    #这里最好自己设置
# the port at which the clients will connect
clientPort=2181
# the maximum number of client connections.
# increase this if you need to handle more clients
#maxClientCnxns=60
#
# Be sure to read the maintenance section of the
# administrator guide before turning on autopurge.
#
# http://zookeeper.apache.org/doc/current/zookeeperAdmin.html#sc_maintenance
#
# The number of snapshots to retain in dataDir
#autopurge.snapRetainCount=3
# Purge task interval in hours
# Set to "0" to disable auto purge feature
#autopurge.purgeInterval=1
#server.1=cnblogs01:8888:9888         #这里修改为自己的主机名或者IP
#server.2=cnblogs02:8888:9888
#server.3=cnblogs03:8888:9888
创建/usr/local/zookeeper-3.4.13/data文件夹,新建一个myid,写入1
mkdir data
vim myid
1.3.5 启动ZooKeeper
/usr/local/zookeeper-3.4.13/bin/zkServer.sh start

2.1安装kafka
2.2 解压
tar -xzf kafka_2.12-2.0.0.tgz
注意,kafka_2.12-2.0.0.tgz版本是已经编译好的版本,解压就能使用。
2.3 配置server.properties
默认配置advertised.listeners=PLAINTEXT://your.host.name:9092修改为advertised.listeners=PLAINTEXT://ip:9092
ip为服务器ip。
hostname和端口是用来建议给生产者和消费者使用的,如果没有设置,将会使用listeners的配置,如果listeners也没有配置,将使用java.net.InetAddress.getCanonicalHostName()来获取这个hostname和port,对于ipv4,基本就是localhost了。
"PLAINTEXT"表示协议,可选的值有PLAINTEXT和SSL,hostname可以指定IP地址,也可以用"0.0.0.0"表示对所有的网络接口有效,如果hostname为空表示只对默认的网络接口有效。也就是说如果你没有配置advertised.listeners,就使用listeners的配置通告给消息的生产者和消费者,这个过程是在生产者和消费者获取源数据(metadata)。
启用kafka
bin/kafka-server-start.sh config/server.properties &
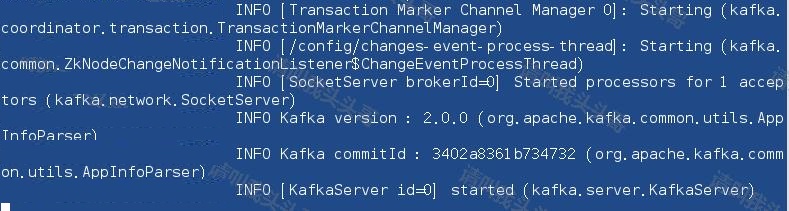
启动Kafka Broker后,在ZooKeeper终端上键入命令 jps,效果如下:

3.2 停止kafka
bin/kafka-server-stop.sh config/server.properties
四. Zookeeper、kafka常用命令
1.启动zookeeper
sh /usr/local/zookeeper/bin/zkServer.sh start 单独的zookeeper启动
/usr/local/kafka/bin/zookeeper-server-start.sh -daemon /usr/local/kafka/config/zookeeper.properties kafka自带的zookeeper启动
2.启动Kafka
/usr/local/kafka/bin/kafka-server-start.sh -daemon /usr/local/kafka/config/server.properties
3.创建一个主题
/usr/local/kafka/bin/kafka-topics.sh --create --zookeeper 192.168.1.10:2181 --replication-factor 1 --partitions 2 --topic test (replication-factor 副本因子 partitions分区)
4.发送消息
/usr/local/kafka/bin/kafka-console-producer.sh --broker-list 192.168.1.10:9092 --topic test
5.消费消息
/usr/local/kafka/bin/kafka-console-consumer.sh --zookeeper 192.168.1.10:2181 --topic test --from-beginning (from-beginning 从最开始消费)
6.查看已创建人topic列表
/usr/local/kafka/bin/kafka-topics.sh --list --zookeeper 192.168.1.10:2181
7.查看topic属性
/usr/local/kafka/bin/kafka-topics.sh --describe --zookeeper 192.168.1.10:2181 --topic test
8.删除topic
/usr/local/kafka/bin/kafka-topics.sh --zookeeper 192.168.1.10:2181 --delete --topic test
(1)登录zookeeper客户端:命令:./zookeeper-shell.sh 192.168.1.10:2181
(2)找到topic所在的目录:ls /brokers/topics
(3)找到要删除的topic,执行命令:rmr /brokers/topics/【topic name】即可,此时topic被彻底删除。
9.查看分组消费情况
/usr/local/kafka/bin/kafka-consumer-groups.sh --new-consumer --bootstrap-server 192.168.1.10:9092 --describe --group test-consumer-group
10.查看所有分组列表
/usr/local/kafka/bin/kafka-consumer-groups.sh --new-consumer --bootstrap-server 192.168.1.10:9092 --list
本文参考于:
https://www.cnblogs.com/toutou/p/linux_install_kafka.html
https://blog.csdn.net/vtopqx/article/details/78638865

 浙公网安备 33010602011771号