AI学习---数据IO操作&神经网络基础
数据IO操作
TF支持3种文件读取:
1.直接把数据保存到变量中
2.占位符配合feed_dict使用
3. QueueRunner(TF中特有的)
文件读取流程
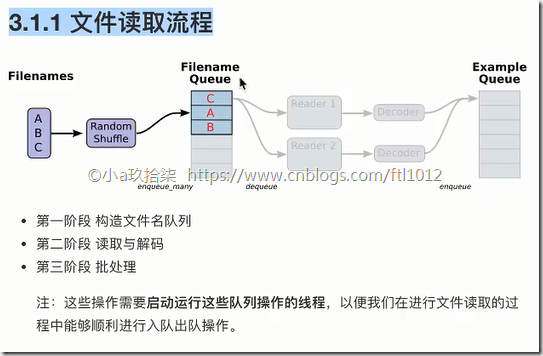
文件读取流程(多线程 + 队列)
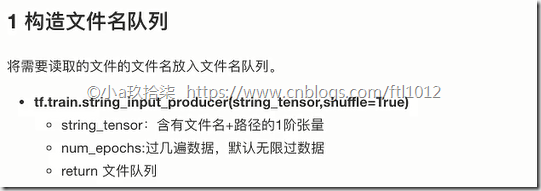
1)构造文件名队列(先读取文件名到队列,方便快速读取文件)
file_queue = tf.train.string_input_producer(string_tensor,shuffle=True)
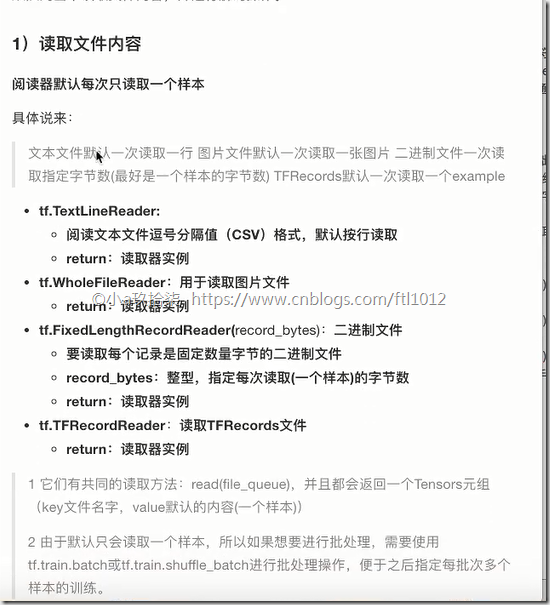
2)读取与解码(读取器根据文件名读取数据,以一个样本为一个单位进行读取,返回一个实例reader)
文本(一行文字):
读取:tf.TextLineReader()
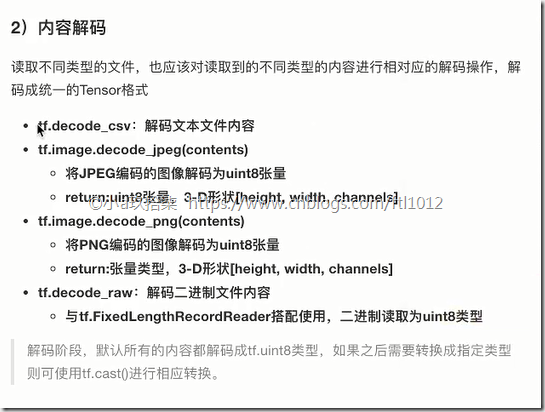
解码:tf.decode_csv()
图片(一张图片):
读取:tf.WholeFileReader()
解码:
tf.image.decode_jpeg(contents) # 将jpeg编码的图片解码为unit8
tf.image.decode_png(contents) # 将png编码的图片解码为unit8
二进制(固定数量字节):
读取:tf.FixedLengthRecordReader(record_bytes)
解码:tf.decode_raw()
TFRecords类型(TF自定义的)
读取:tf.TFRecordReader()
说明:读取器有一个通用的方法read(),返回一个元组
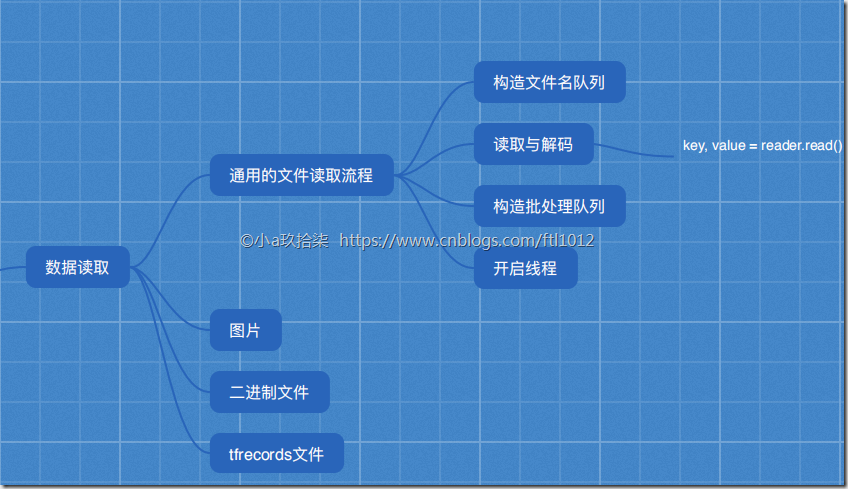
key, value = 读取器.read(file_queue)
key:文件名(指明文件在哪个文件名中)
value:一个样本
3)批处理队列
tf.train.batch(tensors, batch_size, num_threads = 1, capacity = 32, name=None)
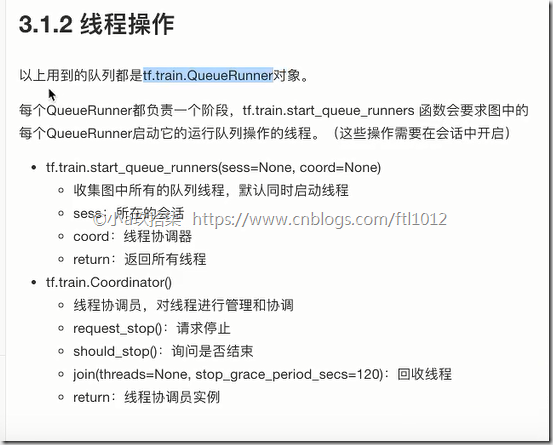
4)手动开启线程
队列操作对象:tf.train.QueueRunner()
开启会话:
tf.train.start_queue_runners(sess=None, coord=None)
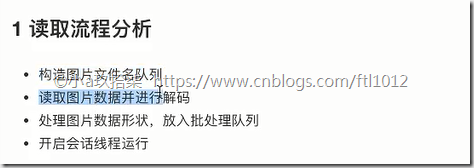
1、构造文件名队列
2、读取与解码
3、批处理
线程操作
图片数据
图像基本知识
0 文本特征处理
文本 -->利用特征词(某个单词,可统计数量Count,可统计重要程度TF-IDF) -> 二维数组shape(n_samples行,m_features列)
字典 –> one-hot编码 -> 二维数组
图片 像素值(组成图片的最基本单位就是像素)
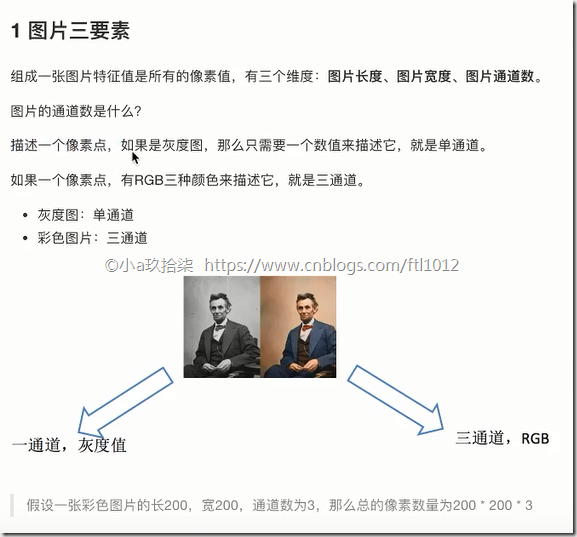
1 图片三要素(长度+宽度+通道数)
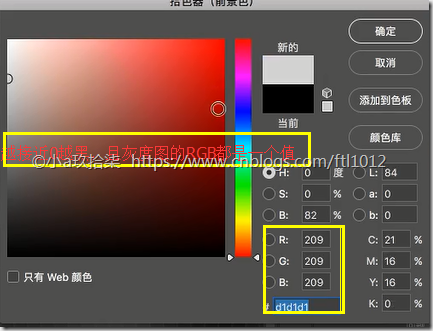
黑白图、灰度图
一个通道
黑[0, 255]白
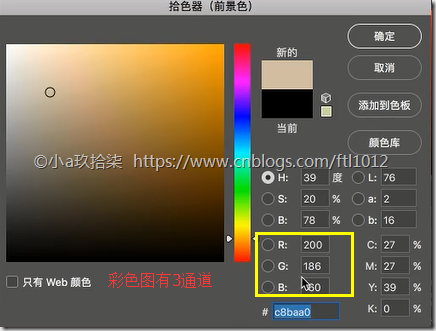
彩色图
三个通道
一个像素点 由三个通道值构成,每一个通道是一个灰度图,3个组合在一起就是一个彩色图的像素点
R [0, 255]
G [0, 255]
B [0, 255]
2 TensorFlow中表示图片
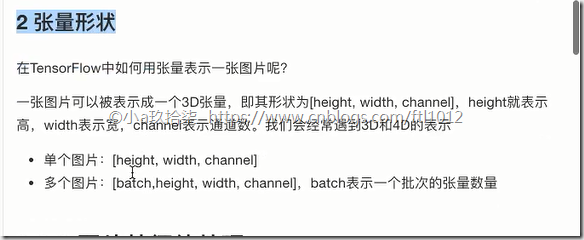
Tensor对象
指令名称、形状、类型
shape = [height, width, channel]
3 图片特征值处理
[samples, features]
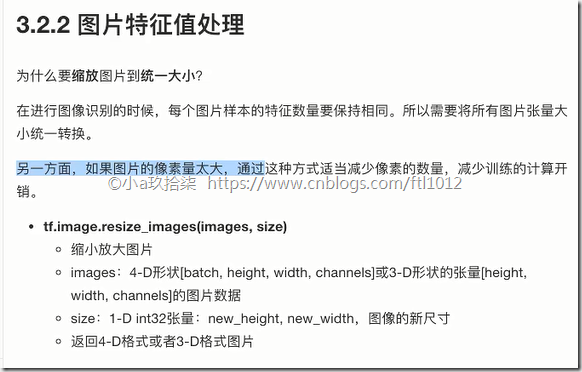
为什么要缩放图片到统一大小?
1)每一个样本特征数量要一样多
2)缩小图片的大小
tf.image.resize_images(images, size)
4 数据格式
存储:uint8
训练:float32
1、图片三要素(长+宽+通道数)
点击查看图片的某一个像素点(左:灰度图, 右:彩色图)
2、张量(类似ndarray)形状--》3D
3、图片特征值处理
iris数据集: 150个样本 4个特征值 目标值
图片数据集:1个样本有500*500*3个特征(像素点) + 每个图片的特征值不一样 –》所以需要进行大小转换
4、数据格式
狗图片读取Demo
1 2 3 4 5 6 7 8 9 10 11 12 13 14 15 16 17 18 19 20 21 22 23 24 25 26 27 28 29 30 31 32 33 34 35 36 37 38 39 40 41 42 43 44 45 46 47 48 49 50 51 52 53 54 55 56 57 58 59 60 61 62 63 64 65 66 67 68 | import tensorflow as tfimport osos.environ["TF_CPP_MIN_LOG_LEVEL"] = '3'def read_picture_dog(file_list): """ 读取狗图片案例 :return: """ # 1、构造文件名队列 file_queue = tf.train.string_input_producer(file_list) # 2、读取与解码 # 读取 reader = tf.WholeFileReader() key, value = reader.read(file_queue) print("key:\n", key) print("value:\n", value) # 解码 image_decoded = tf.image.decode_jpeg(value) print("image_decoded:\n", image_decoded) # 3、图像形状、类型修改 # 将图片缩放到同一个大小 image_resized = tf.image.resize_images(image_decoded, [200, 200]) # 到此仅确定了长和宽,未确定通道 print("image_resized_before:\n", image_resized) # 更新静态形状 image_resized.set_shape([200, 200, 3]) # 第三个的通道一定是3 print("image_resized_after:\n", image_resized) # 4、批处理队列 image_batch = tf.train.batch([image_resized], batch_size=100, num_threads=2, capacity=100) print("image_batch:\n", image_batch) # 5、开始会话 with tf.Session() as sess: # key_new, value_new = sess.run([key, value]) # print('key_new\n', key_new) # 开启单线程的情况下,会阻塞,因为只有一个queue现场,而前面已经运行中 # print('value_new\n', value_new) # 开启线程 # ->构造线程协调器 coord = tf.train.Coordinator() threads = tf.train.start_queue_runners(sess=sess, coord=coord) # 运行 filename, sample, image, n_image = sess.run([key, value, image_resized, image_batch]) print("filename:\n", filename) print("sample:\n", sample) print("image:\n", image) print("n_image:\n", n_image) coord.request_stop() coord.join(threads) # 回收线程if __name__ == "__main__": # 0、构造文件路径 + 文件名列表 filename = os.listdir('F:\\linear') file_list = [ os.path.join('F:\\linear', x) for x in filename ] print('文件名列表:', filename) print('文件路径:', file_list) read_picture_dog(file_list) |
二进制数据
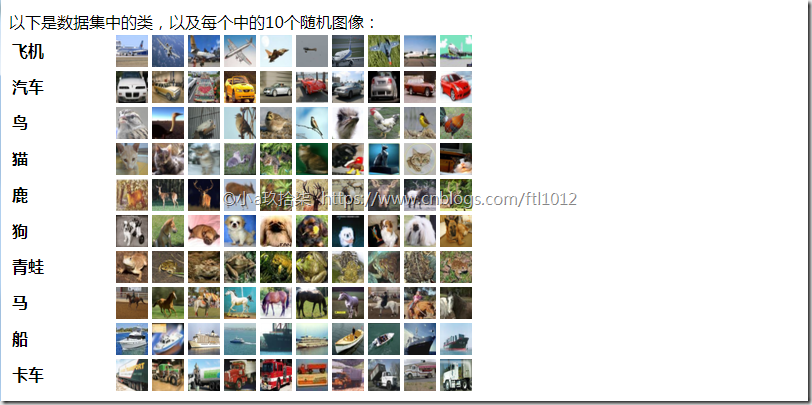
- CIFAR-10数据集介绍
CIFAR-10数据集由10个类中的60000个32x32彩色图像组成,每个类有6000个图像。有50000个训练图像和10000个测试图像。
数据集分为五个训练批次和一个测试批次,每个批次有10000个图像。测试批次包含来自每个类别的1000个随机选择的图像。训练批次以随机顺序包含剩余图像,但是一些训练批次可能包含来自一个类别的更多图像而不是另一个类别。在他们之间,训练批次包含来自每个班级的5000个图像。
http://www.cs.toronto.edu/~kriz/cifar.html
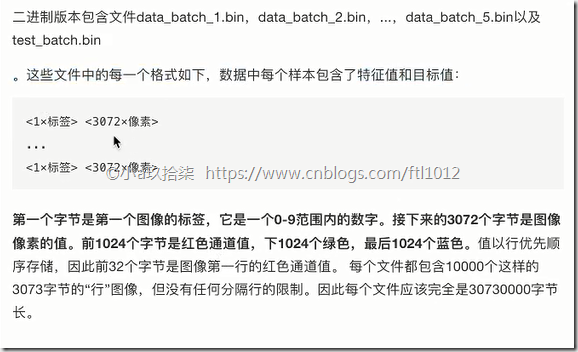
- 二进制版本
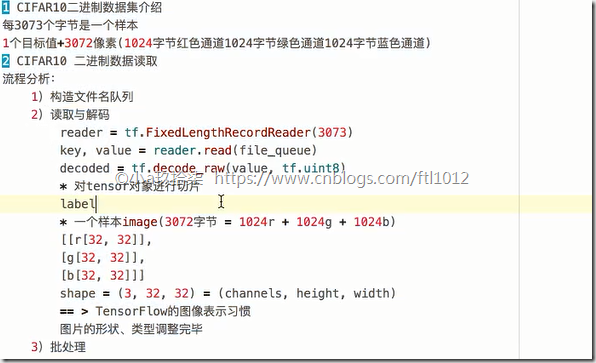
每3072个字节构成一个样本 1个目标值 + 3072个字节
- CIFAR10 二进制数据读取
流程分析:
1)构造文件名队列
2)读取与解码
3)批处理队列
开启会话
手动开启线程
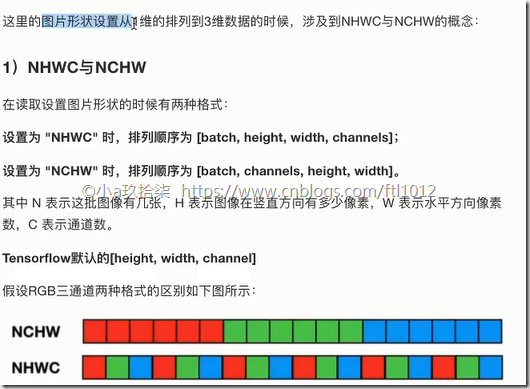
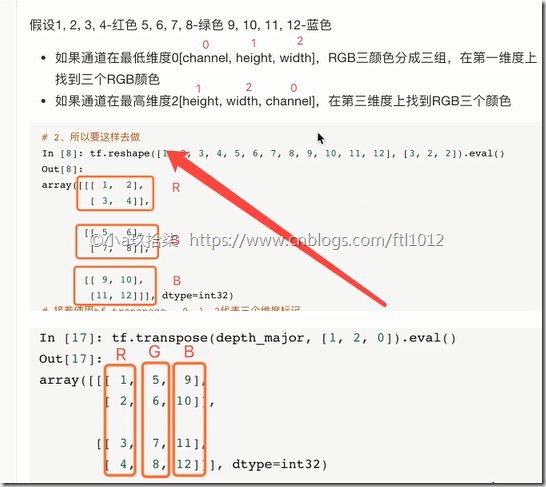
- 图片转置
demo:
1 2 3 4 5 6 7 8 9 10 11 12 13 14 15 16 17 18 19 20 21 22 23 24 25 26 27 28 29 30 31 32 33 34 35 36 37 38 39 40 41 42 43 44 45 46 47 48 49 50 51 52 53 54 55 56 57 58 59 60 61 62 63 64 65 66 67 68 69 70 71 72 73 74 75 76 77 78 79 80 81 82 83 84 85 | import tensorflow as tfimport osos.environ["TF_CPP_MIN_LOG_LEVEL"] = '3'class Cifar(): def __init__(self): # 设置图像大小 self.width = 32 self.height = 32 self.channel = 3 # 设置图像字节数 self.image = self.height * self.width * self.channel # 一个图的字节大小 self.label = 1 # 标签字节数(范围0-9) self.sample = self.image + self.label # 一个样本的大小 = 一个标签 + 一个图 def read_binary(self, file_list): # 1、 构建文件名队列 file_queue = tf.train.string_input_producer(file_list) # 2、 文件读取与解码 # 读取 reader = tf.FixedLengthRecordReader(self.sample) key, value = reader.read(file_queue) print('key\n', key) # Tensor("ReaderReadV2:0", shape=(), dtype=string) print('value\n', value) # 解码 image_decoded = tf.decode_raw(value, tf.uint8) print("image_decoded:\n", image_decoded) # 一阶 Tensor("DecodeRaw:0", shape=(?,), dtype=uint8) # 切片操作 label = tf.slice(image_decoded, [0], [self.label]) image = tf.slice(image_decoded, [self.label], [self.image]) print("label:\n", label) # Tensor("Slice:0", shape=(1,), dtype=uint8) ,1维, print("image:\n", image) # Tensor("Slice_1:0", shape=(3072,), dtype=uint8), 1维,3072字节 # 调整图像的形状 image_reshaped = tf.reshape(image, [self.channel, self.height, self.width]) print("image_reshaped:\n", image_reshaped) # 改变阶数, Tensor("Reshape:0", shape=(3, 32, 32), dtype=uint8) # 三维数组的转置(原数组的顺序不符合 TF的要求,转换后维) image_transposed = tf.transpose(image_reshaped, [1, 2, 0]) print("image_transposed:\n", image_transposed) # 调整图像类型 # image_cast = tf.cast(image_transposed, tf.float32) # 3、构造批处理队列 image_batch, label_batch = tf.train.batch([image_transposed, label], batch_size=100, num_threads=2, capacity=100) # 开启会话 with tf.Session() as sess: # 开启线程 coord = tf.train.Coordinator() threads = tf.train.start_queue_runners(sess=sess, coord=coord) key_new, value_new, image_decoded, label_new, image_new, image_reshaped_new,\ image_transposed_new,image_batch_new, label_batch_new = sess.run([key, value, image_decoded, label, image, image_reshaped, image_transposed, image_batch, label_batch]) print('key_new\n', key_new) # Tensor("ReaderReadV2:0", shape=(), dtype=string) print('value_new\n', value_new) # b'\x03\x9e\x9f\xa5\xa6\xa0 print('image_decoded\n', image_decoded) # [3 158 159 ... 124 129 110] --》 3是类别,158,159是目标和特征值,需切片 print('label_new\n', label_new) # [6] print('image_new\n', image_new) # [ 59 43 50 ... 140 84 72] print('image_reshaped_new\n', image_reshaped_new) print('image_transposed_new\n', image_transposed_new) print('image_batch_new\n', image_batch_new) print('label_batch_new\n', label_batch_new) coord.request_stop() coord.join(threads) # 回收线程 return Noneif __name__ == "__main__": filename = os.listdir('F:\\linear') file_list = [ os.path.join('F:\\linear', x) for x in filename if x[-3:] == 'bin' ] print('filename\n', filename) print('file_list\n', file_list) cifar = Cifar() cifar.read_binary(file_list) |
TFRecords
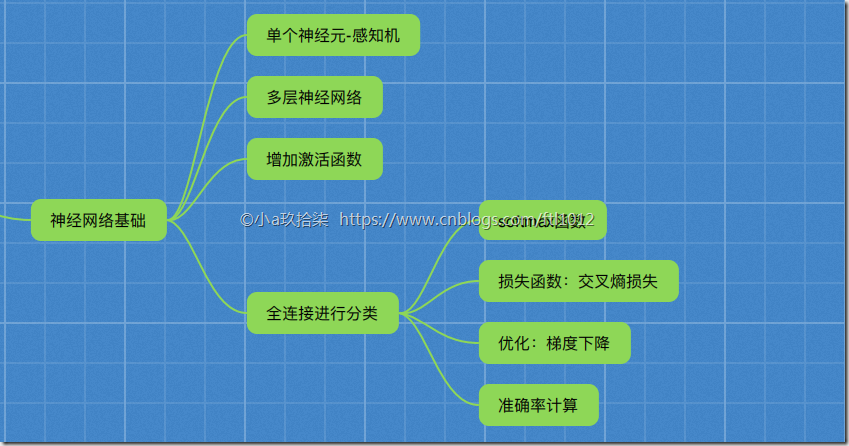
神经网络基础
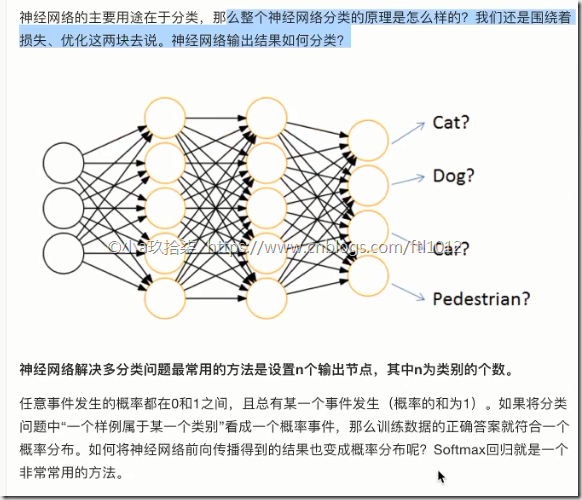
神经网络原理
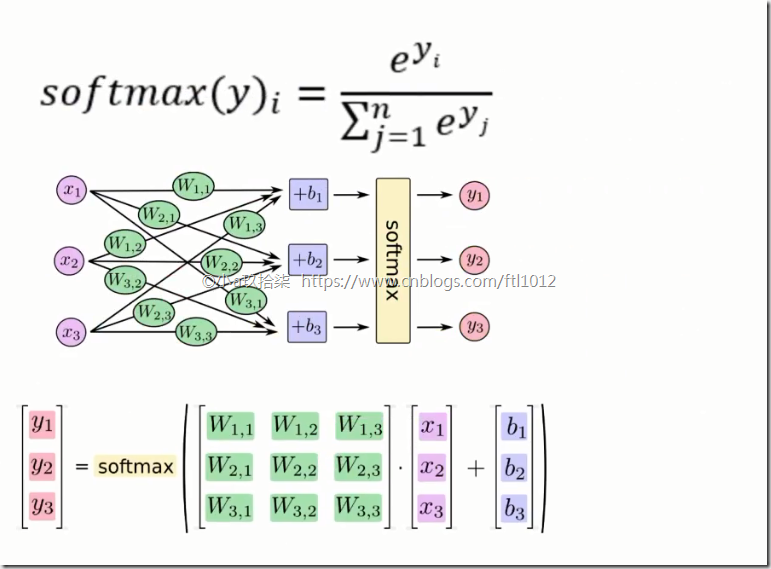
Softmax回归
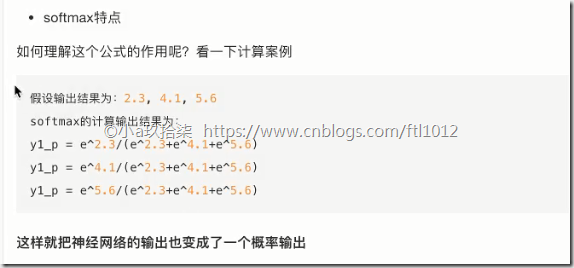
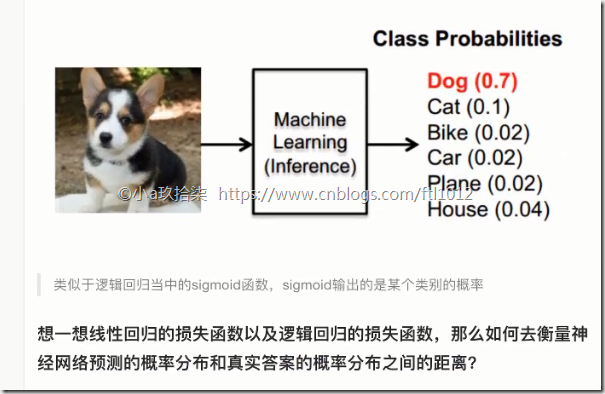
softmax特点:神经网络的输出变成了概率输出
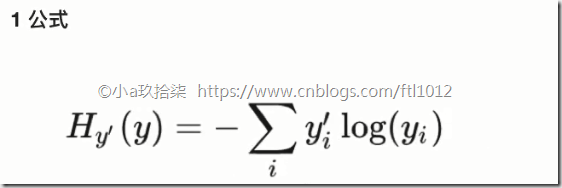
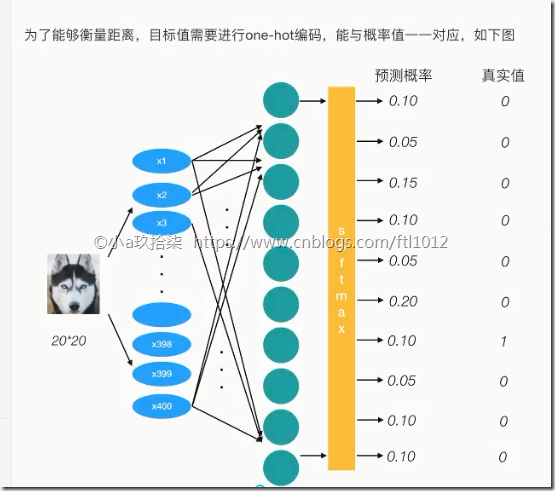
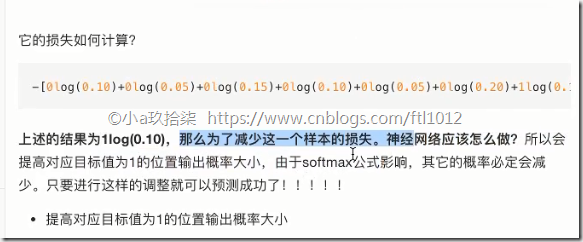
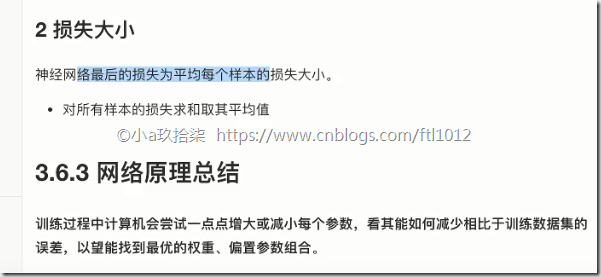
交叉熵损失
logits: 线性值+权重的线性值
Mnist手写数字识别案例
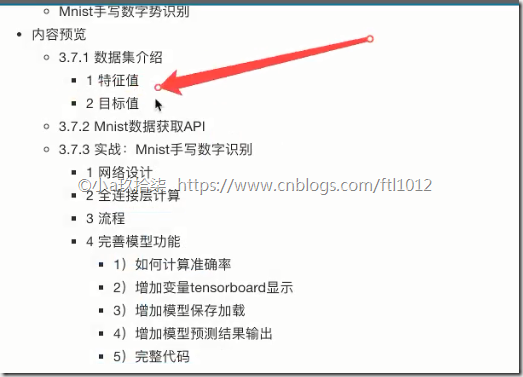
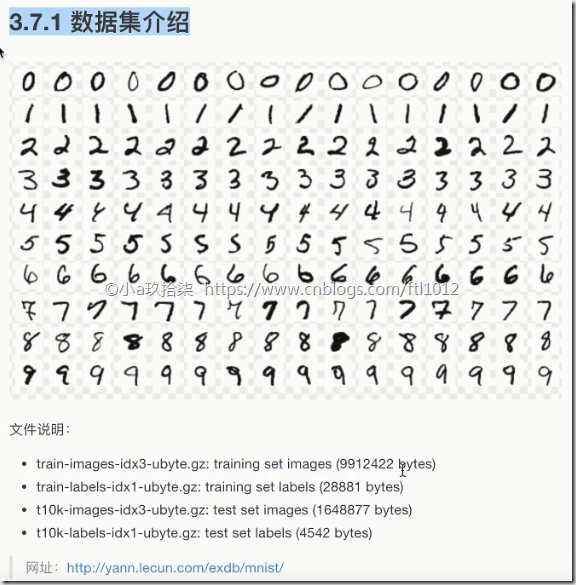
1、数据集介绍
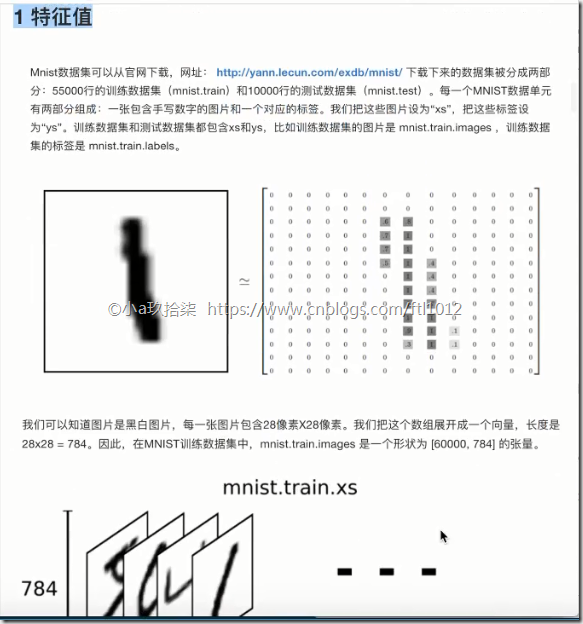
1、特征值:
特征值就是我们的图片(28*28个像素),图片就是以28*28*1的形式存储,根据书写的轨迹进行编码(即把数字1用0.1~1.0的数字进行标识,完全笔直用1,稍微偏一点用0.5标识)。一个手写识别图片包含图片和它对应的标签,设置图片为xs,标签为ys。样本数共55000
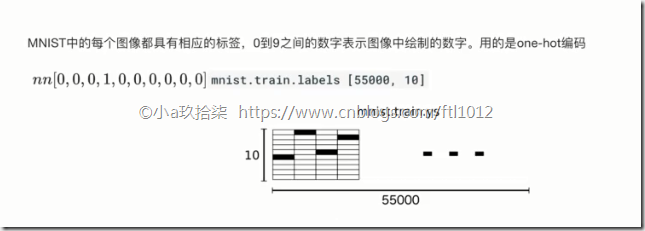
2、目标值
Minist的每个图片都有对应的标签,0~9之间的数字表示图像中绘制的数字,利用one-hot编码,共[55000,10]个样本
3、Mnist数据获取API
Mnist手写数字的识别:
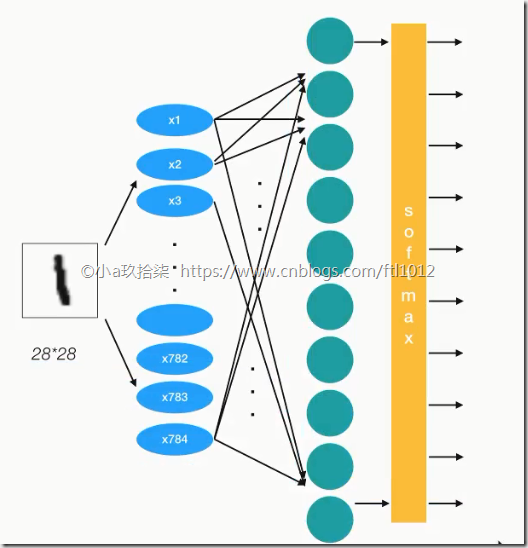
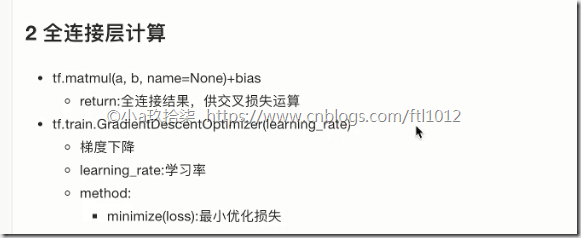
图片数字1 --》 输入特征值28*28*1 --》每个特征都有权重值,进行加权求和(y=w1x1+w2x2+b) -->获取logits -->进行softmax进行分类
1 2 3 4 5 6 7 8 9 10 11 12 13 14 15 16 17 18 19 20 21 22 23 24 25 26 27 28 29 30 31 32 33 34 35 36 37 38 39 40 41 42 43 44 45 46 47 48 49 50 51 52 53 54 55 56 | import tensorflow as tffrom tensorflow.examples.tutorials.mnist import input_datadef full_connection(): """ 用全连接对手写数字进行识别 :return: """ # 1)准备数据 mnist = input_data.read_data_sets("F:\mnist_data", one_hot=True) # 用占位符定义真实数据 X = tf.placeholder(dtype=tf.float32, shape=[None, 784]) y_true = tf.placeholder(dtype=tf.float32, shape=[None, 10]) # 2)构造模型 - 全连接 # [None, 784] * W[784, 10] + Bias = [None, 10] weights = tf.Variable(initial_value=tf.random_normal(shape=[784, 10], stddev=0.01)) bias = tf.Variable(initial_value=tf.random_normal(shape=[10], stddev=0.1)) y_predict = tf.matmul(X, weights) + bias # 3)构造损失函数 loss_list = tf.nn.softmax_cross_entropy_with_logits(logits=y_predict, labels=y_true) loss = tf.reduce_mean(loss_list) # 4)优化损失 # optimizer = tf.train.GradientDescentOptimizer(learning_rate=0.01).minimize(loss) optimizer = tf.train.AdamOptimizer(learning_rate=0.01).minimize(loss) # 5)增加准确率计算 bool_list = tf.equal(tf.argmax(y_true, axis=1), tf.argmax(y_predict, axis=1)) accuracy = tf.reduce_mean(tf.cast(bool_list, tf.float32)) # 初始化变量 init = tf.global_variables_initializer() # 开启会话 with tf.Session() as sess: # 初始化变量 sess.run(init) # 开始训练 for i in range(50): # 获取真实值 image, label = mnist.train.next_batch(50) _, loss_value, accuracy_value = sess.run([optimizer, loss, accuracy], feed_dict={X: image, y_true: label}) print("第%d次的损失为%f,准确率为%f" % (i+1, loss_value, accuracy_value)) return Noneif __name__ == "__main__": full_connection() |
===
-------------------------------------------
个性签名: 所有的事情到最後都是好的,如果不好,那說明事情還沒有到最後~
本文版权归作者【小a玖拾柒】和【博客园】共有,欢迎转载,但未经作者同意必须保留此段声明,且在文章页面明显位置给出原文连接,否则保留追究法律责任的权利!









【推荐】国内首个AI IDE,深度理解中文开发场景,立即下载体验Trae
【推荐】编程新体验,更懂你的AI,立即体验豆包MarsCode编程助手
【推荐】抖音旗下AI助手豆包,你的智能百科全书,全免费不限次数
【推荐】轻量又高性能的 SSH 工具 IShell:AI 加持,快人一步
· 10年+ .NET Coder 心语,封装的思维:从隐藏、稳定开始理解其本质意义
· .NET Core 中如何实现缓存的预热?
· 从 HTTP 原因短语缺失研究 HTTP/2 和 HTTP/3 的设计差异
· AI与.NET技术实操系列:向量存储与相似性搜索在 .NET 中的实现
· 基于Microsoft.Extensions.AI核心库实现RAG应用
· 10年+ .NET Coder 心语 ── 封装的思维:从隐藏、稳定开始理解其本质意义
· 地球OL攻略 —— 某应届生求职总结
· 提示词工程——AI应用必不可少的技术
· Open-Sora 2.0 重磅开源!
· 字符编码:从基础到乱码解决