AI学习---TensorFlow框架介绍[图+会话+张量+变量OP+API]
TensorFlow的数据流图
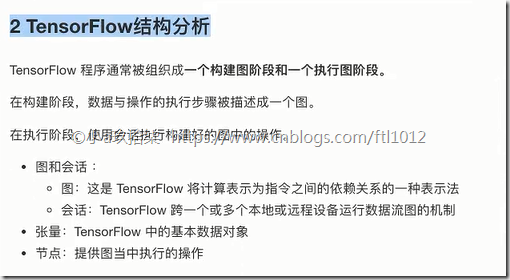
- TensorFlow的结构分析: 图 + 会话
TensorFlow = 构图阶段(数据与操作的执行步骤被描绘出一个图) + 执行图阶段(使用回话执行构建好的图中操作)
1. 一个构建图阶段
流程图:定义数据(张量Tensor)和操作(节点Operate)
2. 一个执行图阶段
调用各方资源,将定义好的数据和操作运行起来
- 数据流图介绍
数据流图【Data Flow Graph】用“结点”(nodes)和“线”(edges)的有向图来描述数学计算。“节点” 一般用来表示施加的数学操作,但也可以表示数据输入(feed in)的起点/输出(push out)的终点,或者是读取/写入持久变量(persistent variable)的终点。“线”表示“节点”之间的输入/输出关系。这些数据“线”可以输运“size可动态调整”的多维数据数组,即“张量”(tensor)。张量从图中流过的直观图像是这个工具取名为“Tensorflow”的原因。一旦输入端的所有张量准备好,节点将被分配到各种计算设备完成异步并行地执行运算。
简单计算的Demo:用于区别py和TF的区别:
1 2 3 4 5 6 7 8 9 10 11 12 13 14 15 16 17 18 19 20 21 22 23 24 25 26 27 28 29 30 31 32 33 | import tensorflow as tfimport osos.environ['TF_CPP_MIN_LOG_LEVEL'] = '2' # 取消TF对我们的一些提示def tensorflow_demo(): """ TensorFlow的基本结构 :return: """ # 原生python加法运算 a = 2 b = 3 c = a + b print("普通加法运算的结果:\n", c) # TensorFlow实现加法运算,可以理解为我们定义了一个图 a_t = tf.constant(2) # 这里是我们的张量 b_t = tf.constant(3) # 这里是我们的张量 c_t = a_t + b_t # 定义了节点 print("TensorFlow加法运算的结果:\n", c_t) # TF必须先开启会话,可以理解回话调用CPU资源进行计算 with tf.Session() as sess: c_t_value = sess.run(c_t) print("c_t_value:\n", c_t_value) return Noneif __name__ == "__main__": tensorflow_demo() |
问题定位:
解决ImportError: numpy.core.multiarray failed to import
问题解决:
pip install -U numpy
图与TensorBoard
图包含了一组tf.Operation代表的计算单元对象和tf.Tensor代表的计算单元直接流动的数据。
- 图的相关操作(默认图 + 自定义图)
1 默认图
查看默认图的方法
1)调用方法
用tf.get_default_graph()
2)查看属性
with tf.Session() as sess:
tt = sess.graph
1 2 3 4 5 6 7 8 9 10 11 12 13 14 15 16 17 18 19 20 21 22 23 24 25 26 27 28 29 30 31 32 33 34 35 36 37 | import tensorflow as tfimport osos.environ['TF_CPP_MIN_LOG_LEVEL'] = '2' # 取消TF对我们的一些提示def graph_demo(): a_t = tf.constant(2) b_t = tf.constant(3) c_t = tf.add(a_t, b_t) print("TensorFlow加法运算的结果:\n", c_t) ''' 查看默认图: 1. 调用get_default_graph() 2. session.graph ''' # 方法1-1:调用默认方法 default_g = tf.get_default_graph() print('调用get_default_graph: \n', default_g) # 方法2-1:查看张量属性 print("a_t的图属性:\n", a_t.graph) print("c_t的图属性:\n", c_t.graph) # 方法2-2:查看回话属性 with tf.Session() as sess: session_g = sess.graph print("回话属性:", session_g) new_c_t = sess.run(c_t) print("TensorFlow回话的的结果c_t_value:\n", new_c_t)if __name__ == "__main__": graph_demo() |
2 创建图
new_g = tf.Graph() # 自定义一个图
with new_g.as_default():
定义数据和操作
with tf.Session(graph=new_g) as sess: # 如果不添加graph=new_g,默认调用默认的图,而不是我们自定义的图
sess.run(XXX)
1 2 3 4 5 6 7 8 9 10 11 12 13 14 15 16 17 18 19 20 21 22 23 24 25 26 27 28 29 30 31 | import tensorflow as tfimport osos.environ['TF_CPP_MIN_LOG_LEVEL'] = '2' # 取消TF对我们的一些提示def graph_demo(): # 第一步:自定义图 new_g = tf.Graph() # 第二步:在自己的图中定义数据和操作 with new_g.as_default(): a_new = tf.constant(20) b_new = tf.constant(30) c_new = a_new + b_new print("a_new:\n", a_new) print("b_new:\n", b_new) print("c_new:\n", c_new) print("a_new的图属性:\n", a_new.graph) print("c_new的图属性:\n", c_new.graph) # 开启new_g的会话,即开启了一个上下文管理器 with tf.Session(graph=new_g) as new_sess: c_new_value = new_sess.run((c_new)) print("c_new_value:\n", c_new_value) print("new_sess的图属性:\n", new_sess.graph) return Noneif __name__ == "__main__": graph_demo() |
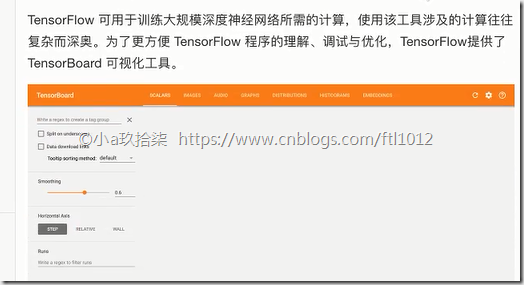
TF有一个亮点就是我们自己写的程序可以进行可视化,这个就是TensorBoard。
Tensorboard的介绍
TensorBoard:可视化学习: 数字序列化 + 启动Tensorboard
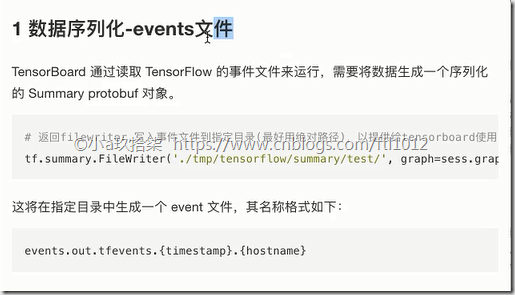
1 数据序列化(即events文件) (因为图也是一个对象,不能以编码的形式写在本地,需要序列化,序列化后的文件叫做events)
tf.summary.FileWriter(path, graph=sess.graph)
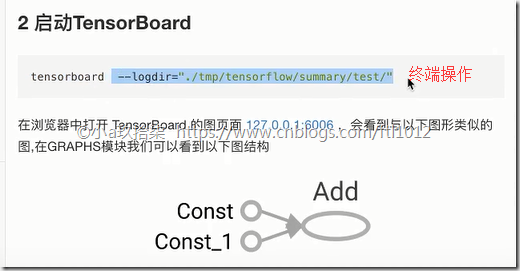
2 tensorboard
1 2 3 4 5 6 7 8 9 10 11 12 13 14 15 16 17 18 19 20 21 22 23 24 25 26 27 28 29 30 31 32 33 34 35 36 37 38 39 | import tensorflow as tfimport osos.environ['TF_CPP_MIN_LOG_LEVEL'] = '2' # 取消TF对我们的一些提示def graph_demo(): """ 自定义图的演示 + Tensorboard可视化 :return: """ # 自定义图 new_g = tf.Graph() # 在自己的图中定义数据和操作 with new_g.as_default(): a_new = tf.constant(20) b_new = tf.constant(30) c_new = a_new + b_new print("a_new:\n", a_new) print("b_new:\n", b_new) print("c_new:\n", c_new) print("a_new的图属性:\n", a_new.graph) print("c_new的图属性:\n", c_new.graph) # 开启new_g的会话 with tf.Session(graph=new_g) as new_sess: c_new_value = new_sess.run((c_new)) print("c_new_value:\n", c_new_value) print("new_sess的图属性:\n", new_sess.graph) # 1)将图写入本地生成events文件 tf.summary.FileWriter("./summary", graph=new_sess.graph) return Noneif __name__ == "__main__": graph_demo() |
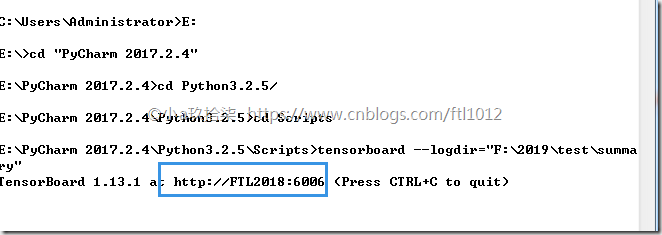
如果没有添加环境变量,就需要进入的Tensorboard的安装目录下进行终端操作
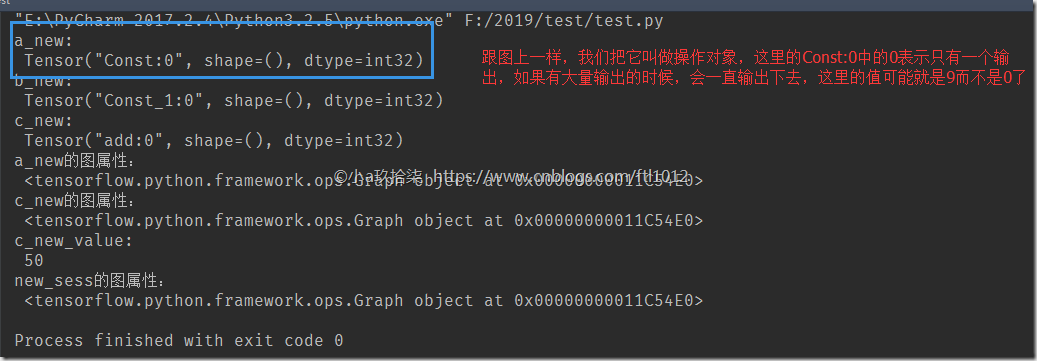
代码输出结果:
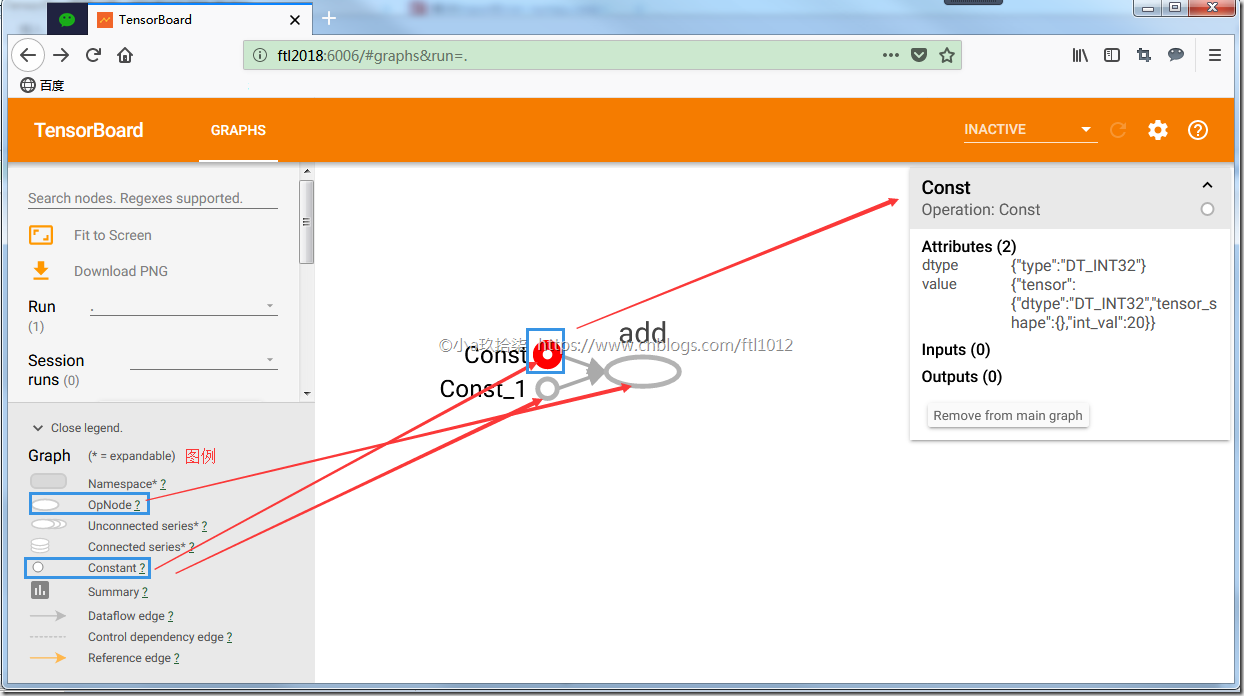
可视化结果:
http://ftl2018:6006/#graphs&run=. 火狐浏览器打开
下面我们讲究OP对象
Operation的介绍
一个图我们包含数据(Tensor对象) + 操作(Operation对象)
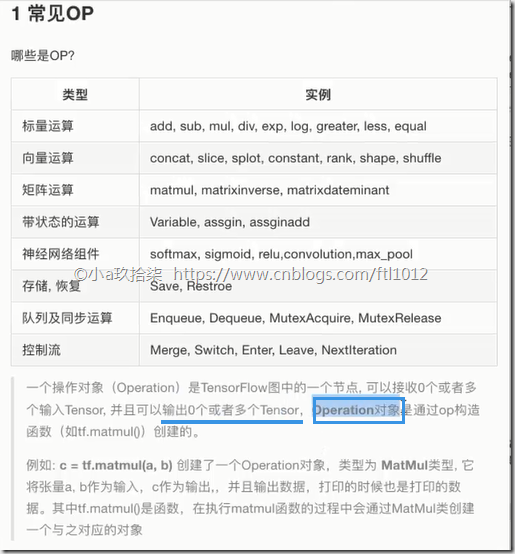
1 常见OP(操作函数和操作对象联系与区别)
操作函数 & 操作对象
tf.constant(Tensor对象) | 输入Tensor对象 –> Const对象 –> 输出 Tensor对象
tf.add(Tensor对象1, Tensor对象2) | 输入Tensor对象1, Tensor对象2 - Add对象 - 输出 Tensor对象3
说明:
假设我们定义了a_new = tf.constant(20);
这里我们定义的数字20也是一个Tensor对象,数字20传递给了tf.constant()函数(即操作函数),然后生成一个Const对象(即操作对象,这里只是一个数字定义,如果进行add()求和,则是Add对象), 到最后我们拿到的也是一个Tensor对象。
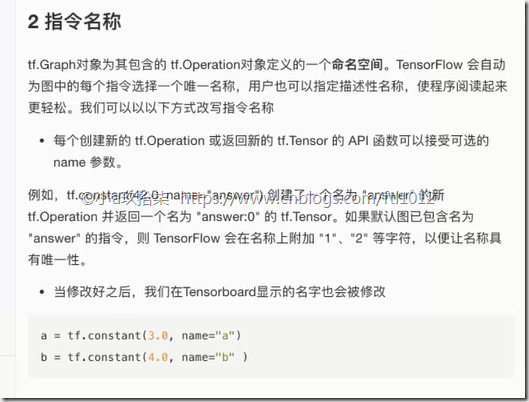
2 指令名称
同一张图,有且只有一个命名唯一空间,默认是递增,Const_0,Const_1,当然我们也可以自定义名称
         a_t = tf.constant(2) # 默认的name都是Const
         b_t = tf.constant(3, name="a_t")
- 常见的OP
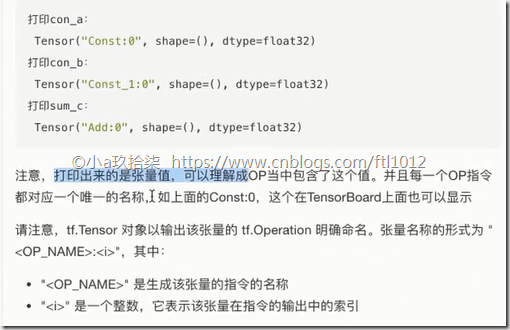
我们打印出来的实际上都是数值(张量值,且OP指令都唯一)。下图是sum_c: 就是由add这个操作产生的
- 指令名称
会话
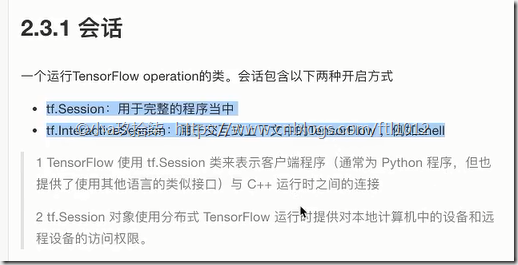
会话(Session+InteractiveSession)
1、tf.Session:用于完整的程序当中
2、tf.InteractiveSession:用于交互式上下文中的TensorFlow ,例如shell,我们打开一个回话,可以利用a.eval()进行快速取值
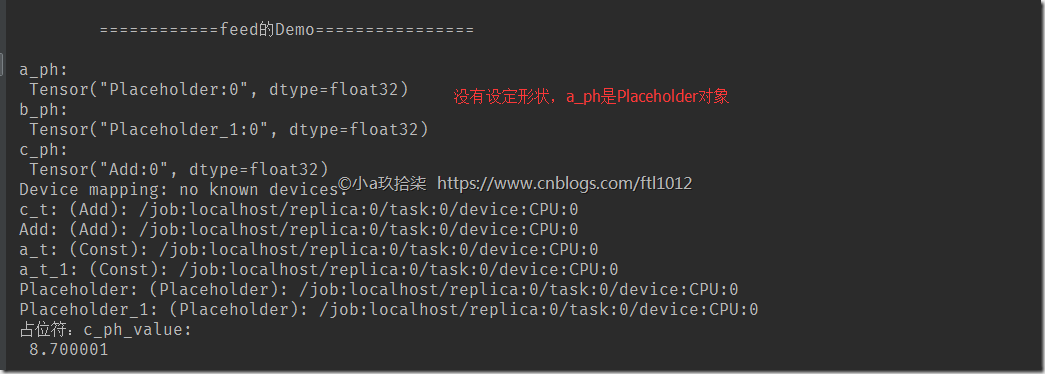
3 feed操作
a = tf.placeholder(tf.float32, shape=)
b = tf.placeholder(tf.float32, shape=)
会话的关键API说明
- 关于初始化__init__()函数:
1)会话掌握资源,用完要回收 - 上下文管理器
with tf.Session(graph=new_g) as new_sess:
2)初始化会话对象时的参数
def __init__(self, target='', graph=None, config=None):
graph=None,默认运行我们的默认图
target:如果将此参数留空(默认设置), 会话将仅使用本地计算机中的设备。
可以指定 grpc:// 网址,以便指定远程TensorFlow 服务器的地址,
这使得会话可以访问该服务器控制的计算机上的所有设备。
config:此参数允许您指定一个 tf.ConfigProto以便控制会话的行为。例如,ConfigProto协议用于打印设备使用信息
3)run(fetches,feed_dict=None)
def run(self, fetches, feed_dict=None, options=None, run_metadata=None):
fetches:单一的operation,或者列表、元组(不属于TensorFlow的不行)
feed_ditc: 允许调用者覆盖图中张量的值,运行时赋值
--》一般与 a = tf.placeholder(tf.float32, shape=)(提供占位符)搭配使用,则会检查值的形状是否与占位符兼容
1 2 3 4 5 6 7 8 9 10 11 12 13 14 15 16 17 18 19 20 21 22 23 24 25 26 27 28 29 30 31 32 33 34 35 36 37 38 39 40 41 42 43 44 45 46 47 48 49 50 51 52 53 54 55 56 57 58 59 | import tensorflow as tfimport osos.environ['TF_CPP_MIN_LOG_LEVEL'] = '2'def session_demo(): """ 会话的演示 :return: """ info1 = ''' ============fetches参数传================ ''' print(info1) # TensorFlow实现加法运算 a_t = tf.constant(2, name="a_t") b_t = tf.constant(3, name="a_t") c_t = tf.add(a_t, b_t, name="c_t") print("a_t:\n", a_t) print("b_t:\n", b_t) print("c_t:\n", c_t) # print("c_t.eval():\n", c_t.eval()) # 开启会话 with tf.Session(config=tf.ConfigProto(allow_soft_placement=True, log_device_placement=True)) as sess: ''' # fetches参数传递多个值demo: 1. abc = sess.run(fetches=[a_t, b_t, c_t]) 返回的值也是一个列表格式 2. a, b, c sess.run([a_t, b_t, c_t]) 用a,b,c分别接受列表的值 ''' # fetches参数传递单一demo: c_new_value = sess.run(c_t) print('session.run()执行结果:\n', c_new_value) print("c_t_value:\n", c_t.eval()) print("sess的图属性:\n", sess.graph) info = ''' ============feed的Demo================ ''' print(info) # 定义占位符 a_ph = tf.placeholder(tf.float32) # 这里占位的个浮点型,所以下面传递一个浮点型数据 b_ph = tf.placeholder(tf.float32) c_ph = tf.add(a_ph, b_ph) print("a_ph:\n", a_ph) print("b_ph:\n", b_ph) print("c_ph:\n", c_ph) # 开启会话 with tf.Session(config=tf.ConfigProto(allow_soft_placement=True, log_device_placement=True)) as session: c_ph_value = session.run(c_ph, feed_dict={a_ph: 3.9, b_ph: 4.8}) print("占位符:c_ph_value:\n", c_ph_value)if __name__ == "__main__": session_demo() |
张量的介绍
TensorFlow的张量就是一个n维数组,类型为tf.Tensor。类似于我们见过的ndarray.
--> 2个重要的属性(type + shape)
1. 数据类型(type)
2. 形状(阶)shape
计算机中各个变量的存储情况:
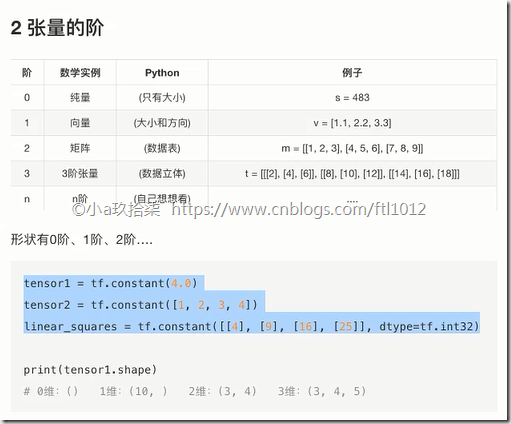
标量 一个数字 0阶张量
向量 一维数组 [2, 3, 4] 1阶张量
矩阵 二维数组 [[2, 3, 4], 2阶张量
[2, 3, 4]]
……
张量 n维数组 n阶张量
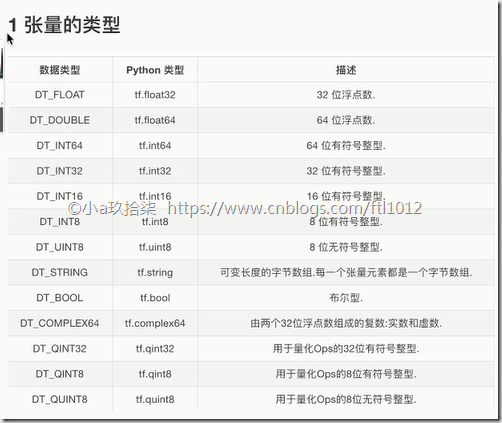
- 张量的类型
- 张量的阶
1 2 3 4 5 6 7 8 9 10 11 12 13 14 15 16 17 18 19 20 21 22 23 24 25 26 27 28 29 | import tensorflow as tfimport osos.environ['TF_CPP_MIN_LOG_LEVEL'] = '2'def tensor_demo(): ''' 张量的demo :return: ''' ''' 创建张量的时候,如果不指定类型 默 认 tf.float32 整 型 tf.int32 浮点型 tf.float32 ''' tensor1 = tf.constant(4.0) # 显示空的元组(),没有指定数组类型 tensor2 = tf.constant([1, 2, 3, 4]) # 显示一个一位数组,表示成(4,) linear_squares = tf.constant([[4], [9], [16], [25]], dtype=tf.int32) # 显示一个二维数组,表示成(4,1),4行一列 print("tensor1:\n", tensor1) # Tensor("Const:0", shape=(), dtype=float32) print("tensor2:\n", tensor2) # Tensor("Const_1:0", shape=(4,), dtype=int32) print("linear_squares_before:\n", linear_squares) # Tensor("Const_2:0", shape=(4, 1), dtype=int32)if __name__ == "__main__": tensor_demo() |
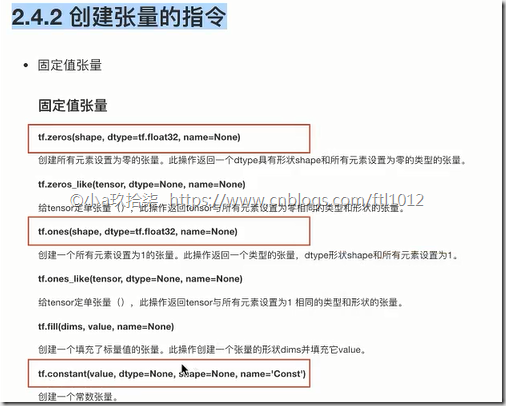
创建张量的指令
张量的指令 = 固定值张量 + 随机张量
- 创建固定的张量
demo:
1 2 3 | import tensorflow as tftf.zeros(shape=[3,4]).eval()tf.ones(shape=[3,4]).eval() |
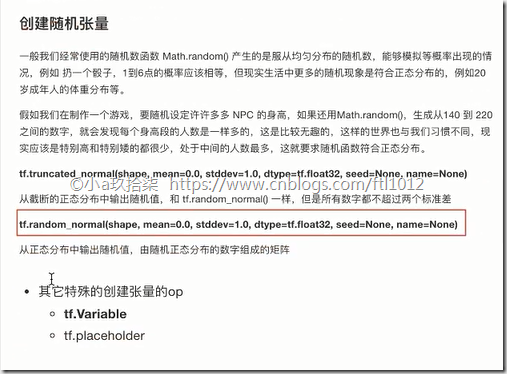
- 创建随机张量
1 2 3 4 5 | import tensorflow as tf# 创建3行4列的数组,均值为1.75,标准差为2tf.random_normal(shape=[3,4], mean=1.75, stddev=2)# # 创建3行4列的数组,均值为1.75,标准差为2,通过eval()查看具体的值tf.random_normal(shape=[3,4], mean=1.75, stddev=2).eval() |
- 张量的修改(类型+形状)与运算
复习ndarray属性的修改
类型的修改
1)ndarray.astype(type)
2)ndarray转换为编码格式:ndarray.tostring()
形状的修改
1)ndarray.reshape(shape)
自动计算形状:ndarray.reshape(-1)
2)ndarray.resize(shape)
说明:reshape会返回一个新的数组,resize会就地修改
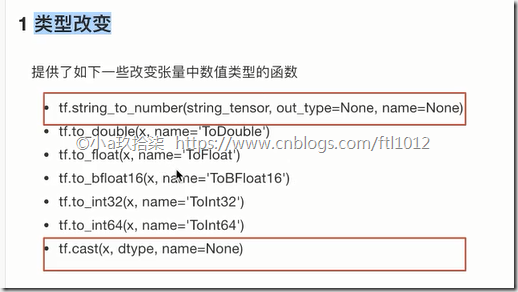
1、类型改变
tf.cast(tensor, dtype)
不会改变原始的tensor
返回新的改变类型后的tensor
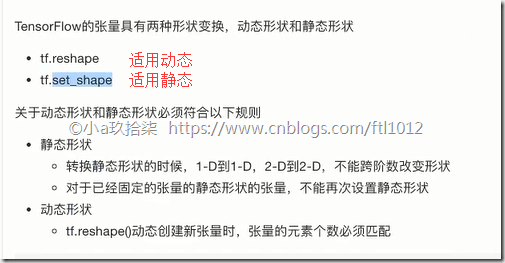
2、形状改变(静态形状+动态形状)
静态形状 - 初始创建张量时的形状
1)如何改变静态形状
tensor.set_shape(shape)
问:什么情况下才可以改变/更新静态形状?
答:只有在形状没有完全固定下来(也就是?的部分)的情况下
2)如何改变动态形状
tf.reshape(tensor, shape)
不会改变原始的tensor
返回新的改变形状后的tensor
动态创建新张量时,张量的元素个数必须匹配(可跨阶,但是数量必须一致)
demo:
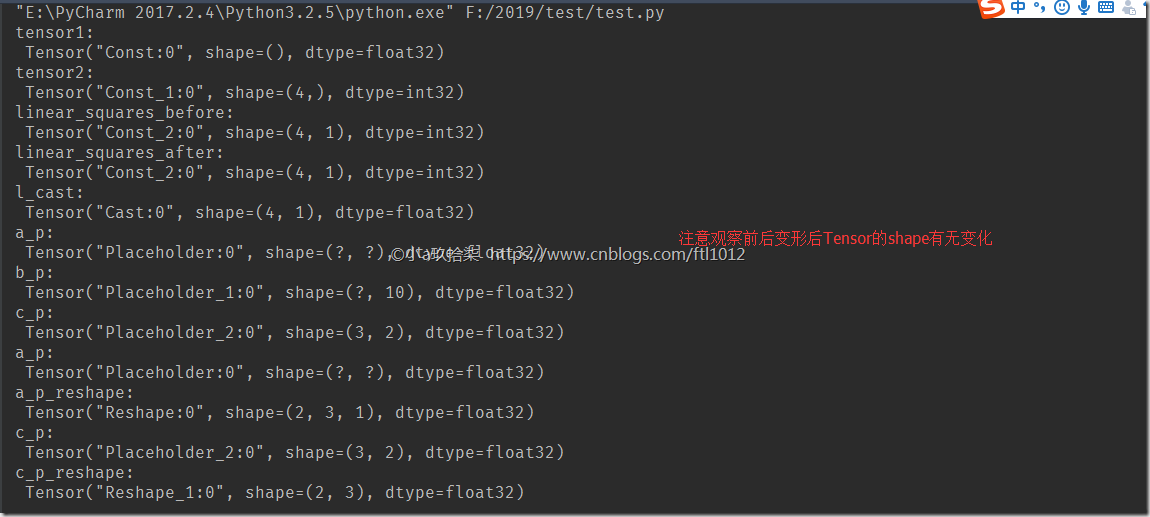
1 2 3 4 5 6 7 8 9 10 11 12 13 14 15 16 17 18 19 20 21 22 23 24 25 26 27 28 29 30 31 32 33 34 35 36 37 38 39 40 41 42 43 44 45 46 47 48 49 50 51 52 53 54 55 56 57 58 59 60 61 62 63 64 65 66 67 68 69 70 71 72 73 | import tensorflow as tfimport osos.environ['TF_CPP_MIN_LOG_LEVEL'] = '2'def tensor_demo(): ''' 张量类型修改 :return: ''' ''' 创建张量的时候,如果不指定类型 默 认 tf.float32 整 型 tf.int32 浮点型 tf.float32 ''' tensor1 = tf.constant(4.0) # 显示空的元组(),没有指定数组类型 tensor2 = tf.constant([1, 2, 3, 4]) # 显示一个一维有4个元素的数组,表示成(4,) linear_squares = tf.constant([[4], [9], [16], [25]], dtype=tf.int32) # 显示一个二维数组,表示成(4,1),4行一列 print("tensor1:\n", tensor1) # Tensor("Const:0", shape=(), dtype=float32) print("tensor2:\n", tensor2) # Tensor("Const_1:0", shape=(4,), dtype=int32) print("linear_squares_before:\n", linear_squares) # Tensor("Const_2:0", shape=(4, 1), dtype=int32) ''' 张量类型的修改: 不会改变原始的tensor 返回新的改变类型后的tensor ''' l_cast = tf.cast(linear_squares, dtype=tf.float32) print("linear_squares_after:\n", linear_squares) print("l_cast:\n", l_cast) ''' 张量形状的改变: # 更新/改变静态形状 # 定义占位符 ''' # a_p,b_p是没有完全固定下来的静态形状,但是形状以及是二维了,只能传递2维的数组 a_p = tf.placeholder(dtype=tf.float32, shape=[None, None]) # a_PTensor("Placeholder:0", shape=(?, ?), dtype=float32) b_p = tf.placeholder(dtype=tf.float32, shape=[None, 10]) # b_p维度是2维,但是有10列已经确定了,不能更改 # c_p是2维且形状以及固定,不能随便更改 c_p = tf.placeholder(dtype=tf.float32, shape=[3, 2]) # print("a_p:\n", a_p) print("b_p:\n", b_p) print("c_p:\n", c_p) # 更新形状未确定的部分 # a_p.set_shape([2, 3]) # a_p.set_shape([2, 3, 3])报错,二维不兼容三维 # b_p.set_shape([2, 10]) # c_p.set_shape([3, 2]) # 单行执行会报错,both shapes must be equal, ''' 张量形状的改变: # 动态形状修改,如果确定了元素数量,则可以修改元素的阶,但是不能修改总量 例如: shape=[2,3] ==> shape=[2,3,1] # 正确,元素数量未变化 shape=[2,3] ==> shape=[3,2] # 正确,元素数量未变化 shape=[2,3] ==> shape=[3,3] # 错误,元素数量变化了,改变后是9个 ''' a_p_reshape = tf.reshape(a_p, shape=[2, 3, 1]) print("a_p:\n", a_p) # print("b_p:\n", b_p) print("a_p_reshape:\n", a_p_reshape) c_p_reshape = tf.reshape(c_p, shape=[2, 3]) print("c_p:\n", c_p) print("c_p_reshape:\n", c_p_reshape)if __name__ == "__main__": tensor_demo() |
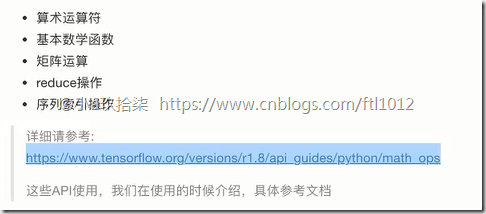
- 张量的数学运算
可参考官网:(需FQ)
变量OP的介绍
TensorFlow - 变量很适合于存储模型参数
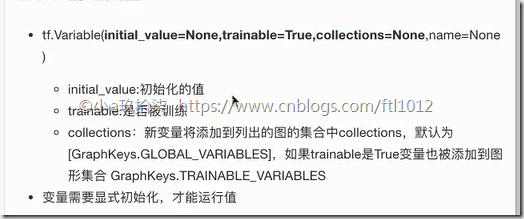
- 创建变量(需要显示初始化以后才可以完成变量初始化)
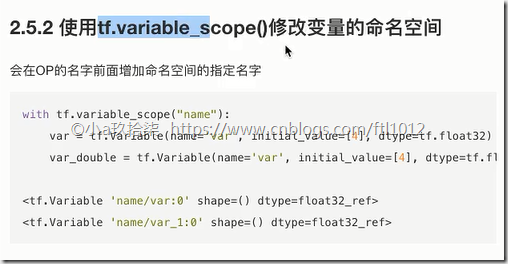
- 使用tf.variable_scope()修改变量的命名空间
添加命名空间后,使得结构更加清晰
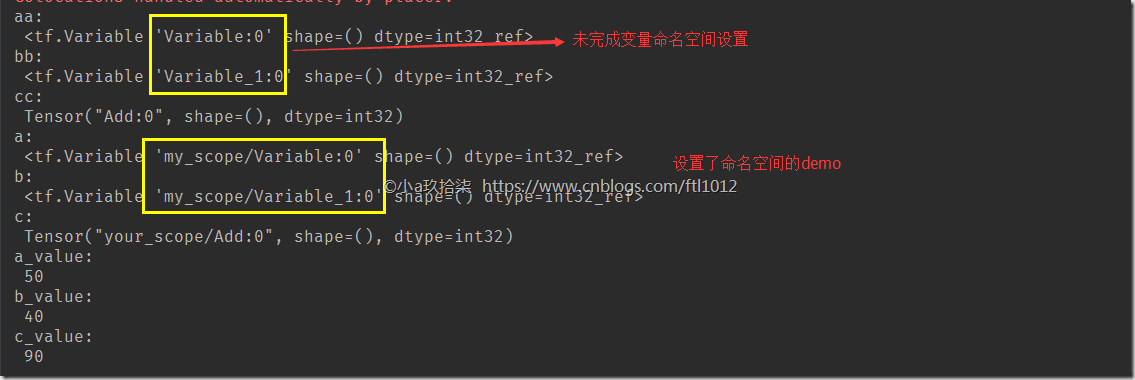
demo:
1 2 3 4 5 6 7 8 9 10 11 12 13 14 15 16 17 18 19 20 21 22 23 24 25 26 27 28 29 30 31 32 33 34 35 36 37 38 39 40 41 42 43 44 45 46 47 48 49 50 51 52 | import tensorflow as tfimport osos.environ['TF_CPP_MIN_LOG_LEVEL'] = '2'def variable_demo(): """ 变量的演示 :return: """ ''' # 创建变量:没有开启会话之前的demo: ''' aa = tf.Variable(initial_value=50) # <tf.Variable 'Variable:0' shape=() dtype=int32_ref> bb = tf.Variable(initial_value=50) # <tf.Variable 'Variable_1:0' shape=() dtype=int32_ref> cc = tf.add(aa, bb) # Tensor("Add:0", shape=(), dtype=int32) print("aa:\n", aa) print("bb:\n", bb) print("cc:\n", cc) ''' # 创建变量: 开启会话的demo: ''' with tf.variable_scope("my_scope"): a = tf.Variable(initial_value=50) b = tf.Variable(initial_value=40) with tf.variable_scope("your_scope"): # 修改变量的命名空间 c = tf.add(a, b) print("a:\n", a) print("b:\n", b) print("c:\n", c) # 初始化变量 # a = tf.Variable(initial_value=50)这正是一个初始化的值,而并非变量的初始化 init = tf.global_variables_initializer() # 开启会话 with tf.Session() as sess: # 给全局的变量做了初始化 sess.run(init) a_value, b_value, c_value = sess.run([a, b, c]) print("a_value:\n", a_value) print("b_value:\n", b_value) print("c_value:\n", c_value) return Noneif __name__ == "__main__": variable_demo() |
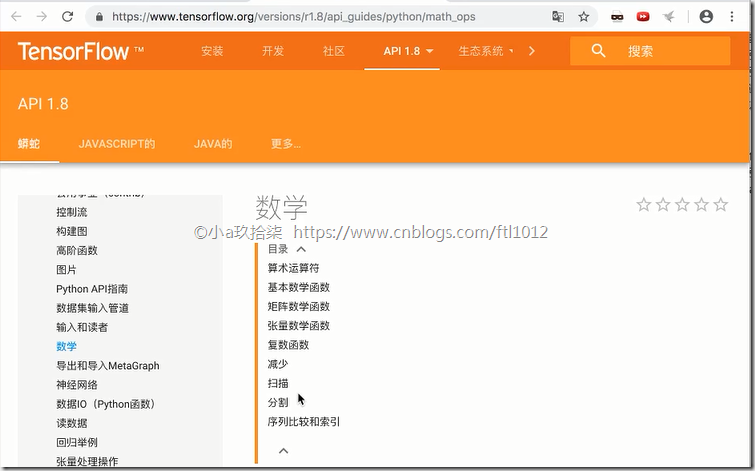
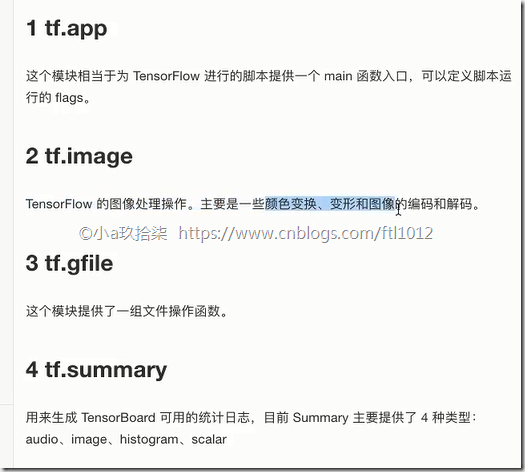
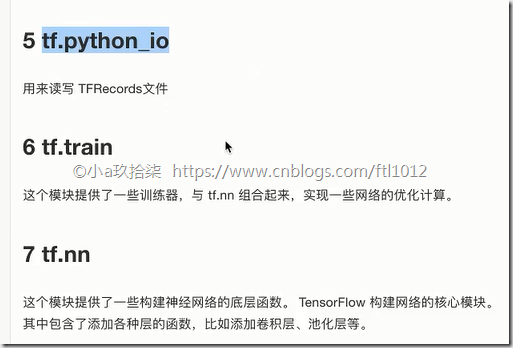
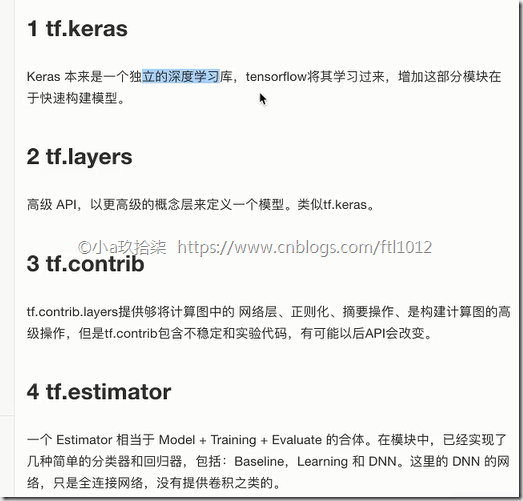
基础API和高级API
- 基础API
- 高级API
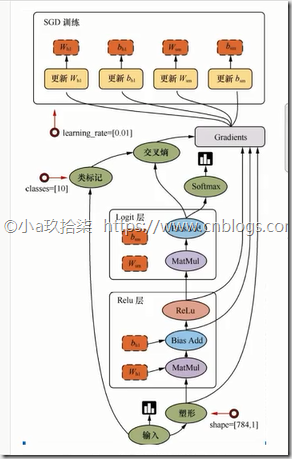
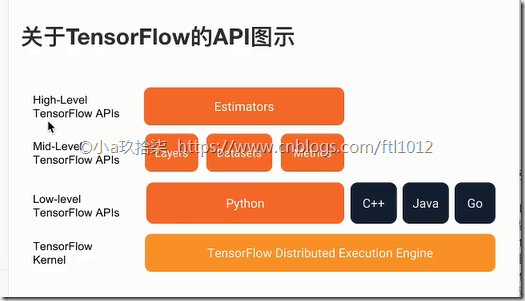
- 关于TensorFlow的API图示

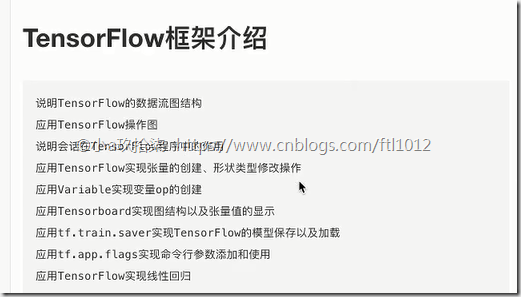
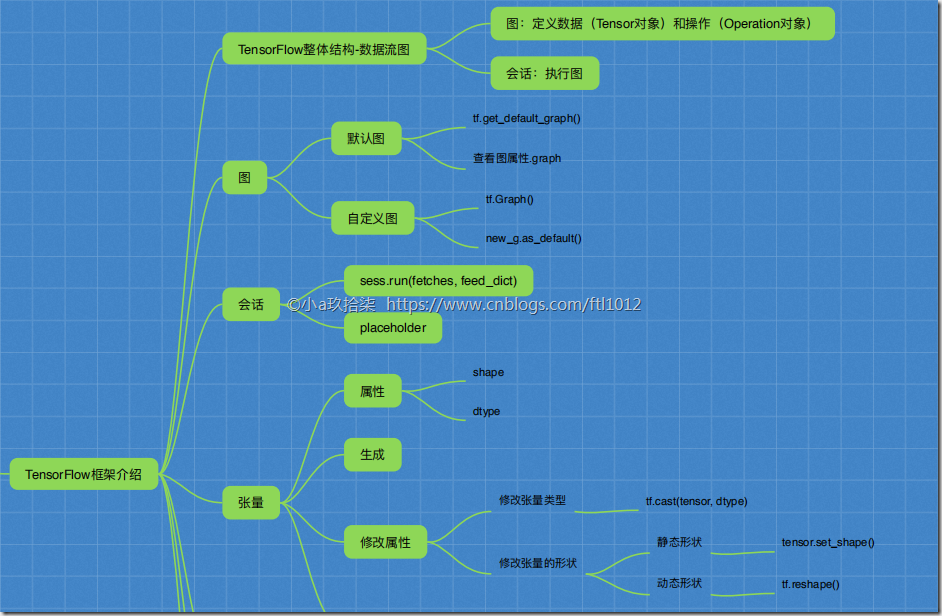
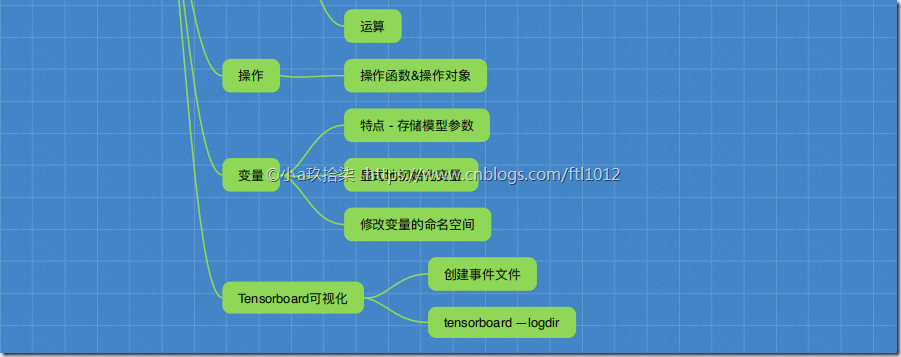










【推荐】国内首个AI IDE,深度理解中文开发场景,立即下载体验Trae
【推荐】编程新体验,更懂你的AI,立即体验豆包MarsCode编程助手
【推荐】抖音旗下AI助手豆包,你的智能百科全书,全免费不限次数
【推荐】轻量又高性能的 SSH 工具 IShell:AI 加持,快人一步
· 10年+ .NET Coder 心语,封装的思维:从隐藏、稳定开始理解其本质意义
· .NET Core 中如何实现缓存的预热?
· 从 HTTP 原因短语缺失研究 HTTP/2 和 HTTP/3 的设计差异
· AI与.NET技术实操系列:向量存储与相似性搜索在 .NET 中的实现
· 基于Microsoft.Extensions.AI核心库实现RAG应用
· 10年+ .NET Coder 心语 ── 封装的思维:从隐藏、稳定开始理解其本质意义
· 地球OL攻略 —— 某应届生求职总结
· 提示词工程——AI应用必不可少的技术
· Open-Sora 2.0 重磅开源!
· 字符编码:从基础到乱码解决