小程序项目网易云(二)
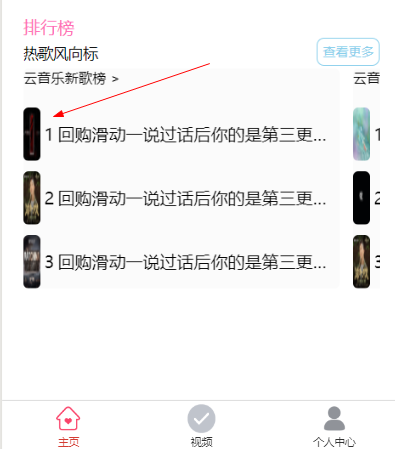
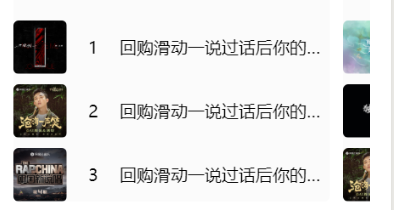
一,排行榜模块(轮播列表),发送请求,获取数据
1,1, 在onload中发送请求,此时需要用到循环,传入的idx参数不同,发送请求获取到的数据也不同
响应数据是一个数组,里头有个name属性,有个tracks数组
    let ids = [0, 1, 2, 3];
    // let index=0;
    let topList = [];
    // 循环发送请求,方式一
    // while(index<ids.length){
    //   let res = await request("/top/list",{idx:ids[index++]})
    //     // .then((res)=>{
    //   let topData={};
    //   topData.name=res.playlist.name;
    //   // 三个对象
    //   topData.musicList=res.playlist.tracks.slice(0,3);
    //   topList.push(topData)
    //   this.setData({
    //     // topList:[...this.data.topList,topData]
    //     topList
    //   })
    // })

      // 方式二
    for (var i = 0; i < ids.length; i++) {
        let res = await request('/top/list', {idx:i})
        let topData = {}
        topData.name = res.playlist.name
      //清除多余的数组对象,我们只要前三个
        topData.musicList = res.playlist.tracks.slice(0,3)
        topList.push(topData)
        this.setData({
          topList
        })
    }
在data赋值
 data: {
    bannerList: [],
    topList: [],
  },
1.2, 填充数据,
next-margin:后边距,可用于露出后一项的一小部分
  <!-- 排行榜区域 -->
  <view class="topContainer">
    <NavHeader title="排行榜" content="热歌风向标"/>
    <swiper class="topSwiper" next-margin="50rpx">
      <swiper-item wx:for="{{topList}}" wx:key="name">
        <view class="topItem">
          <view class="topTitle">{{item.name}}  </view>
          <view class="topContent" wx:for="{{item.musicList}}" wx:for-item="musicItem" wx:for-index="musicIndex" wx:key="id">
            <image class="topImg" src="{{musicItem.al.picUrl}}"></image>
            <text class="topNum">{{musicIndex+1}}</text>
            <text class="topName">{{musicItem.al.name}}</text>
          </view>
        </view>
      </swiper-item>
    </swiper>
  </view>
wxss,
1,swiper组件默认高度为150px,需要设置下高度
2.如果父级开启了flex,如果几个子元素的宽度相加大于父元素的宽度,那么会压缩子元素的宽度,此时需要用到flex-shrink: 0; 不压缩子元素的宽度


.topContainer{
  padding:0 20rpx;
}

.topContainer .topSwiper{
  height:624rpx;
}

.topContainer .topSwiper .topItem{
background: #fbfbfb;
width:96%;
border-radius:10rpx;
}

.topContainer .topSwiper .topItem .topTitle{
  font-size:26rpx;
  padding-bottom: 20rpx;
}

.topContainer .topSwiper .topItem .topContent{
  display:flex;
  align-items: center;
  height:100rpx;
  margin:20rpx 0;
}

.topContainer .topSwiper .topItem .topContent .topImg{
  width:100rpx;
  height:100rpx;
  border-radius: 10rpx;
  /* 父级开启flex,子元素不压缩 */
  flex-shrink: 0;
}

.topContainer .topSwiper .topItem .topContent .topNum{
  width:100rpx;
  height:100rpx;
  text-align: center;
  line-height: 100rpx;
  flex-shrink: 0;
}

.topContainer .topSwiper .topItem .topContent .topName{
  //单行文本换行且省略
  overflow:hidden;
  text-overflow: ellipsis;
  white-space: nowrap;
}
二,底部导航(tabbar配置设置)(框架--全局配置---tabbar)
如果小程序是一个多 tab 应用(客户端窗口的底部或顶部有 tab 栏可以切换页面),可以通过 tabBar 配置项指定 tab 栏的表现,以及 tab 切换时显示的对应页面。
list,tab的列表,最少 2 个、最多 5 个 tab
在app.json中配置
 "tabBar": {
    "color": "#333",
    //选中的颜色
    "selectedColor": "#d43c33",
    "list": [
      {
        页面路径
        "pagePath": "pages/index/index",
        "text": "主页",
        // 没有选中的图片
        "iconPath": "/static/images/tabs/tab-home.png",
        // 选中的图片
        "selectedIconPath": "/static/images/tabs/tab-home-current.png"
      },
      {
        "pagePath": "pages/video/video",
        "text": "视频",
        "iconPath": "/static/images/tabs/select.png",
        "selectedIconPath": "/static/images/tabs/selected.png"
      },
      {
        "pagePath": "pages/personal/personal",
        "text": "个人中心",
        "iconPath": "/static/images/tabs/tab-my.png",
        "selectedIconPath": "/static/images/tabs/tab-my-current.png"
      }
    ]
  }
三,个人中心模块,页面下拉实现
新建personal页面,
1.有三个事件,手指按下事件bindtouchstart, 手指移动事件bindtouchmove, 手指抬起事件,bindtouchend
2.下拉的距离,用transform实现, 过渡的效果用transition实现
3.移动端获取手指的位置,event.touches[0].clientY;
personal.wxml
  <view class="cover-container" bindtouchstart="handleStart" bindtouchmove="handleMove" bindtouchend="handleEnd" style="transform:translateY({{moveDistance}}rpx);transition:{{moveTransition}}">
    <image class="arc" src="/static/images/personal/arc.png"></image>
personal.js
  //用于处理cover-container的手指按下事件
  handleStart(event) {
    // 获取手指按下的位置
    this.startY = event.touches[0].clientY;
    // 每次手指按下,上一次手指的过渡消失
    this.setData({
      moveTransition:"none"
    })

  },
  //用于处理cover-container的手指移动事件
  handleMove(event) {
    // 获取手指移动的位置
    this.moveY = event.touches[0].clientY;
    // 获取手指移动的距离
    let moveDistance = Math.floor(this.moveY-this.startY);
    // 边界值判断
    if (moveDistance <= 0) return;
    if (moveDistance >= 80)return ;
    this.setData({
      moveDistance
    })

  },
  //用于处理cover-container的手指抬起事件
  handleEnd(){
    this.setData({
      // 手指抬起回到原位
      moveDistance:0,
      // 添加过渡效果
      moveTransition:"transform 1s linear"
    })
  },
  data: {
    moveDistance:0,
    moveTransition:"none",
四,个人中心模块(播放记录实现)
利用scroll-view实现卡片切换效果
1.如果有播放记录展示播放记录的图片,如果没有展示暂无数据
 <view class="playList">
        <view class="playTitle">最近播放</view>
        <scroll-view class="playScroll" scroll-x enable-flex wx:if="{{playList}}">
          <!-- <view><image src="/static/images/nvsheng.jpg"></image></view> -->
          <image src="/static/images/nvsheng.jpg"></image>
          <image src="/static/images/nvsheng.jpg"></image>
          <image src="/static/images/nvsheng.jpg"></image>
          <image src="/static/images/nvsheng.jpg"></image>
          <image src="/static/images/nvsheng.jpg"></image>
          <image src="/static/images/nvsheng.jpg"></image>
          <image src="/static/images/nvsheng.jpg"></image>
          <image src="/static/images/nvsheng.jpg"></image>
        </scroll-view>
        <view class="noData" wx:else>暂时没有数据</view>
      </view>
wxss
.playList .playTitle{
  font-size:24rpx;
  color:#333;
  /* 文本缩进 */
  text-indent: 20rpx;
  padding:20rpx;
}

.playList .playScroll{
  display:flex;
  height:200rpx;
  /* 不换行 */
  flex-wrap:nowrap;
  /* white-space:nowrap; */
}

.playList .playScroll image{
  width:160rpx;
  height:160rpx;
  margin-left: 20rpx;
  /* 父级开启flex,子元素不被压缩 */
  flex-shrink: 0;
}

.playList .noData{
  line-height:160rpx;
  /* 文本缩进 */
  text-indent: 40rpx;
}
 data: {
    moveDistance:0,
    moveTransition:"none",
    playList:null
  },
五,用户登录模块,获取登录的用户名和密码
1.绑定change事件,设置自定义属性data-type="username" ,然后在函数可以获取该属性值
2.wx.showToast()为小程序的一个表单验证
 <view class="input-content">
      <view class="input-item">
        <text class="tit">手机号码</text>
        <input id="phone" type="text"
        bindchange="handleChange"
        data-type="username"
        placeholder="请输入手机号码"/>
      </view>
      <view class="input-item">
        <text class="tit">密码</text>
        <input id="password" type="password"
        data-type="password"
        bindchange="handleChange"
        placeholder="请输入密码"/>
      </view>
    </view>
js
  data: {
    username:"",
    password:""
  },
  handleChange(event) {
    // 前端收集数据
    // console.log(event.target.dataset.type)
    // console.log(event.detail)
    // 获取自定义属性值
    let type = event.target.dataset.type;
    // 获取input的文本
    let value = event.detail.value;
    // 前端表单验证
    if (value.trim()) {
      this.setData({
        [type]: value
      })
    }else{
      wx.showToast({
        title:"用户名或密码格式不正确",
        icon:'none'
      })
    }

  },
3.点击登录按钮,发送请求
3.1,
wx.redirectTo(),关闭当前页面,跳转到应用内的某个页面。但是不允许跳转到 tabbar 页面
<button class="confirm-btn" bindtap="handleLogin">登录</button>
 //用于发送登录请求的函数
   async handleLogin(){
    let {phone,password} = this.data;
    let result = await request('/login/cellphone',{
      phone,
      password
    });
    /*
    登录接口
    用户名错误->状态为400
    密码错误  ->状态为502
    登陆成功  ->状态为200
     */
    // console.log('result',result)
    if (result.code===400){
      wx.showToast({
        title: '用户名错误',
        icon:"none"
      })
    } else if (result.code === 502) {
      wx.showToast({
        title: '密码错误',
        icon: "none"
      })
    }else if(result.code===200){
      wx.showToast({
        title: '登陆成功,即将跳转',
        icon: "success",
        success() {
          wx.switchTab({
            url: '/pages/personal/personal'
          })
        }
      })
    }
  },


