Packer构建openStack镜像
使用Packer自动化构建镜像
openstack插件安装:OpenStack | Integrations | Packer | HashiCorp Developer
openstack插件用法示例:OpenStack Builder | Integrations | Packer | HashiCorp Developer
安装openstack 插件
packer plugins install github.com/hashicorp/openstack
编写模板文件openstack.pkr.hcl如下
packer {
  required_plugins {
    openstack = {
      version = "~> 1"
      source  = "github.com/hashicorp/openstack"
    }
  }
}

source "openstack" "example" {
  domain_name                 = "default"
  flavor                      = "m1.medium"
  identity_endpoint           = "http://192.168.200.150:5000/v3"
  image_name                  = "openEuler-22.03-sp4.qcow2"
  insecure                    = true
  password                    = "JBJGuIpffaGMJDtvMXRrmF1qET4KMZseR0Ihyfil"
  region                      = "RegionOne"
  source_image_name           = "openEuler-22.03-LTS-SP4-x86_64.qcow2"
  networks                    = ["289df86a-6780-4563-a806-9f365ec86812"]
  floating_ip_network         = "public1"
  ssh_username                = "root"
  ssh_password	              = "openEuler12#$"
  tenant_name                 = "admin"
  username                    = "admin"
  use_blockstorage_volume     = "true"
  volume_size                 = "40"
  image_disk_format           = "qcow2"
}

build {
  sources = ["source.openstack.example"]
  provisioner "shell" {
    inline = [
      "echo Build image work is starting",
      "yum install vim bash-comp* -y",
      "echo 123 | passwd --stdin root",
      "echo execute successful"
    ]
  }
}
执行构建
packer build ./openstack.pkr.hcl
常用配置项说明:
- domain_name: openstack的域,默认为default
- flavor: 指定创建虚拟机的规格
- identity_endpoint:指定keystone的认证地址
- image_name: 使用Packer生成的镜像名
- tenant_name: 租户名,就是openstack中的project名
- insecure: 是否使用不安全的连接,也就是http和https
- password:openstack用户的密码
- username:openstack用户名
- networks:指定虚拟机创建在哪个网络之中
- source_image_name:使用本地的镜像文件来创建虚拟机
- external_source_image_name:使用外部的镜像文件来创建,该地址是一个url
- source_image:使用glance中的镜像来创建虚拟机
- floating_ip_network:指定浮动IP的网络,即openstack中的外部网络,需要给虚拟机配置浮动IP,不然packer无法使用ssh连接上虚拟机
- ssh_username :启动虚拟机之后使用ssh连接的用户名
- ssh_password :可选参数,指定ssh连接的密码,如果没有这个参数packer会创建一个临时的密钥对,ssh将会使用密钥对来连接
- use_blockstorage_volume:是否使用块存储,
- image_disk_format:指定保存的镜像格式,仅当
use_blockstorage_volume为true时才生效 - volume_size :指定块存储大小
额外说明,我是用的是openEuler官方提供的qcow2的文件,且版本为22.03-sp4,只能为sp4,因为sp3默认是不允许root用户去登录的,只允许普通用户openeuelr登录,但是这个用户并没有sudo的能力,并且没有cloud-init,所以无法做很多的配置,但是sp4这个版本他默认开放了root使用密码登录的权限,所以我们才能够做一些定制化的操作,其他操作系统不存在这个问题
等待packer构建完镜像之后会给你留下一个镜像在glance之中

packer会提示镜像ID为2db14ce1……,等他保存完之后我们去查看
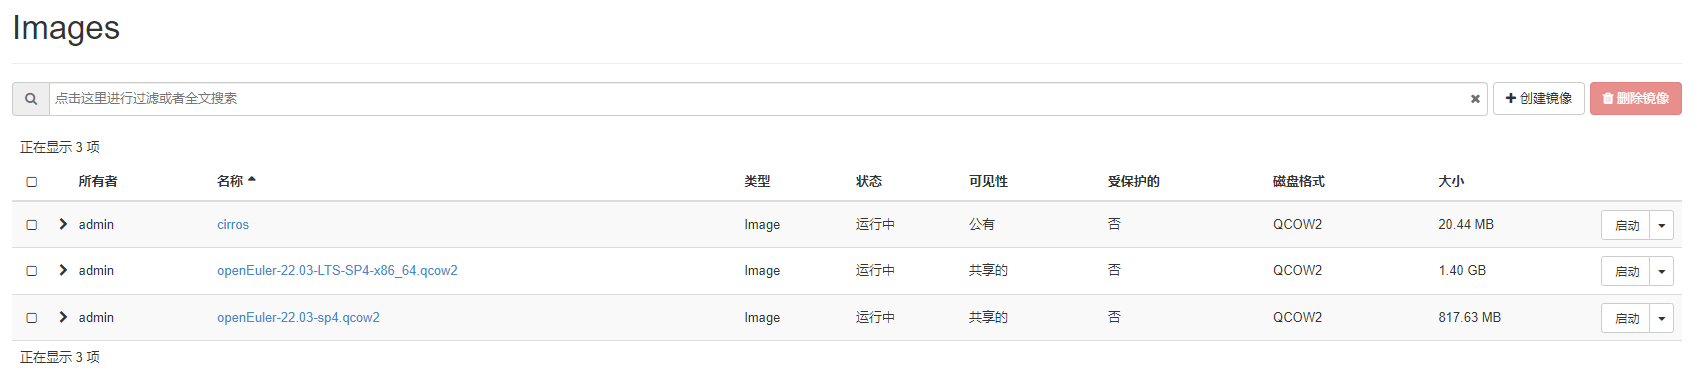
通过dashboard我们可以看到,镜像被保存下来了,并且格式为qcow2,我们只需要通过这个镜像去启动虚拟机,那么这个虚拟机就默认密码为123,并且已经安装好了vim
本文来自博客园,作者:FuShudi,转载请注明原文链接:https://www.cnblogs.com/fsdstudy/p/18314406

 浙公网安备 33010602011771号