Vue技术点整理-Vue CLI安装详解
一,脚手架安装
Node 版本要求

Vue CLI 需要 Node.js 8.9 或更高版本 (推荐 8.11.0+)。你可以使用 nvm 或 nvm-windows 在同一台电脑中管理多个 Node 版本。
1,全局安装Vue CLI
npm install -g @vue/cli
# OR
yarn global add @vue/cli
安装之后,使用以下命令查看安装是否正确
vue --version
2,快速创建一个CLI项目
vue create cli_test
此时会出现以下安装选项:
- 选择安装选项
PS E:\workspace\demo> vue create cli_test

Vue CLI v3.9.2
? Please pick a preset:
  useLessDefault (vue-router, vuex, less, babel, eslint) //上一次我保存的默认配置,第一次是没有的
  default (babel, eslint) //默认配置创建
> Manually select features //自定义配置选项,建议选择
- 选择安装插件
注:按上、下健切换选项,按空格键选择选项,按i键反选
Vue CLI v3.9.2
? Please pick a preset: Manually select features
? Check the features needed for your project: (Press <space> to select, <a> to t
? Check the features needed for your project: (Press <space> to select, <a> to t
? Check the features needed for your project: (Press <space> to select, <a> to t
? Check the features needed for your project: (Press <space> to select, <a> to t
? Check the features needed for your project:
 (*) Babel // 是否使用babel做转义
 ( ) TypeScript //  是否使用class风格的组件语法
 ( ) Progressive Web App (PWA) Support // 支持PWA
 (*) Router // 安装使用路由Router
 (*) Vuex // 安装使用Vuex状态管理,简单项目不建议使用安装
 (*) CSS Pre-processors // 选择CSS 预处理类型
 (*) Linter / Formatter // 选择Linter / Formatter规范类型
>(*) Unit Testing // 选择Unit测试方式
 ( ) E2E Testing // 选择E2E测试方式
- 选择路由HTML5 history 模式
注:可以先不选择,后期如果用到,再手动添加即可
Vue CLI v3.9.2
? Please pick a preset: Manually select features
? Check the features needed for your project: (Press <space> to select, <a> to t
? Check the features needed for your project: (Press <space> to select, <a> to t
? Check the features needed for your project: (Press <space> to select, <a> to t
? Check the features needed for your project: (Press <space> to select, <a> to t
? Check the features needed for your project: Babel, Router, Vuex, CSS Pre-proce

ssors, Linter, Unit
? Use history mode for router? (Requires proper server setup for index fallback
? Use history mode for router? (Requires proper server setup for index fallback

in production) (Y/n) n
- 选择css预处理
注:根据自己的开发习惯选择预处理
? Pick a CSS pre-processor (PostCSS, Autoprefixer and CSS Modules are supported
? Pick a CSS pre-processor (PostCSS, Autoprefixer and CSS Modules are supported
? Pick a CSS pre-processor (PostCSS, Autoprefixer and CSS Modules are supported

by default):
  Sass/SCSS (with dart-sass)
  Sass/SCSS (with node-sass)
> Less
  Stylus
- 选择ESLINT代码验证规则
? Pick a linter / formatter config: (Use arrow keys)
> ESLint with error prevention only
  ESLint + Airbnb config
  ESLint + Standard config
  ESLint + Prettier
- 选择校验规则的时机
? Pick additional lint features: (Press <space> to select, <a> to toggle all, <i

> to invert selection)
>(*) Lint on save //保存代码时校验
 ( ) Lint and fix on commit (requires Git)// fix和commit时候检查
- 选择单元测试组件
? Pick a unit testing solution:
  Mocha + Chai
> Jest
- 选择是否要把Bable、PostCSS、ESlint等放到一个单独的文件里进行管理
? Where do you prefer placing config for Babel, PostCSS, ESLint, etc.? (Use arro

w keys)
> In dedicated config files
  In package.json
- 是否要保存当前的选择配置项,以后安装时可以快速安装使用
? Save this as a preset for future projects? (y/N)y
- 输入自定义的配置名称
? Save this as a preset for future projects? Yes
? Save preset as: myCli
- 回车,开始安装... 出现以下内容表示安装完成!
added 59 packages from 101 contributors, updated 3 packages, moved 13 packages a
nd audited 42942 packages in 30.434s
found 64 low severity vulnerabilities
  run `npm audit fix` to fix them, or `npm audit` for details
⚓  Running completion hooks...

�  Generating README.md...

�  Successfully created project cli_test.
�  Get started with the following commands:

 $ cd cli_test
 $ npm run serve
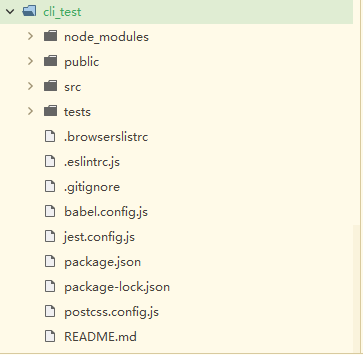
- 安装完成后的目录结构如下:
- 启动项目
cd cli_test

npm run serve

浏览器输入http://localhost:8080
- 部署打包项目
npm run build

执行后,会多一个dist的目录,直接把这个目录放到服务器Nginx下就可以访问了
CLI默认配置只是简单的项目框架,更多配置、组件封装请参考我其它的文章!

 浙公网安备 33010602011771号