
How To Install WordPress on Debian 7
About WordPress
WordPress is a free and open source blogging tool used by more than 18.9% of the top 10 million websites [as of August 2013]. This makes WordPress the most popular blogging system in use on the Web at more than 60 million websites. Setting up WordPress on a DigitalOcean Droplet with Debian is one of the fastest and simplest ways to host your own website-- Let's get started!
Creating a Droplet
Specify Hostname After visiting your control panel and clicking "create," you will want to enter a hostname that's relevant to how you will be utilizing your virtual private server. For this tutorial, we'll simply use myblog.com.
Select Size of your VPS The size plan you choose is completely up to you. The most basic plan has plenty of capacity to host your WordPress site; however, if traffic to the site will be higher than an average user, it may be best to choose the next plan up. Also, you can always resize your VPS later, so at the moment take your best guess and know that in the future you can adjust simply and easily if necessary.

Select Your Desired Region In most cases, you will be choosing the default option for your location:

Select Image *You'll want to choose the most recent distribution of Debian:

Add SSH Keys It is recommended that you use SSH keys as they are more secure than passwords.
Click Create Droplet!
Initial Server Setup
Install Lamp Before working with WordPress, you need to have LAMP installed on your virtual private server. If you don't have the Linux, Apache, MySQL, PHP stack on your VPS, you can find the tutorial for setting it up in the LAMP tutorial.
*If you are signed in as your new user and not in root, many of the commands in the tutorial above will need to be preceded by "sudo" in order to work.
Root Privileges You will want to setup a new user with root capabilities. These steps and more concerning setting up your Droplet are described in this tutorial: Initial Server Setup.
Please make a note of the username that you create, as you will need it later in this tutorial.
You should be signed in as the new user, not root, when you follow this tutorial.
Download and Setup WordPress on your VPS
Download WordPress
We can download WordPress straight from their website:
wget http://wordpress.org/latest.tar.gz
The next command will now download the zipped WordPress package straight to your user's home directory:
tar -xzvf latest.tar.gz
Create WordPress Database and User
After we unzip the WordPress files, they will be in a directory called "wordpress" in the home directory.
MySQL Directory For WordPress
We need to take a moment and create a new MySQL directory for WordPress. Go ahead and log into the MySQL Shell:
mysql -u root -p
*Now let's make the database.
This tutorial will call its database wpdatabse for simplicity's sake-- feel free to give it whatever name you choose):
CREATE DATABASE wpdatabase;
Query OK, 1 row affected (0.00 sec)
Then we need to create the new user. You can replace the database, name, and password, with whatever you prefer:
CREATE USER wpuser@localhost;
Query OK, 0 rows affected (0.00 sec)
Set the password for your new user:
SET PASSWORD FOR wpuser@localhost= PASSWORD("dbpassword");
Query OK, 0 rows affected (0.00 sec)
Finish up by granting all privileges to the new user. Without this command, the wordpress installer will not be able to start up:
GRANT ALL PRIVILEGES ON wpdatabase.* TO
wpuser@localhost IDENTIFIED BY 'dbpassword';
Query OK, 0 rows affected (0.00 sec)
Then refresh MySQL:
FLUSH PRIVILEGES;
Query OK, 0 rows affected (0.00 sec)
Exit out of the MySQL shell:
exit
Setup the WordPress Configuration
The first step to is to copy the sample wordpress configuration file, located in the wordpress directory, into a new file which we will edit, thus creating a new usable wordpress config:
cp ~/wordpress/wp-config-sample.php ~/wordpress/wp-config.php
Then open the wordpress config:
sudo nano ~/wordpress/wp-config.php
Find the section that contains the field below and substitute in the correct name for your database, username, and password:
// ** MySQL settings - You can get this info from your web host ** //
/** The name of the database for WordPress */
define('DB_NAME', 'wpdatabase');

/** MySQL database username */
define('DB_USER', 'wpuser');

/** MySQL database password */
define('DB_PASSWORD', 'dbpassword');
Save and Exit.
Copy the Files
We are almost done uploading Wordpress to the virtual private server. The final move that remains is to transfer the unzipped WordPress files to the website's root directory.
sudo rsync -avP ~/wordpress/ /var/www/
Finally we need to set the permissions on the installation. First, switch in to the web directory:
cd /var/www/
Give ownership of the directory to the Apache user. www-data is the Apache user. You are also going to add your personal user to the www-data group so you don't lose access to the files. You should replace username with the username you created earlier, and which you should be logged in as right now.
sudo chown www-data:www-data /var/www/* -R
sudo usermod -a -G www-data username
From here, WordPress has its own easy to follow installation form online.
However, the form does require a specific php module to run. If it is not yet installed on your server, download php-gd:
sudo apt-get install php5-gd
Access the WordPress Installation
Once that is all done, the wordpress online installation page is up and waiting for you:
Access the page by adding /wp-admin/install.php to your site's domain or IP address (eg. example.com/wp-admin/install.php) and fill out the short online form (it should look like this).
To see the WordPress site, we will need to rename the default Apache index.html page.
mv /var/www/index.html /var/www/index.html.orig
Now you can access the main site by visiting your domain or IP address.

 浙公网安备 33010602011771号
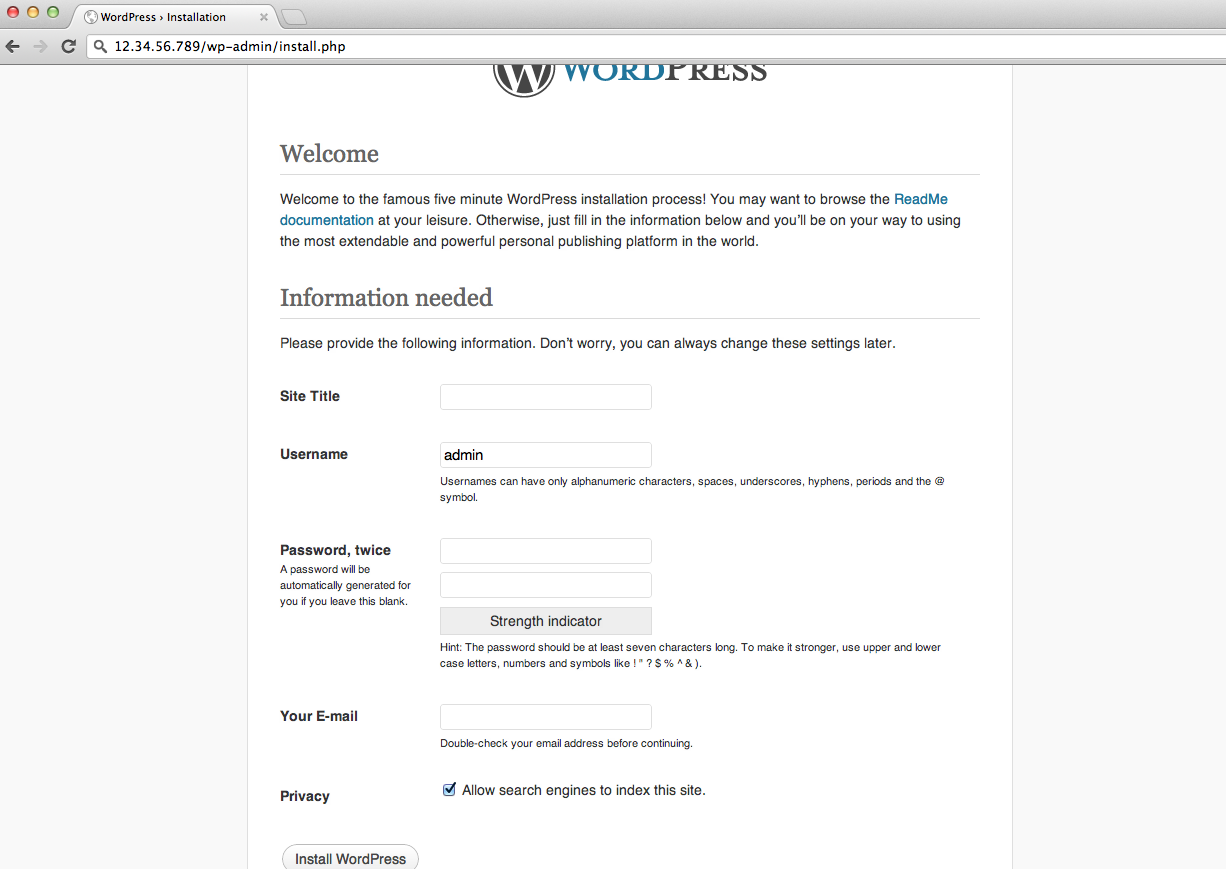