Hibernate 再接触 Hello world 模拟Hibernate
没有Hibernate以前
Cilent 客户端 new出一个对象 然后执行JDBC 然后这样的访问数据库并不是面向对象语言
使用Hibernate以后
Cilent new 出一个对象后 访问配置文件 产生sessionfactory 然后opensession 获得一个session 拿到session后直接save 不用具体的拼sql语句
OR 即hibernate帮我们屏蔽了 R relationship 这层关系 只需要面向对象就好了
第一个小程序
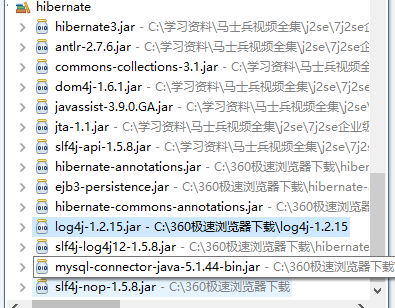
首先引入相关jar包 透了懒 以前弄过 所以全部复制过来了 ‘
首先第一步 copy过来hibernate的配置文件
Hibernate.cfg.xml
<!DOCTYPE hibernate-configuration PUBLIC
        "-//Hibernate/Hibernate Configuration DTD 3.0//EN"
        "http://hibernate.sourceforge.net/hibernate-configuration-3.0.dtd">

<hibernate-configuration>

    <session-factory>

        <!-- Database connection settings -->
        <property name="connection.driver_class">com.mysql.jdbc.Driver</property>
        <property name="connection.url">jdbc:mysql://localhost/hibernate</property>
        <property name="connection.username">root</property>
        <property name="connection.password">123456</property>

        <!-- JDBC connection pool (use the built-in) -->
        <!-- <property name="connection.pool_size">1</property> -->

        <!-- SQL dialect -->
        <property name="dialect">org.hibernate.dialect.MySQLDialect</property>

        <!-- Enable Hibernate's automatic session context management -->
        <!-- <property name="current_session_context_class">thread</property> -->

        <!-- Disable the second-level cache  -->
       <!--  <property name="cache.provider_class">org.hibernate.cache.NoCacheProvider</property> -->

        <!-- Echo all executed SQL to stdout -->
        <property name="show_sql">true</property>

        <!-- Drop and re-create the database schema on startup -->
        <property name="hbm2ddl.auto">update</property>

        <mapping resource="com/easy/Student.hbm.xml"/>
        <!-- <mapping class="com.bjsxt.hibernate.Teacher"/>  -->
    </session-factory>

</hibernate-configuration>
先建立一个model Student
package com.easy;

public class student {
    private int id;
    private String name;
    private int age;
    public int getId() {
        return id;
    }
    public void setId(int id) {
        this.id = id;
    }
    public String getName() {
        return name;
    }
    public void setName(String name) {
        this.name = name;
    }
    public int getAge() {
        return age;
    }
    public void setAge(int age) {
        this.age = age;
    }

}
先建立一个Xml版本的
创建Student.hbm.xml 建立映射关系
<?xml version="1.0"?>
<!DOCTYPE hibernate-mapping PUBLIC
        "-//Hibernate/Hibernate Mapping DTD 3.0//EN"
        "http://hibernate.sourceforge.net/hibernate-mapping-3.0.dtd">

<hibernate-mapping >
    <class name="com.easy.student">
        <id name="id" />
        <property name="name" />
        <property name="age" />
    </class>

</hibernate-mapping>
建立测试类
package com.easy;

import org.hibernate.Session;
import org.hibernate.SessionFactory;
import org.hibernate.cfg.Configuration;

public class studenttest {


      public static void main(String[] args){
          student  su = new student();
          su.setId(2);
          su.setName("不成功");
          su.setAge(22);
          Configuration cf = new Configuration();
          SessionFactory sf = cf.configure().buildSessionFactory();
          Session session = sf.openSession();
          session.beginTransaction();
          session.save(su);
          session.getTransaction().commit();
          session.close();
          sf.close();


      }


}
创建数据库 hibernate 然后创建表student
该表应该有 id name age字段
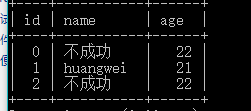
插入成功
建立Annotation 版本 记得加入jar包哦
加入注解
注意包是javax.persistentce
package com.easy;

import javax.persistence.Entity;
import javax.persistence.Id;
@Entity
public class student {
    private int id;
    private String name;
    private int age;
    @Id
    public int getId() {
        return id;
    }
    public void setId(int id) {
        this.id = id;
    }
    public String getName() {
        return name;
    }
    public void setName(String name) {
        this.name = name;
    }
    public int getAge() {
        return age;
    }
    public void setAge(int age) {
        this.age = age;
    }

}
hibernate.cfg.xml
<!DOCTYPE hibernate-configuration PUBLIC
        "-//Hibernate/Hibernate Configuration DTD 3.0//EN"
        "http://hibernate.sourceforge.net/hibernate-configuration-3.0.dtd">

<hibernate-configuration>

    <session-factory>

        <!-- Database connection settings -->
        <property name="connection.driver_class">com.mysql.jdbc.Driver</property>
        <property name="connection.url">jdbc:mysql://localhost/hibernate</property>
        <property name="connection.username">root</property>
        <property name="connection.password">123456</property>

        <!-- JDBC connection pool (use the built-in) -->
        <!-- <property name="connection.pool_size">1</property> -->

        <!-- SQL dialect -->
        <property name="dialect">org.hibernate.dialect.MySQLDialect</property>

        <!-- Enable Hibernate's automatic session context management -->
         <property name="current_session_context_class">thread</property>
        <!-- Disable the second-level cache  -->
       <!--  <property name="cache.provider_class">org.hibernate.cache.NoCacheProvider</property> -->

        <!-- Echo all executed SQL to stdout -->
        <property name="show_sql">true</property>

        <!-- Drop and re-create the database schema on startup -->
        <property name="hbm2ddl.auto">update</property>

       <!--  <mapping resource="com/easy/Student.hbm.xml"/> -->
        <mapping class="com.easy.student"/>
    </session-factory>

</hibernate-configuration>
test
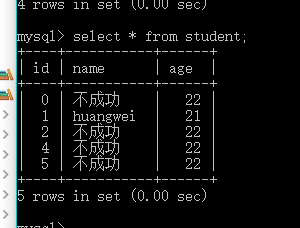
package com.easy;

import org.hibernate.Session;
import org.hibernate.SessionFactory;
import org.hibernate.cfg.AnnotationConfiguration;
import org.hibernate.cfg.Configuration;

public class studenttest {


      public static void main(String[] args){
          student  su = new student();
          su.setId(5);
          su.setName("不成功");
          su.setAge(22);
          Configuration cf = new AnnotationConfiguration();
          SessionFactory sf = cf.configure().buildSessionFactory();
          Session session = sf.openSession();
          session.beginTransaction();
          session.save(su);
          session.getTransaction().commit();
          session.close();
          sf.close();


      }


}
插入成功

 浙公网安备 33010602011771号