
spring mvc环境之Aop切面的xml配置和注解(AspectJ)(十)
Spring的AOP引入步骤:
1.引入jar,pom.xml加入spring-aop坐标(一般引入数据库事务的时候已经引用了).
2.创建目标接口和目标对象(bean类,service或dao层).
3.创建切面类(类有before或after增强方法).
4.将目标对象和切面类交由Spring管理.
5.在applicationContext.xml中配置AOP的织入关系.
6.测试代码.
---------------------------------------
1.引入依赖
    <dependency>
      <groupId>org.springframework</groupId>
      <artifactId>spring-aop</artifactId>
      <version>5.3.1</version>
    </dependency>
2.创建目标接口和目标对象(bean类,service或dao层).
package com.cc8w.service;

import com.cc8w.entity.UserEntity;
import org.apache.ibatis.annotations.Param;

public interface TestService {
    UserEntity queryUserById(@Param("id") int id);
}
service类:(目的是在执行queryUserById()方法的前后,执行切面增强方法)
package com.cc8w.service.impl;

import com.cc8w.dao.TestMapper;
import com.cc8w.entity.UserEntity;
import com.cc8w.service.TestService;
import com.cc8w.service.impl.TestServiceImpl;
import org.springframework.beans.factory.annotation.Autowired;
import org.springframework.stereotype.Service;
import org.springframework.transaction.annotation.Transactional;


@Service("testService")
@Transactional
public class TestServiceImpl implements TestService {
    @Autowired
    private TestMapper testMapper;

    @Override
    public UserEntity queryUserById(int id) {
        return testMapper.queryUserById(id);
    }

}
3.创建切面类(类有before或after增强方法)
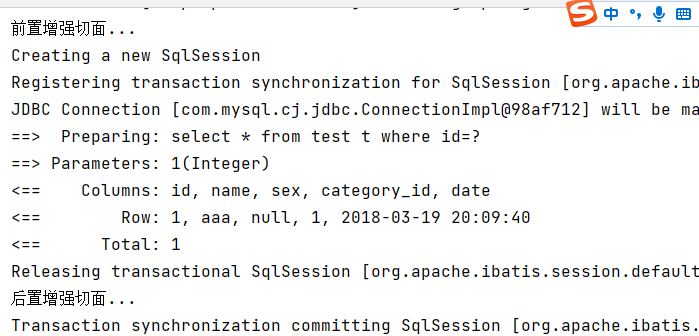
package com.cc8w.aop;

public class TestAspect {
    public void before() {
        System.out.println("前置增强切面...");
    }
    public void after() {
        System.out.println("后置增强切面...");
    }
}
4.将目标对象和切面类交由Spring管理(配置applicationContent.xml).
<!-- 9.声明自动为spring容器中那些配置@aspectJ切面的bean创建AOP代理,织入切面。 -->

    <!-- 设置目标bean (如果已被spring到,可以不设置)-->
    <bean name="target" class="com.cc8w.aop.TestServiceImpl"></bean>
    <!-- 设置切面bean -->
    <bean name="TestAspect" class="com.cc8w.aop.TestAspect"></bean>

    <!-- 配置置入,告诉Spring框架,哪些方法(切点)需要进行增强(前置后置...) 切点表达式书写-->
    <aop:config>
        <aop:aspect ref="TestAspect">
            <aop:before method="before" pointcut="execution(public * com.cc8w.service.TestService.queryUserById(int))"/>
            <aop:after method="after" pointcut="execution(public * com.cc8w.service.TestService.queryUserById(int))"/>
        </aop:aspect>
    </aop:config>
当基于XML Sechma实现Advice时,如果Pointcut需要被重用,可以使用<aop:pointcut></aop:pointcut>来声明Pointcut,然后在需要使用这个Pointcut的地方,用pointcut-ref引用就行了,如:
    <!-- 配置置入,告诉Spring框架,哪些方法(切点)需要进行增强(前置后置...) 切点表达式书写-->
<aop:config>
  <aop:pointcut id="log" expression="execution(public * com.cc8w.service.TestService.queryUserById(int))"/>
  <aop:aspect id="logging" ref="logBeforeAdvice">
    <aop:before pointcut-ref="log" method="before"/>
    <aop:after-returning pointcut-ref="log" method="afterReturning"/>
  </aop:aspect>
</aop:config>
5.执行控制器,调用service测试
====================
Spring的Aop切面注解配置的方式(基于AspectJ)
一,创建接口和目标类(和上面的一样)
二,创建切面类(这里就要配置注解了)
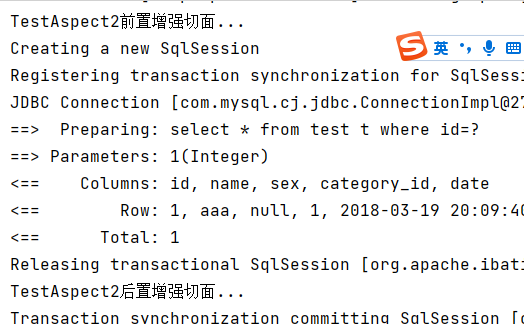
package com.cc8w.aop;

import org.aspectj.lang.annotation.After;
import org.aspectj.lang.annotation.Aspect;
import org.aspectj.lang.annotation.Before;
import org.springframework.stereotype.Component;

@Aspect
@Component
public class TestAspect2 {
    //注意切面表达式书写
    @Before("execution(public * com.cc8w.service.TestService.queryUserById(int))")
    public void before() {
        System.out.println("TestAspect2前置增强切面...");
    }

    //注意切面表达式书写
    @After("execution(public * com.cc8w.service.TestService.queryUserById(int))")
    public void after() {
        System.out.println("TestAspect2后置增强切面...");
    }
}
如果Pointcut需要被重用,可以使用@Pointcut空方法来声明Pointcut,然后在需要使用这个Pointcut的地方,用pointcut方法名就行了,如:
@Aspect
@Component
public class TestAspect2 {

    @Pointcut("execution(public * com.cc8w.service.TestService.queryUserById(int))")
    public void pointcut() {
    }

    //注意切面表达式书写
    @Before("pointcut()")
    public void before() {
        System.out.println("TestAspect2前置增强切面...");
    }

    //注意切面表达式书写
    @After("pointcut()")
    public void after() {
        System.out.println("TestAspect2后置增强切面...");
    }
}
三,applicationContext.xml配置自动扫描
  <!-- 但是由于applicationContext.xml没有扫描控制器,如果给控制器也加切面,感觉spring-mvc.xml中也加入下面的配置 -->
    <!-- 声明自动为spring容器中那些配置@aspectJ切面的bean创建代理,织入切面。 -->
    <aop:aspectj-autoproxy proxy-target-class="true"></aop:aspectj-autoproxy>
四.测试结果(和上面一样)
转: https://www.cnblogs.com/fps2tao/p/13306246.html
https://blog.csdn.net/xichenguan/article/details/50487583

 浙公网安备 33010602011771号