OpenCV图像处理基础(变换和去噪)
OpenCV图像处理基础(变换和去噪)
基础知识
在计算机中通常使用像素矩阵表示图像,像素的位置对应图像的坐标,像素深度用于定义表示像素值的位数,图像通道在RGB色彩模式下就是指那单独的红色、绿色、蓝色部分。
使用OpenCV读取图片
import cv2
from matplotlib import pyplot as plt

img = cv2.imread('8326cffc1e178a82b901c6c5ab4a648da97739124236.jpg')
img = cv2.cvtColor(img,cv2.COLOR_BGR2RGB)
plt.imshow(img)
#打印图像形状
print(img.shape)
plt.show()

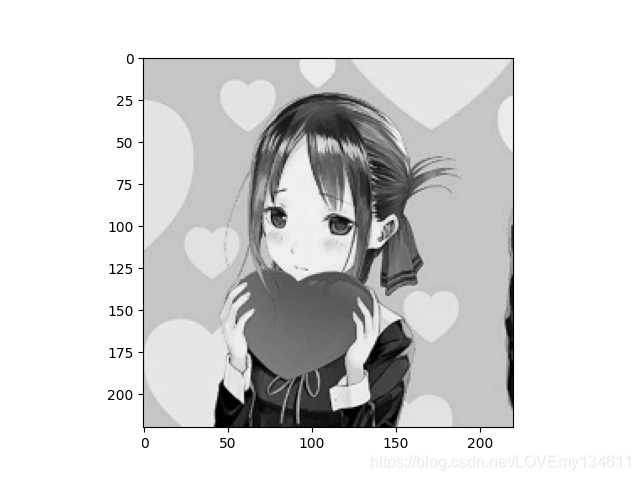
#将图像转换为灰度图像
show_img_1 = cv2.cvtColor(img,cv2.COLOR_BGR2GRAY)
plt.imshow(show_img_1,cmap=plt.cm.gray)
#打印图像形状
print(show_img_1.shape)
plt.show()

图像变换
图像变换在深度学习中常用于图像增强。
仿射变换
仿射变换可以进行缩放、旋转、平移、裁剪和翻转。总计而言,仿射变换会保留图中直线的平直性和平行性。表示成矩阵形式:
[
x
^
y
^
1
]
=
[
a
1
a
2
t
1
a
3
a
4
t
2
0
0
1
]
×
[
x
y
1
]
\begin{bmatrix} \hat x \\ \hat y \\ 1 \end{bmatrix}=\begin{bmatrix} a_1 & a_2 & t_1 \\ a_3 & a_4 & t_2 \\ 0 & 0 & 1 \end{bmatrix} \times \begin{bmatrix} x \\ y \\ 1 \end{bmatrix}
⎣⎡x^y^1⎦⎤=⎣⎡a1a30a2a40t1t21⎦⎤×⎣⎡xy1⎦⎤
其中
[
a
1
a
2
a
3
a
4
]
\begin{bmatrix} a_1 & a_2\\ a_3 & a_4 \end{bmatrix}
[a1a3a2a4]表示缩放和旋转变化,
[
t
1
t
2
]
\begin{bmatrix} t_1 \\ t_2 \end{bmatrix}
[t1t2]表示平移变化。
在OpenCV中可以使用WarpAffine函数进行仿射变换。
wrapAffine(src, M, dsize, flags, borderMode, borderValue)
参数:
src: 源图像
M: 仿射变换矩阵
dsize: 输出图像大小
flags: 插值方式
borderMode: 边界像素模式
borderValue: 边界填充值
同时为了更方便的使用,使用函数getRotationMatrix2D可以方便生成变换矩阵:
getRotationMatrix2D(center, angle, scale)
参数:
center: 旋转中心
angle: 旋转角度
scale: 缩放系数
图像缩放
show_img_3 = cv2.resize(img, (200,200))
plt.imshow(show_img_3)
plt.show()

rows, cols, _ = img.shape
matrix = cv2.getRotationMatrix2D((cols/2,rows/2),0,0.5)
show_img_4 = cv2.warpAffine(img,matrix,(cols,rows))
plt.imshow(show_img_4)
plt.show()

图像旋转
matrix = cv2.getRotationMatrix2D((cols/2,rows/2),90,1)
show_img_5 = cv2.warpAffine(img,matrix,(cols,rows))
matrix = cv2.getRotationMatrix2D((cols/2,rows/2),180,1)
show_img_6 = cv2.warpAffine(img,matrix,(cols,rows))
matrix = cv2.getRotationMatrix2D((cols/2,rows/2),270,1)
show_img_7 = cv2.warpAffine(img,matrix,(cols,rows))
plt.subplot(131)
plt.imshow(show_img_5)
plt.subplot(132)
plt.imshow(show_img_6)
plt.subplot(133)
plt.imshow(show_img_7)
plt.show()

图像平移
import numpy as np
matrix = np.float32([[1,0,25],[0,1,25]])
show_img_8 = cv2.warpAffine(img,matrix,(cols,rows))
matrix = np.float32([[1,0,50],[0,1,50]])
show_img_9 = cv2.warpAffine(img,matrix,(cols,rows))
matrix = np.float32([[1,0,100],[0,1,0]])
show_img_10 = cv2.warpAffine(img,matrix,(cols,rows))
plt.subplot(131)
plt.imshow(show_img_8)
plt.subplot(132)
plt.imshow(show_img_9)
plt.subplot(133)
plt.imshow(show_img_10)
plt.show()

图像裁剪
#[左上角x轴坐标:右下角x轴坐标,左上角y轴坐标:右下角y轴坐标]
show_img_11 = img[50:150,50:150]
plt.imshow(show_img_11)
plt.show()

图像翻转
srcPoints = np.float32([[0,0],[0,150],[200,200]])
canvasPoints = np.float32([[0,0],[0,150],[150,150]])
matrix = cv2.getRotationMatrix2D((0,0),0,0.5)
show_img_12 = cv2.warpAffine(img,matrix,(cols,rows))
plt.subplot(121)
plt.imshow(show_img_12)
matrix = cv2.getAffineTransform(np.array(srcPoints),np.array(canvasPoints))
show_img_13 = cv2.warpAffine(img,matrix,(cols,rows))
plt.subplot(122)
plt.imshow(show_img_13)
plt.show()

亮度与对比度变换
通过调整像素值来改变图像亮度和对比度:
f
(
x
^
)
=
α
f
(
x
)
+
β
f(\hat x)=\alpha f(x) + \beta
f(x^)=αf(x)+β
α
\alpha
α用于调整对比度,
β
\beta
β用于调整亮度。
#调整亮度
show_img_14 = np.uint8(np.clip((img+20),0,255))
#调整对比度
show_img_15 = np.uint8(np.clip((1.5*img),0,254))
plt.subplot(121)
plt.imshow(show_img_14)
plt.subplot(122)
plt.imshow(show_img_15)
plt.show()

图像去噪
常见噪声包括高斯噪声和椒盐噪声。
高斯噪声
噪声的概率密度符合高斯分布的图片噪声称为高斯噪声。
def gasuss_noise(image, mean=0, var=0.001):
    '''
        添加高斯噪声
        mean : 均值
        var : 方差
    '''
    image = np.array(image/255, dtype=float)
    noise = np.random.normal(mean, var ** 0.5, image.shape)
    out = image + noise
    if out.min() < 0:
        low_clip = -1.
    else:
        low_clip = 0.
    out = np.clip(out, low_clip, 1.0)
    out = np.uint8(out*255)
    #cv.imshow("gasuss", out)
    return out
show_img_16 = gasuss_noise(img,var=0.01)
show_img_17 = gasuss_noise(img,var=0.04)
plt.subplot(121)
plt.imshow(show_img_16)
plt.subplot(122)
plt.imshow(show_img_17)
plt.show()

椒盐噪声
椒盐噪声是指图片中包含白色的盐噪声和黑色的胡椒噪声。
def sp_noise(image,prob):
  '''
  添加椒盐噪声
  prob:噪声比例
  '''
  output = np.zeros(image.shape,np.uint8)
  thres = 1 - prob
  for i in range(image.shape[0]):
    for j in range(image.shape[1]):
      rdn = random.random()
      if rdn < prob:
        output[i][j] = 0
      elif rdn > thres:
        output[i][j] = 255
      else:
        output[i][j] = image[i][j]
  return output

show_img_18 = sp_noise(img,0.01)
show_img_19 = sp_noise(img,0.05)
plt.subplot(121)
plt.imshow(show_img_18)
plt.subplot(122)
plt.imshow(show_img_19)
plt.show()

中值和均值滤波
中值滤波是使用邻域内所有像素的中位数替换中心像素,可以有效去除图像中的高斯噪声。而均值是使用邻域内所有像素的平均值替换中心像素。
show_img_20 = gasuss_noise(img,var=0.01)
show_img_20 = np.uint8(show_img_20)
show_img_21 = cv2.medianBlur(show_img_20,3)
show_img_22 = cv2.blur(show_img_20,(3,3))
plt.subplot(131)
plt.imshow(show_img_20)
plt.subplot(132)
plt.imshow(show_img_21)
plt.subplot(133)
plt.imshow(show_img_22)
plt.show()

高斯滤波
高斯滤波是使用邻域内所有像素的加权平均值替换中心像素,可以有效去除图像中的高斯噪声。
show_img_23 = cv2.GaussianBlur(show_img_20,(3,3),0)
show_img_24 = cv2.GaussianBlur(show_img_20,(7,7),0)
plt.subplot(131)
plt.imshow(show_img_20)
plt.subplot(132)
plt.imshow(show_img_23)
plt.subplot(133)
plt.imshow(show_img_24)
plt.show()

高斯双边滤波
高斯双边滤波同时考虑空间域和值域,空间域原理类似高斯滤波,值域考虑领域内像素差值计算滤波器系数:
bilateralFilter(src, n, sigmaColor, sigmaSpace, borderType)
参数:
src:原图像
n:滤波器大小
sigmaColor:颜色空间中滤波器的标准差
sigmaSpace:坐标空间中滤波器的标准差
borderType:用于推断图像外部像素的某种边界模式
show_img_25 = cv2.medianBlur(show_img_20,11)
show_img_26 = cv2.GaussianBlur(show_img_20,(11,11),0)
show_img_27 = cv2.bilateralFilter(show_img_20,11,10,10)
show_img_28 = cv2.bilateralFilter(show_img_20,11,50,50)
show_img_29 = cv2.bilateralFilter(show_img_20,11,100,100)
plt.subplot(231)
plt.imshow(show_img_20)
plt.subplot(232)
plt.imshow(show_img_25)
plt.subplot(233)
plt.imshow(show_img_26)
plt.subplot(234)
plt.imshow(show_img_27)
plt.subplot(235)
plt.imshow(show_img_28)
plt.subplot(236)
plt.imshow(show_img_29)
plt.show()


