
lnmp环境搭建-(持续更新中……)
系统环境:
linux版本:centos6+
php版本:php7+
nginx版本:nginx-1.10+
mysql版本:mysql5+
安装nginx:(以下内容来自:https://www.linuxzen.com/lnmphuan-jing-da-jian-wan-quan-shou-ce-si-lnmpda-jian-yuan-ma-an-zhuang.html)
1)、在nginx官网下载自己喜欢的版本。
cd /usr/src                                  # 一般软件源码放在这个目录下
wget http://nginx.org/download/nginx-1.0.13.tar.gz  # 这里只是个案列

### nginx会有几个依赖包,我们首先安装依赖,不要安装过程中会报错:

yum  -y install zlib-devel pcre-devel openssl-devel
或者
apt-get  install zlib-devel pcre-devel openssl-devel
tar -zxvf nginx-1.0.13.tar.gz #z代表gzip(也就是后面的.gz文件)x代表加压,v表示显示详细信息,-f使用档案文件或设备(必选参数)
2)进行编译安装
cd nginx-1.0.13
 ./configure --prefix=/usr/local/nginx\   # 指定安装目录为/usr/local/nginx
--with-openssl=/usr/include/openssl\  # 启用ssl
--with-pcre\                          # 启用正规表达式
--with-http_stub_status_module        # 安装可以查看nginx状态的程序

make  #编译
make install #安装
注意:安装完成后我们可以到相应的目录查看安装的文件:
ls /usr/local/nginx/
conf  html  logs  sbin
3)启动nginx
/usr/local/nginx/sbin/nginx #在安装路径下面的sbin里面的nginx去启动
注意:通过查看端口看nginx是否启动成功,nginx占用TCP的80端口,执行下面命令
 netstat -antlp ¦ grep 80
tcp        0      0 0.0.0.0:80                  0.0.0.0:*                   LISTEN      5946/ngin
然后打开浏览器访问http://192.168.3.120,我们会看到Welcome to nginx(之前的版本是 It's Work):
然后配置nginx,编辑nginx配置文件(修改nginx配置文件支持php)
server {
        listen       80;
        server_name  localhost;

        #charset koi8-r;

        #access_log  logs/host.access.log  main;

        location / {
            root   html;
            index  index.php index.html index.htm;         # 添加index.php的首页文件
        }

        # 添加下面内容
        location ~ \.php$ {
            fastcgi_pass        unix:/var/run/php-fpm/php-fpm.sock;
            fastcgi_index       index.php;
            fastcgi_param SCRIPT_FILENAME $document_root/$fastcgi_script_name;
            include fastcgi_params;
            include fastcgi.conf;
        }
修改nginx配置文件支持php
pkill -9 nignx                  #关闭nginx
/usr/local/nginx/sbin/nginx     #开启nginx
修改了配置文件后最好先检查一下修改过的配置文件是否正 确,以免重启后Nginx出现错误影响服务器稳定运行。判断Nginx配置是否正确命令如下:
nginx -t -c /usr/nginx/conf/nginx.conf

或者
/usr/nginx/sbin/nginx -t
centos 7 下面安装mysql:
原文链接:http://blog.csdn.net/xyang81/article/details/51759200
1、配置yum源:
在mysql官网下载yum源:http://dev.mysql.com/downloads/repo/yum/
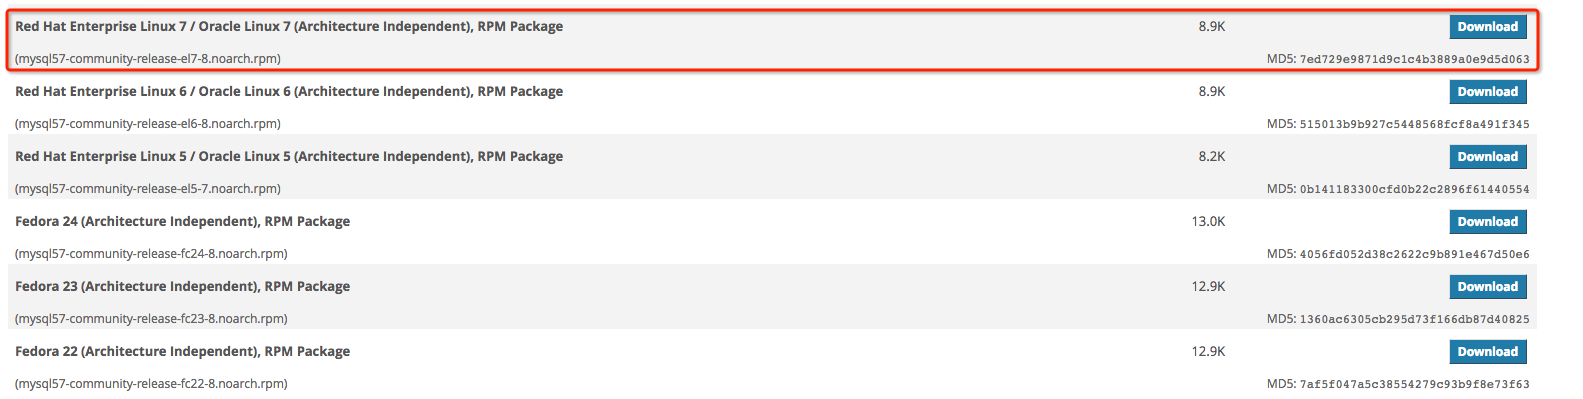
1 # 下载mysql源安装包,根据官网实际安装包链接来
2 shell> wget http://dev.mysql.com/get/mysql57-community-release-el7-8.noarch.rpm
3 # 安装mysql源
4 shell> yum localinstall mysql57-community-release-el7-8.noarch.rpm
检查mysql源是否安装成功
1 shell> yum repolist enabled | grep "mysql.*-community.*"

看到上图所示表示安装成功。
2、安装MySQL
1 shell> yum install mysql-community-server
3、启动MySQL服务
1 shell> systemctl start mysqld
查看MySQL的启动状态
 1 shell> systemctl status mysqld
 2 ● mysqld.service - MySQL Server
 3    Loaded: loaded (/usr/lib/systemd/system/mysqld.service; disabled; vendor preset: disabled)
 4    Active: active (running) since 五 2016-06-24 04:37:37 CST; 35min ago
 5  Main PID: 2888 (mysqld)
 6    CGroup: /system.slice/mysqld.service
 7            └─2888 /usr/sbin/mysqld --daemonize --pid-file=/var/run/mysqld/mysqld.pid
 8
 9 6月 24 04:37:36 localhost.localdomain systemd[1]: Starting MySQL Server...
10 6月 24 04:37:37 localhost.localdomain systemd[1]: Started MySQL Server.
4、开机启动
1 shell> systemctl enable mysqld
2 shell> systemctl daemon-reload
5、修改root默认密码
mysql安装完成之后,在/var/log/mysqld.log文件中给root生成了一个默认密码。通过下面的方式找到root默认密码,然后登录mysql进行修改
1 grep 'temporary password' /var/log/mysqld.log

1 shell> mysql -uroot -p
2 mysql> ALTER USER 'root'@'localhost' IDENTIFIED BY 'MyNewPass4!';
注意:mysql5.7默认安装了密码安全检查插件(validate_password),默认密码检查策略要求密码必须包含:大小写字母、数字和特殊符号,并且长度不能少于8位。
否则会提示ERROR 1819 (HY000): Your password does not satisfy the current policy requirements错误,如下图所示:

PHP 7 安装
下载php7 :
1 [root@lnmp ~]# cd /usr/local/src
2 [root@lnmp src]# wget http://hk1.php.net/get/php-7.1.5.tar.gz/from/this/mirror
1 [root@lnmp src]# tar -zxvf mirror
2 [root@lnmp src]# cd php-7.1.5/
安装之前要先安装那些准备装的扩展要用到的软件模块
[root@lnmp ~]# yum -y install libjpeg libjpeg-devel libpng libpng-devel freetype freetype-devel libxml2 libxml2-devel zlib zlib-devel curl curl-devel openssl openssl-devel
接下来编译php7
[root@lnmp ~]# ./configure --prefix=/usr/local/php7 --enable-fpm --with-fpm-user=nginx --with-fpm-group=nginx --enable-pdo --with-mysqli=mysqlnd --with-pdo-mysql=mysqlnd --with-zlib --with-curl --with-gd --with-jpeg-dir --with-png-dir --with-freetype-dir --with-openssl --enable-mbstring --enable-xml --enable-session --enable-ftp -enable-tokenizer --enable-zip
注意:
1、这里开启了php-fpm,需要指定fpm用户和用户组,否则在fpm启动的时候无法启动。
2、PHP 7 已经删除了 MySQL 扩展,所以 -with-mysql 不再是一个有效的选项。这里用 MySQLi 或 PDO 代替。
5.x开始,PHP连接MYSQL无论使用哪种方式都是使用的mysqlnd驱动(当然是在你安装好的时候)。包括mysql_*、PDO_MYSQL、MYSQLi
在编译安装PHP的时候,需要指定开启以下扩展 --with-mysqli=mysqlnd --with-pdo-mysql=mysqlnd 而不再是 --with-mysqli=/usr/local/mysql
mysqlnd和mysql mysqli pdo_mysql关系打比方说 mysqlnd是金属,而mysql mysqli pdo_mysql只是金属制品而已
安装成功之后会展示如下:
1 +--------------------------------------------------------------------+
2 | License:                                                           |
3 | This software is subject to the PHP License, available in this     |
4 | distribution in the file LICENSE.  By continuing this installation |
5 | process, you are bound by the terms of this license agreement.     |
6 | If you do not agree with the terms of this license, you must abort |
7 | the installation process at this point.                            |
8 +--------------------------------------------------------------------+
9 Thank you for using PHP.
接着编译:
1 [root@lnmp php-7.0.5]# make
2 [root@lnmp php-7.0.5]# make install
安装完之后配置php:
[root@lnmp php-7.0.5]# cp php.ini-development /usr/local/php7/lib/php.ini
[root@lnmp ~]# vim /usr/local/php7/lib/php.ini
查找 mysqli.default_socket,修改成:
mysqli.default_socket = /var/lib/mysql/mysql.sock
其中 /var/lib/mysql/mysql.sock 就是上面安装 MySQL 时提到的
好了,PHP 7 已经安装好,下面验证一下
[root@lnmp php-7.0.5]# /usr/local/php7/bin/php -v
PHP 7.0.5 (cli) (built: Apr  8 2016 00:08:04) ( NTS )
Copyright (c) 1997-2016 The PHP Group
Zend Engine v3.0.0, Copyright (c) 1998-2016 Zend Technologies
[root@lnmp php-7.0.5]#
再查看下已经安装的模块
[root@lnmp php-7.0.5]# /usr/local/php7/bin/php -m
接下来配置php-fpm:
1 [root@lnmp php-7.0.5]# cp /usr/local/php7/etc/php-fpm.conf.default /usr/local/php7/etc/php-fpm.conf
2 [root@lnmp php-7.0.5]# cp /usr/local/php7/etc/php-fpm.d/www.conf.default /usr/local/php7/etc/php-fpm.d/www.conf
修改启动脚本,把里边 prefix 相关的内容用实际路径代替
[root@lnmp php-7.0.5]# vim /usr/lib/systemd/system/php-fpm.service
将
PIDFile=${prefix}/var/run/php-fpm.pid
ExecStart=${exec_prefix}/sbin/php-fpm --nodaemonize --fpm-config ${prefix}/etc/php-fpm.conf
修改成:
1 PIDFile=/usr/local/php7/var/run/php-fpm.pid
2 ExecStart=/usr/local/php7/sbin/php-fpm --nodaemonize --fpm-config /usr/local/php7/etc/php-fpm.conf
重新载入systemd
[root@lnmp php-7.0.5]# systemctl daemon-reload
立即启动 php-fpm
1 [root@lnmp php-7.0.5]# systemctl start php-fpm
