C1WPF制作OLAP Cube浏览工具
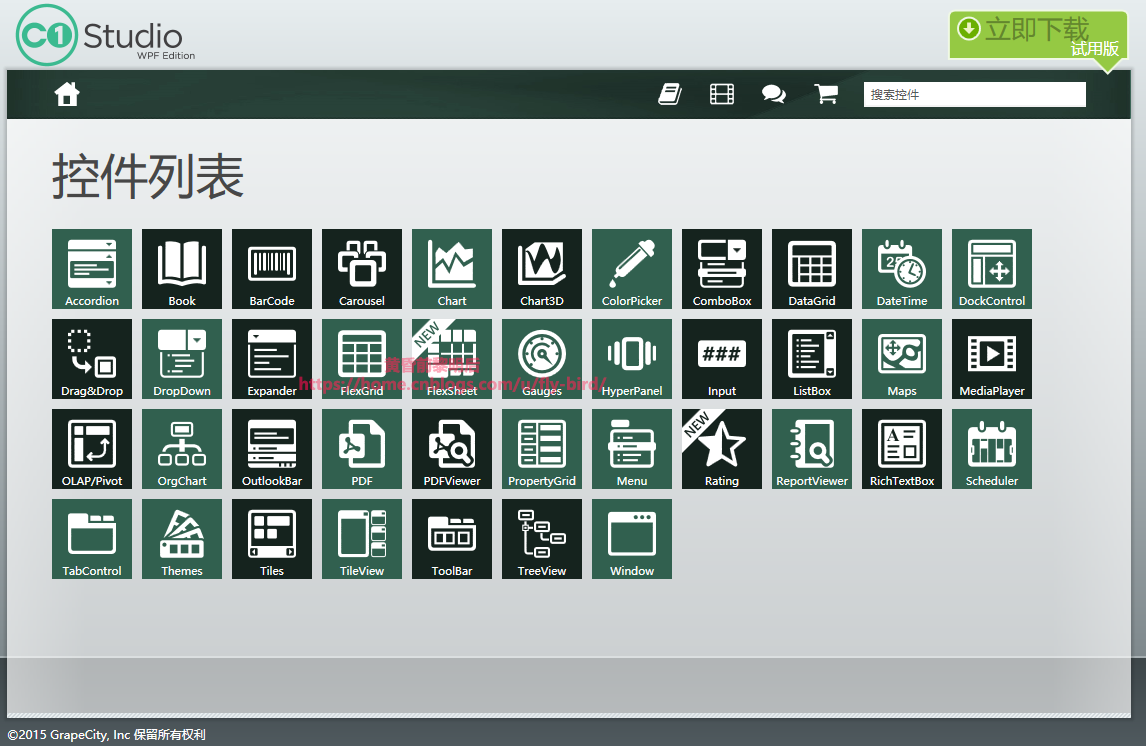
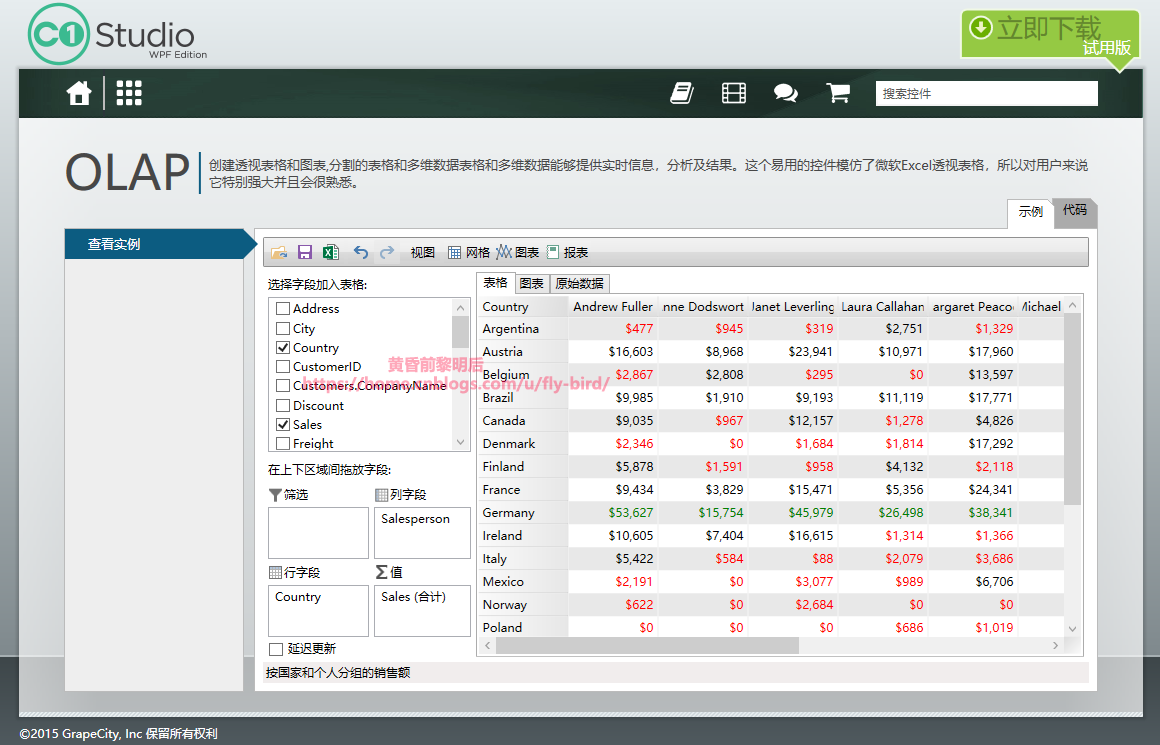
经过前期一段时间对WPF的学习了解,相信大家对WPF有了一定的了解。今天我们一起来了解使用Component One(简称C1)的WPF控件制作CUBE浏览工具。其实这个OLAP控件官方已经有了很详细的示例。
不管官方介绍有多好,我们还是要自己体验了控件使用才能知道到底好不好用,我们开始创建项目。
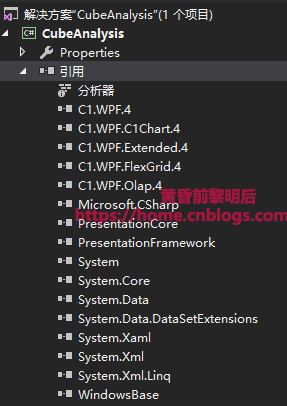
1、新建WPF项目,名称CubeAnalysis,引入C1控件
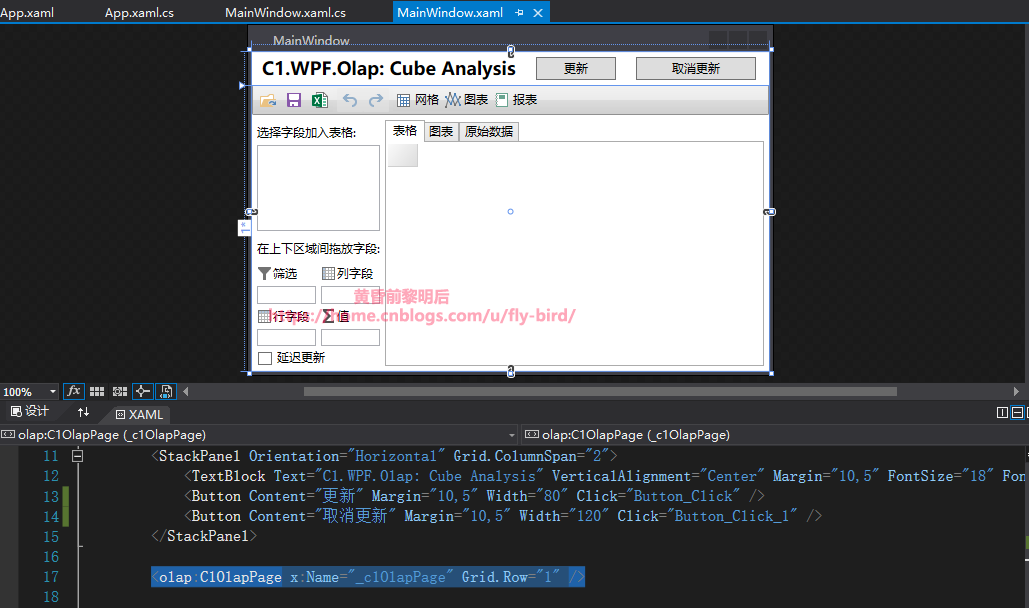
2、 在UI界面中先要引入C1的引用xmlns:olap="clr-namespace:C1.WPF.Olap;assembly=C1.WPF.Olap.4" xmlns:c1="http://schemas.componentone.com/winfx/2006/xaml"

 1 <Window x:Class="CubeAnalysis.MainWindow"
 2
 3         xmlns="http://schemas.microsoft.com/winfx/2006/xaml/presentation"
 4
 5         xmlns:x="http://schemas.microsoft.com/winfx/2006/xaml" WindowState="Maximized"
 6
 7         Title="MainWindow" Height="350" Width="525" xmlns:olap="clr-namespace:C1.WPF.Olap;assembly=C1.WPF.Olap.4" xmlns:c1="http://schemas.componentone.com/winfx/2006/xaml">
 8
 9     <Grid x:Name="LayoutRoot">
10
11         <Grid.RowDefinitions>
12
13             <RowDefinition Height="Auto" />
14
15             <RowDefinition />
16
17         </Grid.RowDefinitions>
18
19
20
21         <StackPanel Orientation="Horizontal" Grid.ColumnSpan="2">
22
23             <TextBlock Text="C1.WPF.Olap: Cube Analysis" VerticalAlignment="Center" Margin="10,5" FontSize="18" FontWeight="Bold" />
24
25             <Button Content="更新" Margin="10,5" Width="80" Click="Button_Click" />
26
27             <Button Content="取消更新" Margin="10,5" Width="120" Click="Button_Click_1" />
28
29         </StackPanel>
30
31
32
33         <olap:C1OlapPage x:Name="_c1OlapPage" Grid.Row="1" />
34
35
36
37         <StackPanel x:Name="info" Grid.Row="1" Visibility="Collapsed" HorizontalAlignment="Center" VerticalAlignment="Center">
38
39             <c1:C1ProgressBar x:Name="progress" Width="250" Height="20" />
40
41             <StackPanel Orientation="Horizontal" HorizontalAlignment="Center">
42
43                 <TextBlock HorizontalAlignment="Center" Text="Loading" Margin="0,4,4,0" FontSize="12" FontWeight="Bold"/>
44
45                 <TextBlock x:Name="txt" HorizontalAlignment="Center" Margin="0,4,0,0" FontSize="12" FontWeight="Bold"/>
46
47             </StackPanel>
48
49         </StackPanel>
50
51     </Grid>
52
53 </Window>
4、后端加载数据连接cube,只需要使用ConnectCube函数即可解决多维数据集获取问题。

  1 using System;
  2
  3 using System.Collections.Generic;
  4
  5 using System.Linq;
  6
  7 using System.Text;
  8
  9 using System.Windows;
 10
 11 using System.Windows.Controls;
 12
 13 using System.Windows.Data;
 14
 15 using System.Windows.Documents;
 16
 17 using System.Windows.Input;
 18
 19 using System.Windows.Media;
 20
 21 using System.Windows.Media.Imaging;
 22
 23 using System.Windows.Navigation;
 24
 25 using System.Windows.Shapes;
 26
 27 /*************作者:黄昏前黎明后***************************************************
 28
 29 *   作者:黄昏前黎明后
 30
 31 *   CLR版本:4.0.30319.42000
 32
 33 *   创建时间:2018-04-18 13:12:57
 34
 35 *   命名空间:CubeAnalysis
 36
 37 *   唯一标识:57a428fc-1bad-4455-ae05-2b591db69167
 38
 39 *   机器名称:HLPC
 40
 41 *   联系人邮箱:hl@cn-bi.com
 42
 43 *
 44
 45 *   描述说明:
 46
 47 *   修改历史:
 48
 49
 50
 51 *****************************************************************/
 52
 53 namespace CubeAnalysis
 54
 55 {
 56
 57     /// <summary>
 58
 59     /// Interaction logic for MainWindow.xaml
 60
 61     /// </summary>
 62
 63     public partial class MainWindow : Window
 64
 65     {
 66
 67         public MainWindow()
 68
 69         {
 70
 71             InitializeComponent();
 72
 73
 74
 75             //绑定OLAP数据源
 76
 77             _c1OlapPage.Loaded += (s, ea) =>
 78
 79             {
 80
 81                 //准备连接数据源和cube名称
 82
 83                 string connectionString = @"Data Source=HLPC;Initial Catalog=AdventureWorksDW2014Multidimensional-EE";
 84
 85
 86
 87                 string cubeName = "Adventure Works";
 88
 89                 try
 90
 91                 {
 92
 93                     _c1OlapPage.OlapPanel.ConnectCube(cubeName, connectionString);
 94
 95
 96
 97                     ////默认显示数据
 98
 99                     var olap = _c1OlapPage.OlapEngine;
100
101                     olap.BeginUpdate();
102
103                     olap.ColumnFields.Add("Color");
104
105                     olap.RowFields.Add("Category");
106
107                     olap.ValueFields.Add("Order Count");
108
109                     olap.EndUpdate();
110
111                 }
112
113                 catch (Exception ex)
114
115                 {
116
117                     MessageBox.Show(ex.Message);
118
119                 }
120
121
122
123                 _c1OlapPage.OlapEngine.Updated += (s1, e) =>
124
125                 {
126
127                     _c1OlapPage.OlapGrid.Opacity = 1;
128
129                     info.Visibility = Visibility.Collapsed;
130
131                 };
132
133                 //进度条处理
134
135                 _c1OlapPage.OlapEngine.UpdateProgressChanged += (s1, e) =>
136
137                 {
138
139                     _c1OlapPage.OlapGrid.Opacity = 0.4;
140
141                     info.Visibility = Visibility.Visible;
142
143                     progress.Value = (int)e.ProgressPercentage;
144
145                     txt.Text = e.ProgressPercentage.ToString() + " %";
146
147                 };
148
149             };
150
151         }
152
153
154
155         void Button_Click(object sender, RoutedEventArgs e)
156
157         {
158
159             // 刷新
160
161             _c1OlapPage.OlapPanel.OlapEngine.Update();
162
163         }
164
165
166
167         private void Button_Click_1(object sender, RoutedEventArgs e)
168
169         {
170
171             // 取消更新
172
173             _c1OlapPage.OlapPanel.OlapEngine.CancelUpdate();
174
175         }
176
177     }
178
179 }
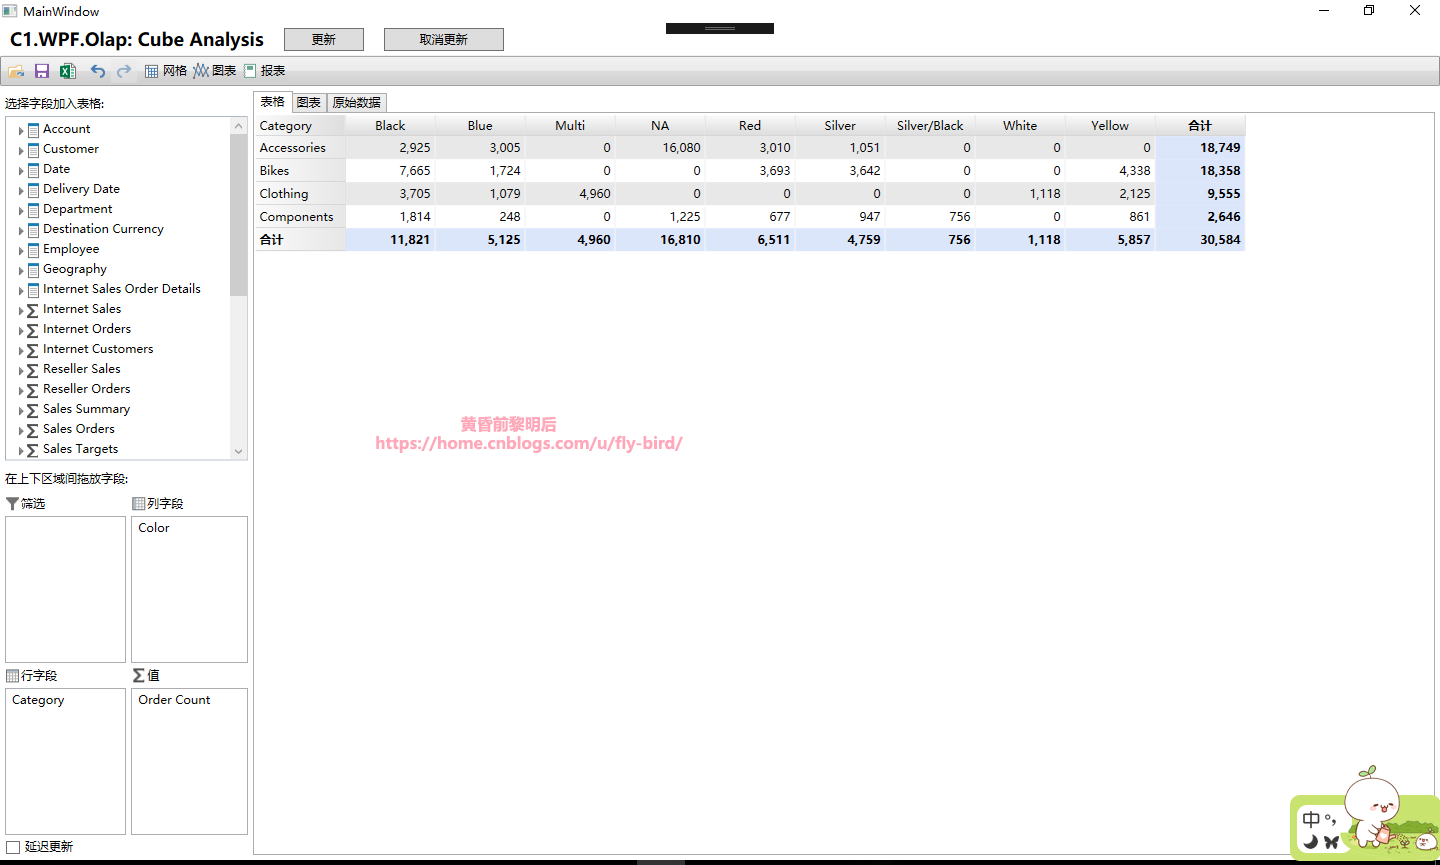
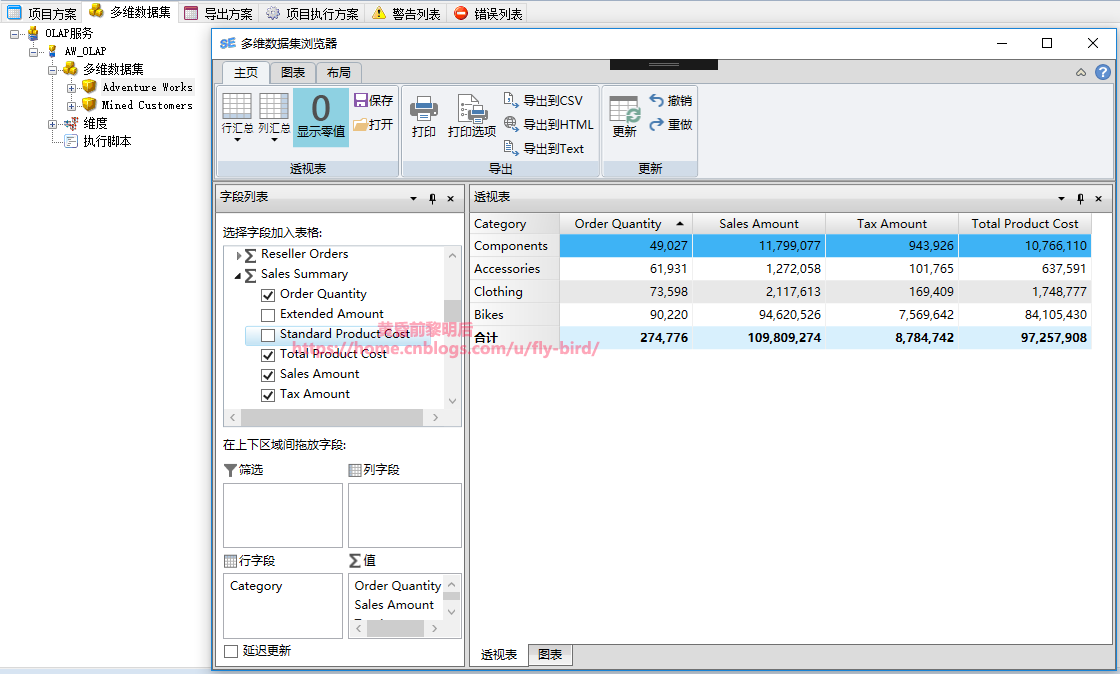
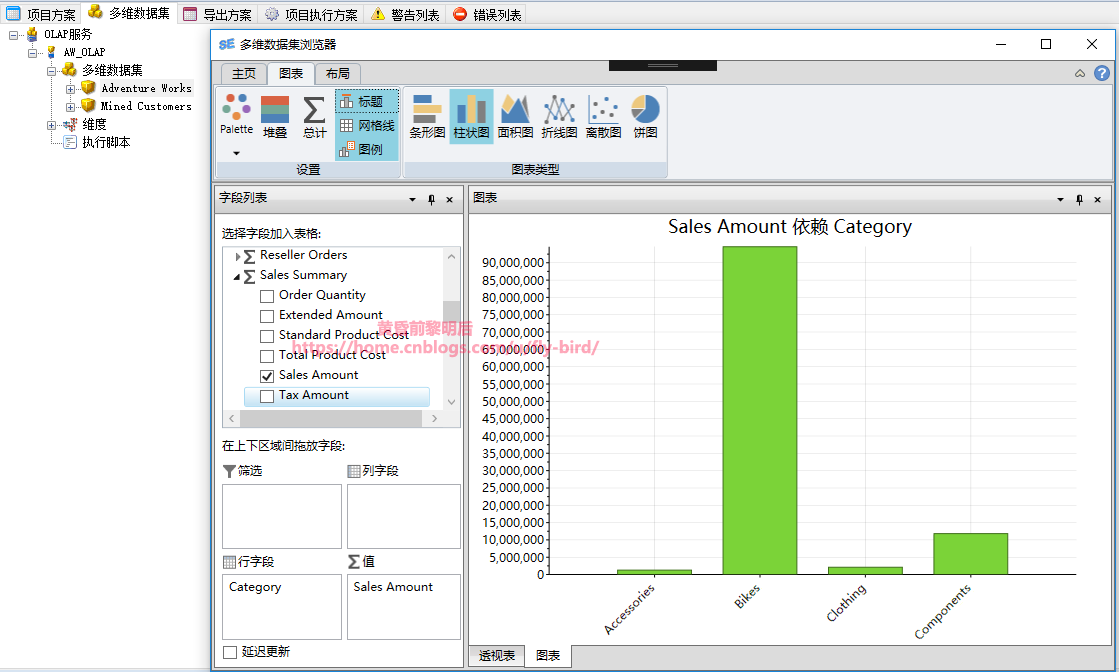
看到这个结果,是不是感觉使用C1WPF控件构建OLAP服务很简单很方便。其实这个只是最基本的控件,还可以制作自定义界面的,让页面布局更方便自己的使用习惯。可以轻松实现下图效果:
小黎子,一个专注于数据分析整体数据仓库解决方案的程序猿!
作 者:黄昏前黎明后
出 处:http://www.cnblogs.com/fly-bird/
欢迎关注个人公众号:小黎子数据分析,转载文章请务必注明出处。


