百度UEditor在线编辑器的配置和图片上传
前言
最近在项目中使用了百度UEditor富文本编辑器,配置UEditor过程中遇到了几个问题,在此记录一下解决方案和使用方法,避免以后使用UEditor出现类似的错误。
基本配置
一、下载UEditor.NET版本开发包。
UEditor可以到 http://ueditor.baidu.com/website/download.html#ueditor 进行下载,我们这里选用1.4.3.3 .NET版本。
二、把UEditor开发包放到项目里面。
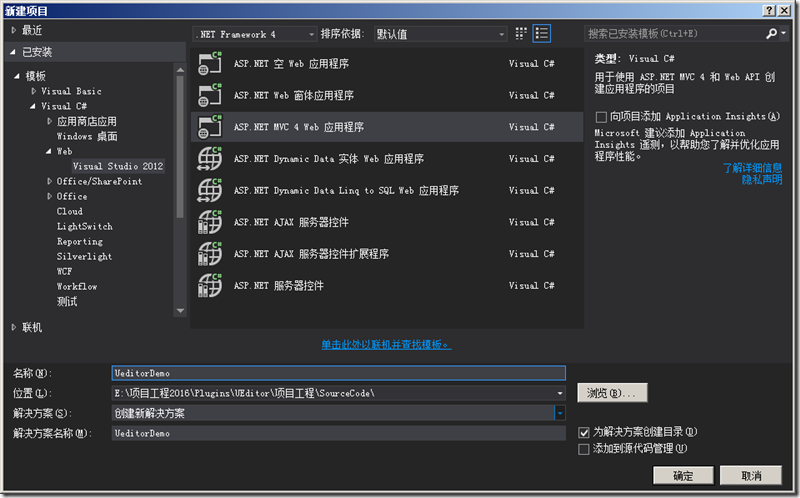
1、新建一个ASP.NET MVC 4应用程序
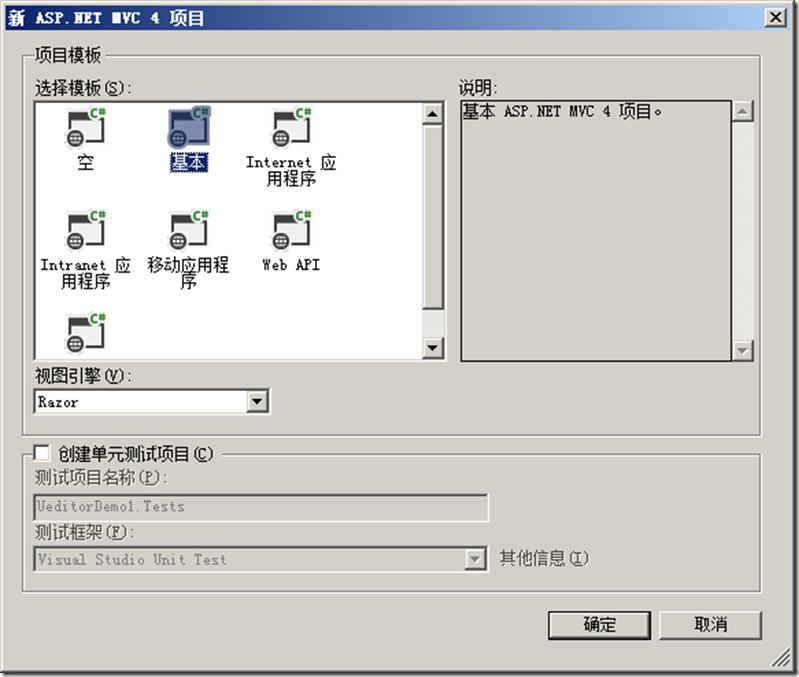
2、选择基本项目模板。
3、把开发包的必要的文件放到项目里面。
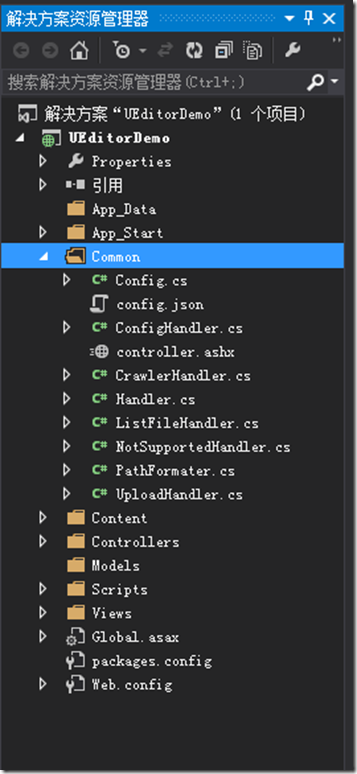
首先我们在项目Script目录下新建一个ueditor文件夹用来保存图1所示的JS文件,然后在项目根目录创建一个Common文件夹用来保存图2所示的后台处理文件。
4、在Views=>Shared=>_Layout.cshtml文件里面引入UEditor必要的JS文件。
<!DOCTYPE html>
<html>
<head>
    <meta charset="utf-8" />
    <meta name="viewport" content="width=device-width" />
    <title>@ViewBag.Title</title>
    @Styles.Render("~/Content/css")
    @Scripts.Render("~/bundles/modernizr")
</head>
<body>
    @RenderBody()

    @Scripts.Render("~/bundles/jquery")
    <script src="~/Scripts/ueditor/ueditor.config.js"></script>
    <script src="~/Scripts/ueditor/ueditor.all.js"></script>
    @RenderSection("scripts", required: false)
</body>
</html>
注意:ueditor.config.js和ueditor.all.js前后顺序不能写反了
5、创建UEditorController并添加视图。
using System;
using System.Collections.Generic;
using System.Linq;
using System.Web;
using System.Web.Mvc;

namespace UEditorDemo.Controllers
{
    public class UEditorController : Controller
    {
        [ValidateInput(false)]
        public ActionResult Index(FormCollection fc)
        {
            var content = fc["container"];
            return View();
        }
    }
}
注意:在Index Action上面要加上[ValidateInput(false)]特性
注意:在添加Index视图的时候需要引入_Layout.cshtml母版页。
在Index视图里面添加textarea标签和相关JS代码用来显示编辑器,更多配置可参考ueditor.config.js里面的配置说明。
@{
    ViewBag.Title = "Index";
    Layout = "~/Views/Shared/_Layout.cshtml";
}

@using (Html.BeginForm("Index", "UEditor"))
{
    <textarea id="container" name="container"></textarea>
    <br />
    <input type="submit" value="提交" />
}

@section scripts{
    <script>
        $(function () {
            var editor = UE.getEditor('container', {
                minFrameHeight: 500,
                initialFrameHeight: 500,
                autoHeightEnabled: true,
            });
        });
    </script>
}
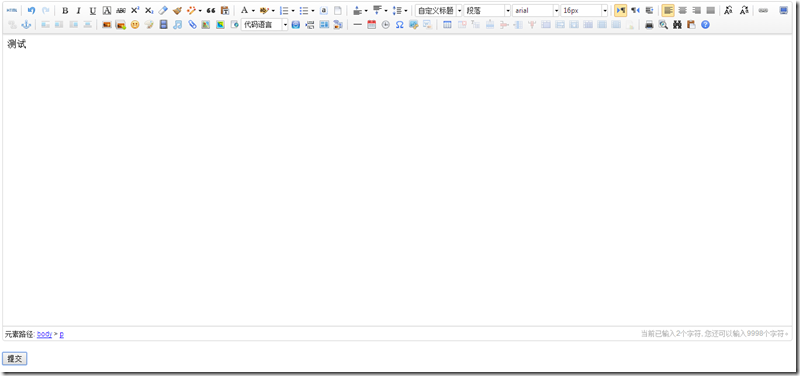
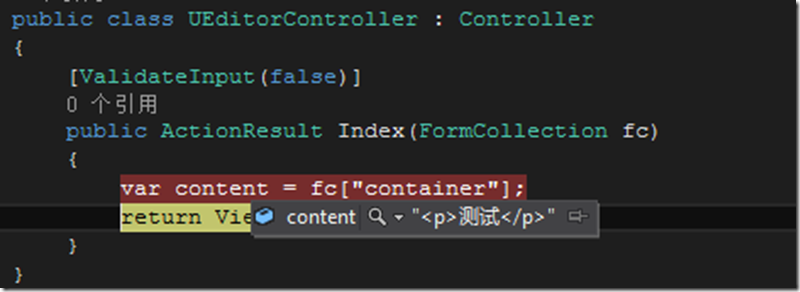
到目前为止,正常情况下,页面上已经能显示出来编辑器的样子了。现在我们输入“测试”内容,点击提交按钮,后台也能获取到刚才输入的“测试”内容,如图所示:
配置图片上传
在基本配置中,我们可以把文本内容上传到服务器,这时候我们想上传一张图片到服务器,发现上传图片的按钮是禁用状态,并且在打开多图上传对话框=>本地上传选项卡显示:后端配置项没有正常加载。这是为什么呢?通过查找文档发现是因为没有配置ueditor.config.js文件的serverUrl属性,现在让我们动手配置一下试试吧。
1、配置serverUrl属性。
由于我们的controller.ashx放在Common文件夹下面,所以我们打开ueditor.config.js文件把属性serverUrl改为:
serverUrl: "/Common/controller.ashx"
2、配置图片访问路径前缀和上传保存路径。
为了能够让图片在编辑器里面显示,我们还需要配置图片访问路径前缀和上传保存路径。
1)打开Common文件夹下面的config.json文件,我们把imageUrlPrefix属性改为:
"imageUrlPrefix": "http://192.168.199.171/UploadFiles/", /* 图片访问路径前缀 */
注意:需要在iis默认站点里面添加一个别名为“UploadFiles”的应用程序,并指定相应的物理路径,上传的图片才能在编辑器里面显示。
2)把imagePathFormat属性修改为:
"imagePathFormat": "/upload/image/{yyyy}{mm}{dd}/{time}{rand:6}", /* 上传保存路径,可以自定义保存路径和文件名格式 */
注意:在upload路径前面加了一个“/”。
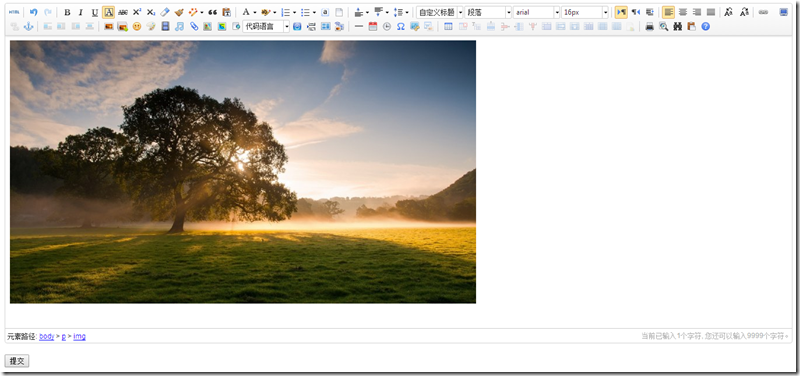
现在应该可以上传图片并在编辑器里面进行显示了,如下图所示:
图片上传进阶
在实际的项目中,我们上传图片可能保存在别的盘符下面以及访问图片的域名也需要改变,一般是后台可配的,这时候我们可以通过修改后台代码实现这种需求。
1、修改UploadHandler.cs文件。
打开Common=>UploadHandler.cs文件找到下面的代码,修改LocalPath和Result.Url变量即可得到想要的效果。
var savePath = PathFormatter.Format(uploadFileName, UploadConfig.PathFormat);  //修改地方1
var localPath = Server.MapPath(savePath);
try
{
    if (!Directory.Exists(Path.GetDirectoryName(localPath)))
    {
        Directory.CreateDirectory(Path.GetDirectoryName(localPath));
    }
    File.WriteAllBytes(localPath, uploadFileBytes);
    Result.Url = string.Format("http://192.168.199.171/sowerestres/Notice/{0}", savePath);  //修改地方2
    Result.State = UploadState.Success;
}
catch (Exception e)
{
    Result.State = UploadState.FileAccessError;
    Result.ErrorMessage = e.Message;
}
finally
{
    WriteResult();
}
2、修改ListFileHandler.cs文件。
打开Common=>ListFileHandler.cs文件找到下面的代码,修改LocalPath和PathToList变量即可得到想要的效果。
public ListFileManager(HttpContext context, string pathToList, string[] searchExtensions)
        : base(context)
    {
        this.SearchExtensions = searchExtensions.Select(x => x.ToLower()).ToArray();
        this.PathToList = "http://192.168.199.171/sowerestres/Notice/";  //修改地方1
    }
try
{
    var localPath = Server.MapPath(PathToList);  //修改地方2
    buildingList.AddRange(Directory.GetFiles(localPath, "*", SearchOption.AllDirectories)
        .Where(x => SearchExtensions.Contains(Path.GetExtension(x).ToLower()))
        .Select(x => PathToList + x.Substring(localPath.Length).Replace("\\", "/")));
    Total = buildingList.Count;
    FileList = buildingList.OrderBy(x => x).Skip(Start).Take(Size).ToArray();
}
catch (UnauthorizedAccessException)
{
    State = ResultState.AuthorizError;
}
catch (DirectoryNotFoundException)
{
    State = ResultState.PathNotFound;
}
catch (IOException)
{
    State = ResultState.IOError;
}
finally
{
    WriteResult();
}
以上是本人在.net mvc项目中使用ueditor编辑器的简单配置,欢迎转载和使用。
同时附上Demo下载地址:http://pan.baidu.com/s/1nvc0hAx (提取码:61l0)







 浙公网安备 33010602011771号