十分钟搭建和使用sonarqube代码质量管理平台
前言
Sonarqube为静态代码检查工具,采用B/S架构,帮助检查代码缺陷,改善代码质量,提高开发速度,通过插件形式,可以支持Java、C、C++、JavaScripe等等二十几种编程语言的代码质量管理与检测。本文介绍如何快速安装、配置、使用Sonarqube及Sonarqube Scanner。
工作原理
Sonaqube-scanner:负责搜集代码相关数据 (可以理解为搜集端)
Sonarqube:负责对搜集的数据进行分析,通过不同的插件算法来对这些结果进行再加工,最终以量化的方式来衡量代码质量,最终展现给用户。

环境信息
| IP | 功能 | 软件 | 安装路径 | 操作系统 |
| 192.168.9.11 | sonarqube服务端 | jdk1.8.0_151,mysql5.7.21 sonarqube6.7 | /usr/local/ | centos7.5 |
| 192.168.9.12 | sonarqube-scanner客户端 | sonarqube-scanner3.2.0 | d:/sonar | windows7 |
搭建步骤:(sever端安装jdk mysql过程略)
sonarqube的安装
wget  https://sonarsource.bintray.com/Distribution/sonarqube/sonarqube-6.7.zi
unzip  sonarqube-6.7.zip -d /usr/local/
useradd sonar
chown  -R  sonar.  /usr/local/sonarqube-6.7/
sonarqube配置文件修改
vim /usr/local/sonarqube-6.7/conf/sonar.properties
sonar.web.host=0.0.0.0
sonar.web.port=9000
sonar.jdbc.url=jdbc:mysql://localhost:3306/sonarqube?useUnicode=true&characterEncoding=utf8&rewriteBatchedStatements=true&useConfigs=maxPerformance
sonar.jdbc.driver=com.mysql.jdbc.Driver
sonar.jdbc.username=sonar
sonar.jdbc.password=password
建立数据库 (在数据库中建立需使用的库)
mysql -u root -p
> CREATE USER 'sonar’@'%' IDENTIFIED BY 'password';
> GRANT all privileges ON sonarqube.* TO sonar’@‘%' IDENTIFIED BY 'password';
> flush privileges;
> create database sonarqube;
启动及关闭
cd /usr/local/sonarqube-6.7/bin/linux-x86-64
./sonar.sh start
./sonar.sh stop
通过浏览器登录查看,并使用缺省密码登录。(可以在“配置”项的“应用市场”中选择安装中文插件来支持中文,)

sonarqube-scanner的安装
1.下载sonar-scanner-3.2.0.1227-windows.zip并解压,将bin文件加入环境变量path中如我的路径D:\sonar\sonar-scanner\bin将此路径加入path中
2.编辑配置文件conf/sonar-scanner.properties。根据数据库使用情况进行取消相关的注释即可,同时需要添加数据库用户名和密码信息,即配置要访问的sonar服务和mysql服务器地址
#Configure here general information about the environment, such as SonarQube server connection details for example
#No information about specific project should appear here

#----- Default SonarQube server
sonar.host.url=http://192.168.9.11:9000

#----- Default source code encoding
#sonar.sourceEncoding=UTF-8
sonar.jdbc.username=sonar
sonar.jdbc.password=password
sonar.jdbc.url=jdbc:mysql://192.168.9.150:3306/sonarqube?useUnicode=true&characterEncoding=utf8&rewriteBatchedStatements=true&useConfigs=maxPerformance&useSSL=false
3.编辑sonar-project.properties 放入需要扫描的project中(注意:同时要在sonarqube里添加对应的项目名称)
# must be unique in a given SonarQube instance
sonar.projectKey=saas_core
# this is the name and version displayed in the SonarQube UI. Was mandatory prior to SonarQube 6.1.
sonar.projectName=saas_core
sonar.projectVersion=1.0

# Path is relative to the sonar-project.properties file. Replace "\" by "/" on Windows.
# This property is optional if sonar.modules is set.
sonar.sources=saas_core
sonar.binaries=bin
sonar.language=java
sonar.java.binaries=D:\sonar\saas_core
# Encoding of the source code. Default is default system encoding
#sonar.sourceEncoding=UTF-8
4.sonar-scanner执行扫描分析
sonar-scanner -X
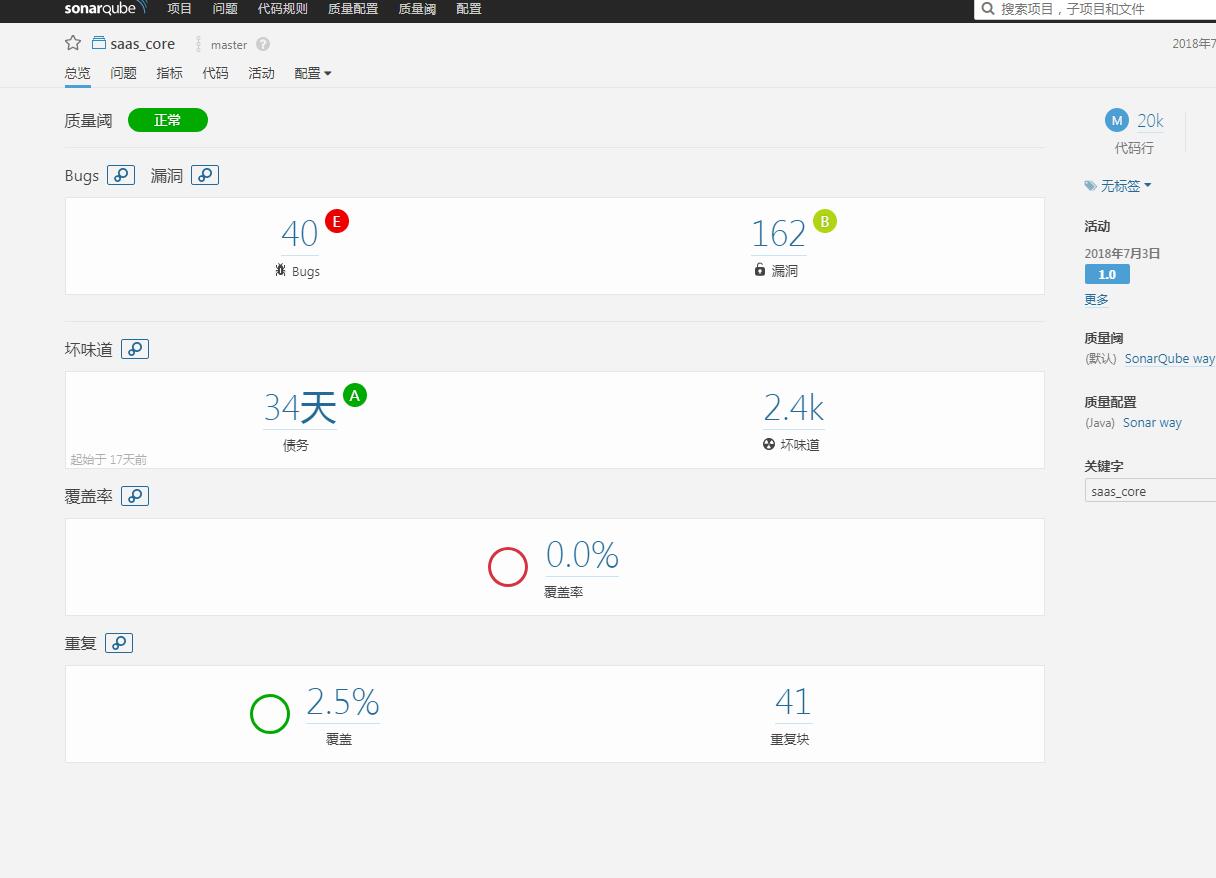
以上分析执行后,会将分析数据上传至sonarqube,在sonarqube中分析完成后,就可以看到分析结果

--------------------------------------------------------------------------------------------------------------------------------------------------------------------------------------


 浙公网安备 33010602011771号